
- Amigurumi
- Amigurumi Food
- Christmas / Winter
- Crochet Patterns
- Fall / Halloween
- Holidays & Seasonal
- Thanksgiving
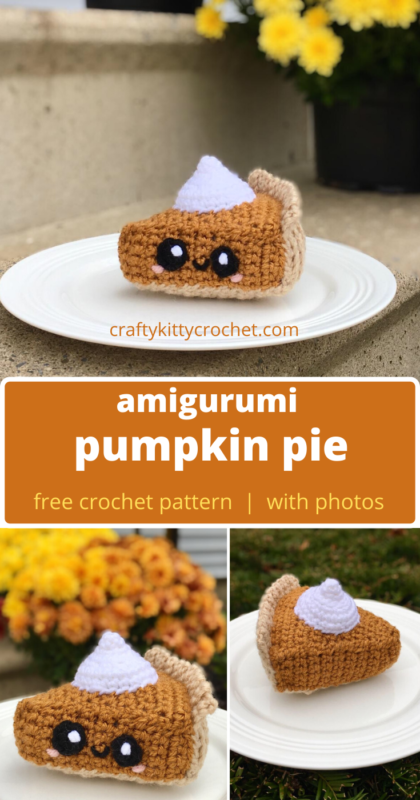
Perky Pumpkin Pie – Crochet Pattern
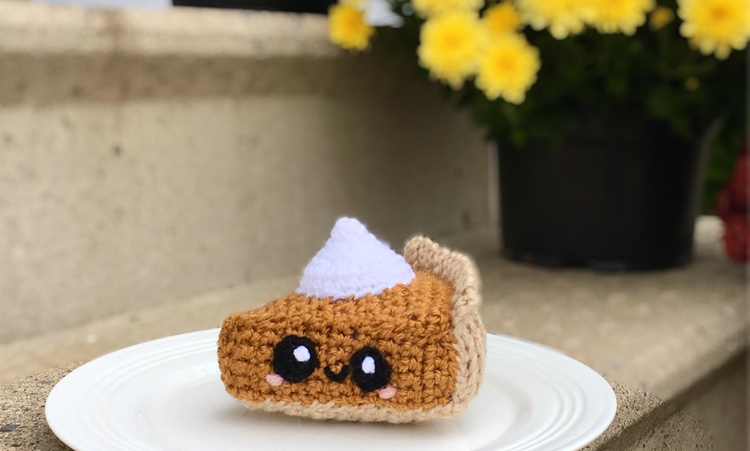
Looking for that perfect pumpkin pie to spice up your fall and holiday season? You know – easy to make, zero calories, etc.? Well, you found it! This recipe……err, crochet pattern….is fast, fun and easy! This cute little amigurumi pumpkin pie is sure to be a hit as a gift or as part of your fall and winter decor!
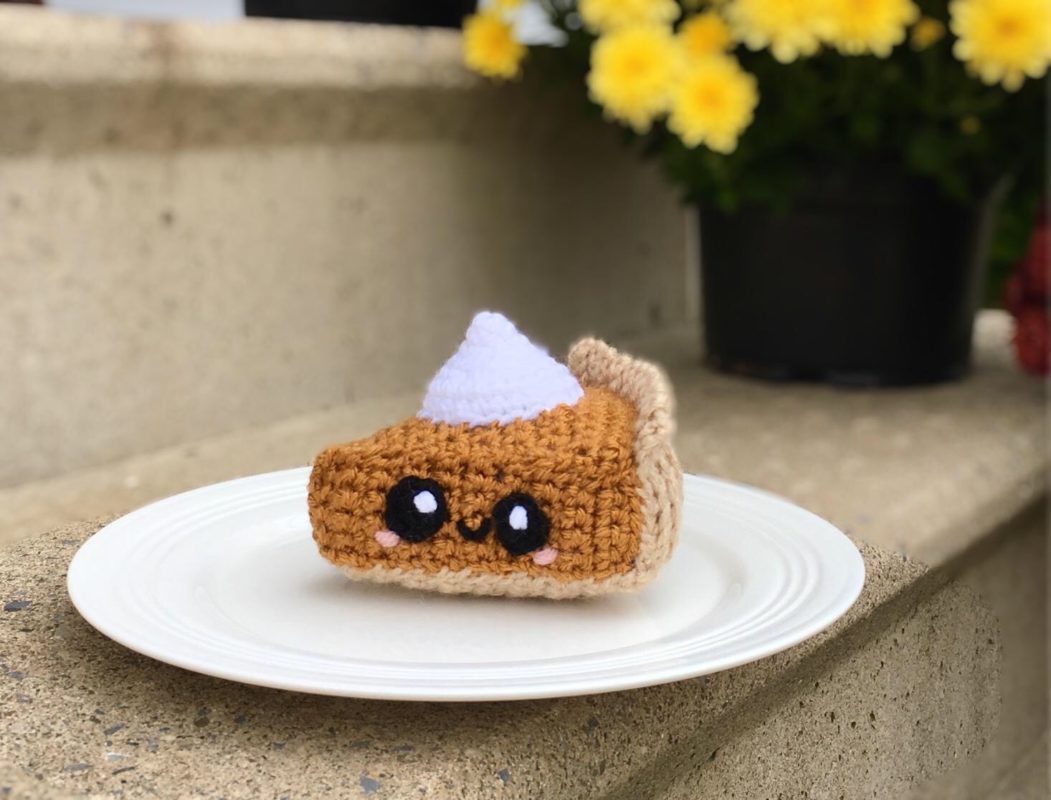
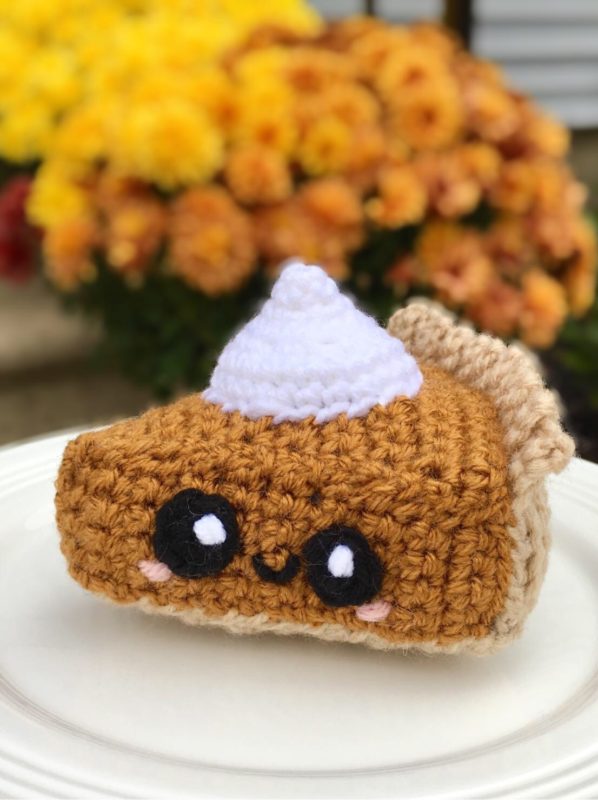
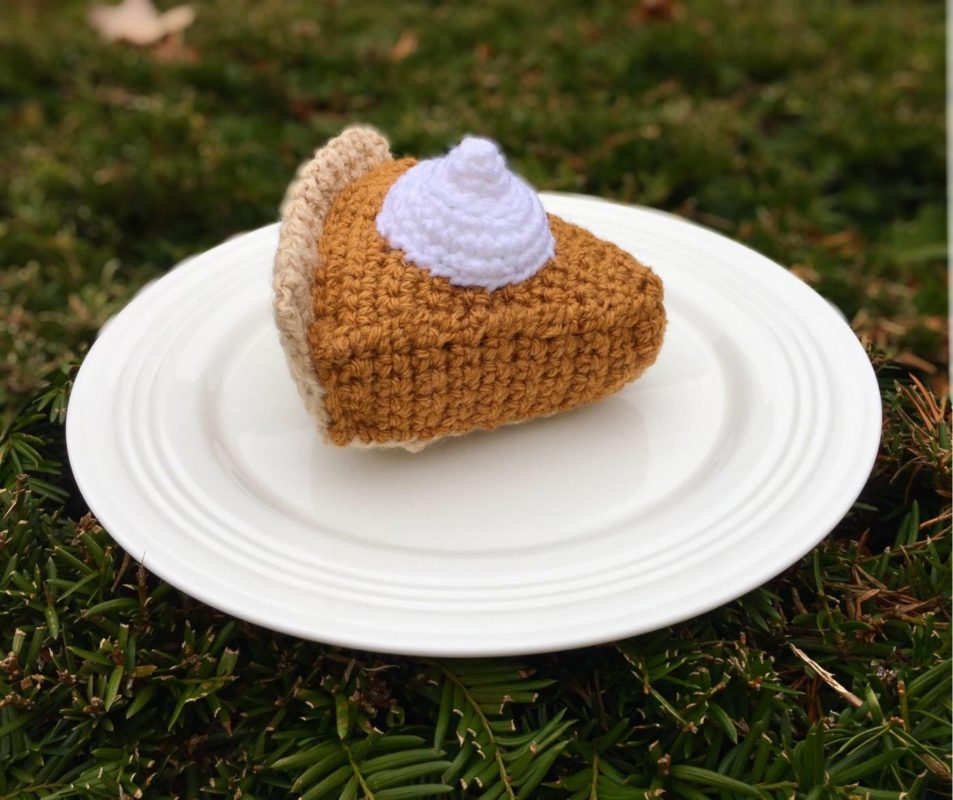
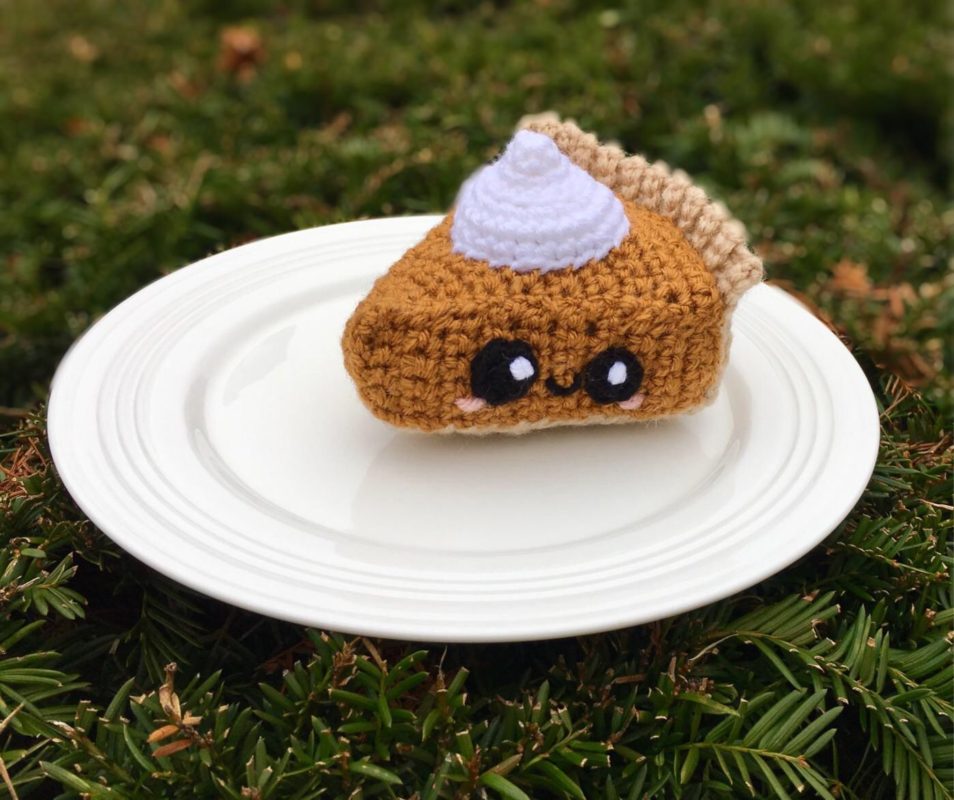
This pattern is the perfect blend of realistic-looking with a dash of cuteness all at the same time! The stuffed pie has a very similar look to actual pumpkin pie, in both size and color. But the addition of the cute, sparkly eyes, tiny smile, and bashful blush make it all the more fun and unique!
(Pin it for later!)
What makes this little pie so authentic looking is hands down the yarn that I chose for the pattern. Finding a true pumpkin pie color is tough – it’s not like crocheting a pumpkin, where you can get away with lots of different shades of orange. No, it has to be that exact orange/brown/amber color! Fortunately, I found the perfect yarn! It’s Lion Brand Vanna’s Choice in Honey (find it on Amazon HERE)! It’s just perfect, and also a really pretty fall color in general – so it couldn’t hurt to have what’s left over from your skein for your yarn stash!
There are so any possibilities as to what you could use this for. It would be super cute to set out at your Thanksgiving celebration or holiday parties, since pumpkin pie is a hallmark of fall and winter gatherings. It would also be great as a play food toy for the little one in your life! Or how about a gift for someone in your life who just plain loves pumpkin pie?! What a sweet surprise it would be as a gift!
Looking for the ad-free PDF version of this pattern? Find it in my shop HERE!!
So who’s ready to whip up some pumpkin perfection? Let’s get started!
Supplies
Size D-3 / 3.25 mm crochet hook
1 skein of Lion Brand Vanna’s Choice in:
- Honey (about 100 yds)
- Beige (about 75 yds)
- White (about 40 yds)
Small amounts of Vanna’s Choice in Black and Pink for Eyes, Smile and Blush (1 yds or less each)
Fiberfill stuffing
Yarn Needle
Scissors
Abbreviations
BLO = back loop only
Ch = chain
Sc = single crochet
Sl st – slip stitch
St(s) = stitch(es)
Rnd(s) = round(s)
Gauge
Exact gauge is not essential to this project.
Size
About 4.5 inches length
Instructions
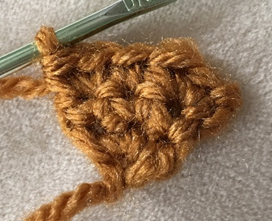
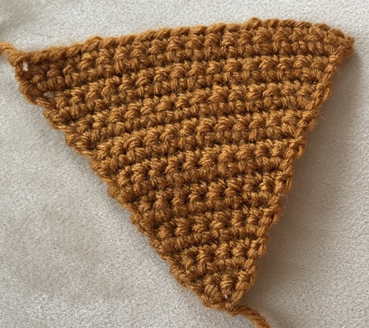
Pumpkin Top
With Honey, ch 2.
Row 1 – in 2nd ch from hook, make 3 sc. Ch 1, turn. (3 sc)
Row 2 – sc in each st across. Ch 1, turn (3 sc)
Row 3 – 2 sc in first st, sc in next st, 2 sc in last st. Ch 1, turn (5 sc)
Row 4 – sc in each st across. Ch 1, turn (5 sc)
Row 5 – 2 sc in first st, sc in next 3 sts, 2 sc in last st. Ch 1, turn (7 sc)
Row 6 – sc in each st across. Ch 1, turn (7 sc)
Row 7 – 2 sc in first st, sc in next 5 sts, 2 sc in last st. Ch 1, turn (9 sc)
Row 8 – sc in each st across. Ch 1, turn (9 sc)
Row 9 – 2 sc in first st, sc in next 7 sts, 2 sc in last st. Ch 1, turn (11 sc)
Row 10 – sc in each st across. Ch 1, turn (11 sc)
Row 11 – 2 sc in first st, sc in next 9 sts, 2 sc in last st. Ch 1, turn (13 sc)
Row 12 – sc in each st across. Ch 1, turn (13 sc)
Row 13 – 2 sc in first st, sc in next 11 sts, 2 sc in last st. Ch 1, turn (15 sc)
Row 14 – sc in each st across. Ch 1, turn (15 sc)
Row 15 – 2 sc in first st, sc in next 13 sts, 2 sc in last st. Ch 1, turn (17 sc)
Row 16 – sc in each st across. Ch 1, turn (17 sc)
Row 17 – 2 sc in first st, sc in next 15 sts, 2 sc in last st. Ch 1, turn (19 sc)
Row 18 – sc in each st across. Ch 1, turn (19 sc)
Fasten off, leaving long tail for sewing.
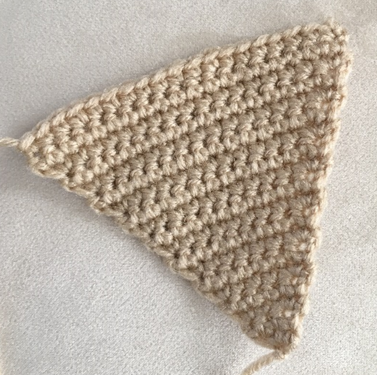
Bottom Crust
With Beige, ch 2.
Row 1 – in 2nd ch from hook, make 3 sc. Ch 1, turn. (3 sc)
Row 2 – sc in each st across. Ch 1, turn (3 sc)
Row 3 – 2 sc in first st, sc in next st, 2 sc in last st. Ch 1, turn (5 sc)
Row 4 – sc in each st across. Ch 1, turn (5 sc)
Row 5 – 2 sc in first st, sc in next 3 sts, 2 sc in last st. Ch 1, turn (7 sc)
Row 6 – sc in each st across. Ch 1, turn (7 sc)
Row 7 – 2 sc in first st, sc in next 5 sts, 2 sc in last st. Ch 1, turn (9 sc)
Row 8 – sc in each st across. Ch 1, turn (9 sc)
Row 9 – 2 sc in first st, sc in next 7 sts, 2 sc in last st. Ch 1, turn (11 sc)
Row 10 – sc in each st across. Ch 1, turn (11 sc)
Row 11 – 2 sc in first st, sc in next 9 sts, 2 sc in last st. Ch 1, turn (13 sc)
Row 12 – sc in each st across. Ch 1, turn (13 sc)
Row 13 – 2 sc in first st, sc in next 11 sts, 2 sc in last st. Ch 1, turn (15 sc)
Row 14 – sc in each st across. Ch 1, turn (15 sc)
Row 15 – 2 sc in first st, sc in next 13 sts, 2 sc in last st. Ch 1, turn (17 sc)
Row 16 – sc in each st across. Ch 1, turn (17 sc)
Row 17 – 2 sc in first st, sc in next 15 sts, 2 sc in last st. Ch 1, turn (19 sc)
Rows 18 – 19 – sc in each st across. Ch 1, turn (do not ch 1 at end of Row 19). (19 sc)
Fasten off, leaving long tail for sewing.
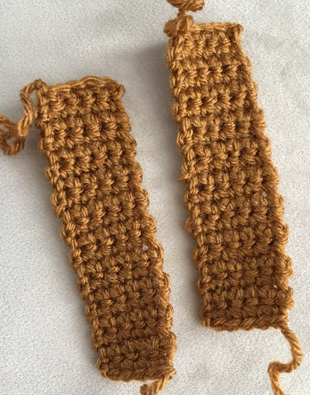
Pumpkin Side (make 2)
With Honey, ch 6.
Row 1 – sc in 2nd ch from hook and in each st across. Ch 1, turn (5 sc)
Rows 2 – 20 – sc in each st across. Ch 1, turn (do not ch 1 at the end of Row 20). (5 sc per row)
Fasten off, leaving long tail for sewing.
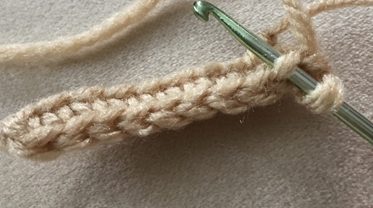
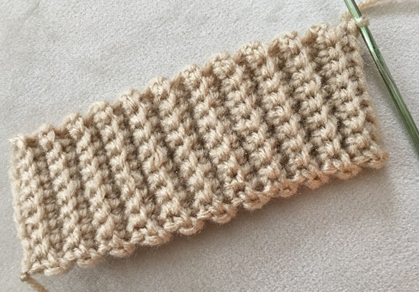
Edge Crust
With Beige, ch 10.
Row 1 – sc in 2nd ch from hook, and in each st across. Ch 1, turn (9 sc)
Rows 2 – 22 – working in BLO, sc in each st across. Ch 1, turn (do not ch 1 and end of Row 22). (9 sc per row)
Fasten off, leaving long tail for sewing.
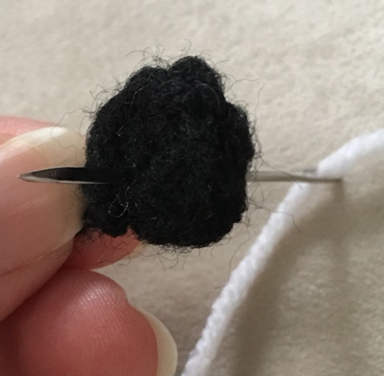
Eye (make 2)
Rnd 1 – With Black, make a magic ring. 6 sc in ring. Join with sl st to first st of rnd. (6 sc)
Fasten off, leaving long tail for sewing.
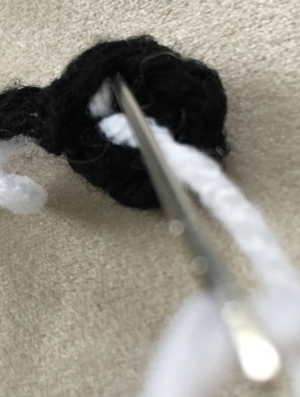
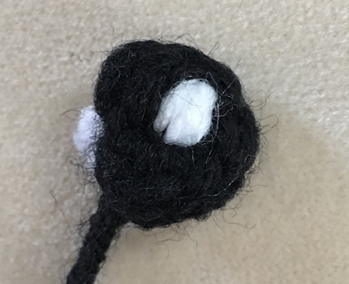
Eye Sparkle
With White, sew a few small vertical lines near top edge of Eye.
Fasten off, tie off ends on back of Eye.
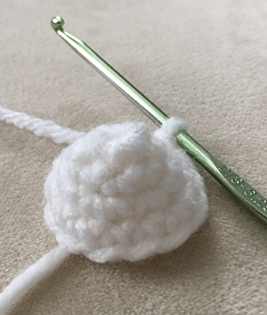
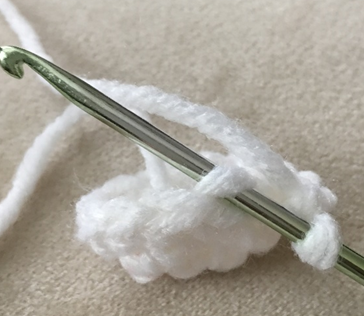
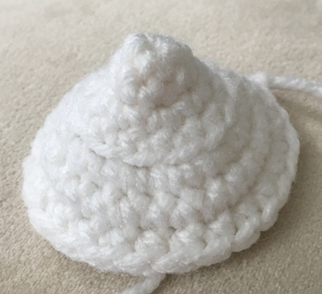
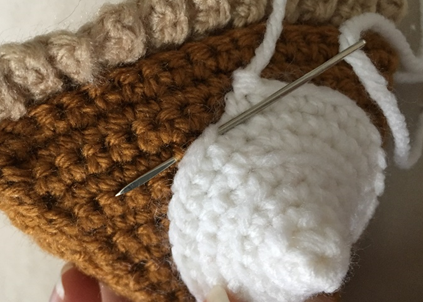
Whipped Cream
This piece is worked in continuous rnds. You may wish to use a stitch marker and move it up at the beginning of each new rnd.
Rnd 1 – With White, make a magic ring. 6 sc in ring (6 sc)
Rnd 2 – sc in each st around. (6 sc)
Rnd 3 – 2 sc in each st around. (12 sc)
Rnd 4 – sc in each st around. (12 sc)
Rnd 5 – working in BLO, 2 sc in each st around. (24 sc)
Rnds 6 – 7 – sc in each st around. (24 sc per rnd)
Fasten off, leaving long tail for sewing.
Rnd 4 – working in BLO, 2 sc in each st around. (24 sc)
Rnds 5 – 6 – sc in each st around. (24 sc per rnd)
Fasten off, leaving long tail for sewing.
Finishing
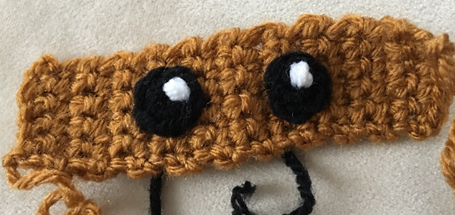
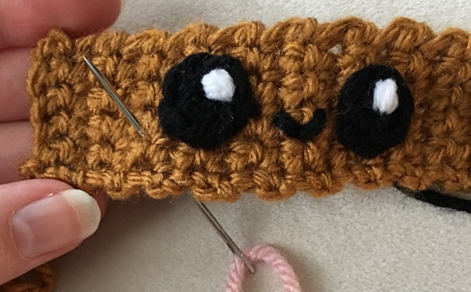
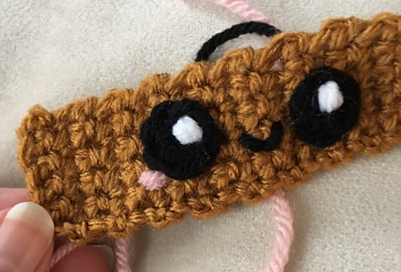
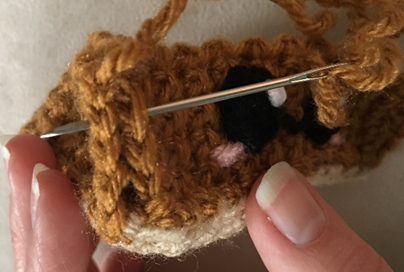
Sew Eyes to right side of one Pumpkin Side. With Black, sew a small “v” between Eyes. With Pink, make small horizontal lines on outer edge of each Eye for Blush. Fasten off, tie off ends on back of Pumpkin Side.

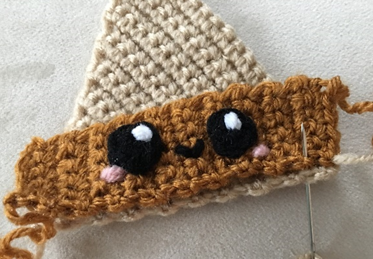
Using long tail left over from Bottom Crust, sew Pumpkin Sides along edges of Bottom Crust. Using long tail left over from Pumpkin Top, sew Pumpkin Top to Pumpkin Sides, sewing together tip where two Pumpkin Sides intersect in the process. Stuff piece (do not overstuff).
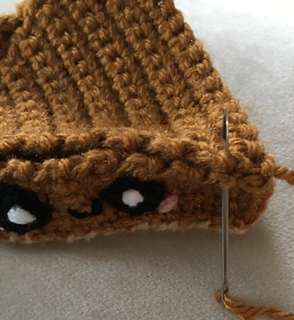
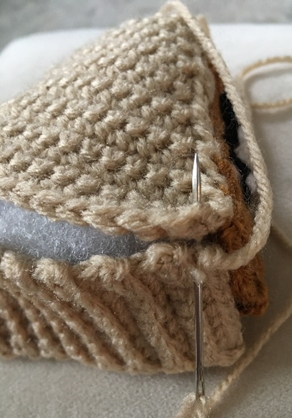
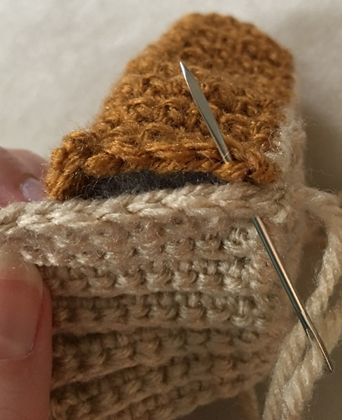
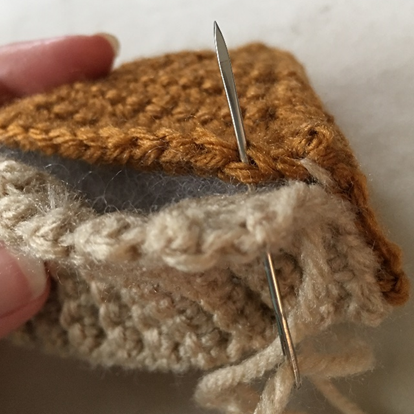
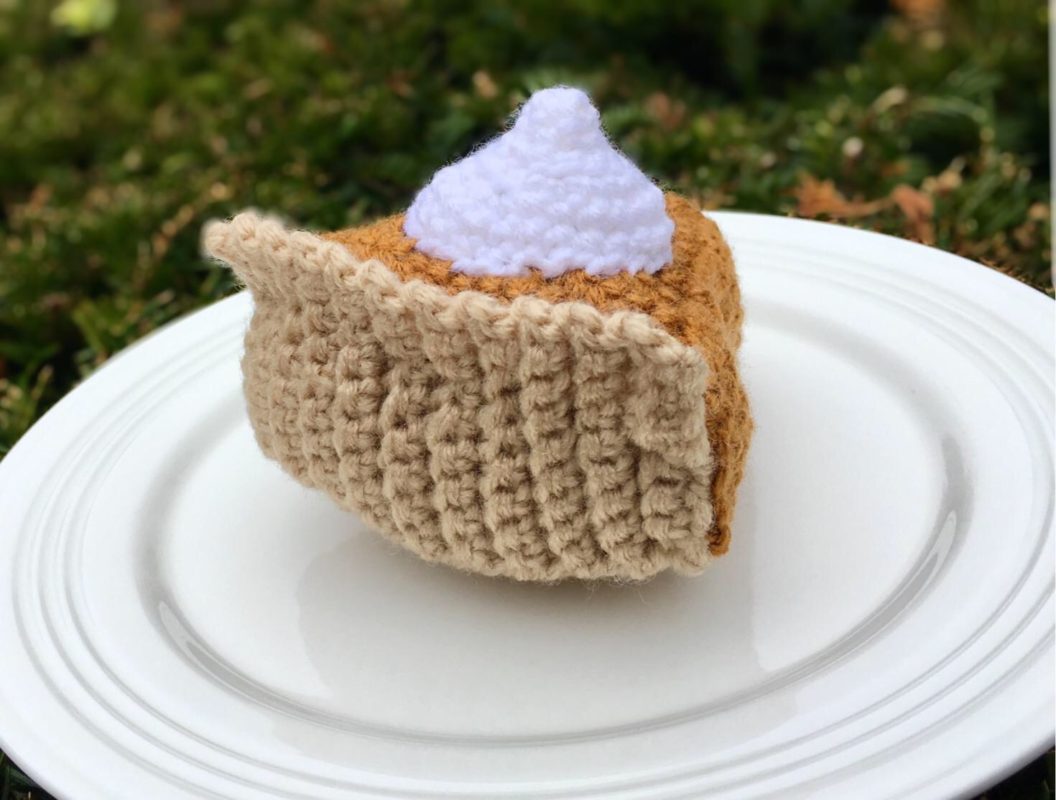
With long tail left over from Edge Crust, sew Edge Crust to Pumpkin Top and Sides (through BLO of Pumpkin sts), and Bottom Crust. Overlap about 3 sc sts from Edge Crust over Pumpkin Top, so that there is crust sticking up from the back of the pie.
Stuff Whipped Cream and sew to top of Pumpkin Pie.
Fasten off, weave in ends or tie off and hide knots in sts.
Here is the finished Pumpkin Pie!
I hope you enjoyed crocheting this Pumpkin Pie along with me! If you love fun, free patterns like this one, please be sure to subscribe to my email list and follow me on social media. I have lots more fun patterns like this one coming soon!
Happy Crocheting!
COPYRIGHT: This pattern is owned by Crafty Kitty Crochet (Melissa Moore). Any reselling or distribution of this pattern is prohibited. Sale of items made using this pattern is welcomed, but I do ask that credit/a link be provided back to my site, craftykittycrochet.com.

Comments (3)
Best Thanksgiving Crochet Patterns (Turkeys, Pumpkins, and More!) –
August 29, 2022 at 10:47 pm
[…] up is a cute one: the Perky Pumpkin Pie! Isn’t he so cute? With its realistic texture and adorable face design, it’s the […]
Best Pumpkin Pie Free Amigurumi Pattern Ideas – Carolinamontoni.com
November 6, 2022 at 1:28 pm
[…] Get Pattern […]
Crochet Pumpkin Pie Slice Free Patterns ( Free Crochet Patterns + Videos 2023
March 14, 2023 at 11:32 am
[…] there! I had a chance to check out the Perky Pumpkin Pie Crochet Pattern on Crafty Kitty Crochet and I have to say, it’s a really fun and creative […]