
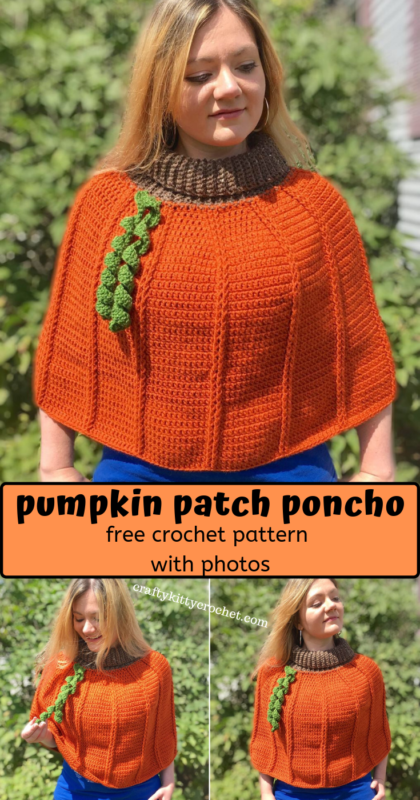
Pumpkin Patch Poncho – Crochet Pattern
It’s Pumpkin Everything season, and in case you don’t have enough Pumpkin Spice in your life, here is a crochet pattern that is sure to hit the spot when it comes to your pumpkin cravings! This Pumpkin Patch Poncho is easy to make, works up quickly, and is the perfect accessory for those crisp fall days that are ahead of us.
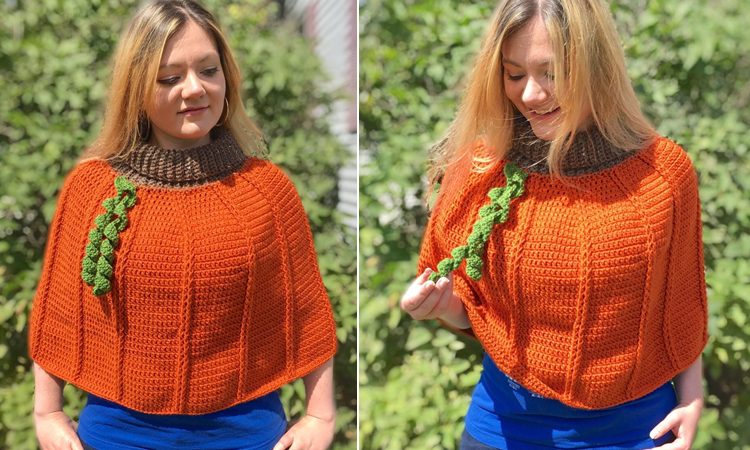
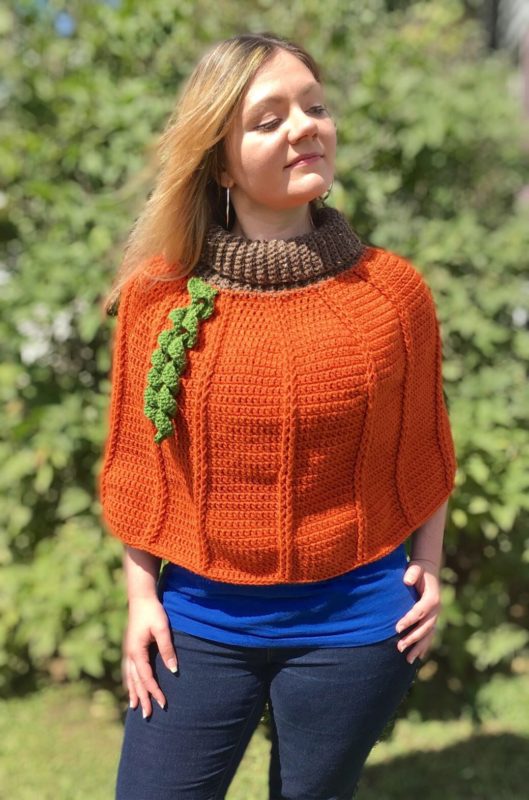
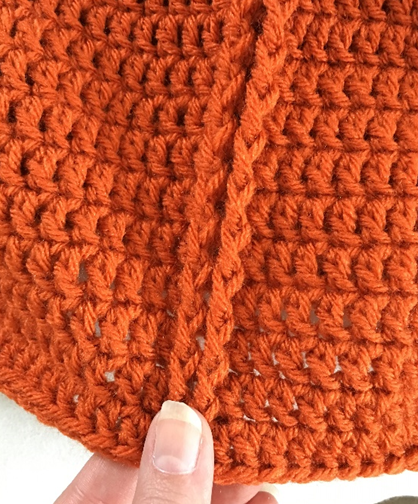
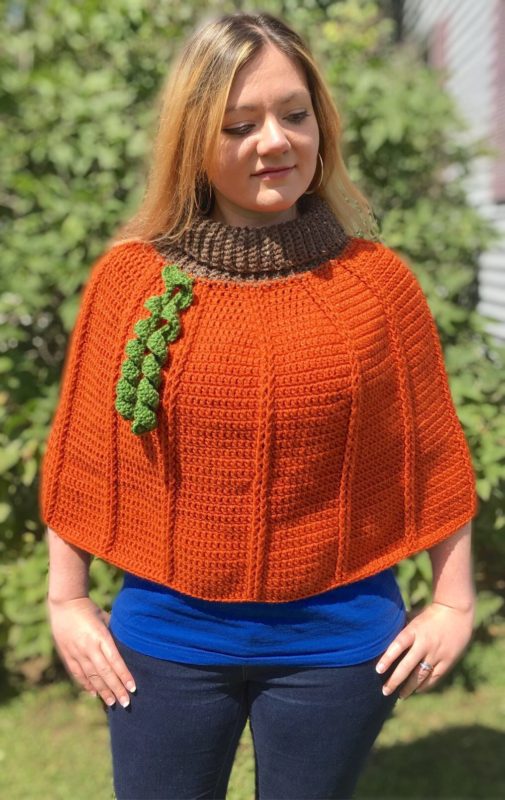
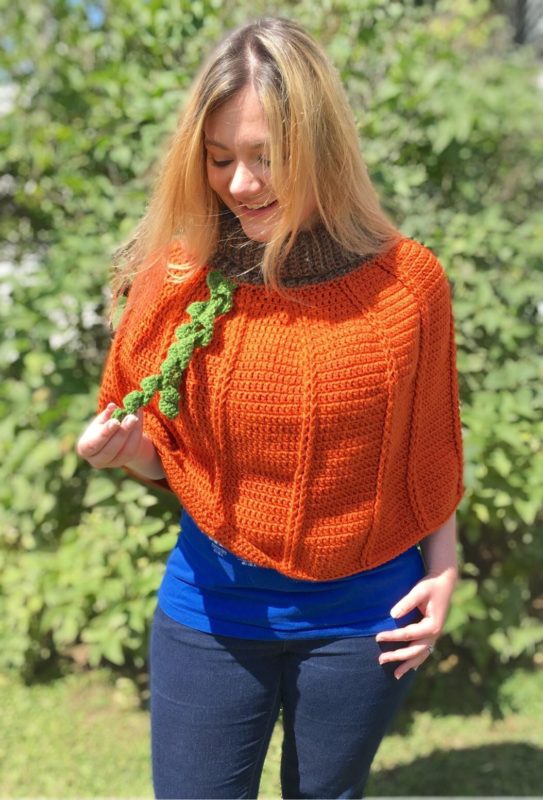
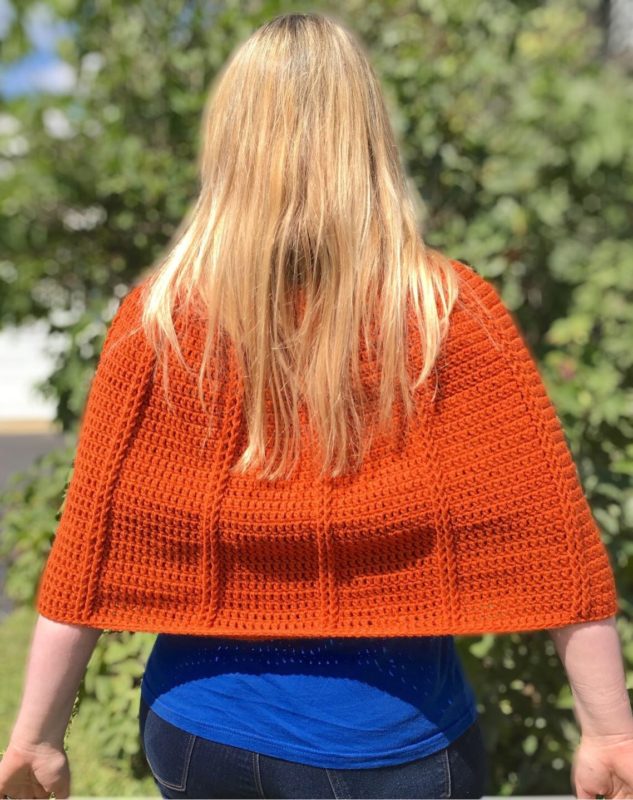
The poncho is made to look like a pumpkin fresh out of the patch, complete with “ridges” throughout the body of the poncho. The top part of the poncho, the cowl-like portion that sits on the neck, is made to look like a weathered, rustic stem. To top it all off, the pattern features instructions on how to make curly green “vines”, which really accentuates the authentic pumpkin look!
(Pin it for later!)
You may have noticed from my other seasonal patterns that I am a fall/Halloween fanatic. Last year, I hosted a frightfully fun crochet-along for a Kawaii Halloween Scarf. In the past, when I sold finished crocheted products full time, my shop was always full of the most fun and unique baby Halloween costumes I could think of! Since my birthday falls right before Halloween, I’ve always grown up thinking it was “my” holiday. Maybe that’s why every year around August, I get the intense craving for pumpkin spice everything, including when it comes to my crochet!
When designing this poncho, I knew I wanted to a medium weight yarn so that the poncho wasn’t too heavy for those early fall days (i.e. Sweater Weather in the morning, and Sweat Weather in the afternoon!). But I also wanted something with a decent texture and extra softness. I turned to an old favorite, Vanna’s Choice by Lion Brand, and I’m very happy with the results! The deep orange color, Terracotta, is both vivid somewhat neutral at the same time. You can find this lovely color on Amazon HERE
! I’m also very pleased with the color I chose for the stem, Barley. It’s a rustic brown with tiny flecks of black and cream throughout. This speckled look really brings out the earthy-ness of the stem! Find Barley on Amazon HERE
! Last but not least, the green jewel tone used for the vines is Kelly Green. I find that it really pops out against the more subtle, earthy tones! Find Kelly Green on Amazon HERE
!
The great thing about this poncho is that it’s cute and seasonal, but also comfy! If you really want to deck it out, you could always add a jack-o-lantern face to it, as well – instant Halloween costume!!! I love the sweet simplicity of the pumpkin design by itself, too – it has just enough detail so that you can recognize what it is, but it’s still subtle enough to wear in public and not feel like you’re wearing a costume (not that I would have any problem doing that, since much of my wardrobe consists of t-shirts with kawaii crocheted critters sewn onto them).
So who’s ready to go pumpkin picking? Let the pattern – and pumpkin season – begin!!
You can purchase an ad-free PDF copy of this pattern in my shop HERE!)
Supplies
H/8 5.0 mm crochet hook
Lion Brand Vanna’s Choice in:
- Terracotta (5 skeins)
- Barley (1 skein)
- Kelly Green (1 skein)
Yarn Needle
Scissors
Abbreviations
*= indicates the beginning/end of a section to be repeated
BLO = back loop only
Ch = chain
Dc = double crochet
Fpdc = front post double crochet
Sc = single crochet
Sl st = slip stitch
St(s) = stitch(es)
Rep = repeat
Rnd = round
Gauge
3 dc and 2 rnds = 1 inch
Size
One size fits most for women/teens; approx. 29” width by 25” length (including stem/cowl)
Special Stitches Used
Front Post Double Crochet – yarn over, insert hook around the post of a double crochet stitch, pushing it outward. Complete a regular double crochet stitch from here (pull up a loop, pull through two loops on the hook, yarn over, pull through remaining two loops on hook).
Instructions
Pumpkin / Body of Poncho
With Terracotta, Ch 80. Join with sl st to first ch, being careful not to twist work.
Rnd 1 – Make 84 dc inside ring made by ch sts. Join with sl st to first dc of rnd. Ch 2 (84 dc)
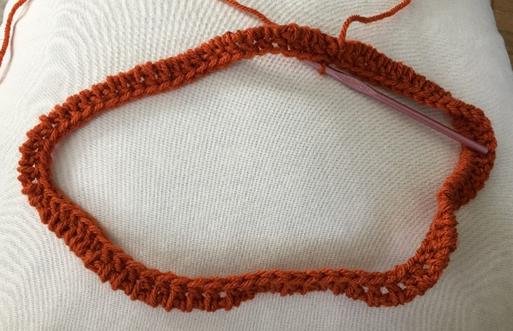
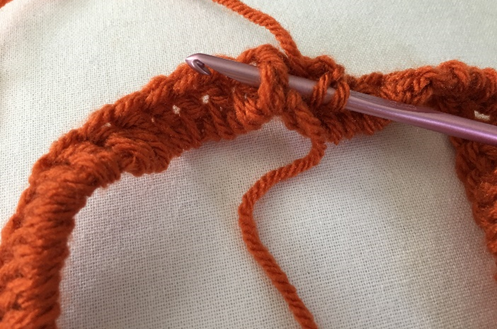
Rnd 2 – *Fpdc over next 2 sts. Dc in next 4 sts. In next st, make 2 dc.* Rep from * to * around. Ch 2 (96 Dc)
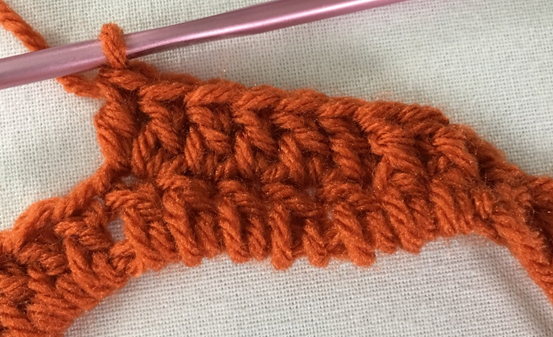
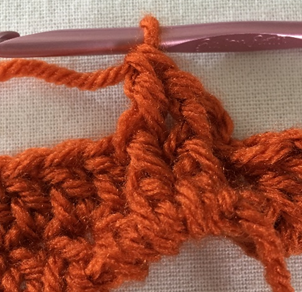
Rnd 3 – *Fpdc around each of the 2 fpdc sts of previous rnd below. Dc in next 5 sts. In next st, make 2 dc.* Rep from * to * around. Ch 2 (108 Dc)
Rnd 4 – * Fpdc around each of the 2 fpdc sts of previous rnd below. Dc in next 7 sts. In next st, make 2 dc.* Rep from * to * around. Ch 2 (120 Dc)
Rnd 5 – * Fpdc around each of the 2 fpdc sts of previous rnd below. Dc in next 8 sts. In next st, make 2 dc.* Rep from * to * around. Ch 2 (132 Dc)
Rnd 6 – * Fpdc around each of the 2 fpdc sts of previous rnd below. Dc in next 9 sts. In next st, make 2 dc.* Rep from * to * around. Ch 2 (144 Dc)
Rnd 7 – * Fpdc around each of the 2 fpdc sts of previous rnd below. Dc in next 10 sts. In next st, make 2 dc.* Rep from * to * around. Ch 2 (156 Dc)
Rnd 8 – * Fpdc around each of the 2 fpdc sts of previous rnd below. Dc in next 11 sts. In next st, make 2 dc.* Rep from * to * around. Ch 2 (168 Dc)
Rnd 9 – * Fpdc around each of the 2 fpdc sts of previous rnd below. Dc in next 13 st.* Rep from * to *. Ch 2 (168 dc)
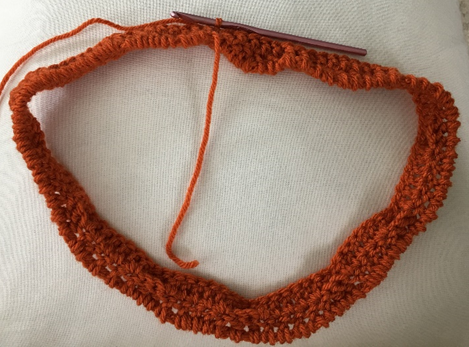
Rnds 10 – 34 – Rep Rnd 9. Do not ch 2 at end of Rnd 34. Throughout these rnds, slightly pull fpdc sts lengthwise to prevent curling upwards. (168 dc per rnd)
Rnd 35 – working in BLO, sl st in each st around. (168 sl sts)
Fasten off.
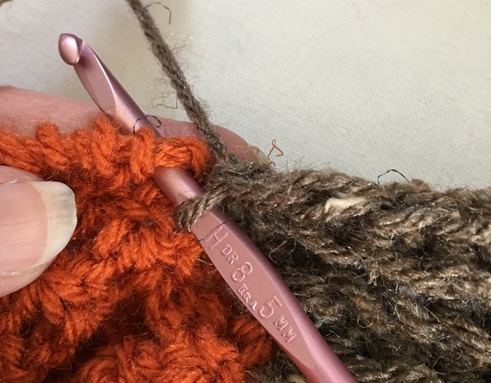
Stem / Cowl
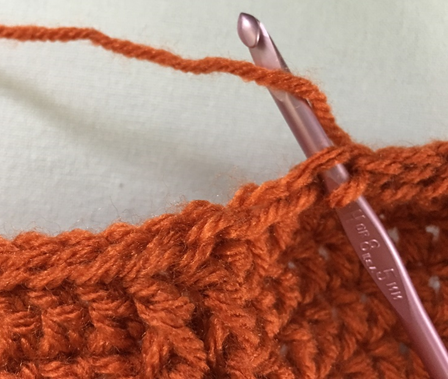
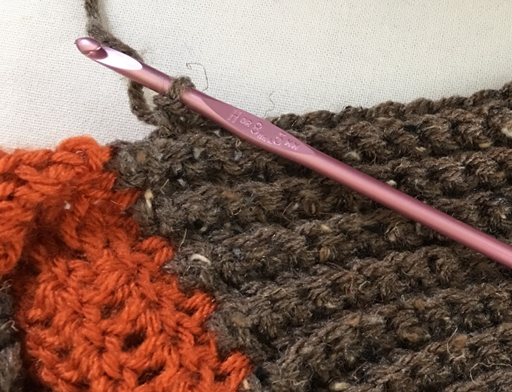
Rnd 1 – Attach Barley at top of Pumpkin (on top of initial ch sts). Ch 21. Sc in each ch across, sl st in next on top of Pumpkin, sl st in next st. Ch 1, turn. (20 sc)
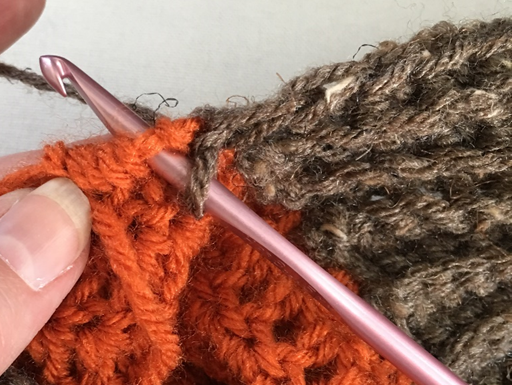
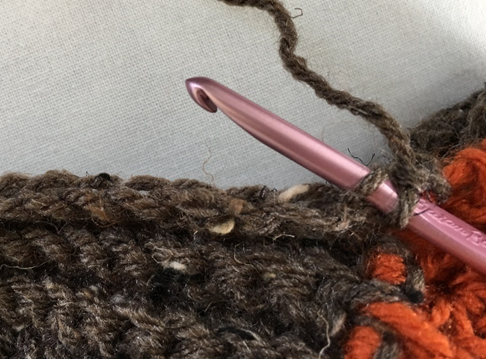
Rnd 2 – working in BLO, sc in each st across. Ch 1, turn (20 sc)
Rnd 3 – working in BLO, sc in each st across. Sl st in next on top of Pumpkin, sl st in next st. Ch 1, turn. (20 sc)
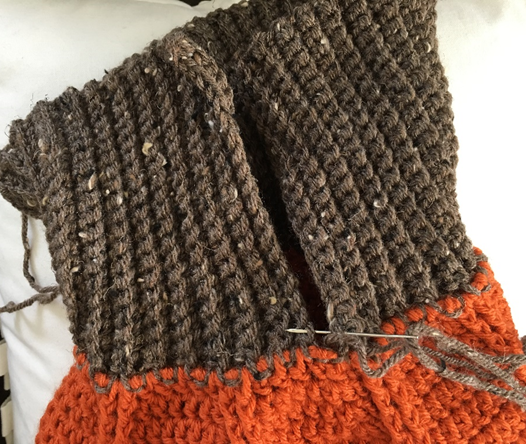
Rnds 4 – 85 – Rep Rnds 2 and 3. Do not ch 1 at end of Rnd 85. At end of Rnd 85, sl st back into first st of Stem / Cowl. (20 sc per rnd)
Fasten off, leaving long tail for sewing. Thread long tail on yarn needle and use to sew each end of stem together, so that it is a one-piece cowl and not separated.
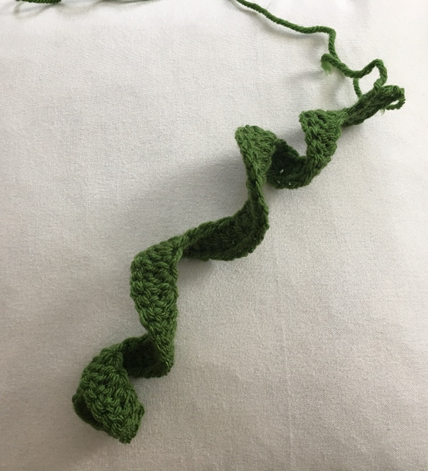
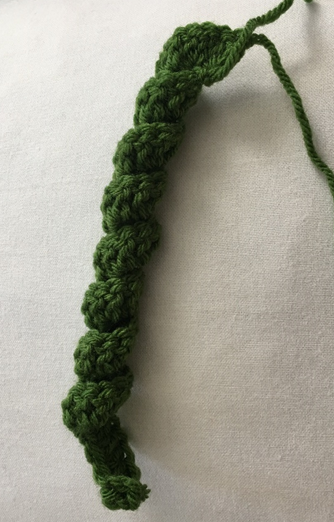
Vine (make 2 or as many as desired)
With Kelly Green, ch 40.
Row 1 – make 2 Dc in 3rd ch from hook and in each ch across. (76 dc)
Fasten off, leaving long tail for sewing. Roll strip tighter for a curlier vine, if desired.
Finishing
Place vines as desired between bottom of Stem/Cowl and top of Pumpkin/Poncho (they are placed to the side on poncho in cover photo). Sew in place.
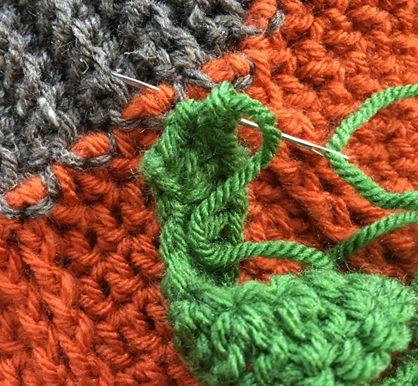
Weave in all ends.
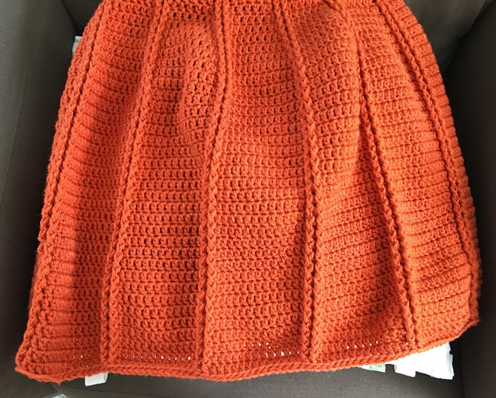
Here is the finished poncho!
I hope you enjoyed crocheting this Pumpkin Patch Poncho along with me! If you love fun, free crochet patterns, please be sure to subscribe to my email list and follow me on social media! I have so many more patterns like this one coming soon!
Happy Crocheting!
COPYRIGHT: This pattern is owned by Crafty Kitty Crochet (Melissa Moore). Any reselling or distribution of this pattern is prohibited. Sale of items made using this pattern is welcomed, but I do ask that credit/a link be provided back to my site, craftykittycrochet.com.

Comments (7)
Henriette
March 21, 2020 at 11:42 am
Thanks for the pattern, my boy is a scout and he wished for one, when they sit around the fire
Melissa
March 21, 2020 at 3:22 pm
Hi Henriette! You are so welcome and thank you for using my pattern! I got your very sweet email with photos; I’m so happy your son likes his poncho!!!!!! Thank you again!! ~ Melissa
Pumpkin Messy Bun Beanie for Kids & Adults – Crochet Pattern ~ Crafty Kitty Crochet
August 28, 2020 at 3:07 pm
[…] Introducing the Pumpkin Messy Bun Beanie – the perfect way to keep warm and stay stylish this fall! The pattern is easy, fast, fun, and includes instructions on how to make both a Kids and Adults size – so you can crochet one for every pumpkin spice lover you know! What a great accessory this would be for apple picking, visits to the pumpkin patch, or for an adorable fall photo prop! Now you can keep your ponytail or messy bun, wear a fun hat, and show off your pumpkin love all at once – this hat doesn’t sacrifice comfort for cuteness! Using about a skein of yarn, it’s a great quick project that is sure to please this autumn season! (Psst – this hat would pair really well with my Pumpkin Patch Poncho pattern, which can be found HERE!) […]
Amigurumi Pumpkin Spice Latte – Crochet Pattern ~ Crafty Kitty Crochet
September 4, 2020 at 5:20 pm
[…] you may know from many of my crochet patterns (like my Pumpkin Poncho and my Pumpkin Messy Bun Hat), I’m a pumpkin maniac! Whether it’s the sight of […]
10 FREE Crochet Pumpkin Patterns – Gabrielle Crochets
August 15, 2022 at 4:37 am
[…] 9. Pumpkin Patch Poncho – Crafty Kitty Crochet […]
4 FREE Pumpkin Shawl Crochet Patterns – iGOODideas.com
October 20, 2023 at 9:59 pm
[…] 4 . Click here for this Pumpkin Patch Poncho FREE PATTERN […]
10 Pumpkin Patch Outfit Ideas and Free Crochet Patterns
October 28, 2023 at 10:58 pm
[…] Pumpkin Patch Poncho […]