
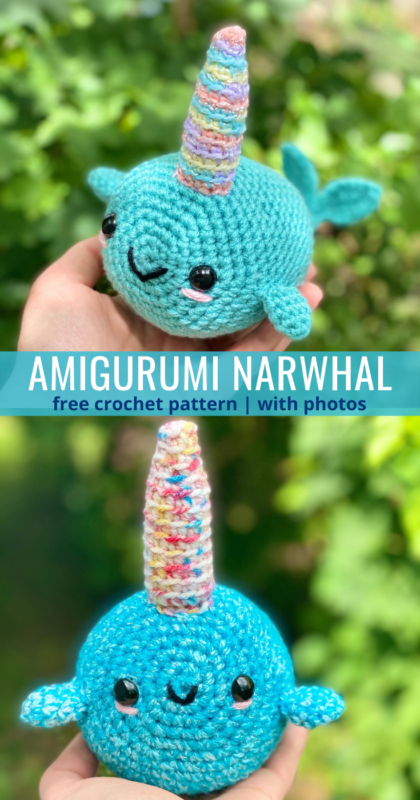
Amigurumi Narwhal – Crochet Pattern
Pin it for later!
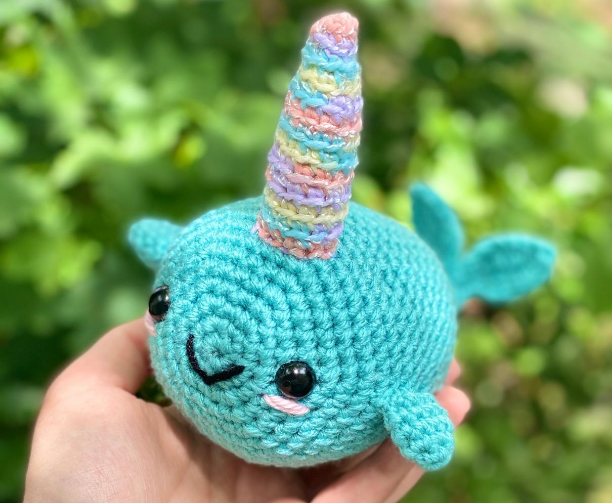
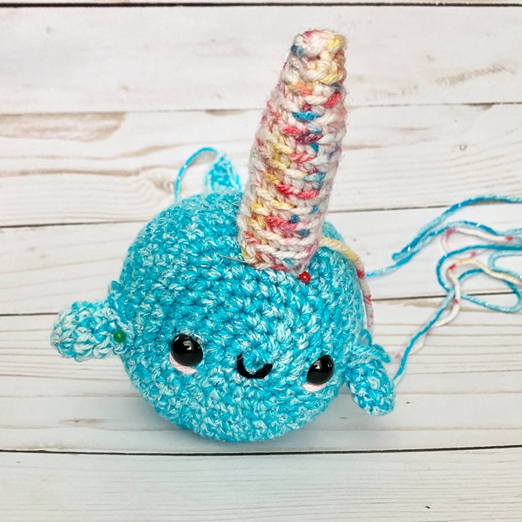
The Narwhal truly is the Unicorn of the Sea! These cute critters have become hugely popular in kids’ cartoons and media in general. And why shouldn’t they? They’re like an adorable combination of a whale, a unicorn, and a mermaid! Now you can crochet your very own little Narwhal with this fun, fast, easy crochet pattern! It uses very little yarn, so it makes a great stash buster. Gift it as a toy, use it as a decorative plushie, or even make a whole bunch as stocking stuffers – the possibilities are endless!
Amigurumi Narwhal
It seemed only natural to me to continue my ongoing crochet menagerie with a Narwhal. After all, I love crocheting mermaids (see my Amigurumi Mermaid pattern HERE!), and my very first amigurumi pattern was an Octopus (see the pattern HERE!). I guess I really enjoy critters with an oceanic theme! Plus, this is a fast and fun pattern for crocheters of all skill levels – my favorite kind of design! Requiring less than 150 yds of yarn and just a few other supplies to complete the project, this is such a great way to use up extra yarn quickly!
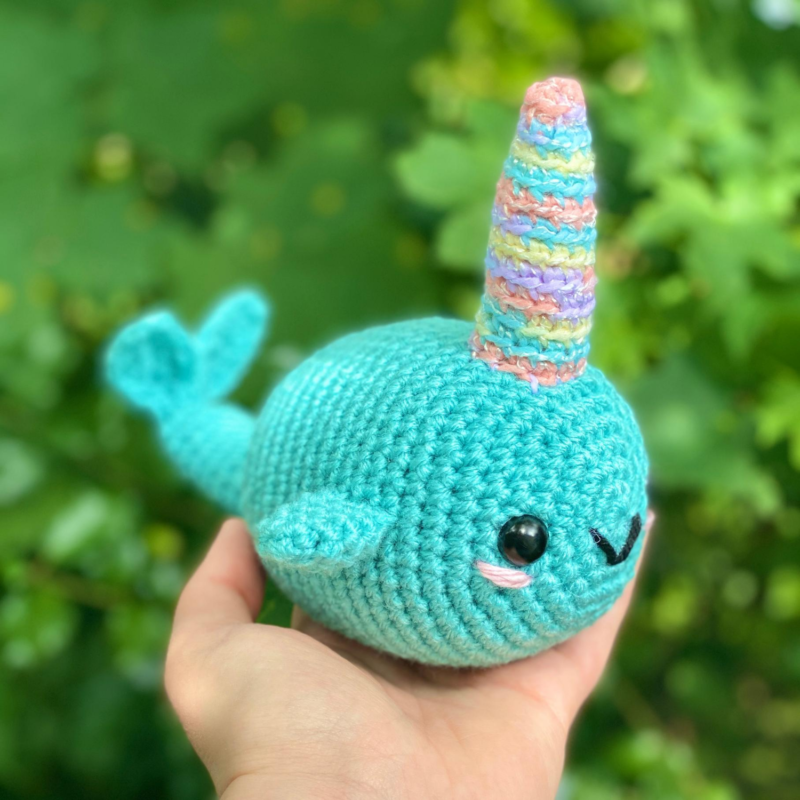
This pattern was just made for your favorite shade of aqua blue yarn! Some of the photos here show the critter made in discontinued yarns (more details in the pattern – again, this is just a great pattern for using up leftover yarn, so I decided to do that with some yarns I had that went out of production a while back)! But good news – the yarns for the lighter colored Narhwal pictured here are still available! The main color is Red Heart Super Saver in Aruba Sea (on Amazon HERE) and the contrast/horn color is Bernat Baby Coordinates in Cotton Candy (on Amazon HERE
)! Together they create the perfect aquatic-yet-pastel-and-cute effect!
Psstt! Looking for an ad-free PDF copy of this pattern? You can purchase one in my shop HERE!
Supplies
- * Size D/3 3.25 mm crochet hook
- * Medium weight yarn in main color (Red Heart Super Saver in Aruba Sea, and Stitch Studio by Nicole Studio Soiree in Arctic Blue [discontinued] used in photos) – about 100 yds
- * Medium weight yarn in contrast color (Bernat Baby Coordinates in Cotton Candy and Big Twist Sincerely in Rainbow Confetti [discontinued] used in photos) – about 10 yds
* 1 pair of 12 mm safety eyes
* Fiberfill stuffing
* Straight pins (optional)
Abbreviations
*= indicates beginning/end of a section to be repeated
Beg = beginning
BLO = back loop only
Ch = chain
Dc = decrease
Hdc = half double crochet
Rep = repeat
Rnd(s) round(s)
Sc = single crochet
Sc2tog = single crochet 2 together
St(s) = stitch(es)
Tr = triple crochet
Gauge
Exact gauge is not essential to this project.
Size
About 7 inches in length
How to Make This
Instructions
Body
This piece is worked in continuous rnds; do not join. You may wish to use a stitch marker and move it up at the beg of each new rnd.
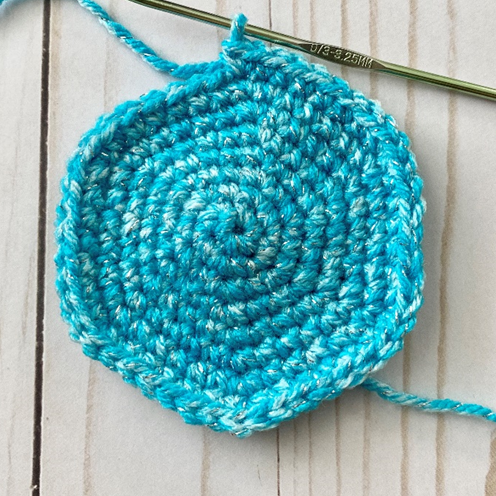
Rnd 1 – with Main Color, make a magic ring, 6 sc in ring. (6 sc)
Rnd 2 – 2 sc in each st around. (12 sc)
Rnd 3 – 2 sc in next st, sc in next st; rep around (18 sc)
Rnd 4 – 2 sc in next st, sc in next 2 sts; rep around (24 sc)
Rnd 5 – 2 sc in next st, sc in next 3 sts; rep around (30 sc)
Rnd 6 – 2 sc in next st, sc in next 4 sts; rep around (36 sc)
Rnd 7 – 2 sc in next st, sc in next 5 sts; rep around (42 sc)
Rnd 8 – 2 sc in next st, sc in next 6 sts; rep around (48 sc)
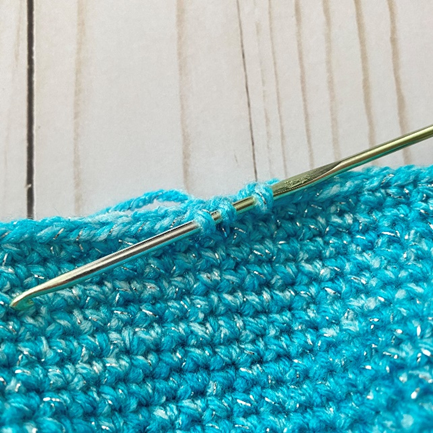
Rnds 9 – 20 – sc in each st around. Attach safety eyes near Rnds 7 and 8, and begin stuffing. (48 sc per rnd)

Rnd 21 – sc2tog over next 2 sts (see photo below), sc in next 6 sts; rep around (42 sc)
Rnd 22 – sc in each st around. (42 sc)
Rnd 23 – sc2tog over next 2 sts, sc in next 5 sts; rep around (36 sc)
Rnd 24 – sc in each st around. Continue stuffing. (36 sc)
Rnd 25 – *sc2tog over next 2 sts, sc in next.* Rep from * to * 6 more times. Sc in next 15 sts. (29 sc)
Rnd 26 – *sc2tog over next 2 sts, sc in next.* Rep from * to * 4 more times. Sc in next 14 sts. (24 sc)
Rnd 27 – sc2tog 5 times. Sc in next 14 sts. (19 sc)
Rnd 28 – *sc2tog over next 2 sts, sc in next.* Rep from * to * 5 more times. Sc in last st. Continue stuffing. (13 sc)
Rnds 29 – 37 – sc in each st around. (13 sc per rnd)
Rnd 38 – sc2tog 6 times, sc in last st. Finish stuffing. (7 sc)
Do not fasten off.
Fins
Ch 8.
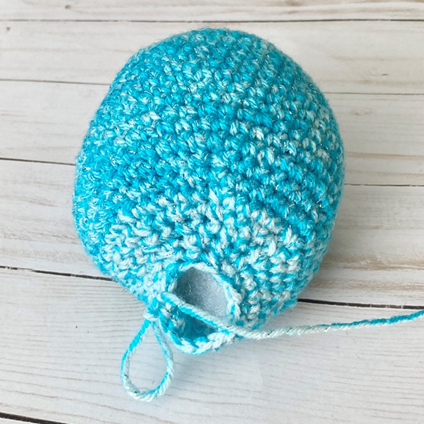
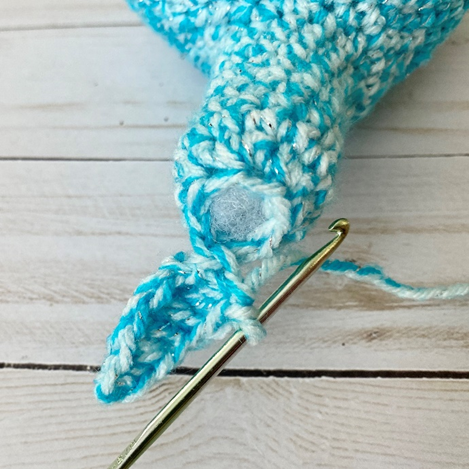
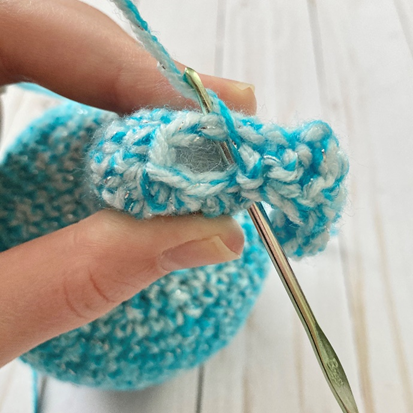
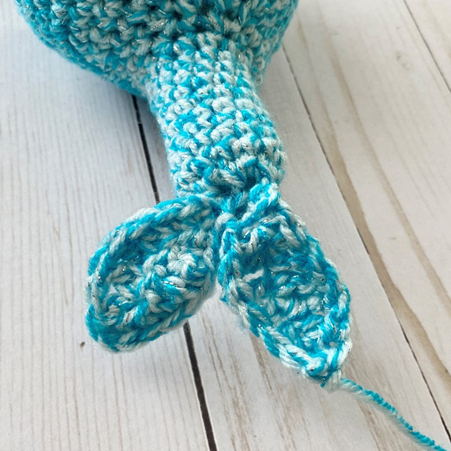
Row 1 – Working back down sts of ch, in 2nd ch from hook, sc in next, hdc in next, dc in next, tr in next 2 sts, hdc in next, sc in last (see first photo below). Sl st through both sides of rnd below (see second photo below), ch 1, turn. (2 sc, 2 hdc, 1 dc, 2 tr)
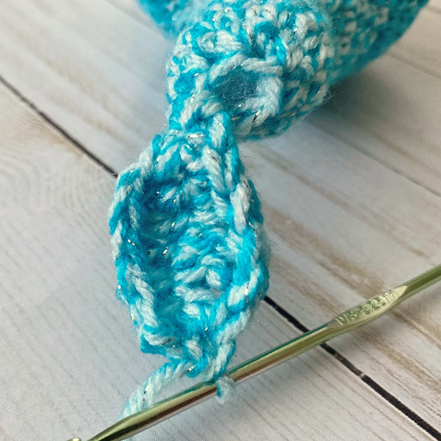
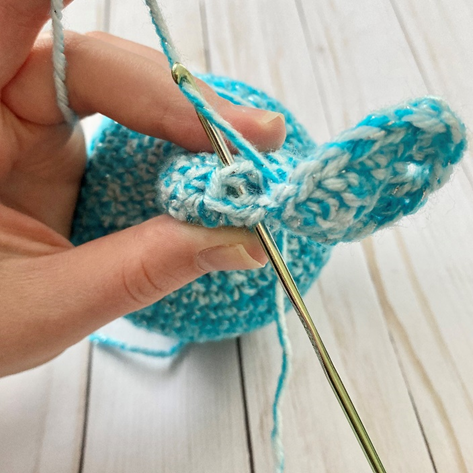
Row 2 – Working across Row 1 of first Fin, sc in next, hdc in next, tr in next 2 sts, dc in next, hdc in next, sc in last (see first photo below) . Ch 1, turn, and sl st down row just created, back down to Body. Sl st through both sides of rnd below (second photo below), and rep Rows 1 and 2 to make second Fin (third photo below). Fasten off. (2 sc, 2 hdc, 1 dc, 2 tr)
Arm (make 2)
This piece is worked in continuous rnds; do not join. You may wish to use a stitch marker and move it up at the beg of each new rnd.
Rnd 1 – With Main Color, make a magic ring, 5 sc in ring. (5 sc)
Rnd 2 – 2 sc in each st around. (10 sc)
Rnds 3 – 5 – sc in each st around. (10 sc per rnd)
Fasten off leaving long tail for sewing.
Horn
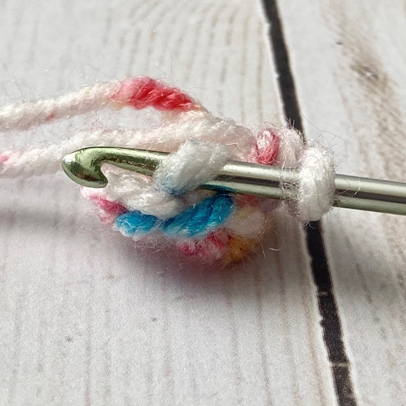
This piece is worked in continuous rnds; do not join. You may wish to use a stitch marker and move it up at the beg of each new rnd. NOTE: all rnds after Rnd 1 are worked in BLO (see first photo below).
Rnd 1 – with Contrast Color, make a magic ring, 6 sc in ring. (6 sc)
Rnd 2 – sc in each st around. (6 sc)
Rnd 3 – 2 sc in next st, sc in next st; rep around. (9 sc)
Rnd 4 – sc in each st around. (9 sc)
Rnd 5 – 2 sc in next st, sc in next 2 sts; rep around. (12 sc)
Rnds 6 – 13 – sc in each st around. (12 sc per rnd)
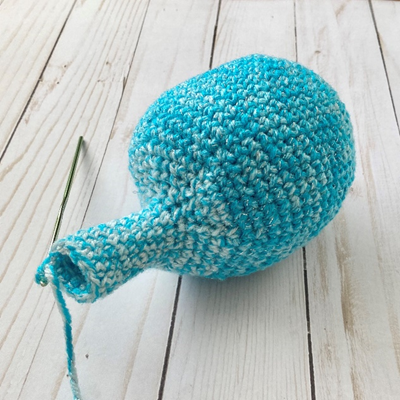
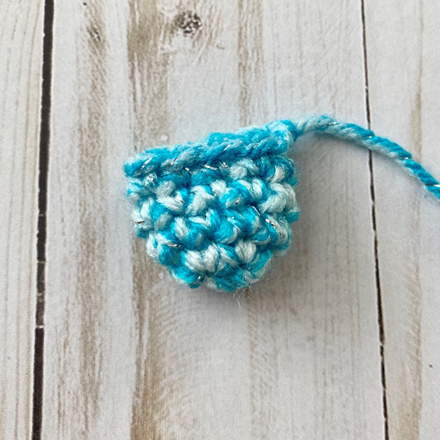
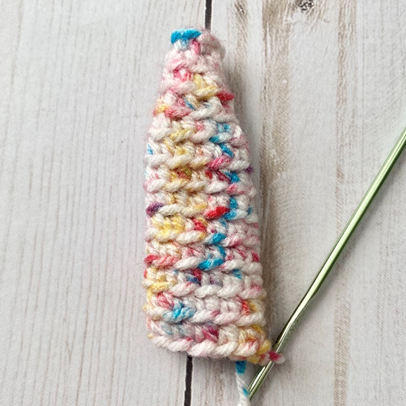
Fasten off, leaving long tail for sewing. Second photo below shows finished Horn.
Finishing
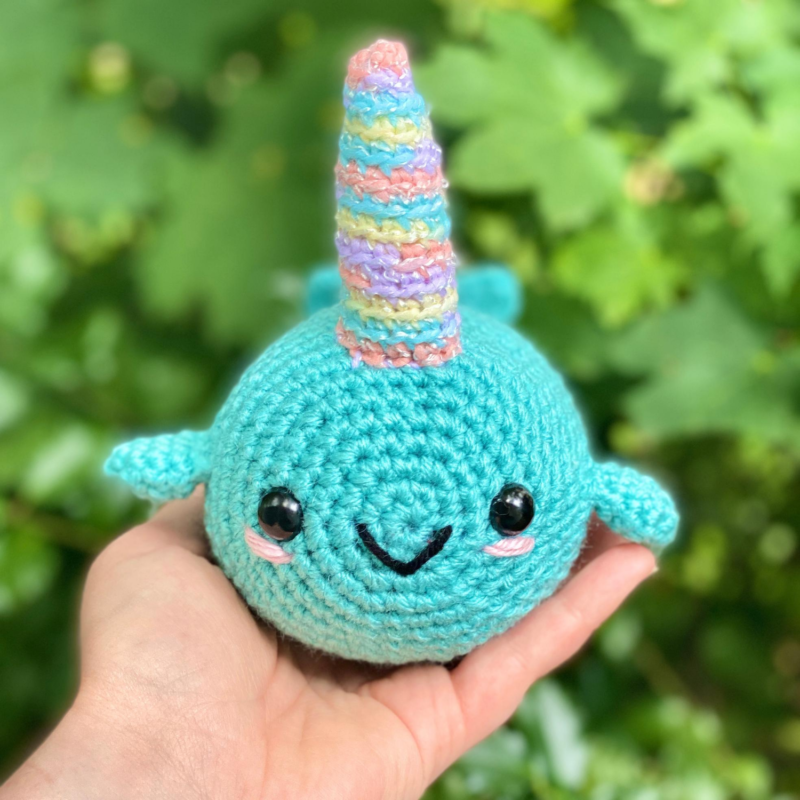
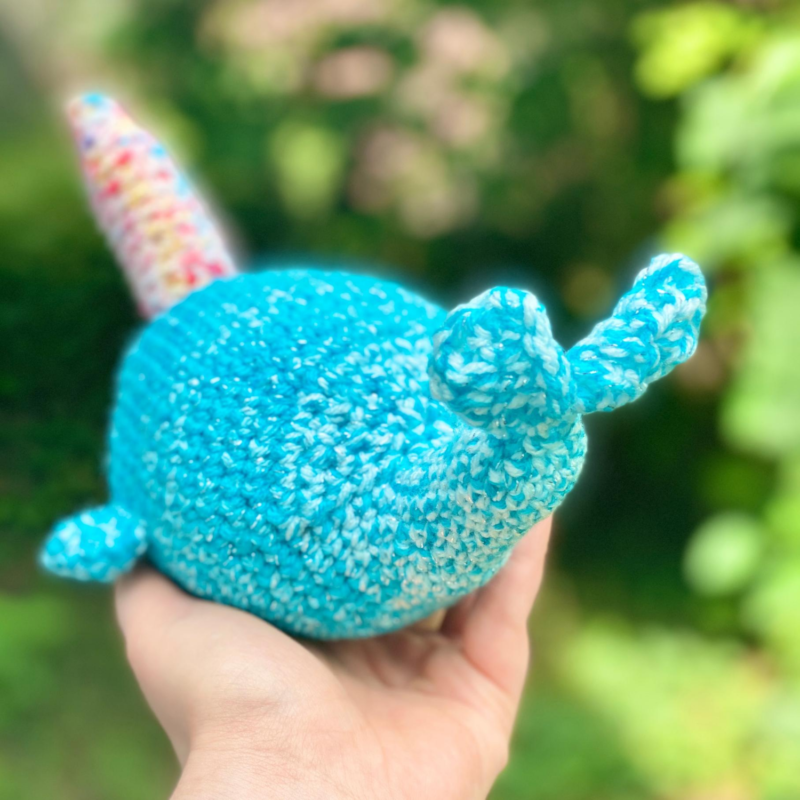
With black, make a small v between eyes for Smile. With pink, make small horizontal lines underneath each eye for Blush. (See first photo below.) Lightly stuff Horn, and arrange Arms and Horn on Body as seen in second photo below (use straight pins to hold in place if desired). Sew pieces to Body. Weave in all ends, and/or tie off and hide knots inside sts.

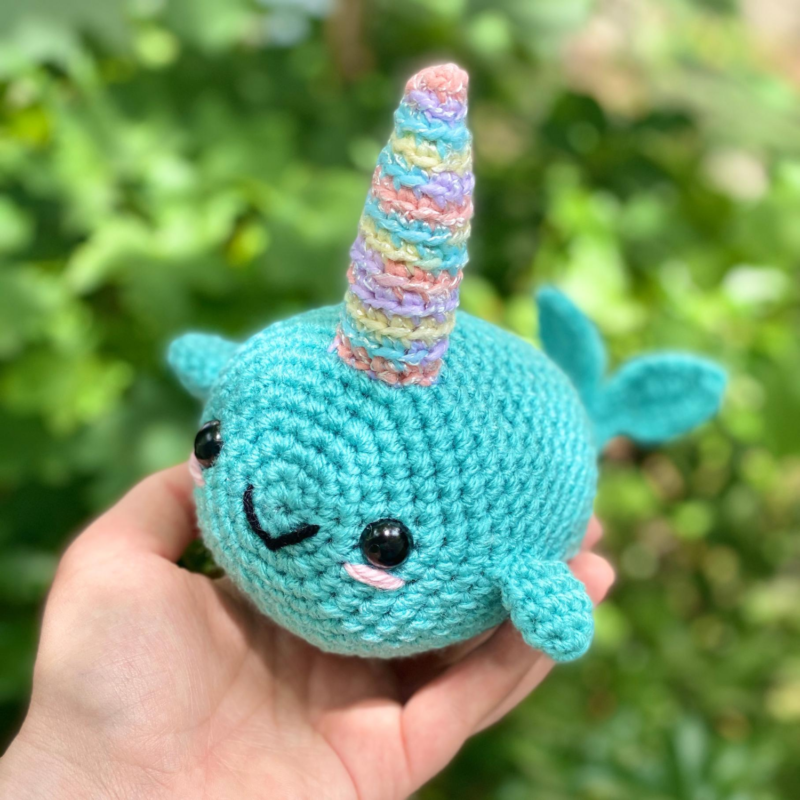
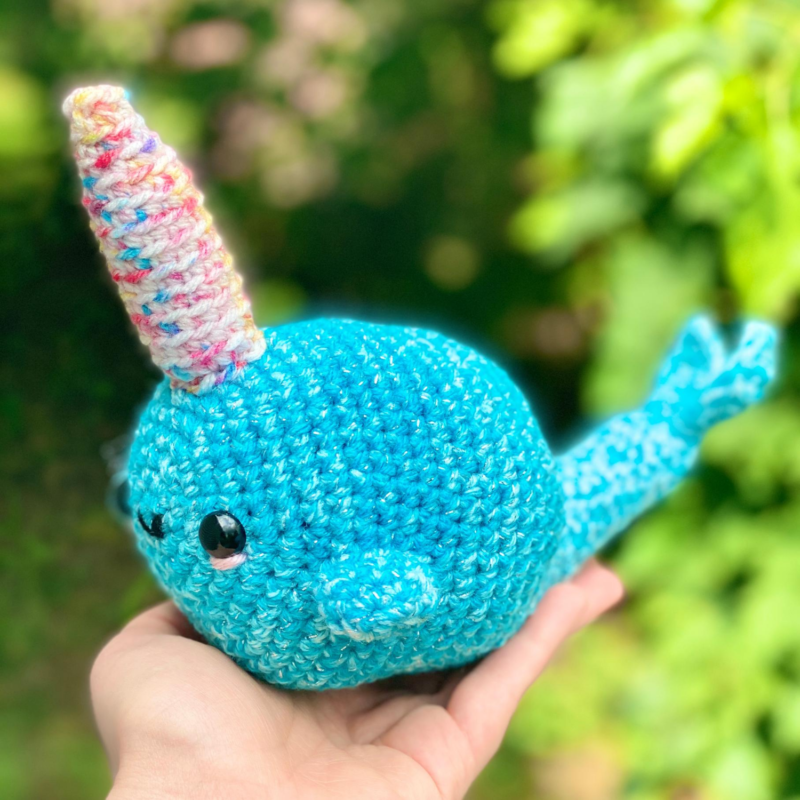
Here is the finished Narwhal!
I hope you enjoyed crocheting this little Narhwal along with me today! If you love fun, free patterns, please be sure to subscribe to my email list to keep up to date with my latest designs:
And also be sure to follow me on social media, and tag me with photos of your finished projects so I can see your lovely work!
Don’t forget to pin it for later HERE!
And you can find that ad-free PDF pattern HERE!
Happy Crocheting!
COPYRIGHT: This pattern is owned by Crafty Kitty Crochet (Melissa Moore). Any reselling or distribution of this pattern is prohibited. Sale of items made using this pattern is welcomed, but I do ask that credit/a link be provided back to my site, craftykittycrochet.com.

Comments (3)
Rainbow the Amigurumi Jellyfish – Crochet Pattern ~ Crafty Kitty Crochet
June 26, 2021 at 9:22 pm
[…] with the octopus (find my crochet pattern HERE!) and narwhals (and another crochet pattern for that HERE!). So I decided to combine my love of crocheting amigurumi animals with my love for anything and […]
Adorable Narwhal Free Amigurumi Pattern Ideas – Carolinamontoni.com
February 10, 2022 at 1:37 pm
[…] Get Pattern […]
10 Crochet Narwhal Patterns For Kids Amigurumi – The Newlywed
November 18, 2023 at 11:49 am
[…] Click Here […]