
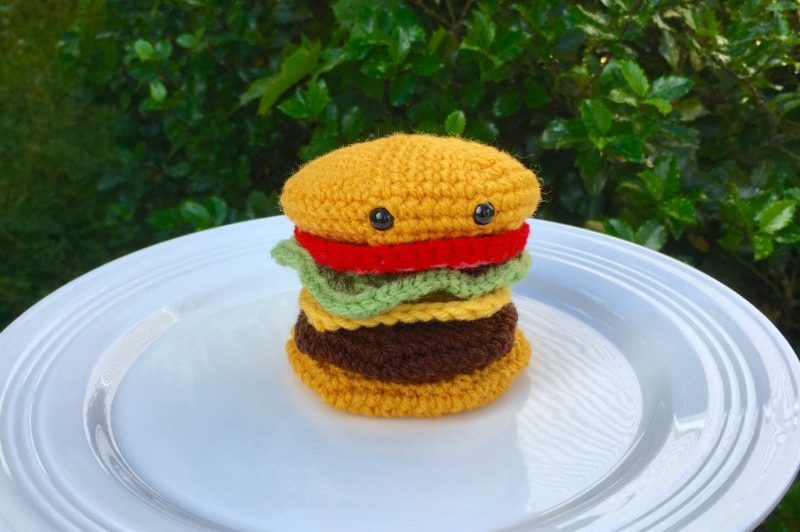
Amigurumi Cheeseburger Crochet Pattern
There aren’t many foods that are quite as open to customization as burgers! Well-done? Rare? Lettuce and tomato? Pickles? Onions? Condiments? It seems like there’s a never-ending list of choices when it comes to them! Heck, even holding the cheese leads to a completely different category of burger, the hamburger as opposed to the cheeseburger. What could be more fun than having your own little crocheted cheeseburger that you can take apart and put back together? As of right now, this fun little pattern consists of the top/bottom buns, the burger, cheese, tomato, and lettuce. But I’m thinking of doing something similar to my idea for my Pizza Slouchy Hat Pattern – releasing an “extra toppings” pattern later on! There could be little chain stitched ketchup and mustard, tiny pickles, etc.!
So fire up the grill! We’re about to make some burgers!!
(To purchase an ad-free PDF copy of this pattern in my shop, click here!)
Supplies:
Size D/3 (3.25 MM) Crochet Hook
Yarn Needle
Scissors
Fiberfill stuffing
9 mm Safety Eyes
(You will not need entire skeins of each color of yarns listed below)
Red Heart Super Saver in Gold (buns)
Red Heart Super Saver in Coffee (burger)
Red Heart Super Saver Yarn in Flamingo (tomato)
Red Heart Super Saver Yarn in Cherry Red (tomato)
Red Heart Super Saver in Tea Leaf (lettuce)
Caron One Pound Yarn in Sunflower (cheese)
Abbreviations:
* = Indicates the beginning of a section that will be repeated
Beg = beginning
Ch = chain
Dc = double crochet
Dec = decrease
Hdc = half double crochet
Rep = repeat
Rnd = round
Sc = single crochet
Sc2tog = single crochet 2 together
Sl st = slip stitch
Sp(s) = space(s)
St(s) = stitch(es)
Size:
About 3.5 inches/9 cm wide (top bun); stands about 3 inches tall depending on how hard you press the “ingredients” together!
Gauge:
Exact gauge is not essential to this project.
Optional: You may choose to sew all of the “ingredients” together into one piece, or keep them separate – whichever you like best, and/or whichever will make for the most fun play!
Instructions
Top bun
Work in continuous rnds without joining; you may find it helpful to use stitch markers and move them up at the end of each rnd
Rnd 1 – Magic ring, 6 sc in ring
Rnd 2 – 2 sc in each st around (12 sc)
Rnd 3 – 2 sc in next st, sc in next; rep around (18 sc)
Rnd 4 – 2 sc in next st, sc in next 2 sts; rep around (24 sc)
Rnd 5 – 2 sc in next st, sc in next 3 sts; rep around (30 sc)
Rnd 6 – 2 sc in next st, sc in next 4 sts; rep around (36 sc)
Rnd 7 – 2 sc in next st, sc in next 5 sts; rep around (42 sc)
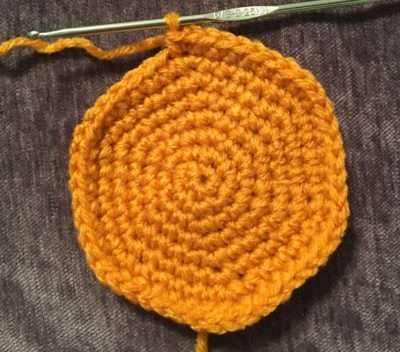
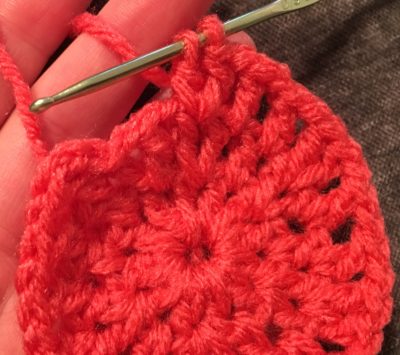
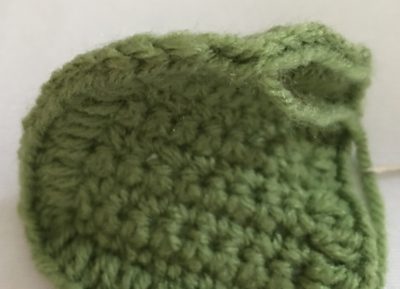
Rnd 8 – 2 sc in next st, sc in next 6 sts; rep around (see first photo below – this is how the piece will look after this rnd) (48 sc)
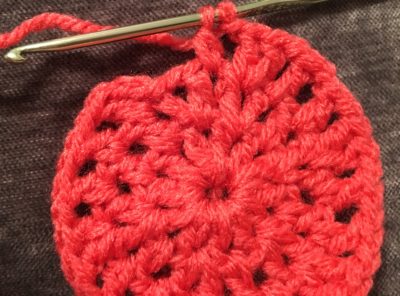
Rnds 9-11 – Sc around (see second photo below – this is how piece will look after this rnd) (48 sc per rnd)
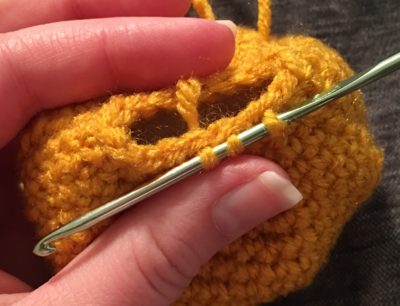
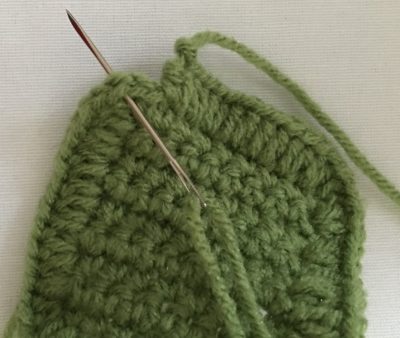
Rnd 12 – Sc2tog, sc in next 6 sts, rep around (see third photo below for how to “squeeze” piece to prevent gaps in sts while decreasing) (42 sc)
Rnd 13 – Sc2tog, sc in next 5 sts, rep around (36 sc)
Rnd 14 – Sc2tog, sc in next 4 sts, rep around (30 sc)
Rnd 15 – Sc2tog, sc in next 3 sts, rep around (24 sc)
Rnd 16 – Sc2tog, sc in next 2 sts, rep around (18 sc)
Attach safety eyes between rnds 9 and 10, about 3 sts apart. Stuff very lightly – the bun should still be very flat!
Rnd 17 – Sc2tog, sc in next st, rep around (12 sc)
Rnd 18 – Sc2tog in each st around (6 sc)
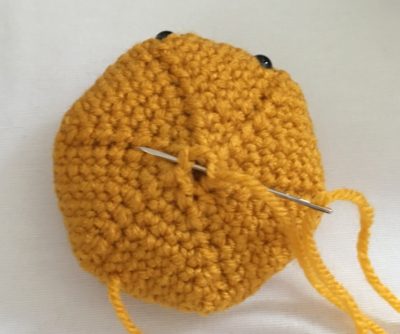
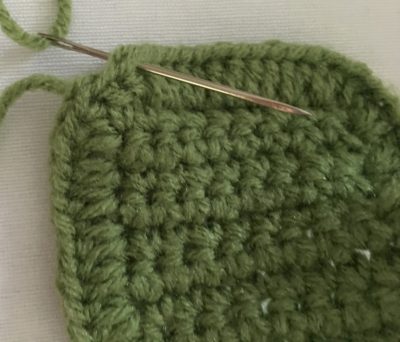
Fasten off and leave a long tail for sewing – you will close the remaining gap by stitching these last few stitches together with a yarn needle (see photo D). Weave in ends.

Bottom bun
Work in continuous rnds without joining; you may find it helpful to use stitch markers and move them up at the end of each rnd
Rnds 1-8 – Work first 8 rnds of top bun (48 sc)
Rnd 9 – Sc around (48 sc)
Rnds 10-16 – Rep Rnds 12-18 of top bun
Fasten off and leave a long tail for sewing – you will close the remaining gap by stitching these last few stitches together with a yarn needle (see photo below). Weave in ends.
Burger
Work in continuous rnds without joining; you may find it helpful to use stitch markers and move them up at the end of each rnd
Rnds 1-7 – Rep rnds 1-7 of top bun
Rnd 8 – Sc around
Rnd 9-15 Rep rnds 12-18 of top bun
Fasten off and leave a long tail for sewing – you will close the remaining gap by stitching these last few stitches together with a yarn needle (see Photo D). Weave in ends.
Cheese
Ch 10
Row 1 – Sc in 2nd ch from hook, ch 1, turn (9 sc)
Row 2 – Sc in each st across, ch 1, turn (9 sc)
Rows 3-9 – Rep Row 2 (9 sc)
Finishing: Sc evenly around entire piece, making a ch 1 in corners (about 8 sc on side, and 9 sc across top and bottom)
Fasten off, weave in ends.
Tomato
With lighter red, Ch 4, join to make a ring
Rnd 1 – Ch 2, dc in ring (first 2dc cluster). *Ch 1, 2 dc in ring; rep from * 4 more times. Ch 1, join with sl st to top of ch 2 (6 2dc clusters and 6 ch 1 sps)
Rnd 2 – Ch 2, dc between 2dc cluster below, ch 1. *Dc in ch 1 sp, ch 1. 2 dc between 2dc cluster below, ch 1. Rep from * 4 more times. Dc in last ch sp and ch 1, join with sl st to top of ch 2 (6 2dc clusters, 6 dc) (To see what 2 dc between a 2dc cluster below looks like, see first photo below; to see what a dc in ch-1 sp from rnd below looks like, see second photo below)
Rnd 3 – Ch 2, dc between 2dc cluster below, * ch 1, [Dc in ch 1 sp, ch 1] twice. 2 dc between 2dc cluster below. Rep from * 4 times. [Dc in ch 1 sp, ch 1] two more times, join with sl st to top of ch 2. Switch to darker red when joining (6 2dc clusters, 12 dc)
Rnd 4 – Ch 1, sc around in each st and ch 1 sp (41 sc)
Fasten off, weave in ends.
Lettuce
Ch 10
Rows 1-9 – Rep rows 1-9 of Cheese (9 sc)
Curling edges: working around piece, 2 Hdc in each st around (about 16 hdc on each of the four sides, and 18 hdc in top and bottom each)
Fasten off. Use invisible join to weave in the end left over from curling edges (see photos below). Weave in all ends.
Invisible Join: with tail left after fastening off, thread yarn needle. Skip one stitch and place needle in next stitch (first photo below). Pull needle through, and place needle back into last stitch (the one you fastened off on – see second photo below). You have now “invisibly joined”! This means it will be less noticeable that you fastened off in this stitch (see third photo below).
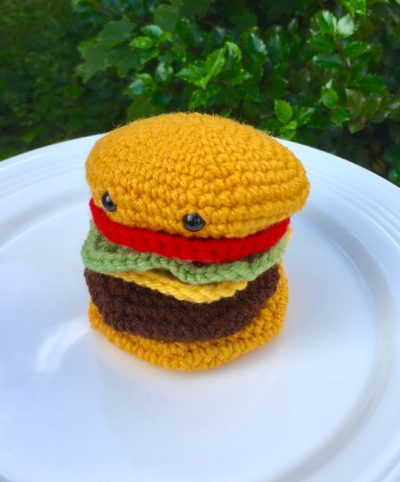
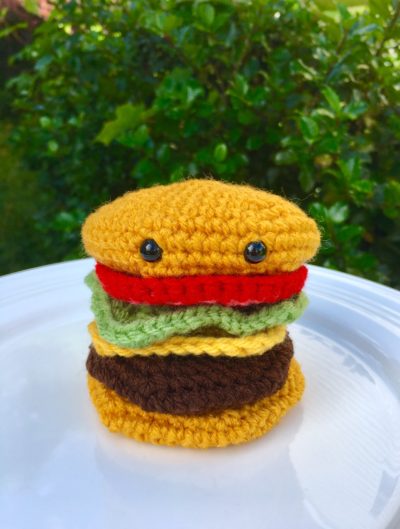
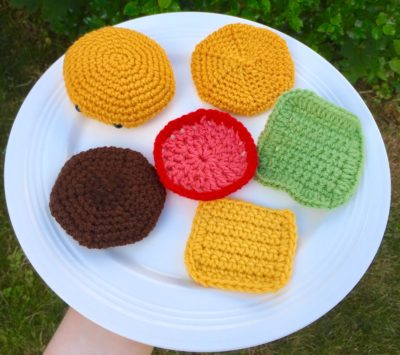
Here is the finished burger, and all its ingredients!
COPYRIGHT:
This pattern is owned by Crafty Kitty Crochet (Melissa Moore). Any reselling or distribution of this pattern is prohibited. Sale of items made using this pattern is welcomed, but I do ask that credit/a link be provided back to my site, craftykittycrochet.com.

Comments (3)
Amigurumi Hot Dog – Crochet Pattern ~ Crafty Kitty Crochet
July 10, 2020 at 6:06 pm
[…] sense that they’d be cute toys, as well. If you love this pattern, be sure to check out my Amigurumi Cheeseburger, as well! Pair these two together with my Amigurumi S’mores pattern, and you’ve got the […]
Amigurumi Broccoli Crochet Pattern ~ Crafty Kitty Crochet
April 25, 2021 at 3:50 pm
[…] I was making a large play food set, and wanted to have a balance of fun “barbecue” foods like a Cheeseburger (find the pattern HERE!), but also foods that promoted healthy eating such as fruits and vegetables. The broccoli turned out […]
Easy Amigurumi Burger Free Pattern Ideas – Carolinamontoni.com
February 26, 2022 at 1:36 pm
[…] Get Pattern […]