

Light Up Your Ugly Christmas Sweater – String Light Applique Crochet Pattern
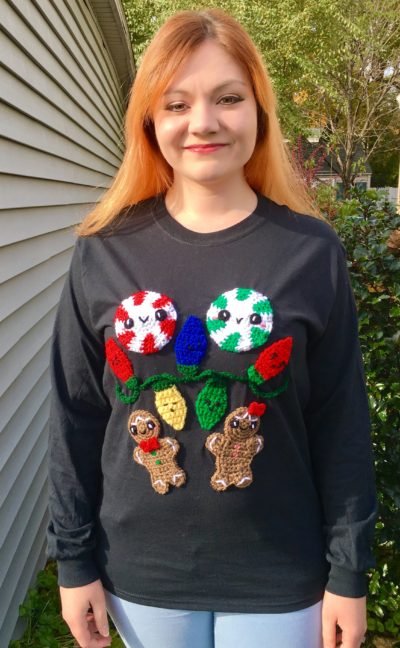
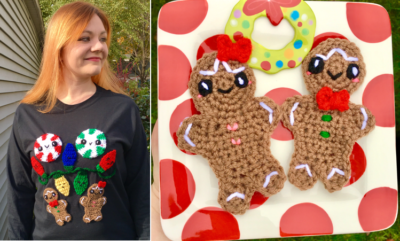
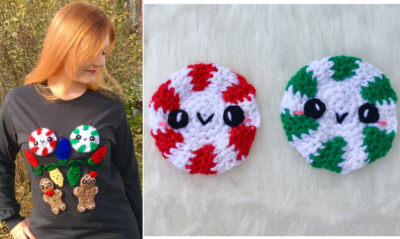
A tacky holiday sweater wouldn’t be complete without some bulky, funky Christmas lights! I think this applique fills out the sweater so well. I placed mine in the middle of the Gingerbread Boy & Girl and the Kawaii Peppermints (see my post on how to attach crocheted appliques to fabric to learn how), and I love how it looks!
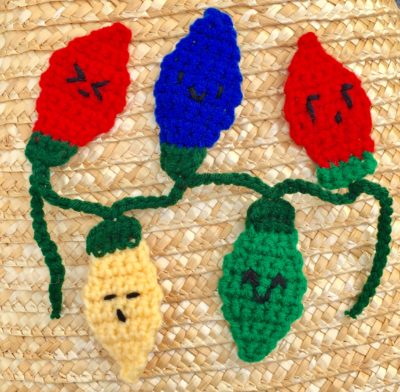
One of my favorite things to crochet is groups of characters with different faces – for example, a bunch of little amigurumi animals or play food, each with a different expression. There’s something about it that makes each little character feel unique! So when I was brainstorming ideas for appliques for my sweater, the idea of a bunch of “colorful” little personalities seemed perfect! I made five different kinds of faces for my string lights, which I explain in the pattern below. But if you’re comfortable with the idea of going free-form with your embroidering, then feel free to get creative and make lots of different expressions for your lights!
As you can see below, my sweater was pretty full once I placed all my appliques on it! If you’re looking for the Gingerbread Boy & Girl applique pattern, click here! And stay tuned for the Kawaii Peppermint pattern, as well!
Looking for the ad-free PDF version of this pattern? You can find it in my shop HERE!
As I mentioned in my Gingerbread Boy & Girl applique post, the only thing I changed up this time around when attaching them (compared to my post on how to attach crocheted appliques to fabric) was the fabric glue. This time, I used Aleene’s Fabric Fusion. I love this stuff! It dries clear and is non-toxic, so you can make this a fun holiday DIY project with the kiddos. Plus, it dries in 4 hours according to the bottle (mine was much more dry and sewing-ready after an overnight dry, but after a few hours it was not too wet), so you could easily make a few of these in a weekend and not have to worry about them taking forever to dry!
As always, I used a Gildan brand cotton t-shirt. I managed to find their long-sleeved t-shirts, which I think work perfectly for the ugly Christmas sweater!
Also, it’s worth noting that when I attached the String Lights to my shirt, I did not glue or sew the “string” in between the lights – only the ends to the left and right of the first/last lights. I think having the “string” pop up from the shirt a bit looks cuter! But if you want yours to be totally flat and attached, I suggest just sewing the string and not gluing it, as it’s likely that the glue will seep out since that area is so small.
Let’s not wait another minute to start “untangling” those festive lights!
Supplies
G/6 4.0 mm crochet hook (move hook size up/down to make appliqué larger/smaller)
Scissors
Yarn Needle
Red Heart Super Saver in
– Cherry Red
– Paddy Green
– Hunter Green
– Royal Blue
– Bright Yellow
– Black
Abbreviations
BLO = back loop only
Ch = chain
Rep = repeat
Sc = single crochet
Sc2tog = single crochet 2 together
Sl st = slip stitch
St(s) = stitch(es)
Size
Each light is about 3.5” in length, with about 2” of “string” between each light (move hook size up/down to make appliqué larger/smaller)
Gauge
Exact gauge is not essential to this project.
Instructions
Light (make 5 in the colors of your choice from list of yarns above)
Ch 2.
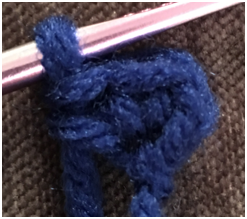
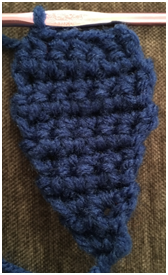
Row 1 – 2 sc in 2nd ch from hook, ch 1, turn (first photo below) (2 sc)
Row 2 – Sc across. ch 1, turn (2 sc)
Row 3 – 2 sc in first st, 2 sc in last st (second photo below). Ch 1, turn (4 sc)
Row 4 – Sc across. ch 1, turn (4 sc)
Row 5 – 2 sc in first st, sc in next 2 sts, 2 sc in last st. Ch 1, turn (6 sc)
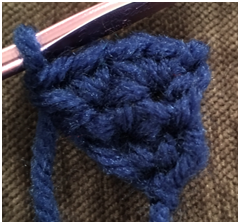
Row 6 – Sc across. Ch 1, turn (third photo below) (6 sc)
Rows 7 – 9 – Rep Row 6 (6 sc per row)
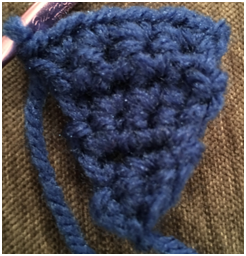
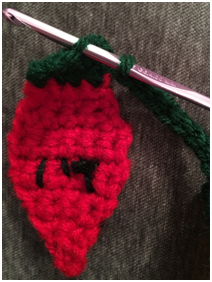
Row 10 – Sc2tog over next 2 sts, sc in next 2 sts, sc2tog over last 2 sts (fourth photo below). Ch 1, turn (4 sc)
Row 11 – Sc across. Ch1, turn (4 sc)
Row 12 – Rep Row 11, switching to Hunter Green in last st (4 sc)
Rows 13 – 14 – Rep Row 11. Do not ch 1 at end of Row 14. (Fifth photo below shows finished piece.) (4 sc)
Fasten off, weave in ends.
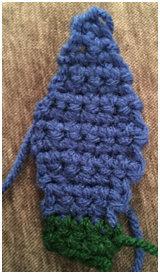
String
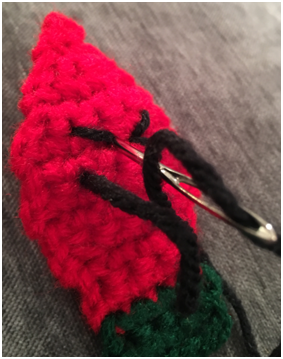
With Hunter Green, ch 15. *Sl st in BLO of top-center of one Light (photo below). Ch 8.* Rep from * to * for each light. Do not ch 8 after last light – instead, ch 15. Fasten off, weave in ends. Tie a knot at ends of String and snip closely to knot.
Finishing
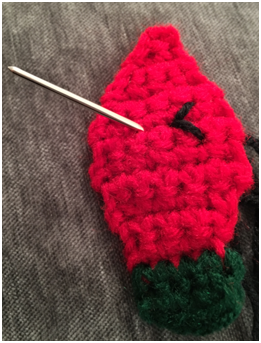
With Black, use yarn needle to sew faces onto Lights.
- Closed-eye face: Make 2 sideways “V” shapes (first three photos below), with a small horizontal line beneath for smile. Tie off ends on back of Light. (Fourth photo below shows finished piece.)
- Sleepy face: Make two horizontal lines, with a small vertical line beneath for mouth. Tie off ends on back of Light.
- Smiley face: Make two vertical lines, with a small “V” beneath for smile. Tie off ends on back of Light.
- Super happy face: Make two upside-down “V” shapes, with another “V” shape below for smile. Tie off ends on back of Light.
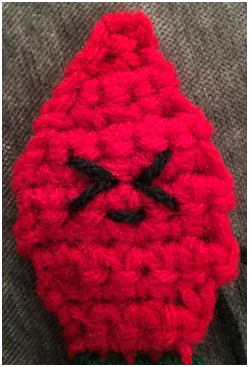
- Shifty face: Make two vertical lines for eyes, with two smaller horizontal lines connected to tops of eyes, both facing to the right. Make a small vertical line below for mouth. Tie off ends on back of Light.

Here are the finished String Lights!

Join me next time to make two more appliques for this delightfully ugly Christmas sweater – Kawaii Peppermints!
COPYRIGHT: This pattern is owned by Crafty Kitty Crochet (Melissa Moore). Any reselling or distribution of this pattern is prohibited. Sale of items made using this pattern is welcomed, but I do ask that credit/a link be provided back to my site, craftykittycrochet.com.
Comments (3)
Make this Holiday Season Sweet: Kawaii Peppermint Applique Crochet Pattern – Crafty Kitty Crochet
April 18, 2020 at 4:27 pm
[…] If you’re looking for the other appliques on the sweater, you can find the free patterns for the Gingerbread Boy & Girl here, and the String Lights here! […]
Snowman Applique / Ornament Crochet Pattern – Crafty Kitty Crochet
April 18, 2020 at 4:41 pm
[…] and I was trying to make something a little different from the Peppermints, Gingerbread Cookies, String Lights, and Christmas Tree appliques that I was planning for her sweater. In the end, I decided on this […]
4 Christmas Lights Appliques Free Crochet Pattern Ideas – Carolinamontoni.com
June 28, 2022 at 1:36 am
[…] Get Pattern […]