
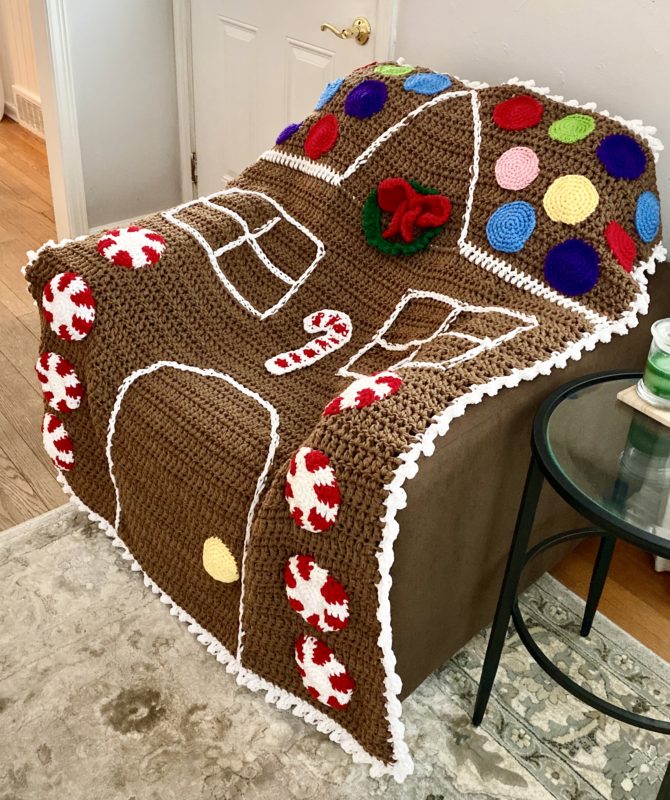
Gingerbread House Blanket – Crochet Pattern
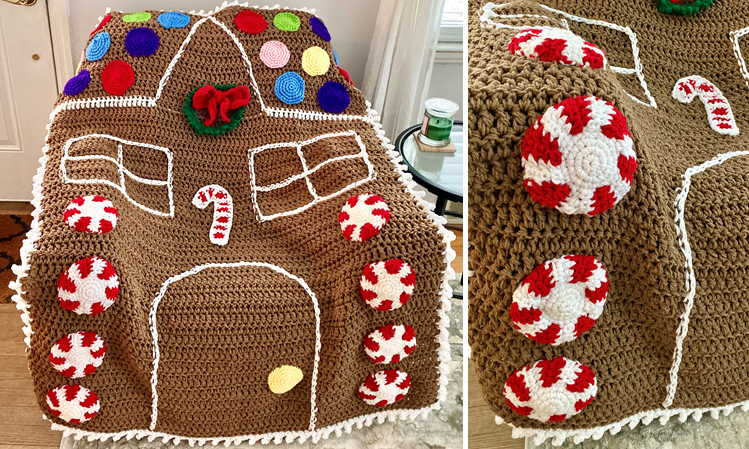
Sweetness meets coziness in this comfy and adorably detailed Gingerbread House blanket! The blanket portion is easy and fairly quick to make, and all the candy goodness is sewn on afterwards, so you can get creative and arrange your House the way you like! It’s like making an actual gingerbread house, only much warmer and less calories!
Pin it for later!
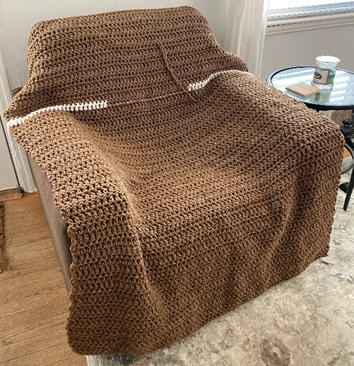
It’s the coldest time of the year in many parts of the globe, including mine. This is the time of year we crocheters live for – don’t get me wrong, I love crocheting all year round, but being able to make warm blankets in the winter is where so many of us yarncrafters really shine! So how about giving the gift of a cozy blanket that looks like a gingerbread house this season? Or, make it as a gift-to-self and drape it over your favorite crocheting chair!
The details are what really bring this blanket to life. The “icing”, which is easy to do using the slip stitch, outlines the shape of the “house”. And all the colorful candies, peppermints, and candy cane are made in separate pieces and sewn on afterwards – so you can arrange them in any order you like, make them in different colors, etc.! I personally think throwing some green peppermints in there would mix it up, and I might try that on my next afghan! To top it off, this little House even has a wreath with a poofy bow! It doesn’t get much cuter, or sweeter, than that!
When designing this blanket, I knew I wanted a thick texture in a warm light brown gingerbread color. I also knew I’d want a lot of it if I was making a blanket, so not breaking the bank was imperative! I went with a favorite of mine for gingerbread projects – Red Heart Super Saver in Cafe Latte! Less than 3 whole “Jumbo” skeins of this yarn made the blanket portion, and the miscellaneous candies are so relatively small that you could turn this into a stashbuster project and use scraps for those if you wanted to. Cute and unique crochet projects that fit in your budget are a must this time of year! You can find Cafe Latte on Amazon HERE (this isn’t the Jumbo skein, but the conversion is about 3 regular skeins to make one Jumbo skein)!
Another reason why this blanket is such a great project is that it’s so unique! It’s not too likely that anyone on your gift list will already have one – and even if by some chance they did, that’s the beauty of customizing your gingerbread blanket to be truly, creatively your own! Giving someone their very own gingerbread blanket handmade by you is like giving them a cozier, permanent version of a gingerbread house that you made just for them!
So what are we waiting for? Let’s build this house!!!!!!!!
Supplies
Size P / 11.50 mm crochet hook
Size J-10 / 6.00 mm crochet hook
3 skeins of Red Heart Super Saver Jumbo in Café Latte
1 skein each of Red Heart Super Saver in White, Cherry Red, Spring Green, Paddy Green, Lemon, Amethyst, and Delft Blue
1 skein Red Heart Soft Baby Steps in Rose
Yarn Needle with large eye
Straight pins
Scissors
Abbreviations
*= indicates the beginning/end of a section to be repeated
Beg = beginning
Ch = chain
Hdc = half double crochet
Dc = double crochet
Rep = repeat
Rnd(s) = round(s)
Sc = single crochet
Sc2tog = single crochet 2 together
Sl St = slip stitch
St(s) = stitch(es)
Gauge
Exact gauge is not essential to this project.
Size
About 45 inches wide by about 60 inches long
Notes
All pieces in this pattern are worked holding two strands of yarn together.
Instructions
Blanket
With P hook and two strands of Café Latte, ch 73.
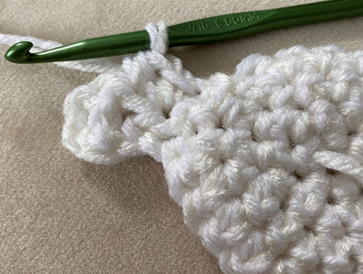
Row 1 – dc in 3rd ch from hook and in each st across. Ch 2, turn. (71 dc)
Rows 2 – 44 – dc in each st across. Change to two strands of White in last st of Row 44, but do not fasten off Café Latte. Ch 2, turn. (71 dc per row)
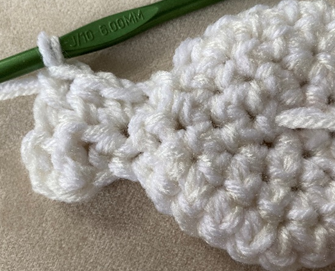
Row 45 – carrying Café Latte through sts, dc in next 24 sts; change to Café Latte in last st. Carrying White, dc in next 23 sts; change to White in last st. Carrying Café Latte, dc in last 24 sts, changing to Café Latte in last st of row. (71 dc)
Rows 46 – 60 – dc in each st across. Ch 2, turn (do not ch 2 at the end of Row 60). (71 dc per row)
Fasten off.
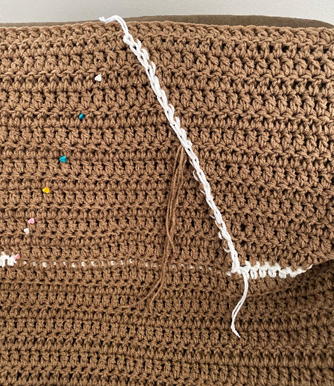
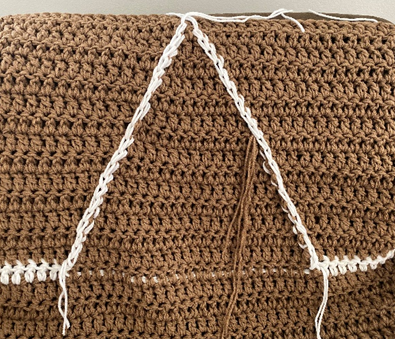
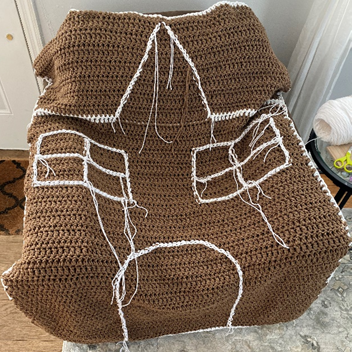
Roof Icing
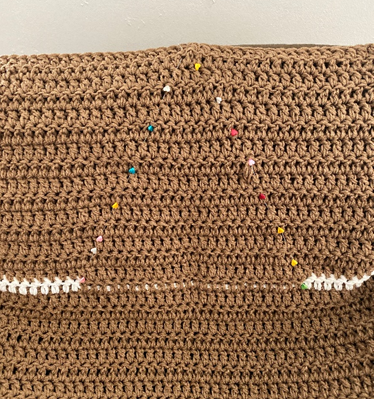
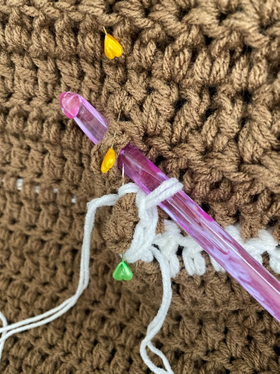
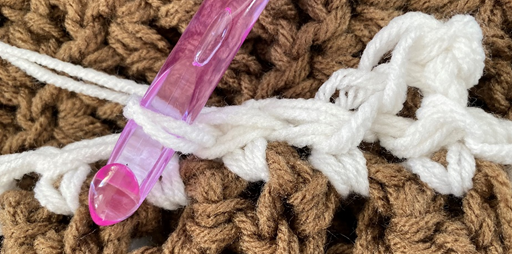
Use straight pins to mark areas where peak/gable that separates the “house” from the “roof” will be stitched. Ensure that the angles are not crooked before stitching. When finished marking the area, use two strands of White and P hook to sl st around dc posts, following straight pin markers. Fasten off.
Window Icing
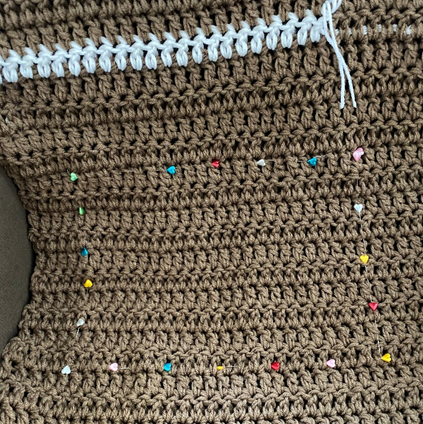
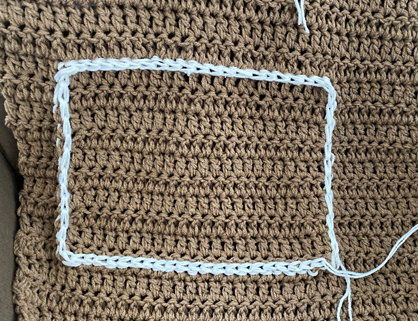
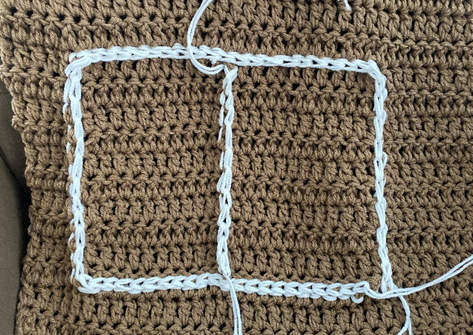
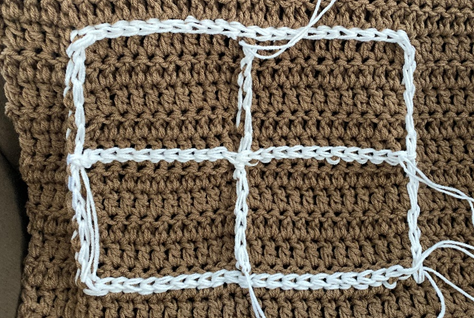
Use straight pins to mark areas where Icing will be stitched. Windows should span across 23 dc sts in width, 10 dc sts in length, and begin about 4 dc sts inward from edges of blanket. Use two strands of White and P hook to sl st around dc posts, following straight pin markers. Make lines of horizontal and vertical sl sts inside Windows to make Window Pane. Vertical line should have 11 dc sts on either side, and horizontal line should begin about 5 rows down from top of Window. Fasten off.
Door Icing
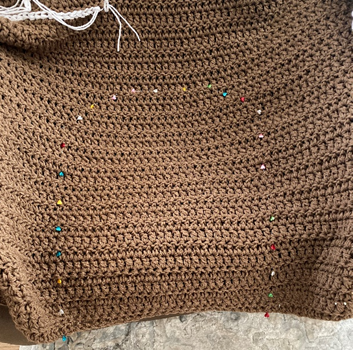
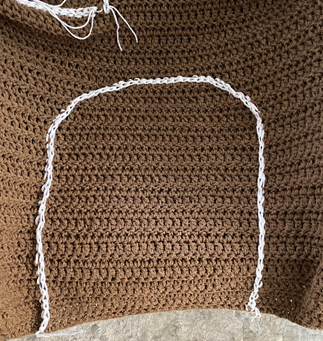
Use straight pins to mark areas where sl sts will be made. Width of door at bottom should span 27 dc sts in order to be centered on blanket, and should have the length of 24 rows. Near 14th row, begin arching by indenting about 1-2 sts per row. With two strands of White and P hook, sl st around dc posts, following straight pin markers. Fasten off.
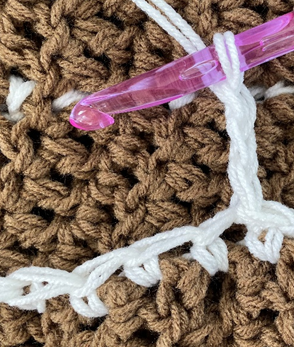
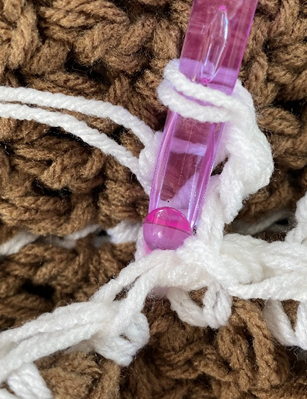
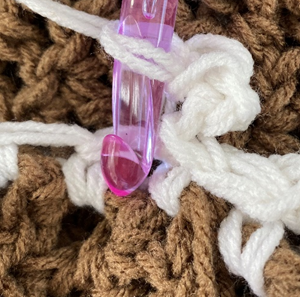
Border
Rnd 1 – With two strands of White and P hook, join in any st of Blanket. Ch 1, sc around entire piece, making about 68 sc on each side. Ch 1 at each corner of Blanket. Join with sl st to first sc of rnd (278 sc)
Rnd 2 – *ch 3, sl st into first ch made. Sl st back into same sc, and sl st in next 2 sc from Rnd 1 of Border.* Rep from * to * around (139 ch-3 clusters)
Fasten off.
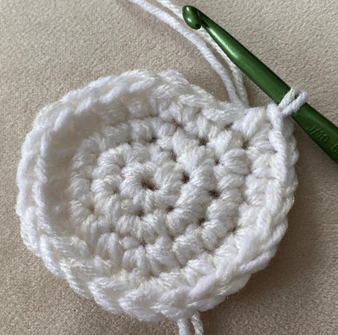
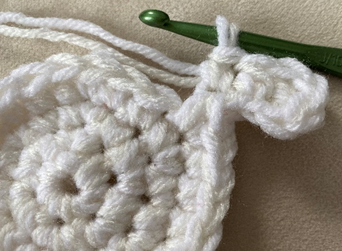
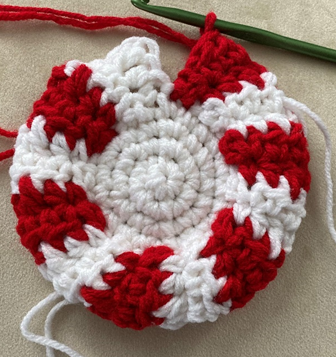
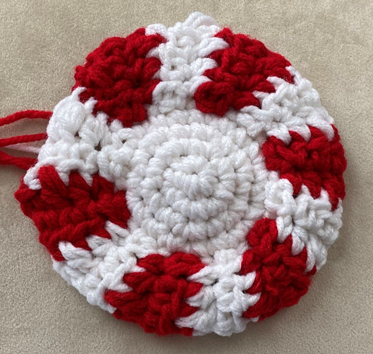
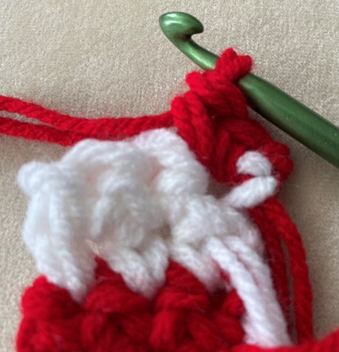
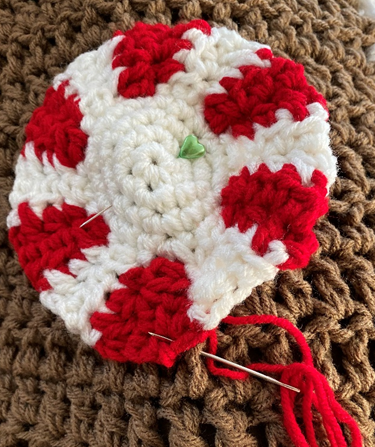
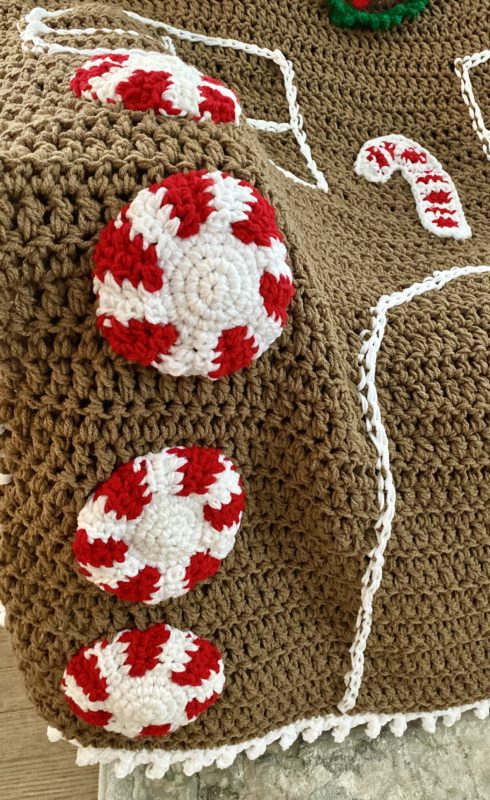
Peppermint Discs (make 8)
Center of Peppermint
Rnd 1 – With 2 strands of White and J hook, make a magic ring, 6 sc in ring (6 sc)
Rnd 2 – 2 sc in each st around (12 sc)
Rnd 3 – 2 sc in next st, sc in next. Rep around (18 sc)
Rnd 4 – 2 sc in next st, sc in next 2 sts. Rep around. Do not fasten off. (24 sc)
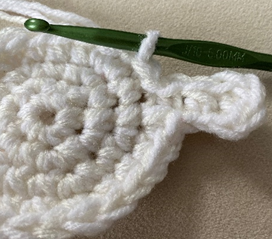
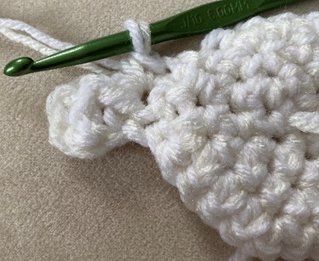
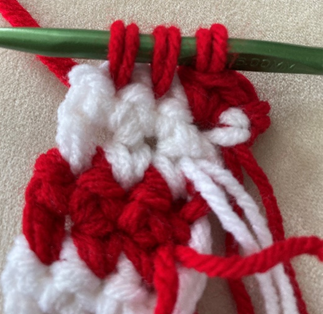
Stripes
Row 1 – Ch 5. Dc in 3rd ch from hook. Hdc in next. Sc in last. Sl st into next sc from previous rnd. Sl st in next sc on previous rnd, ch 1, turn. (1 dc, 1 hdc, 1 sc)
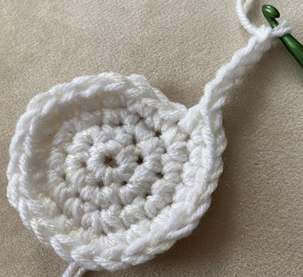

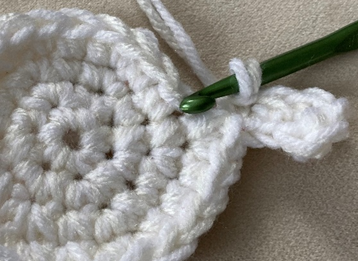
Row 2 – Sc in next st, Hdc in next st, dc in last st. Join Cherry Red in last st. Do not fasten off White; you will carry it to next Rnd later. Ch 2, turn. (1 sc, 1 hdc, 1 dc)
Row 3 – Dc in next st. Hdc in next st. Sc in last st. Sl st into next sc from previous rnd. Sl st in next sc on previous rnd, ch 1, turn. (1 dc, 1 hdc, 1 sc)
Row 4 – Sc in next st, Hdc in next st, dc in last st. Join White in last st. Do not fasten off contrast color; carry it to next row. Ch 2, turn. (1 sc, 1 hdc, 1 dc)
Row 5 – Dc in first st, Hdc in next, sc in last. Sl st in next sc on rnd, Sl st in next st. Ch 1, turn. (1 dc, 1 hdc, 1 sc)
Row 6 – Sc in first st, Hdc in next st, dc in last st. Join contrast yarn in last st. Ch 2, turn. (1 sc, 1 hdc, 1 dc)
Rows 7 – 26 – Rep Rows 3 – 6 five times (do not ch 2 at the end of Row 26). Fasten off, leaving a long tail for sewing. Sew last row to beg row with yarn needle. (1 sc, 1 hdc, 1 dc per row)
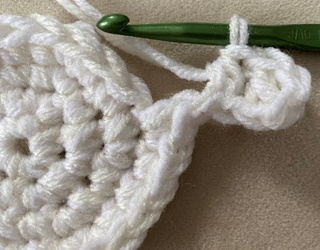
Candy (make 19 total – about 2-3 per color – 9 for each side of Roof and one extra Lemon to use as Door Knob)
This piece is worked in continuous rnds; do not join. You may wish to use a stitch marker and move it up at the beginning of each new rnd.
Rnd 1 – With J hook and two strands of Cherry Red, Rose, Lemon, Spring Green, Delft Blue, or Amethyst, make a magic ring. 6 sc in ring. (6 sc)
Rnd 2 – 2 sc in each st around. (12 sc)
Rnd 3 – 2 sc in next st, sc in next st; rep around. (18 sc)
Rnd 4 – 2 sc in next st, sc in next 2 sts; rep around. (24 sc)
Rnd 5 – 2 sc in next st, sc in next 3 sts; rep around. (30 sc)
Fasten off, leaving long tail for sewing.
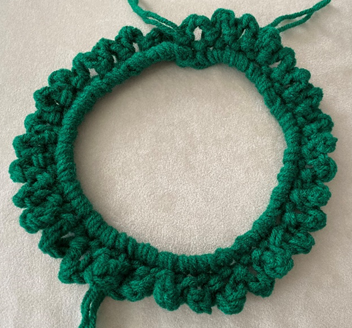
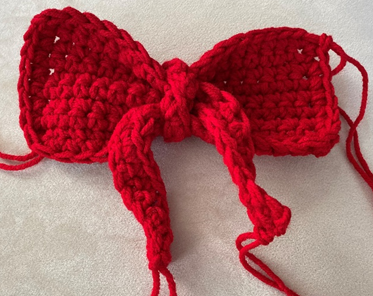
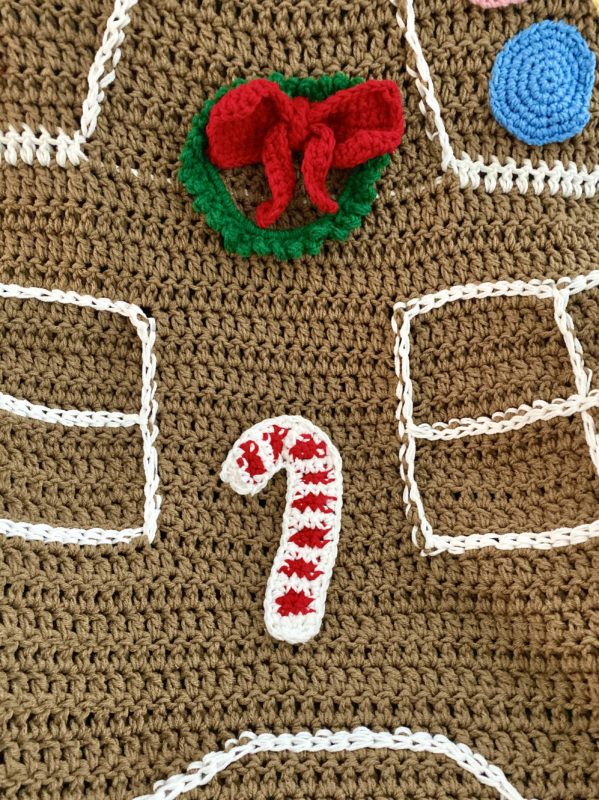
Wreath
With J hook and two strands of Paddy Green, ch 35. Join with sl st to make a ring, being careful not to twist piece.
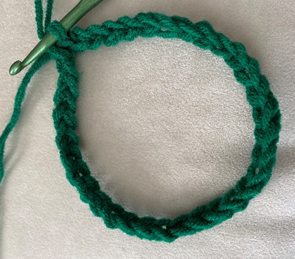
Rnd 1 – Ch 1, 35 sc in ring. Join with sl st to first sc. (35 sc)
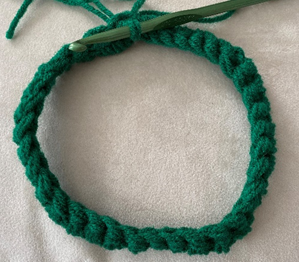
Rnd 2 – *Ch 4, sl st in next sc.* Rep from * to * 34 more times. (35 ch-4 clusters)

Fasten off.
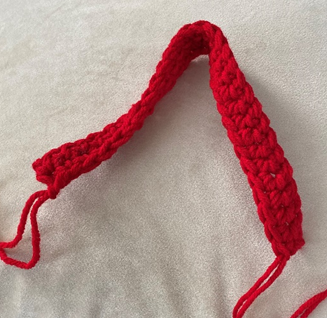
Body of Bow
With J hook and two strands of Cherry Red, ch 19.
Row 1 – sc in 2nd ch from hook and in each st across. Ch 1, turn (18 sc)
Rows 2 – 9 – sc in each st across. Ch 1, turn (18 sc per row)
Edging
Sc around around sides and bottom of piece. Join with sl st to corner sc near top of Bow.
Fasten off.
Tie for Bow
With J hook and 2 strands of Cherry Red, ch 30.
Row 1 – sc in 2nd ch from hook and in each st across. Ch 1, turn (29 sc)
Row 2 – sc in each st across. (29 sc)
Fasten off. Weave in ends from Body of Bow and Tie. Wrap Tie around center of Body and pull tightly to make a knot. Even out sides of Tie by pulling at ends of Tie, if necessary.
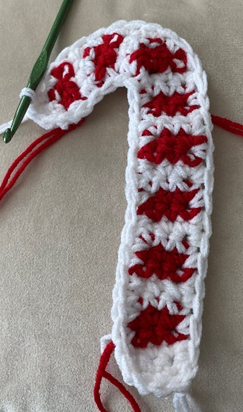
Candy Cane
With two strands of White and J hook, ch 4.
Row 1 – sc in 2nd ch from hook and in each st across. Ch 1, turn (3 sc)
Row 2 – sc in each st across. Change to Cherry Red in last st. Ch 1, turn (3 sc)
Rows 3 – 4 – carrying Contrast Color to the beginning of each row, sc in each st across. Change to Contrast Color in last st of row. Ch 1, turn (3 sc per row)
Rows 5 – 22 – Rep Rows 3 – 4. (3 sc per row)
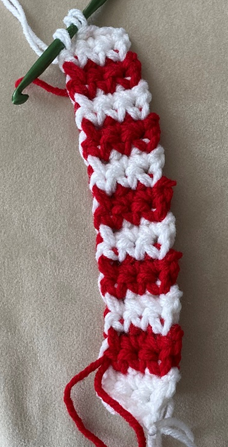
Row 23 – 2 sc in first st, sc2tog over last 2 sts. Ch 1, turn (3 sc)
Row 24 – sc2tog over first 2 sts, 2 sc in last st. Change to Contrast Color in last st. Ch 1, turn (3 sc)
Rows 25 – 36 – Rep Rows 23 – 24. (3 sc per row)
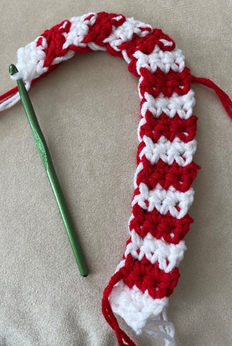
Edging
Sc evenly around entire piece with 2 strands of White, skipping a few sts underneath top curve of Candy Cane, and adding a few sts on top of arch of Candy Cane, to help shape the piece.
Fasten off, leaving long tail for sewing.
Finishing
Arrange all items to be sewn on to Blanket as desired or as seen in photo. Use straight pins to space out items evenly. Sew through a few strands of posts of sts, instead of sewing from front to back of Blanket, in order to prevent sewn sts from showing through on back of Blanket.
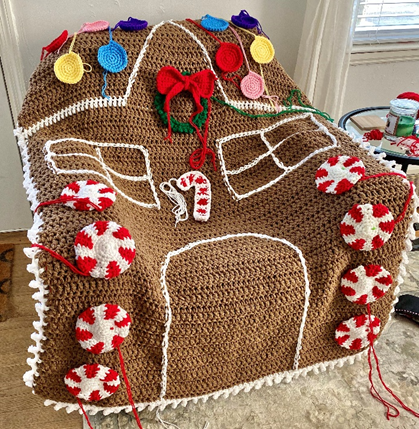
Sew 4 Peppermint Discs to either side of Door. Sew Lemon Candy inside Door for Knob. Sew Candy Cane above Door, between Windows. Sew Bow to Wreath, and sew Wreath below Gable/Peak near Roof. Alternate colors and sew Candies to Roof (about 3 rows of Candies on either side of Peak – 4 on the first row, 3 on the second row, and 2 on the third row).
Weave in all ends.
Here is the finished blanket!


I hope you enjoyed crocheting this Gingerbread House Blanket along with me! If you love fun, free crochet patterns, then please be sure to subscribe to my email list and follow me on social media. I have many more patterns coming soon!
Happy Crocheting!
COPYRIGHT: This pattern is owned by Crafty Kitty Crochet (Melissa Moore). Any reselling or distribution of this pattern is prohibited. Sale of items made using this pattern is welcomed, but I do ask that credit/a link be provided back to my site, craftykittycrochet.com.
Comments (7)
Happy Homestyle Throw Pillow – Crochet Pattern – Crafty Kitty Crochet
April 3, 2020 at 4:27 pm
[…] But for the back, I used my Bunny Applique Pattern and a stitch writing method I used for my Gingerbread Blanket Pattern to customize the pillow for the Easter holiday! You could do this with just about anything – […]
Easter Bunny Applique – Crochet Pattern – Crafty Kitty Crochet
April 5, 2020 at 4:07 pm
[…] the pillow, this pattern for the applique, and some stitch/writing techniques that I went over in my Gingerbread Blanket Pattern to make the text. What a cute Easter, spring, or anytime gift this would […]
Portia Roberson
December 24, 2021 at 12:56 am
Hi Melissa thanks for your kind words. I was wondering on the windows and doors for the Ginger bread blanket could I crochet embroidery the windows and door. Thanks Mrs Portia Roberson. Merry Christmas
Portia Roberson
December 23, 2021 at 10:00 pm
This Ginger bread house is the cutest blanket I’ve ever saw. I can’t wait to make this. But I will have to do it for next year. I’m really sick in the bed. With the flu. Thanks For sharing this beautiful blanket.Mrs Portia Roberson
Melissa
December 23, 2021 at 10:05 pm
Hi Portia! Thank you so much for your kind words! I’m so sorry to hear you’re sick and I wish you a speedy recovery! I would love it if you made one of these gingerbread house blankets – there’s lots of time to start making one for next year, so that’s good! Thank you again and I hope you have a blessed holiday season! ~ Melissa
Portia Roberson
December 24, 2021 at 1:00 am
Hi Melissa thanks for your kind words. I was wondering on the windows and doors for the Ginger bread blanket could I crochet embroidery the windows and door. Thanks Mrs Portia Roberson. Merry Christmas
Melissa
December 24, 2021 at 4:03 am
You are so welcome Portia! And yes, I think embroidery would work really well for the “icing” of the windows and doors if you preferred that to surface slip stitching! Merry Christmas and hope you enjoy the pattern! ~ Melissa