
Hyacinth Granny Square – Crochet Pattern
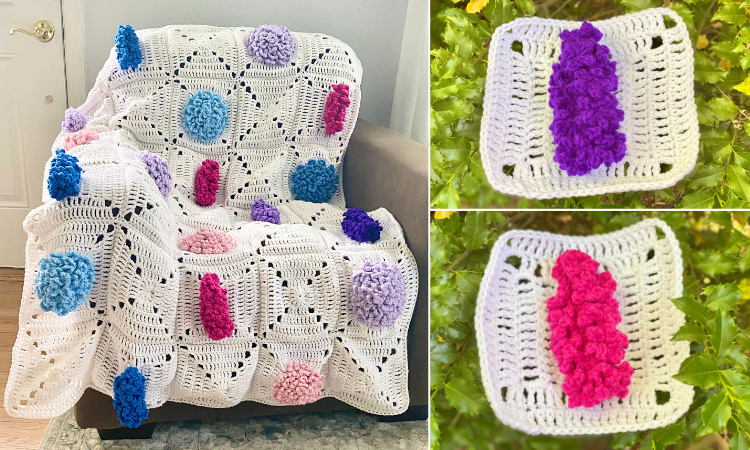
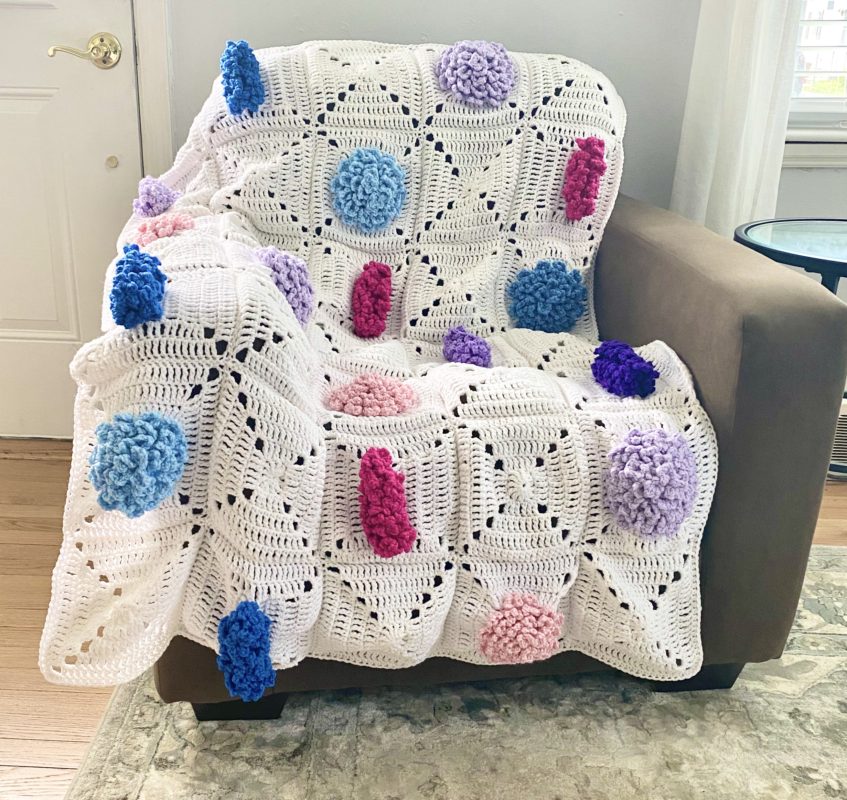
You can have gorgeous blooms all year round with these lovely crocheted hyacinth flowers! They capture the shape, look and colorfulness of real hyacinths, and you can use these large and bright afghan squares to decorate all over the house. They are perfect for making into blankets, pillows, or even tote bags! The possibilities are endless!
Pin it for later!
These hyacinths were part of a special birthday project I made for my cousin. I paired them with my Hydrangea Granny Squares (pattern HERE!) and some regular granny squares (pattern HERE – just replace all the stitches with triple crochet to make the squares seen here!) to make an afghan. I’m really happy with the results!
The great thing about hyacinths is that they come in such a large variety of colors – everything from pastel to jewel tones! I managed to find a few yarns that capture the bright, deep color of many hyacinths perfectly – Red Heart Super Saver in Shocking Pink (on Amazon HERE), Blue (on Amazon HERE
), and Amethyst (on Amazon HERE
).
And of course, with bright tones like these, you can’t go wrong with a basic bright white as a contrast color! Find some Red Heart Super Saver in White on Amazon HERE!
The hyacinths have a very basic framework. The petals are worked into leftover loops from four rows of double crochet. Then you fold the piece to make a “tube” shape, add the square around it, and you’re good to go! You’ll be on your way to planting a field of crocheted flowers in no time!
So who’s ready to create some beautiful crocheted blooms? Let’s go!
(Pssst! Looking for an ad-free PDF copy of this pattern? You can purchase one in my shop HERE!)
Supplies
Size H/8 5.0 mm crochet hook
1 skein of Red Heart Super Saver in Main Color (Shocking Pink, Amethyst, Blue, Orchid); 1 skein of Red Heart Super Saver in Contrast Color (White)
- To make the blanket seen in the cover photo: 2 jumbo skeins of White, and about 90 yds for each flower.
Yarn Needle
Scissors
Abbreviations
*= indicates beginning/end of a section to be repeated
Beg = beginning
BLO = back loop only
Ch = chain
Dc = double crochet
FLO = front loop only
Rem = remaining
Rep = repeat
Rnd(s) = round(s)
Sc = single crochet
Sk = skip
Sl st = slip stitch
St(s) = stitch(es)
Tr = triple crochet
Gauge
1 petal = about 1.25 inches across; 4 tr sts and 1 rnd = about 1 inch
Size
Finished square measures about 7.5 inches square; flower measures about 5.5 inches length
Instructions
Base of Flower
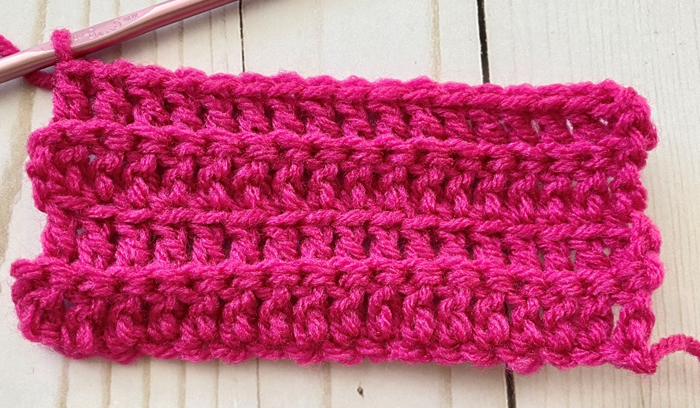
With main color, ch 19.
Row 1 – dc in 3rd ch from hook and in each st across. Ch 2, turn (17 dc)
Row 2 – working in BLO, dc in each st across. Ch 2, turn (17 dc)

Row 3 – working in FLO, dc in each st across. Ch 2, turn (17 dc)
Row 4 – working in BLO, dc in each st across. Do not fasten off (17 dc)
Petals
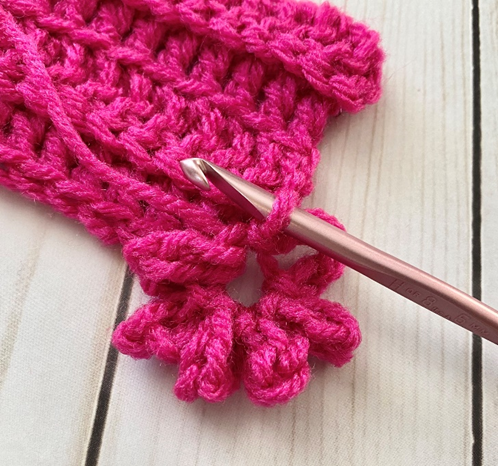
Make petals using ch sts worked into loops left over from Base of Flower. Rows 1 and 4 only have 4 petals; this is to shape the top of the Flower and give it a more “tapered” look at the top.
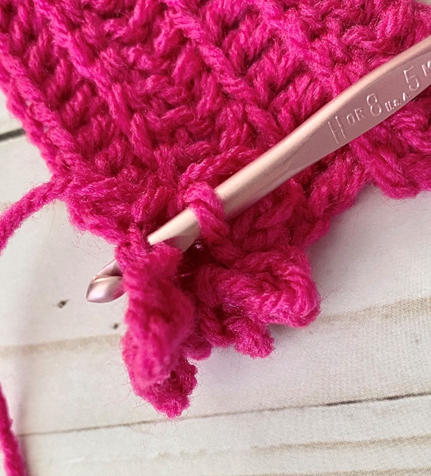
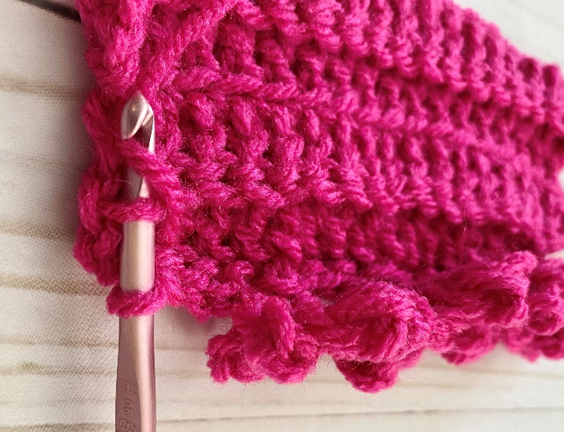
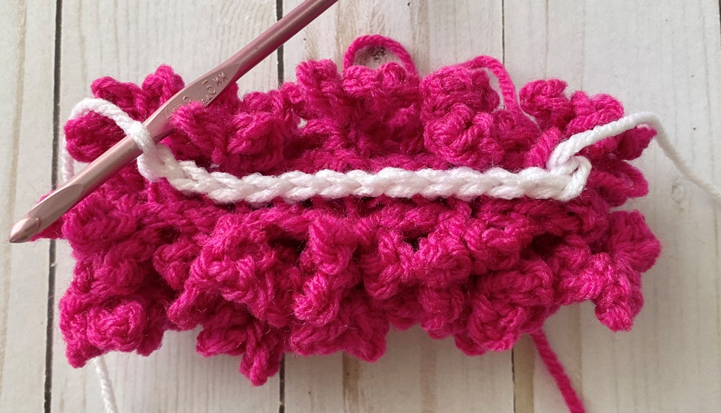
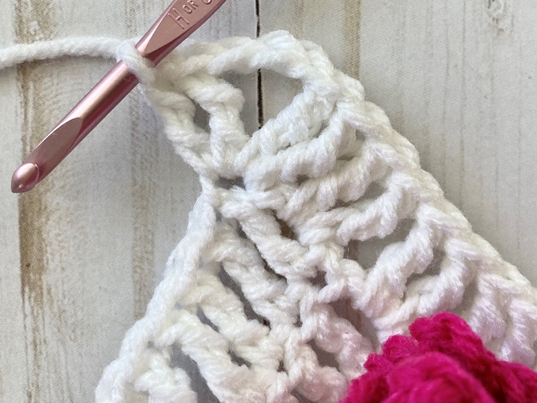
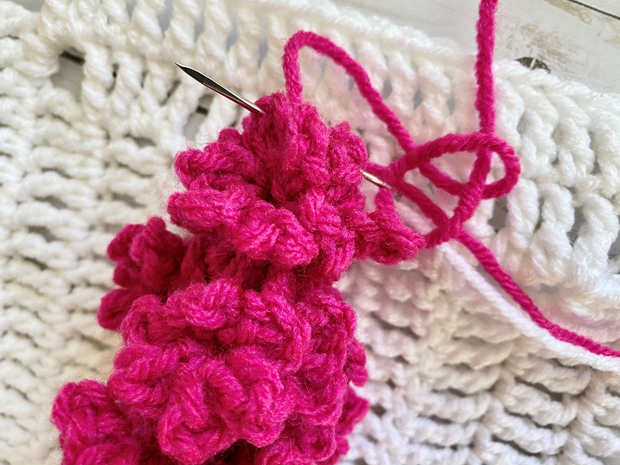
Row 1 – Ch 4, turn. Sl st in BLO of same st. [Ch 4, sl st in BLO of same st] 5 more times (first photo below). Rotate slightly to form a flower shape, and sl st back into same st (second and third photos below). (When working across rows, pull yarn over each petal when you continue to the sl sts – fourth photo below.) *Sl st in BLO of next 4 sts. [Ch 4, sl st in BLO of same st] 6 times. Rotate slightly to form a flower shape, and sl st back into same st. * Rep from * to * two more times. Sl st in BLO of last 4 sts. (Last photo below shows finished row.) (4 petals)
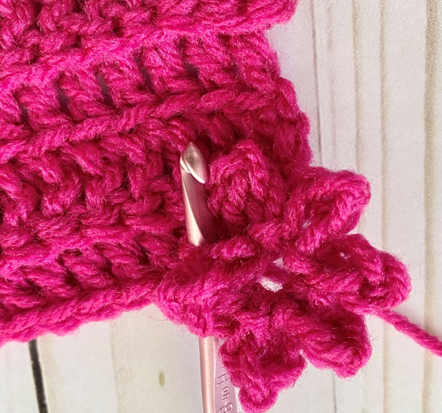
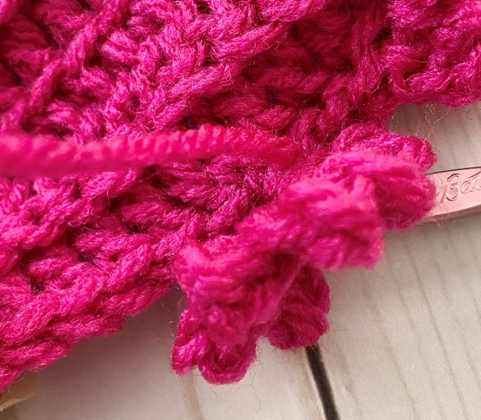
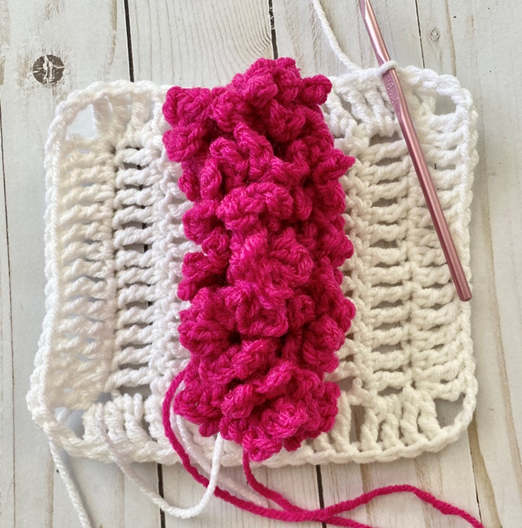
Row 2 – sl st to rem loop of Row 3 above (first photo below). Ch 4, turn. Sl st back into same st. [Ch 4, sl st in same st] 5 more times. Rotate slightly to form a flower shape, and sl st back into same st. *Working into rem loops of Row 3, Sl st in next 4 sts. [Ch 4, sl st in same st] 6 times. Rotate slightly to form a flower shape, and sl st back into same st.* Rep from * to * two more times. [Ch 4, sl st in same st] 6 times into last st of row. Rotate slightly to form a flower shape, and sl st back into same st. (Second photo below shows finished row.) (5 petals)
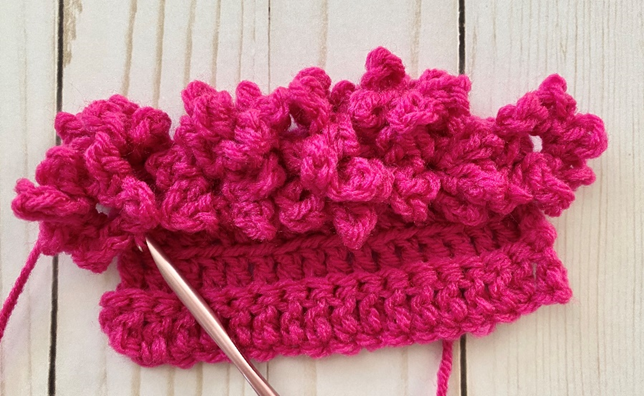
Rows 3 – 4 – rep Row 2, but work into rem loops of Rows 2 and 1 of Base, respectively. (5 petals per row)
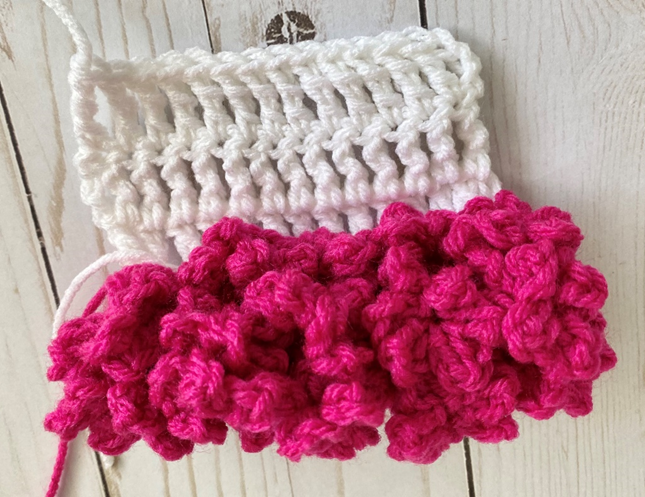
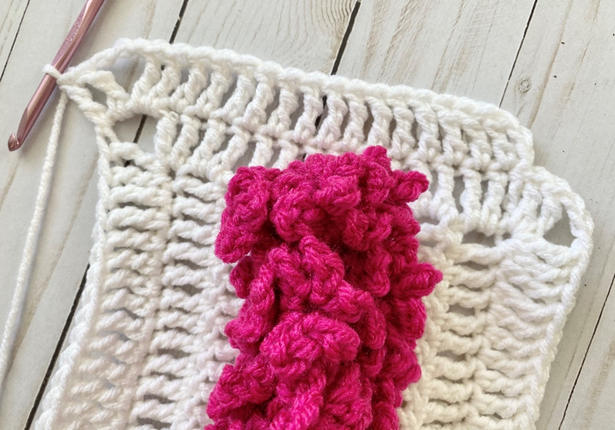
Row 5 – sl st into FLO of first st of foundation ch from Row 1 above (first photo below). Ch 4, turn. Sl st back into same st. [Ch 4, sl st in same st] 5 more times. Rotate slightly to form a flower shape, and sl st back into same st. *Working into FLO of sts of foundation row, sl st in next 4 sts. [Ch 4, sl st in same st] 6 times. Rotate slightly to form a flower shape, and sl st back into same st.* Rep from * to * two more times. Change to contrast color in last sl st. Ch 1, turn. Do not fasten off. (Second photo below shows finished row.) (4 petals)
Folding/Shaping Flower
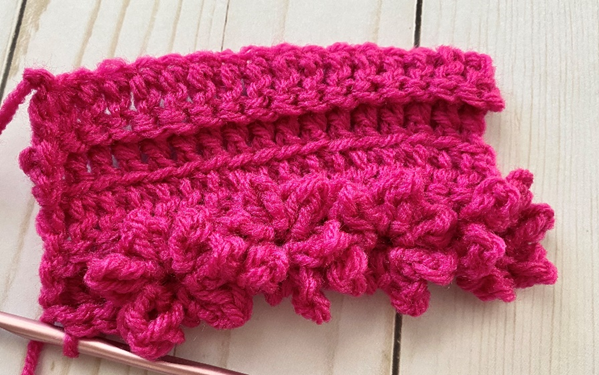
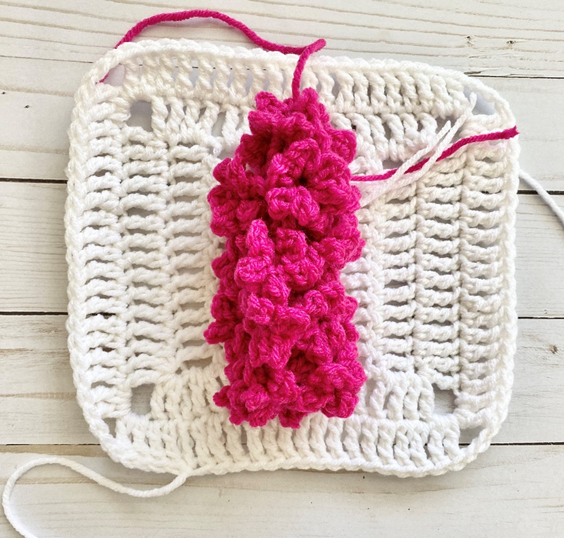
Working through rem loops of sts of Row 4 of Base, and through rem loops of sts of Row 1 of Base, fold piece together and evenly sc 13 sts across, joining rows 1 and 4 together. Ch 3, turn. Do not fasten off (13 sc)

Square Foundation
In order to make a square shape, a few rows need to be added to each side of the Flower to widen the piece out.
First Side
Row 1 – Working in FLO of sts of sc sts made when joining the Flower, tr in each st across. Ch 3, turn. (13 tr)

Rows 2 – 3 – tr in each st across. Ch 3, turn. Do not ch 3 at the end of Row 4. (13 tr per row)
Fasten off.
Second Side
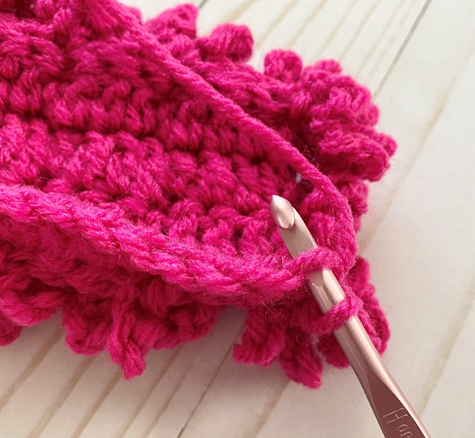
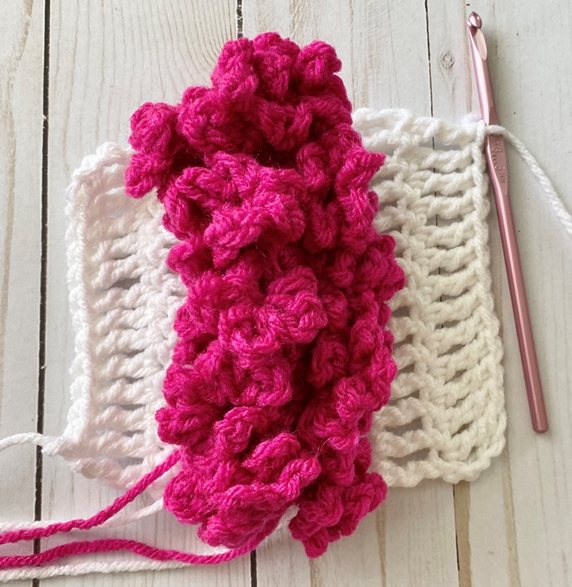
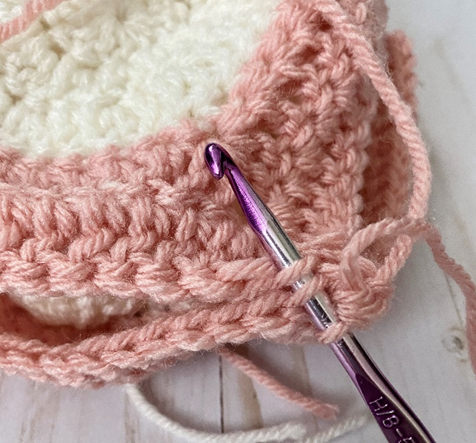
Row 1 – Starting at top end of piece (where Flower is tapered at the top), attach contrast color in first rem loop of first row of Square (first photo below), ch 3. Tr in each st across. Ch 3, turn (13 tr)
Rows 2 – 3 – tr in each st across. Ch 3, turn. (13 tr per row)
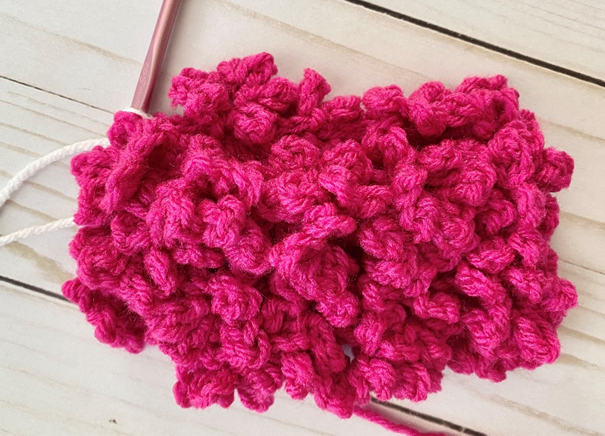
Do not fasten off. (Second photo below shows finished Second Side.)

Square
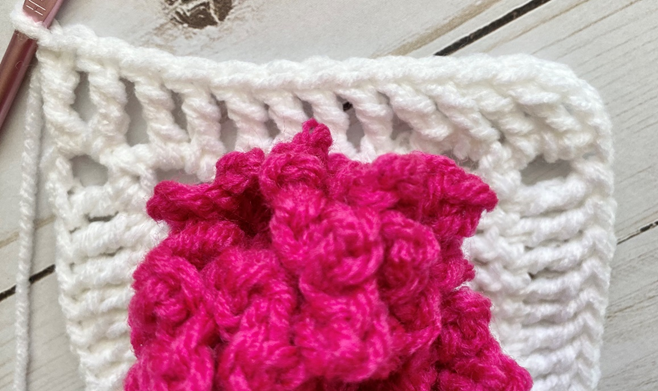
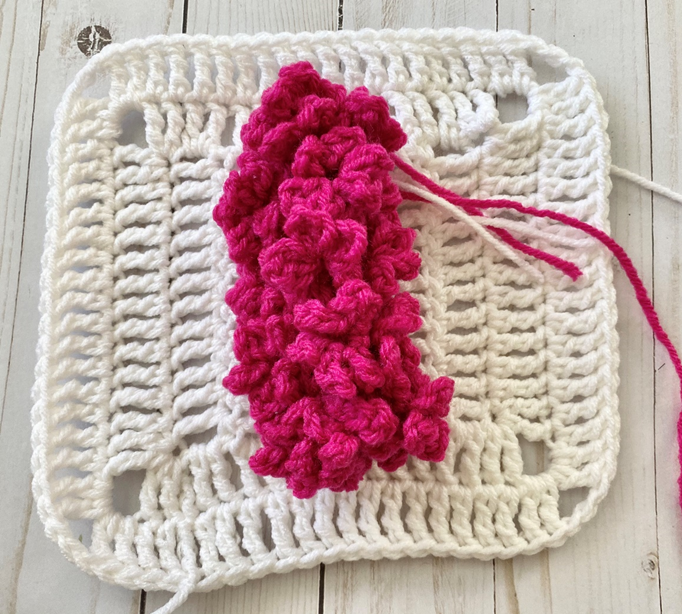
Rnd 1 – Working around other side of piece, evenly make 12 tr across (it helps to make 2 tr in each space – see first photo below). Working around other side, make [2tr, ch2 2tr – corner made] in first st (second photo below). Tr in next 11 sts. In last st, [2tr, ch2 2tr – corner made]. Working around other side, evenly make 12 tr across (it helps to make 2 tr in each space). Working around last side, [2tr, ch2 2tr – corner made] in first st. Tr in next 11 sts. In last st, [2tr, ch2 2tr – corner made]. Join with sl st to beg ch 3. (Last photo below shows finished rnd.) (62 tr, 4 corners)
Rnd 2 – Ch 3. Tr in next 14 sts. *In next corner, [2tr, ch2 2tr – corner made] (see first photo below). Tr in next 15 sts.* Rep from * to * once more. In next corner, [2tr, ch2 2tr – corner made]. Tr in next 16 sts. In next corner, [2tr, ch2 2tr – corner made]. Tr in last 2 sts, join with sl st to top of first tr of rnd.
Fasten off. (Second photo below shows finished rnd.) (78 tr, 4 corners)
Finishing
Gather petals at top of Flower and sew them together to give a more tapered/cone-shaped appearance at top.
Weave in all ends.
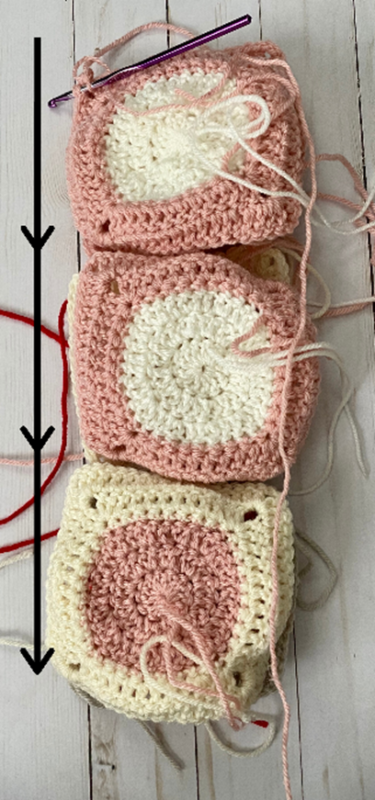
Assembling Squares
Place squares so that the right sides are facing each other. Working through BLO of square closest to you, and through FLO of square furthest away from you, sc across.
Rep this process with another two squares to make a longer row of squares. To add more rows, add squares along bottom of an existing row. Sc squares together along side edges to attach squares vertically. Weave in all ends.
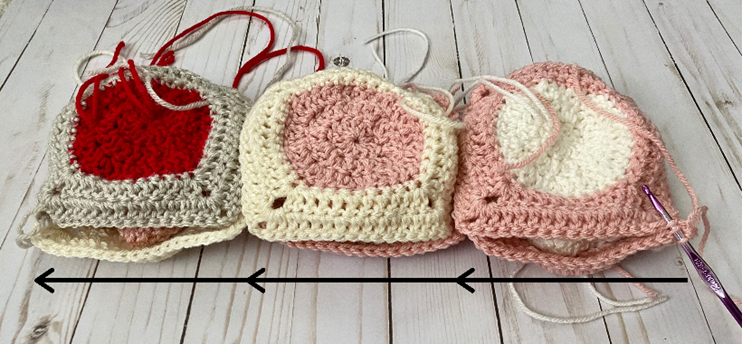
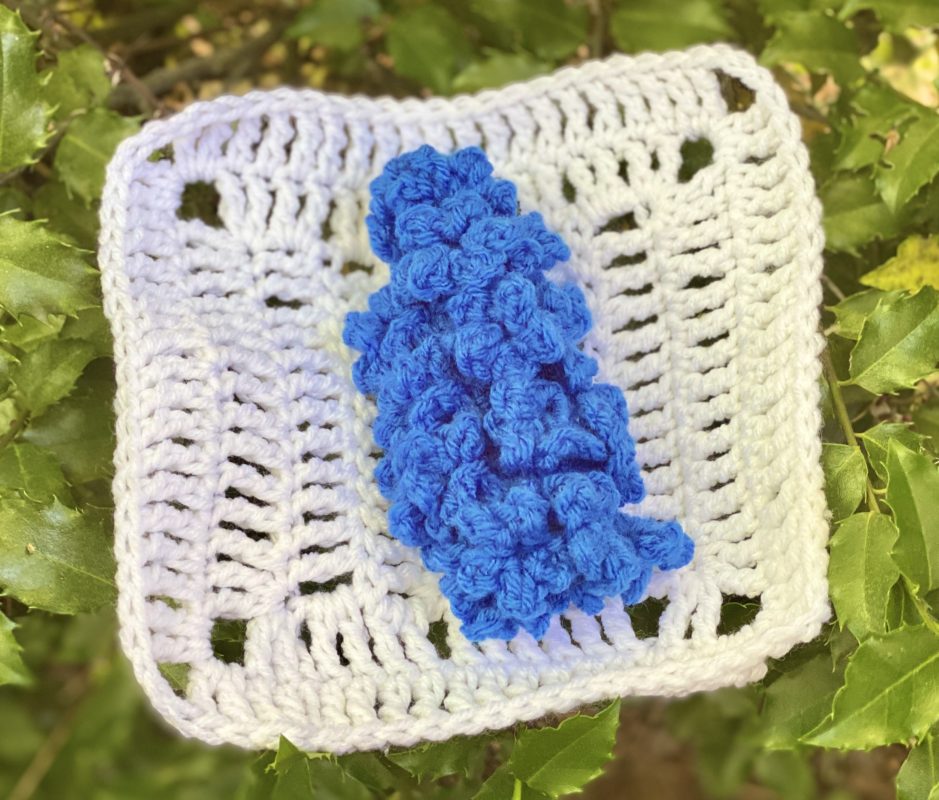
Here are the finished squares!


I hope you’ve enjoyed crocheting these granny squares along with me! If you love fun, free patterns like this one, then please be sure to subscribe to my email list and follow me on social media. I have many more patterns like this one coming soon!
Happy Crocheting!
COPYRIGHT: This pattern is owned by Crafty Kitty Crochet (Melissa Moore). Any reselling or distribution of this pattern is prohibited. Sale of items made using this pattern is welcomed, but I do ask that credit/a link be provided back to my site, craftykittycrochet.com.
Comments (2)
Colourful Free Crochet Square Patterns | Crochet Patterns
February 1, 2021 at 1:17 am
[…] craftykittycrochet […]
Colourful Free Crochet Square Patterns – Crochet Arts
October 29, 2022 at 6:21 am
[…] craftykittycrochet […]