
“Let the Games Begin” Granny Square – Crochet Pattern
Pin it for later!
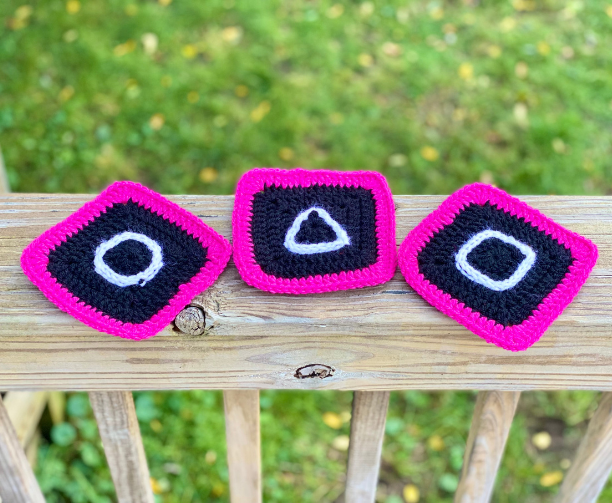
You’ve seen the show – now crochet the granny square! Inspired by the mega-popular recent Netflix drama, “Squid Game”, these granny squares can be made into just about anything – coasters, blankets, pillows, or even hats, scarves and gloves! What a perfect holiday gift idea this is for anyone who’s a fan of the show! The squares are fast and easy to make, and don’t take much yarn – so they’re also great stash busters. Each square can be customized with the iconic “Pink Soldier” shapes (circle, square, and triangle). So why not binge watch the whole series again and see how many granny squares you can make while doing it?! (Spoiler alert: it’s a LOT!!!!)
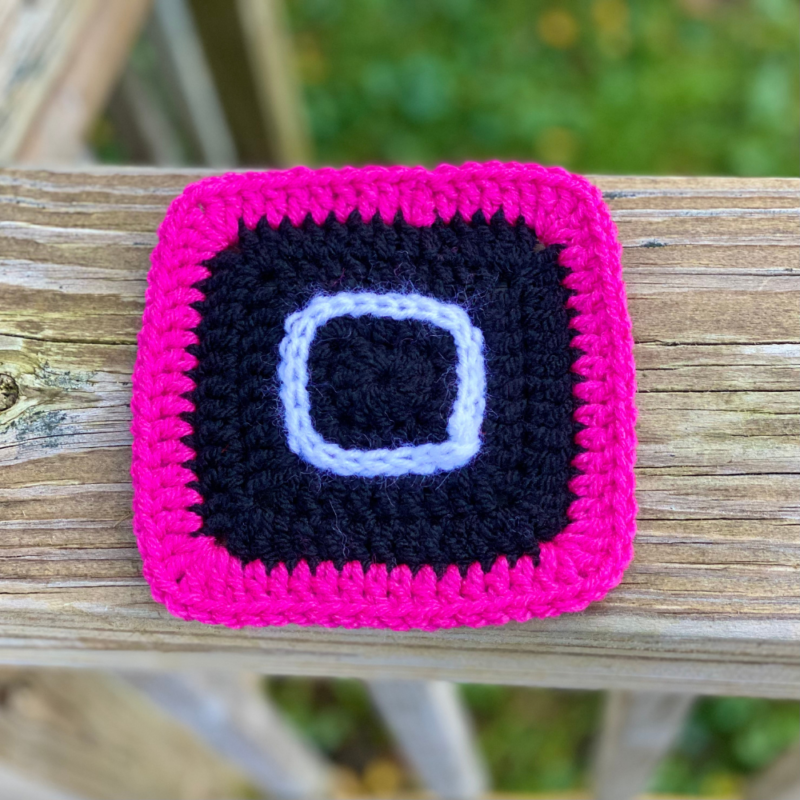
Pink Soldier Granny Square
I recently had the opportunity to watch through the entire series of “Squid Game”. I had been hearing so much about it, and see little amigurumi Pink Soldiers EVERYWHERE, so I had to give it a shot! And I’ll tell you what – I was NOT disappointed. Each episode is more tense and unpredictable than the last. And for a series with less than 10 episodes, they do a great job of getting you so invested in the characters that you are legitimately TERRIFIED to see who makes it out and who doesn’t! Complete with gut wrenching drama, edge-of-your-seat tension, and twists that happen right up to the very end of the series, it’s no wonder this show was rated number 1 on Netflix for such a stretch of time! It’s now a global phenomenon, so you can bet that this holiday season, you’ll be needing to whip up some pink-and-black gifts for all your loved ones! That’s where this granny square comes in – it can be customized in so many different ways, that you’re sure to find a way to tailor it to just about anyone. They’re already basically coasters, and they can also be incorporated into blankets, placemats, scarves and pillows very easily! You could even make them into a hat and/or set of gloves. A while back, I did this with one of my Sunflower Granny Squares – you can see the hat tutorial HERE and the gloves tutorial HERE!
But before we get started, you’ll need black yarn and just that right shade of hot pink yarn! I found Red Heart Super Saver in Black and Shocking Pink did the trick very nicely. Find them on Amazon:
Supplies
H/8 5.0 mm crochet hook
About 40 yards of medium weight Black yarn for one square – Red Heart Super Saver in Black used in photos
About 10 yds of medium weight Pink yarn for one square – Red Heart Super Saver in Shocking Pink used in photos
About 1 yd of medium weight yarn in White for one square – Red Heart Super Saver in White used in photos
Yarn Needle
Scissors
Straight pins and/or sewing chalk (optional)
Abbreviations
*=indicates beginning/end of a section to be repeated
Ch = chain
Dc = double crochet
Rep = repeat
Rnd(s) = round(s)
Sl St = slip stitch
Sp = space
St(s) = stitch(es)
Gauge
4 dc and 2 rows = about 1 inch
Size
About 5.5 inches square
Notes
-In this pattern, clusters made up of 2 double crochet or half double crochet stitches, plus chain 3, plus another 2 double crochet or half double crochet stitches, are known as “corners”. When counting stitches at the end of a row, only count these as “corners”; do not count the individual stitches within the corners.
-Ch 2 does not count as a double crochet stitch in this pattern.
-To make a solid square, use about 50 yds of desired color (instead of 40 yds and 10 yds)
How to Make This
Instructions
Square
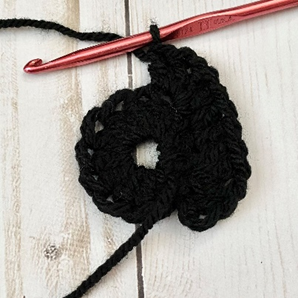
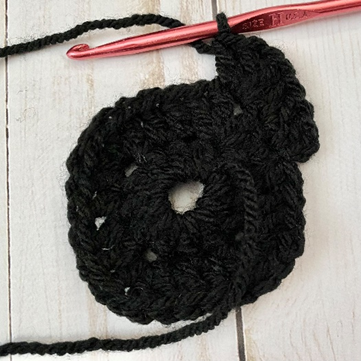
Rnd 1 – Make a magic ring; do not pull ring closed too tightly. 12 Dc in ring. Join with sl st to first st of rnd. (12 dc)
Rnd 2 – Ch 2. [2dc, ch 1, 2 dc – corner made] in next st. *Dc in next 2 sts, [2dc, ch 1, 2 dc] in next st.* Rep from * to * two more times. Dc in next 2 sts. Join with sl st to first st of rnd. (8 dc, 4 corners)
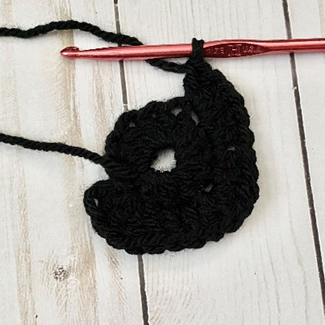
Rnd 3 – Ch 2. Dc in next 2 sts, [2dc, ch 1, 2 dc – corner made] in next corner sp. *Dc in next 6 sts, [2dc, ch 1, 2 dc] in next corner sp.* Rep from * to * two more times. Dc in next 4 sts. Join with sl st to first st of rnd. (24 dc, 4 corners)

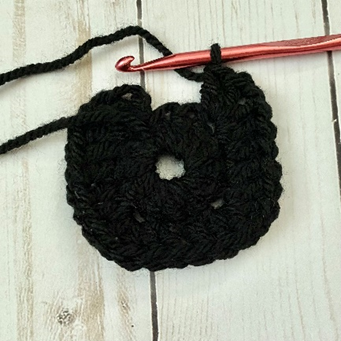
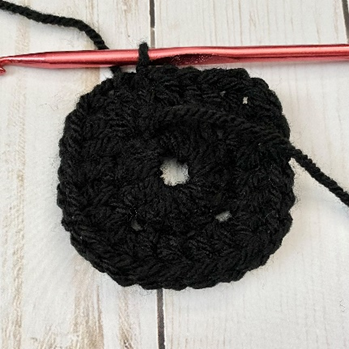
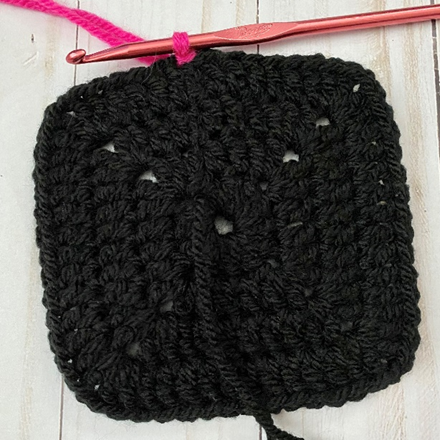
Rnd 4 – Ch 2. Dc in next 4 sts, [2dc, ch 1, 2 dc – corner made] in next corner sp. *Dc in next 10 sts, [2dc, ch 1, 2 dc] in next corner sp.* Rep from * to * two more times. Dc in next 6 sts; change to Shocking Pink in last st. Join with sl st to first st of rnd. (40 dc, 4 corners)
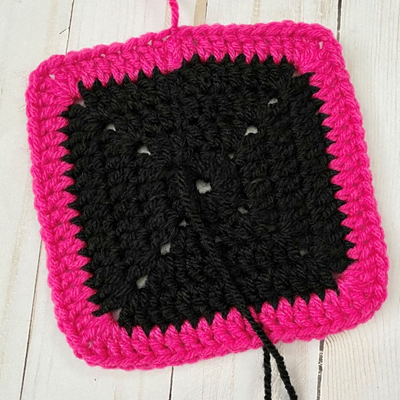
Rnd 5 – Ch 2. Dc in next 6 sts, [2 dc, ch 1, 2 dc – corner made] in next corner sp. *Dc in 14 sts, [2 dc, ch 1, 2 dc] in next corner sp.* Rep from * to * two more times. Dc in next 8 sts. Join with sl st to first st of rnd. Fasten off, weave in all ends. (56 dc, 4 corners)
Shapes
You may wish to use sewing chalk and/or straight pins to outline shapes before beginning to stitch them.
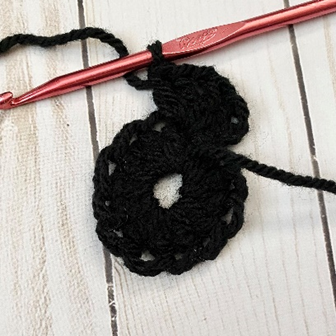
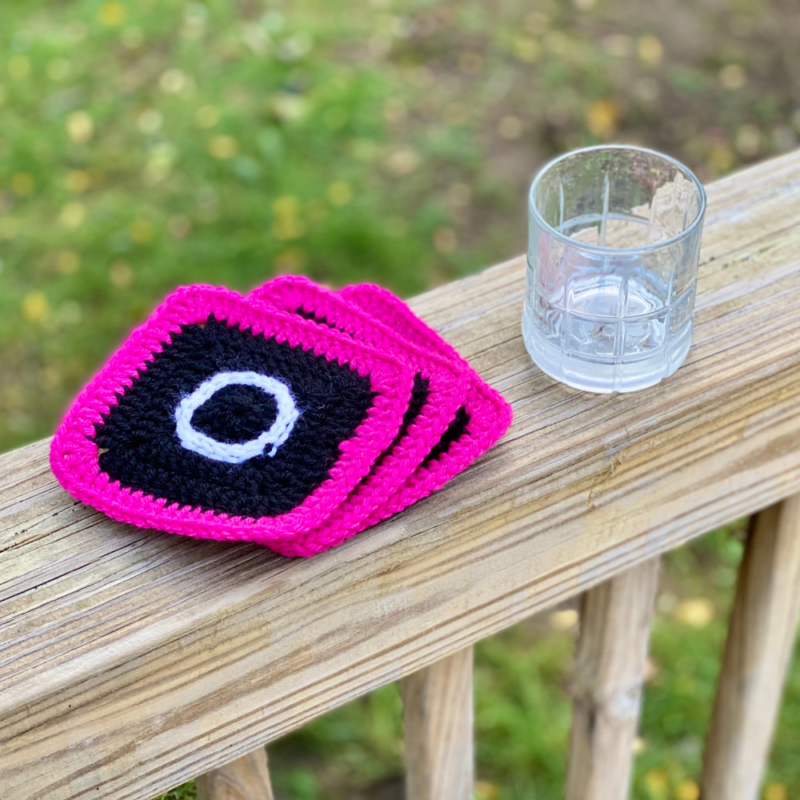
Circle
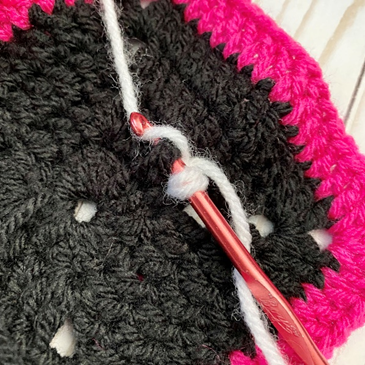
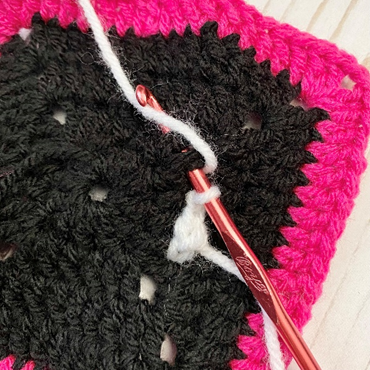
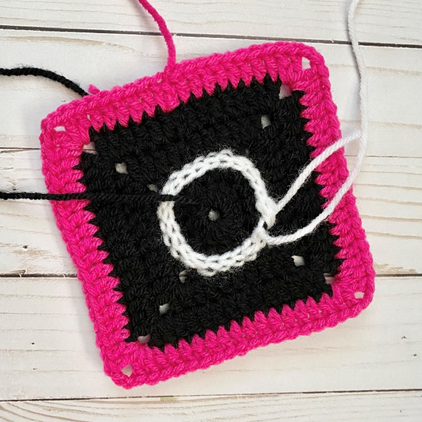
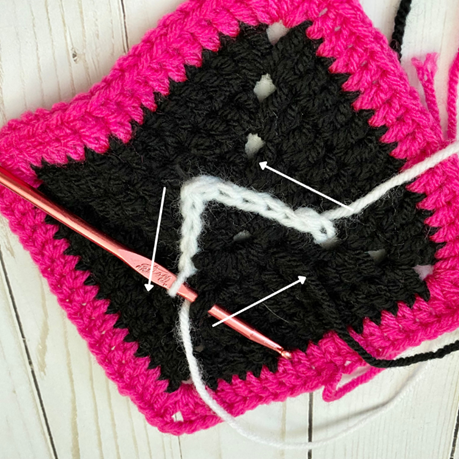
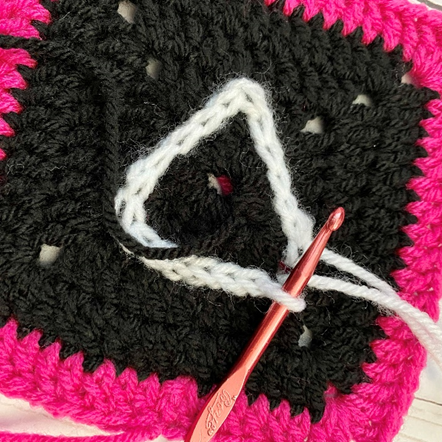
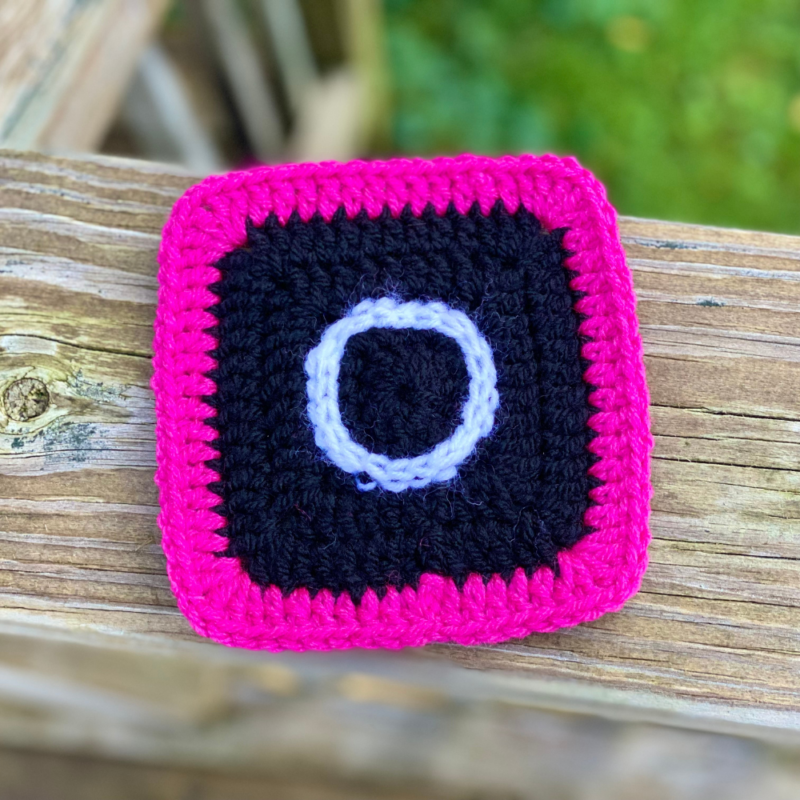
Attach white around a dc post of Rnd 2 (first photo below), ch 1. *Working around dc posts, make 4 sl sts, moving in direction of next closest corner from Rnd 2. Make 1 sl st around 2 posts at once at corner (second photo below).* Rep from * to * until start of Circle is reached. Join with sl st to first sl st of Circle. Third photo below shows finished piece. (20 sl sts)
Fasten off, weave in all ends.
Square
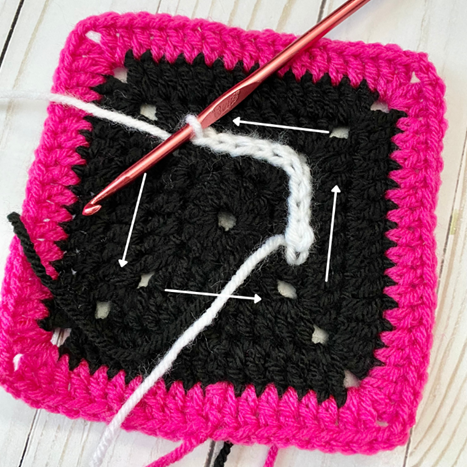
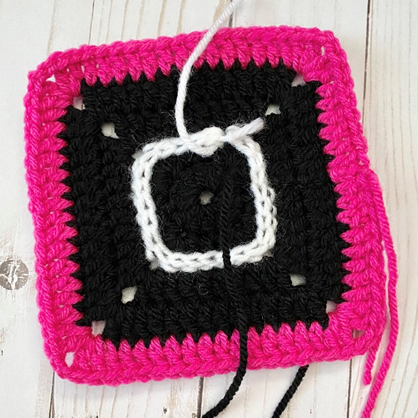
Attach white around a dc post of Rnd 2, ch 1. *Working around dc posts, make 6 sl sts, moving in direction of next closest corner from Rnd 2. Turn at next corner and begin working in other direction (first photo below shows directions in which sl sts are made to form square shape).* Rep from * to * until start of Square is reached. Join with sl st to first sl st of Square. Second photo below shows finished piece. (24 sl sts)
Fasten off, weave in all ends.
Triangle
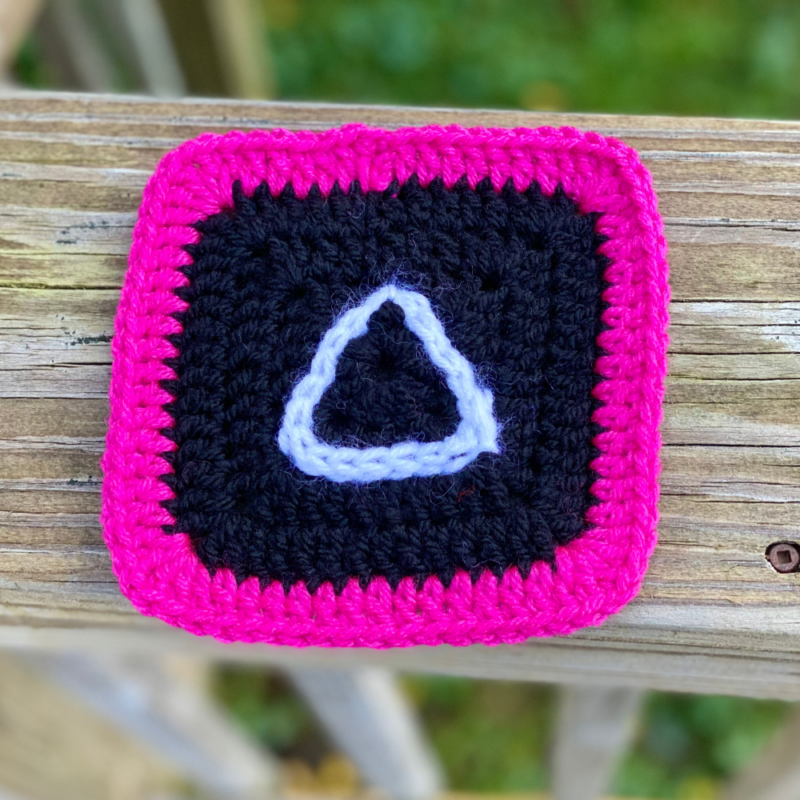
Attach white around a dc post of Rnd 2, ch 1. Working around and between dc posts of Rows 2 and 1, headed towards center-top area of Rnd 2, make 6 sl sts. (First photo below shows direction in which sl sts are made to make triangle shape.) Turn at center-top; sl st 6 around and between dc posts of Rows 2 and 1, working towards bottom. Sl st 7 across bottom edge (around dc posts of Rnd 2 – second photo below). Join with sl st to first sl st of Triangle. (19 sl sts)
Fasten off, weave in all ends.
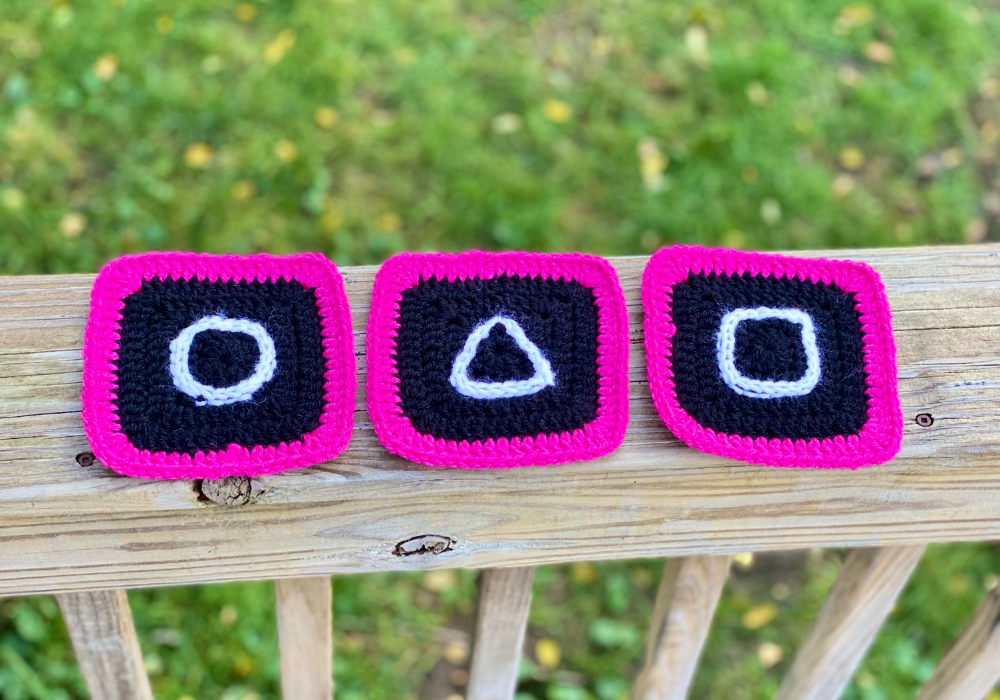
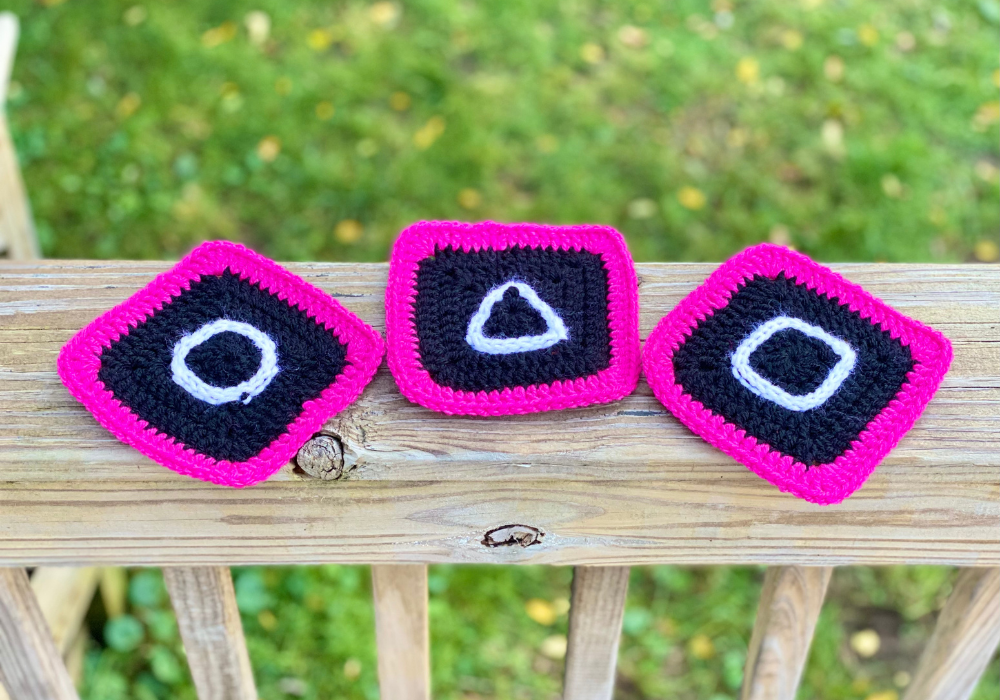
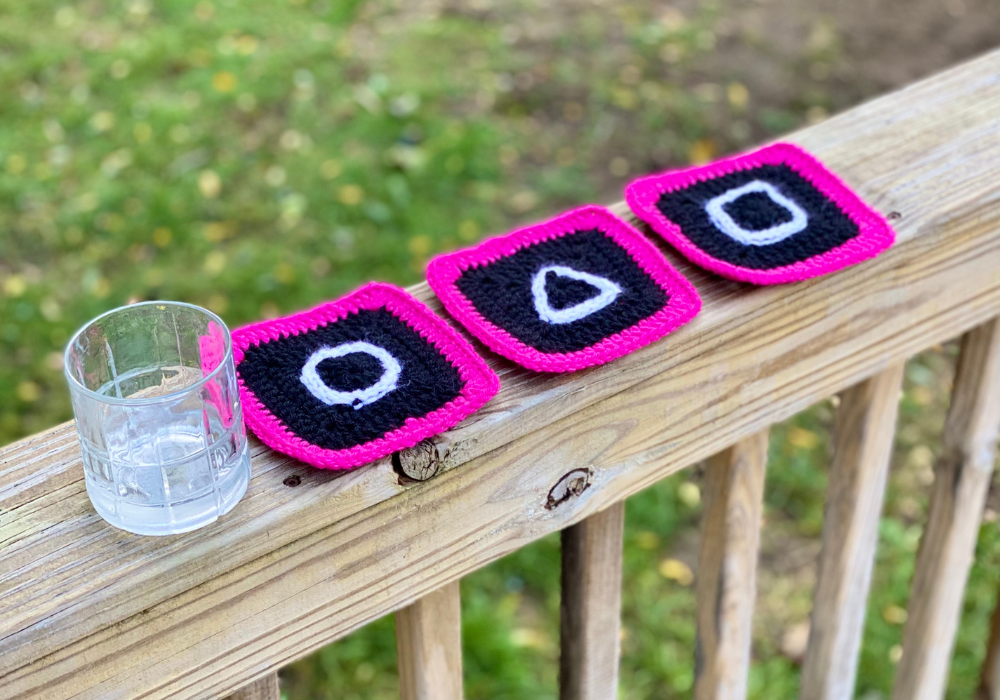
Here are the finished granny squares!
I hope you enjoyed crocheting these granny squares along with me today. If you love fun, free patterns like this one, then please be sure to sign up for my email list to keep up to date with all my latest designs:
Also, please be sure to follow me on social media, and tag me in photos of your finished projects made from my patterns, so I can see your lovely work!
Don’t forget to pin it for later HERE!
Happy Crocheting!
COPYRIGHT:
This pattern is owned by Crafty Kitty Crochet (Melissa Moore). Any reselling or distribution of this pattern is prohibited. Sale of items made using this pattern is welcomed, but I do ask that credit/a link be provided back to my site, craftykittycrochet.com.
Comments (1)
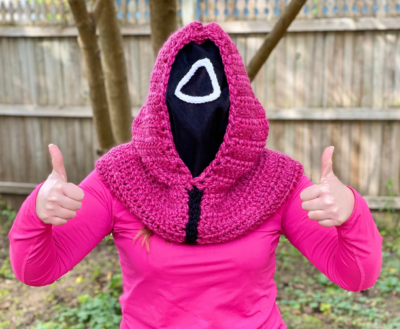
Pink Soldier Hooded Cowl – Crochet Pattern ~ Crafty Kitty Crochet
October 23, 2021 at 10:28 pm
[…] you’ve seen my granny square pattern inspired by Squid Game, then you’ve probably figured it out that I’m a big fan of the show! The fact that it was less […]