
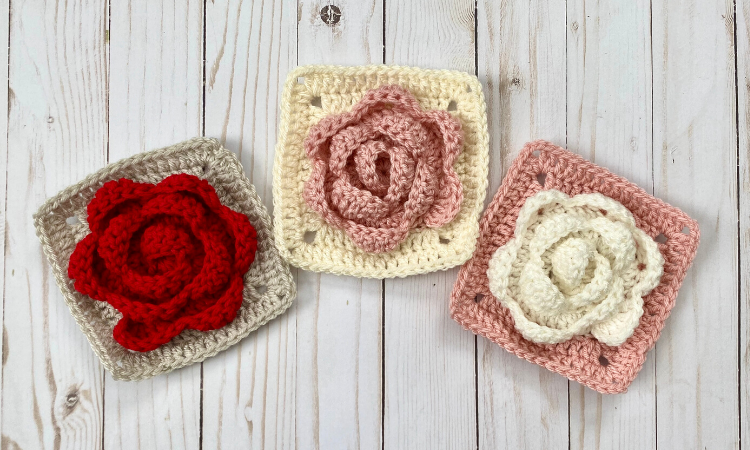
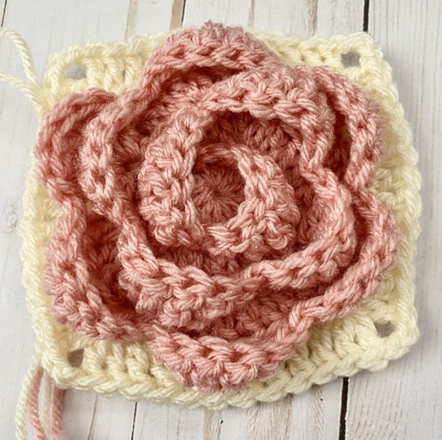
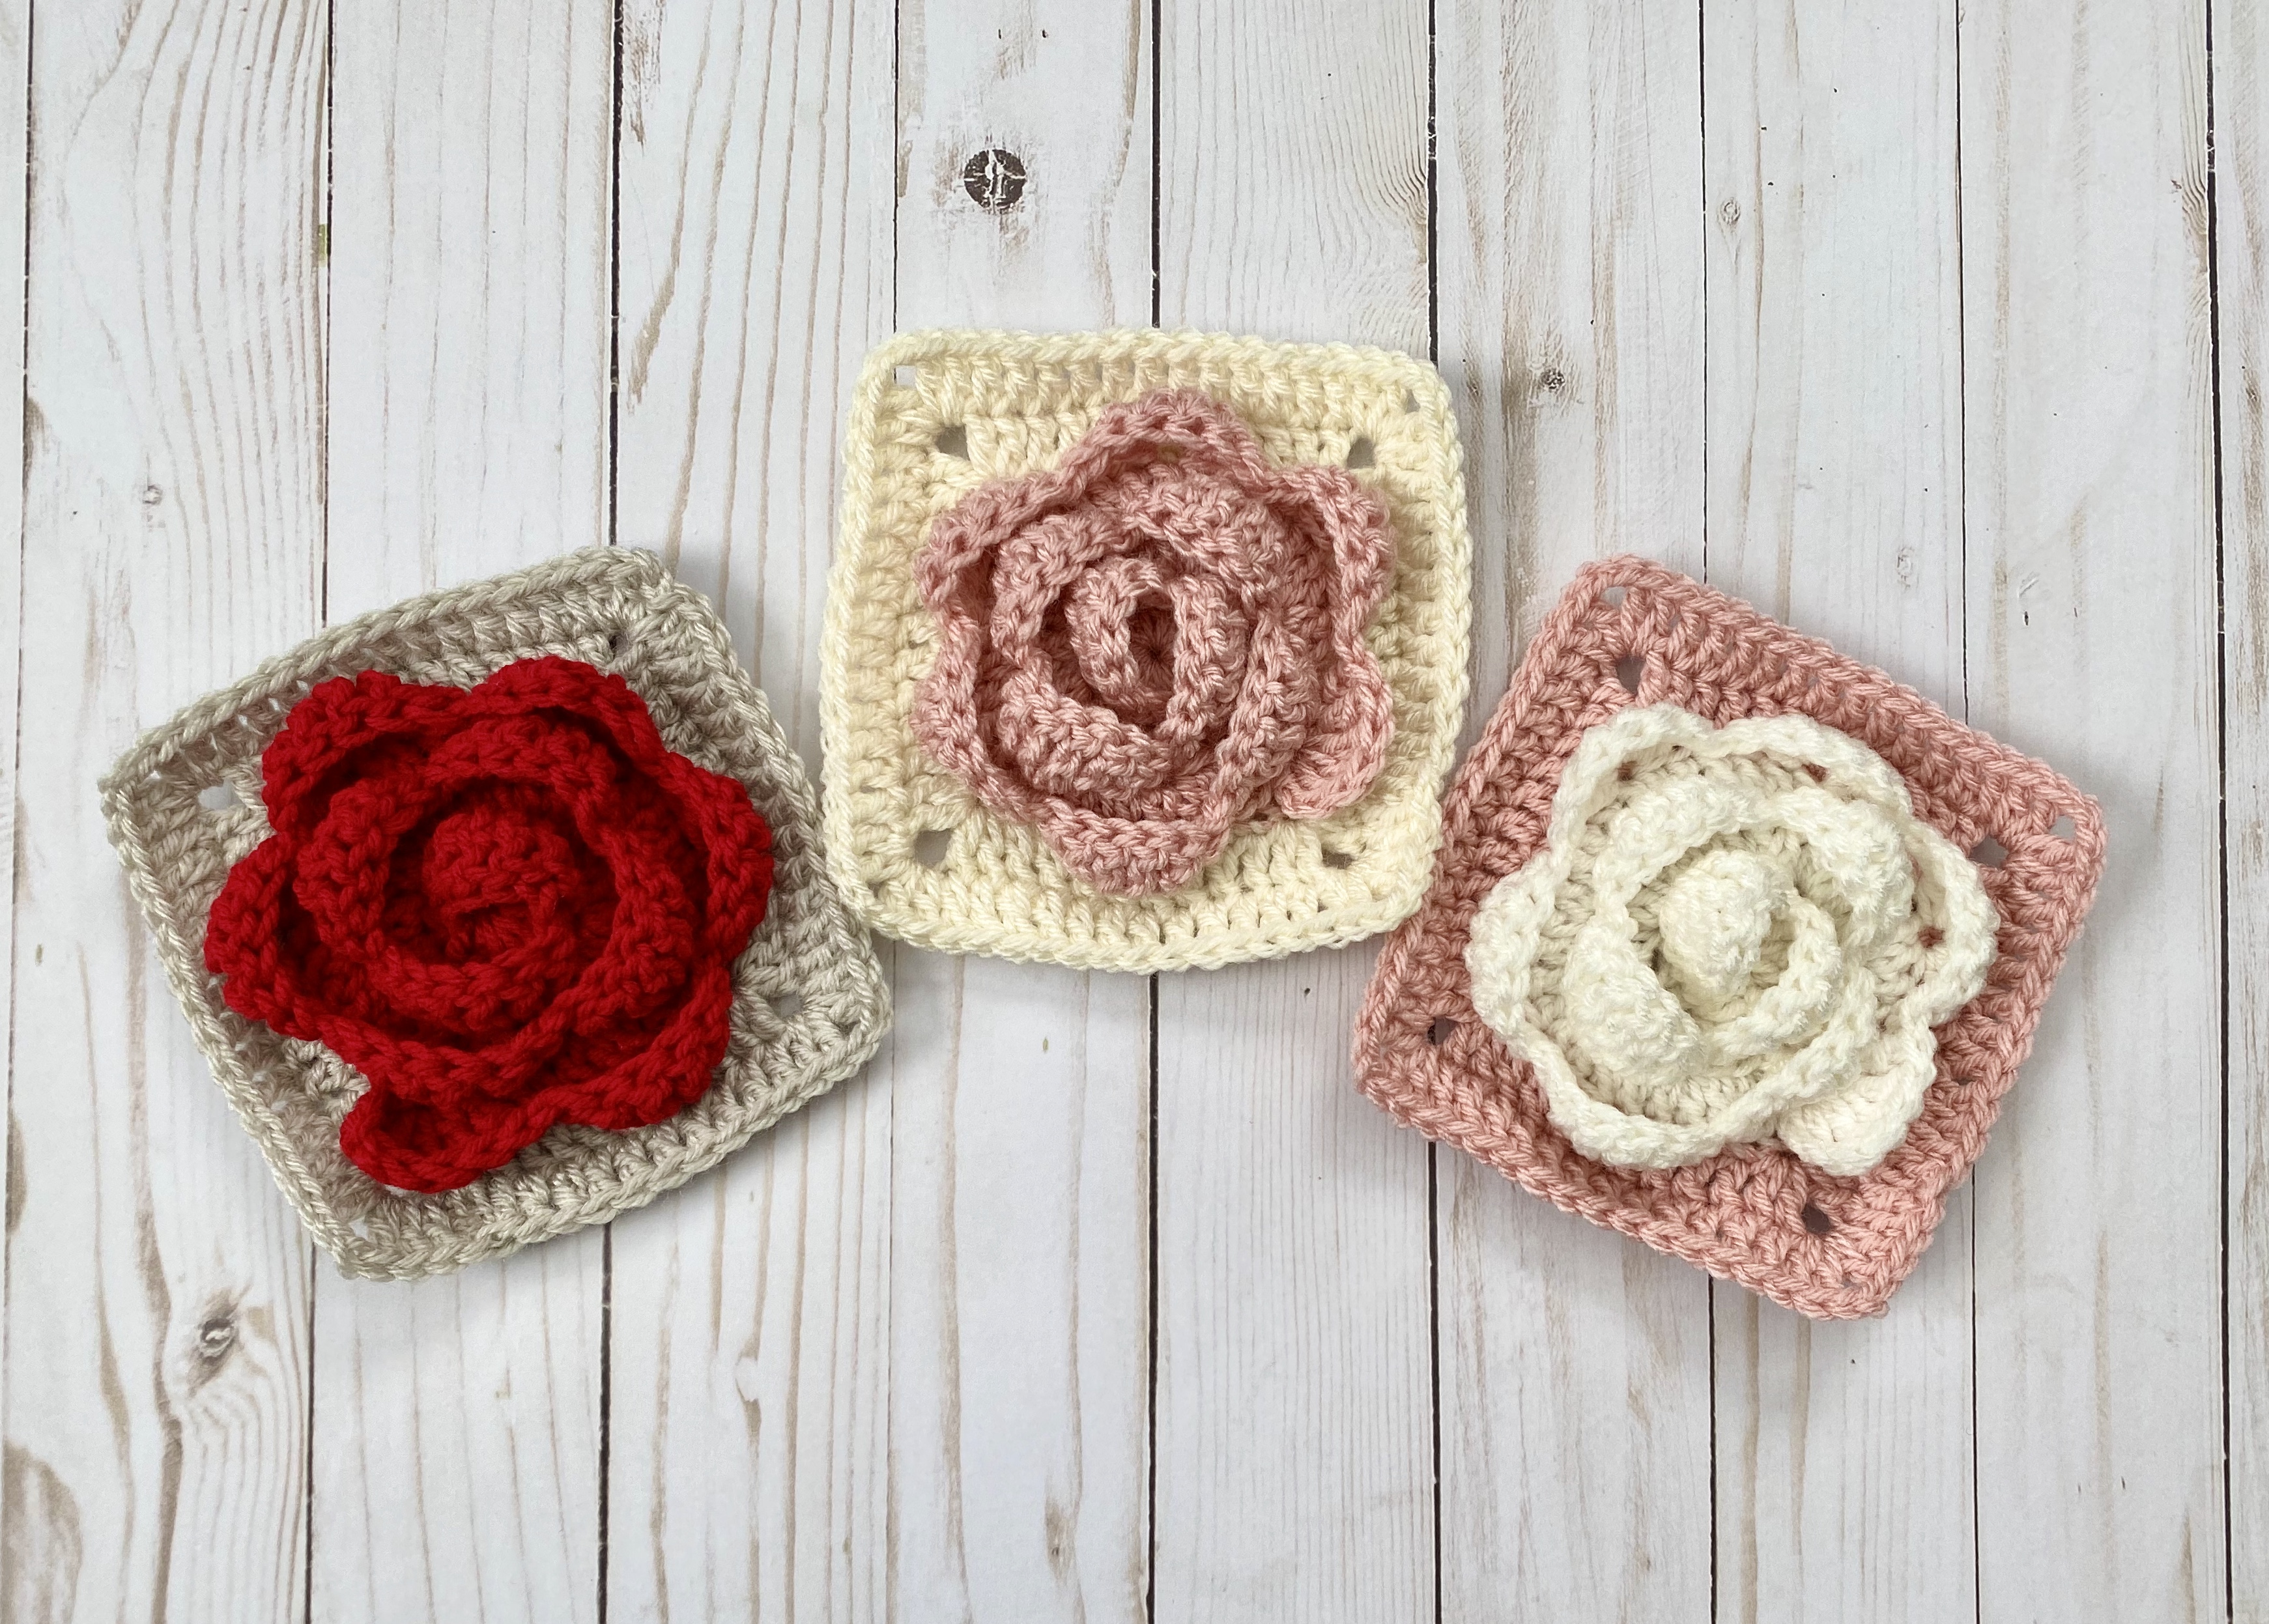
Rose Granny Square – Crochet Pattern
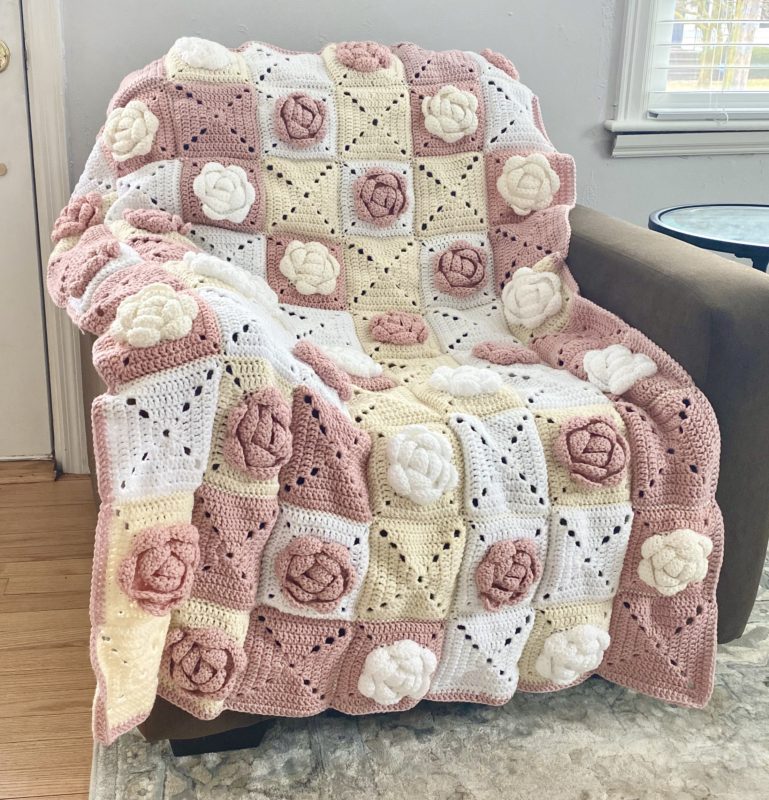
Roses are red, violets are blue – I love this easy crochet pattern, and so will you! If you’re looking for a fun, easy Valentine’s Day project that is also a great stash buster, then look no further! These beautiful, textured, three-dimensional rose granny squares would look lovely as a blanket, pillow, scarf, tote bag, or just about anything else – so feel free to get creative!
Making three-dimensional roses is such a beautiful and rewarding craft endeavor! If you love floral crochet, then making these roses will be a lot of fun. Also, if you’re looking for other floral crochet patterns, be sure to check out my Sunflower Granny Square, Cherry Blossom Hat, and Cherry Blossom Scarf! I plan on bringing more floral crochet patterns to my blog in the near future, too. With spring around the corner, I’m very inspired!
Pin it for later!
Speaking of springtime, these roses aren’t just for Valentine’s Day! The white, cream, and pink colors in particular have a light, fresh spring vibe. So there’s no need to limit your roses to just one time of year! They’d be a gorgeous addition to any blanket, pillow, etc. regardless of the season.
Looking for an ad-free PDF copy of this pattern? You can find one in my shop HERE!
If you’ve read my blog before, then you know I’m a big fan of Lion Brand Vanna’s Choice for a variety of projects! It has a soft but durable texture and comes in a palette of beautiful colors. For this project, I chose White (on Amazon HERE), Fisherman (on Amazon HERE
), Linen (on Amazon HERE
), Pink (on Amazon HERE
) and Scarlet (on Amazon HERE
). These are quintessential Valentine’s Day colors, and also really bring out the beauty in these 3D rose squares!
Ready to plant….errr…crochet….a bunch of these lovely blooms? Then let’s get started!
Supplies
Size H-8 / 5 mm crochet hook
2 skeins of Lion Brand Vanna’s Choice – 1 for main color and 1 for contrast color – in Pink, Linen, or White (can be used as main/rose color or square/contrast color)
Scissors
Yarn Needle
Abbreviations
*= indicates the beginning/end of a section to be repeated
BLO = back loop only
Ch = chain
Dc = double crochet
FLO = front loop only
Rem = remaining
Rep = repeat
Rnd(s) = round(s)
Sc = single crochet
Sk = skip
Sl St = slip stitch
St(s) = stitch(es)
Tr = triple crochet
Gauge
1 petal = about 1 inch length (at tallest point) and 1.5 inches width (measuring across all 6 triple crochet stitches)
Size
Square measures about 5.25 inches square; rose measures about 13 inches in circumference
Instructions
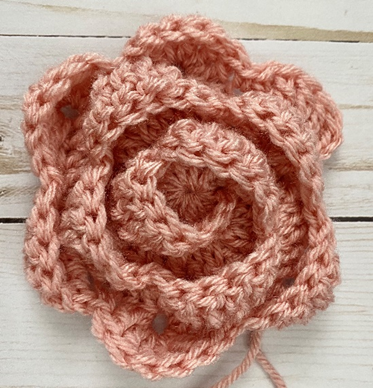
Rose
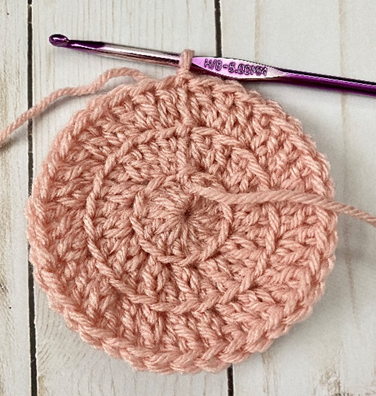
Rnd 1 – With rose/main color, make a magic ring. 12 dc in ring. Join with sl st to first dc of rnd. Ch 2 (12 dc)
Rnd 2 – Working in BLO, 2 dc in each st around. Join with sl st to first dc of rnd. Ch 2 (24 dc)
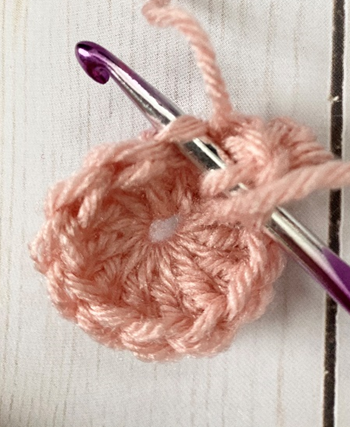
Rnd 3 – Working in BLO, dc in next st, 2 dc in next st; rep around. Join with sl st to first dc of rnd. Ch 2 (36 dc)
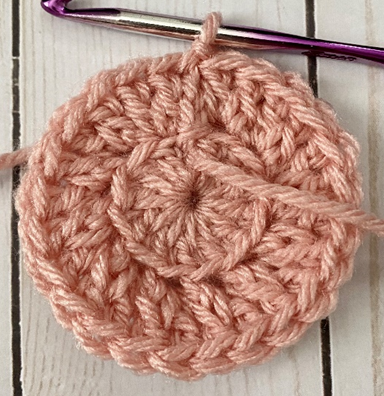
Petals
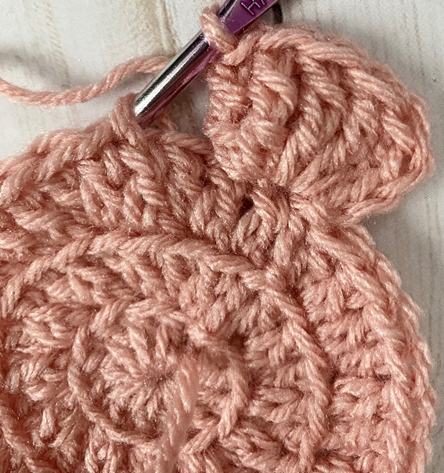
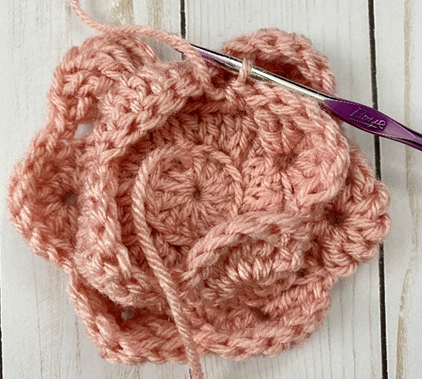
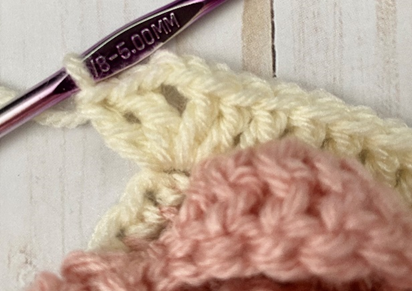
(Direction is now working from Rnd 3 inward towards center of piece. See photos and diagram.)
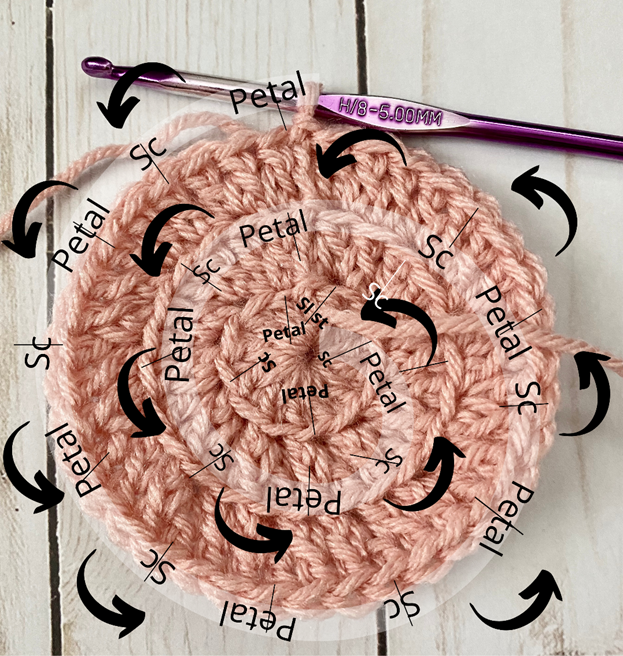
Ch 3. Working in FLO on sts of Rnd 3, and working in rem front loops from Rnds 2 and 1, ch 3, 5 tr in next st (first petal made).
Sk 2 sts, sc in next. *Sk next 2 sts, 6 tr in next st. Sk next 2 sts, sc in next st.* Rep from * to * 10 more times (6 petals on Rnd 3, 4 petals on Rnd 2, 2 petals on Rnd 1).
Sk 1 st, sl st into last rem front loop of Rnd 1.
Fasten off.
Rnd 3 Petals:

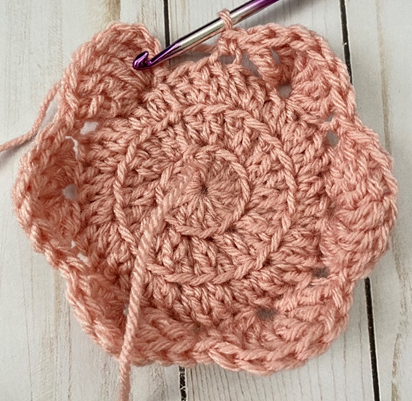
Rnd 2 Petals:
Rnd 1 Petals:
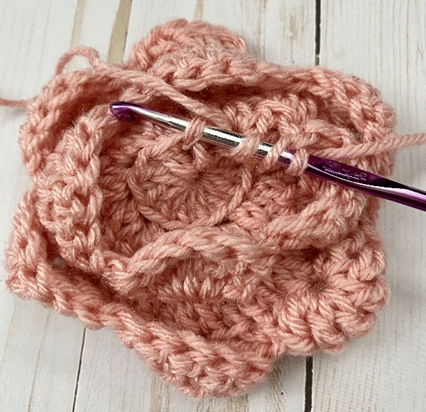
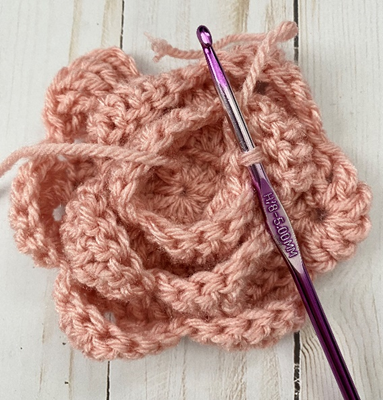
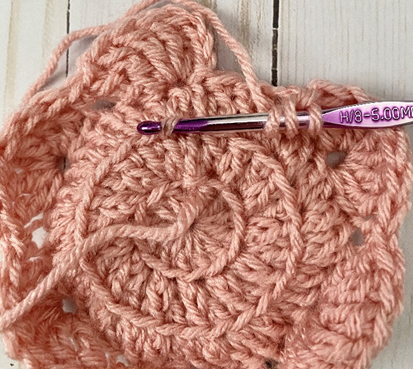
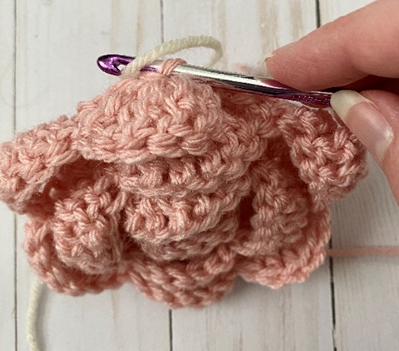
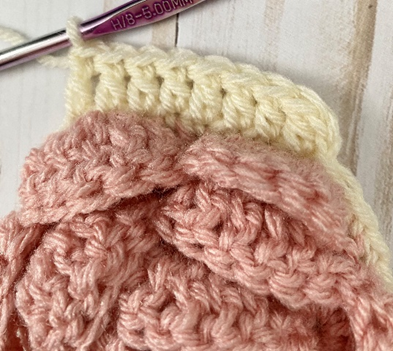
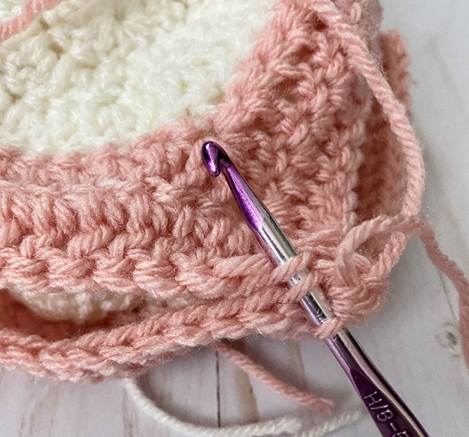
Square Edging
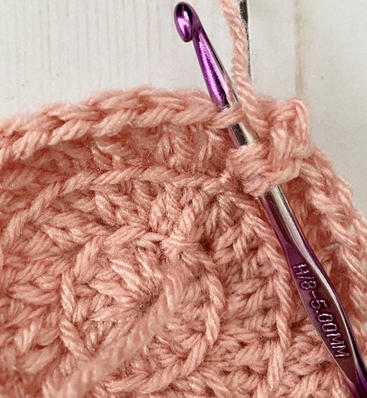
Rnd 1 – Attach square/contrast color in first rem back loop from Rnd 3. Ch 1, sc in each st around, join with sl st to first sc of rnd. (36 sc)

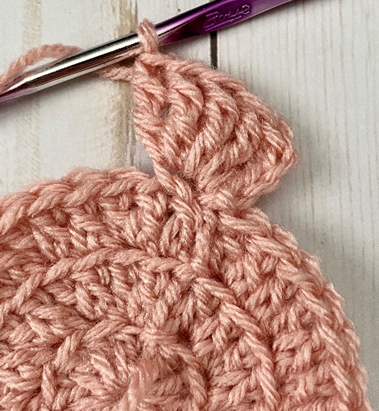
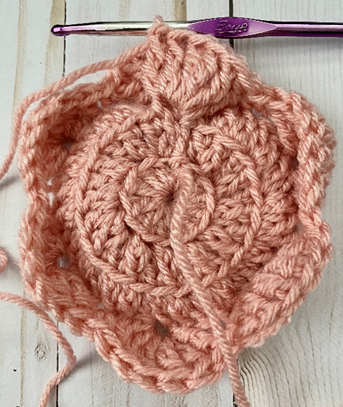
Rnd 2 – Ch 2, *dc in next 8 sts, [2 dc, ch 2, 2 dc] (corner made) in next st.* Rep from * to * 3 more times, join with sl st to first dc of rnd. (32 dc, 4 corners)
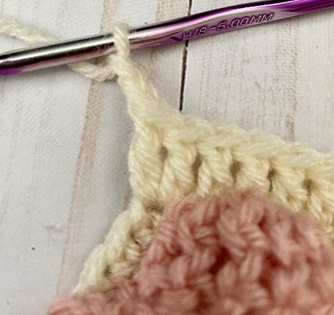
Rnd 3 – Ch 2, dc in next 10 sts, [2 dc, ch 2, 2 dc] (corner made) in next st. *Dc in next 12 sts, [2 dc, ch 2, 2 dc] in next st*; rep from * to * twice. Dc in last 2 sts, join with sl st to first dc of rnd. (48 dc, 4 corners)
Fasten off.

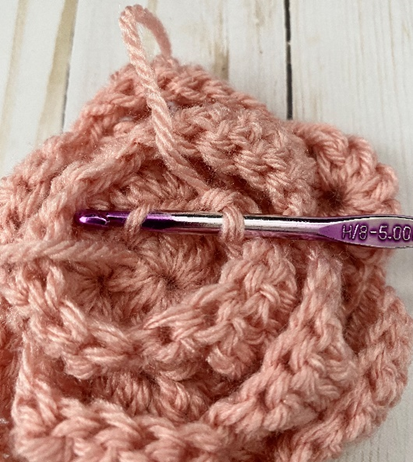
Assembling Squares
Place squares so that the right sides are facing each other. Working through BLO of square closest to you, and through FLO of square furthest away from you, sc across. Rep this process with another two squares to make a longer row of squares. To add more rows, add squares along bottom of an existing row.
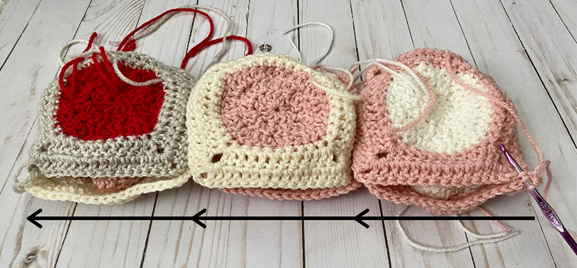
Sc squares together along side edges to attach squares vertically.
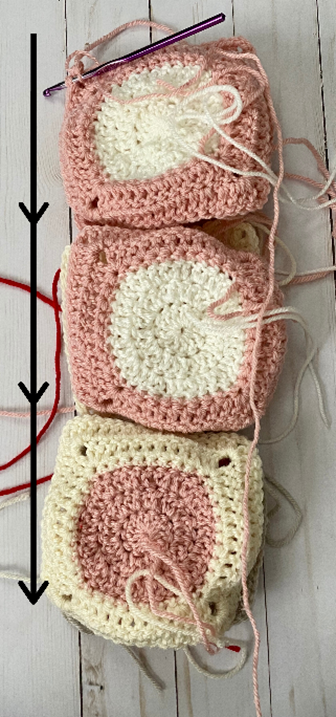
Weave in all ends.
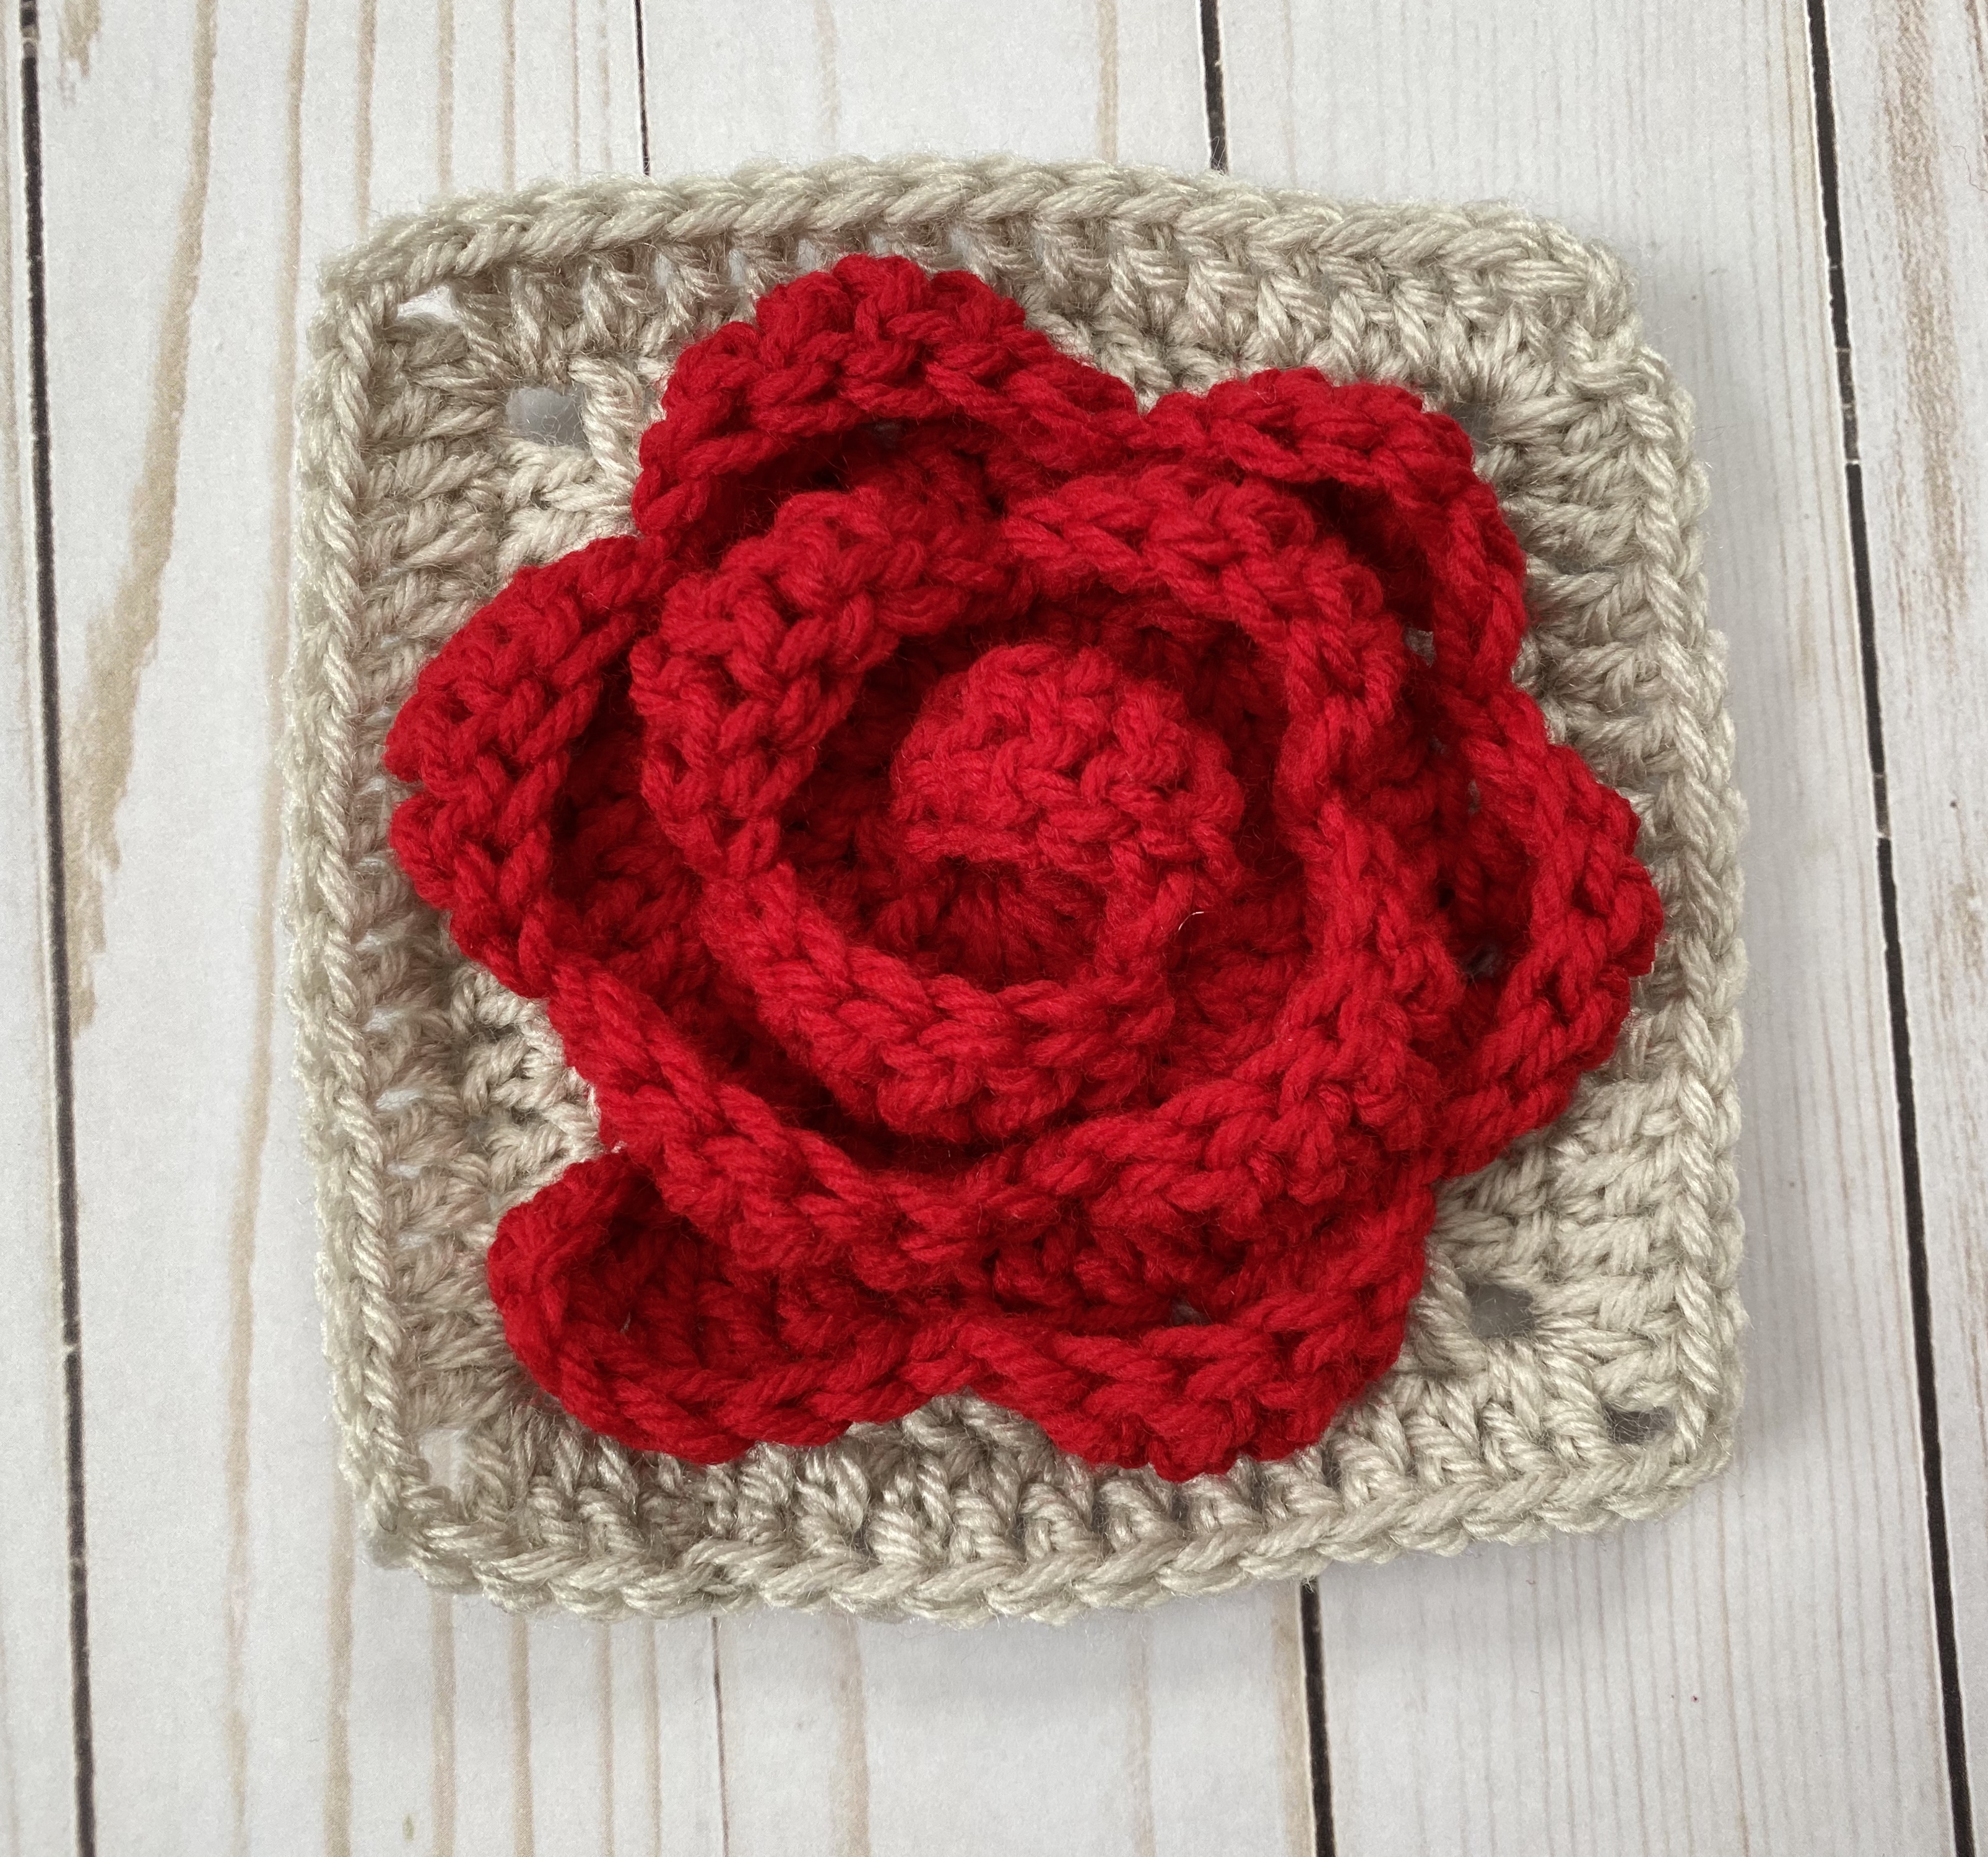
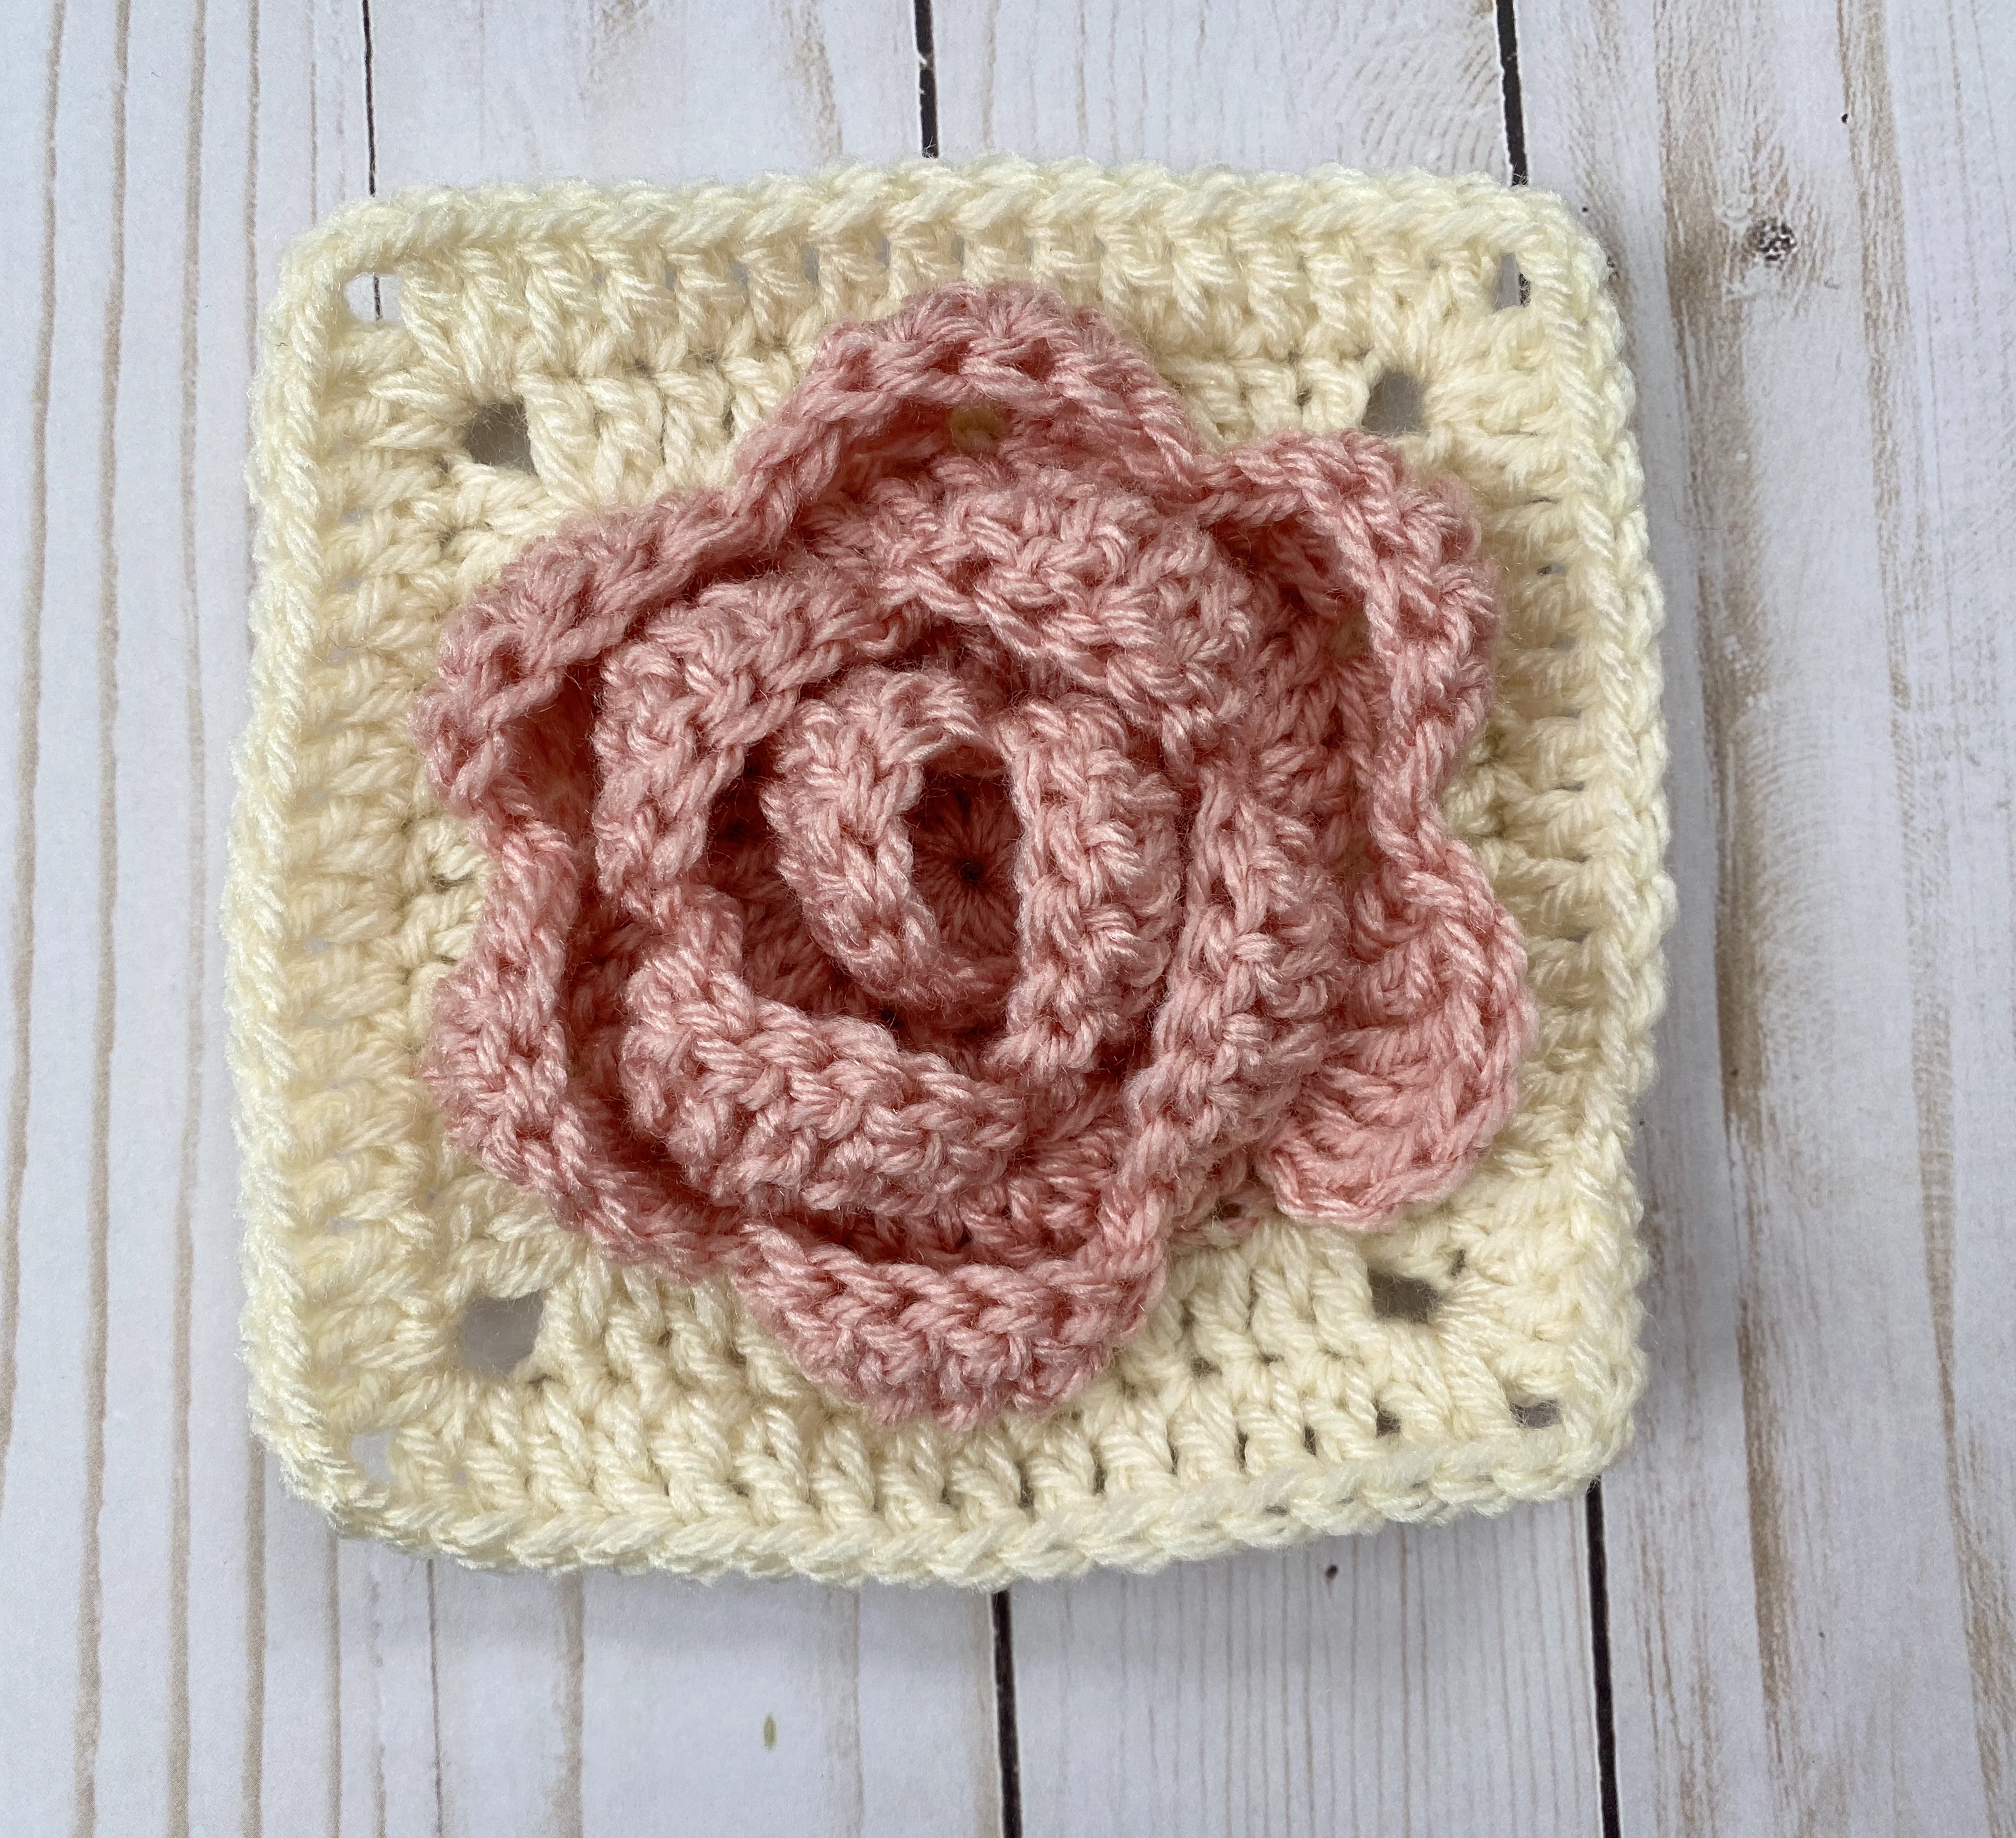
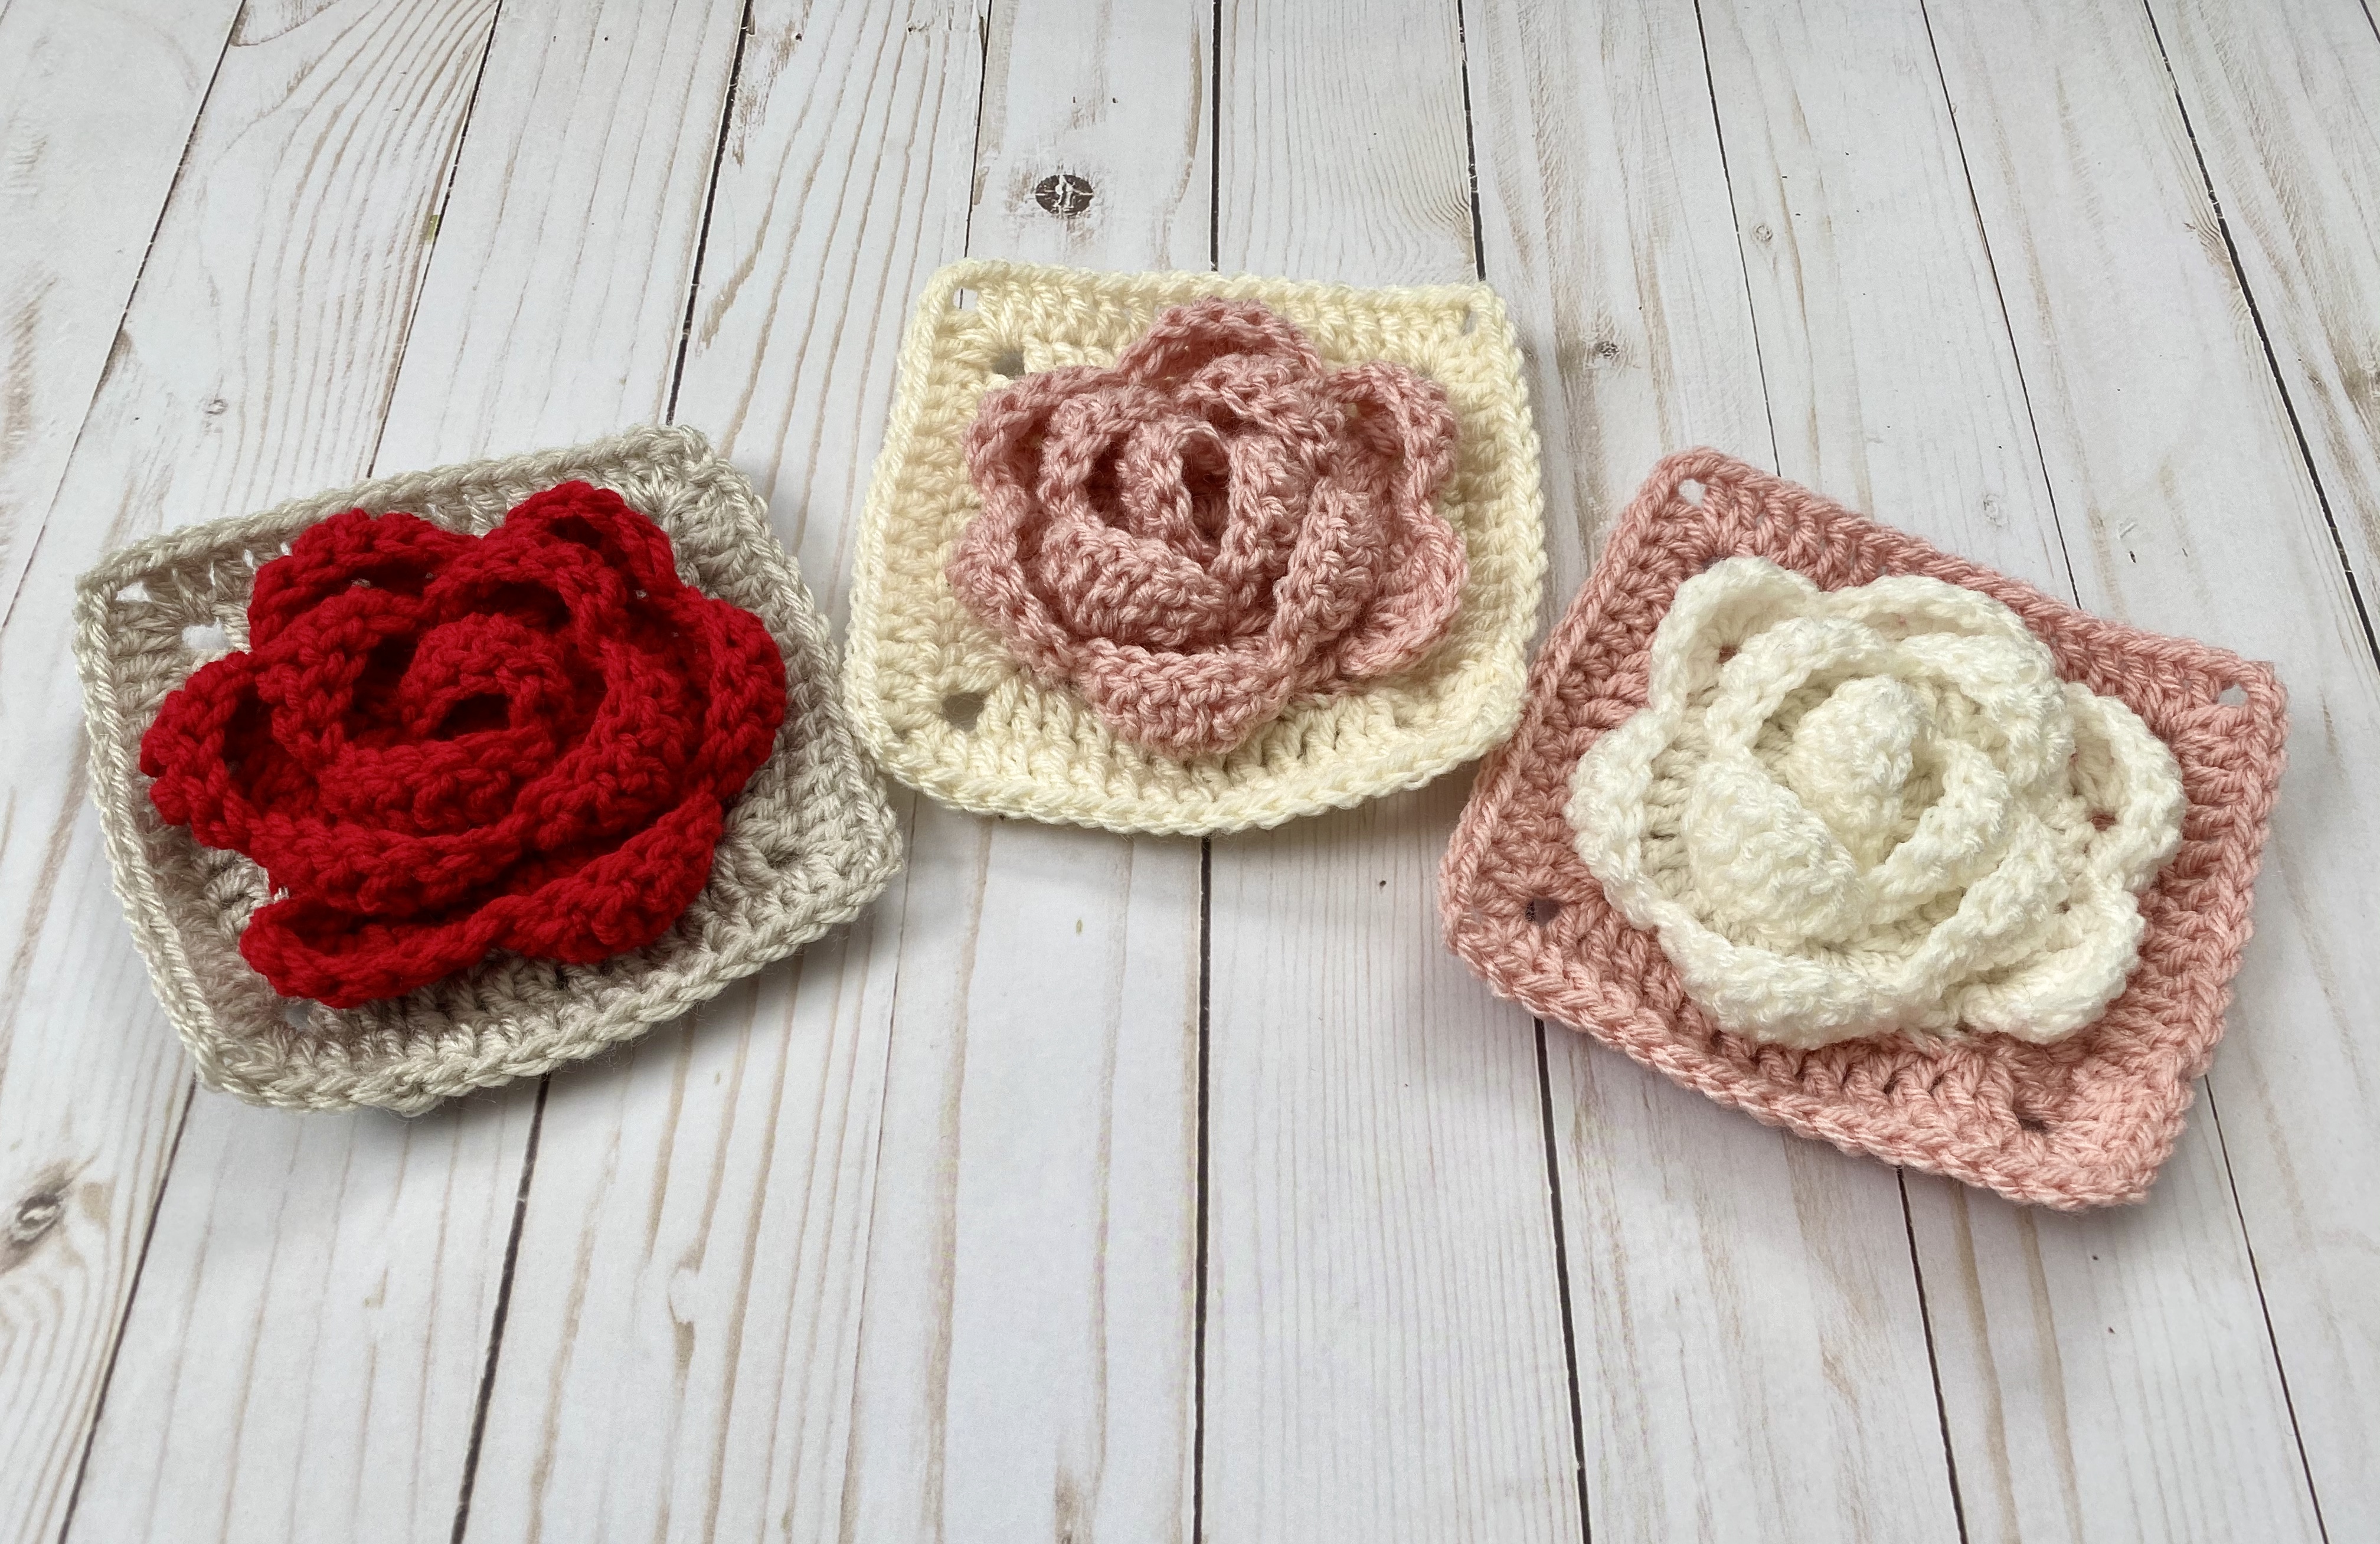
Here are the finished squares!
I hope you enjoyed crocheting these rose granny squares along with me! If you love fun, free patterns like this one, then please be sure to subscribe to my email list and follow me on social media. I have so many more fun patterns like this one coming soon!
Happy Crocheting!
COPYRIGHT: This pattern is owned by Crafty Kitty Crochet (Melissa Moore). Any reselling or distribution of this pattern is prohibited. Sale of items made using this pattern is welcomed, but I do ask that credit/a link be provided back to my site, craftykittycrochet.com.
Comments (19)
Solid Granny Square – Crochet Pattern – Crafty Kitty Crochet
April 10, 2020 at 4:07 pm
[…] squares for are blankets! Since I make granny squares that have quite a bit going on, such as my Rose Granny Squares, Sunflower Granny Square, and Fall Granny Squares, I like to be able to accent these squares with a […]
Bonnie
May 11, 2020 at 1:25 pm
Do you have this pattern for left-handers? https://craftykittycrochet.com/2020/02/07/rose-granny-square-crochet-pattern/
Does your web site have any left-handed crochet patterns?
Thank you,
Melissa
May 11, 2020 at 1:45 pm
Hi Bonnie! Thank you for asking; unfortunately, since I am unable to crochet left-handed, my patterns are all written from the perspective of a right-handed crocheter. I did some research on how left-handed crocheters can read patterns for right-handed crocheters and found this article! I hope that maybe this will help so that you can still enjoy my patterns! Thank you! ~ Melissa
https://www.twobrothersblankets.com/reading-patterns/
Rose Granny Square Blanket Free Crochet Pattern – Knitting – DIY – Craft Blog
May 24, 2020 at 9:16 pm
[…] Rose Granny Square Blanket Free Crochet Pattern is here […]
Robin
December 19, 2022 at 12:33 am
Where can I get the pattern please .
Melissa
December 20, 2022 at 1:44 pm
Hi Robin! The free pattern can be found here: https://www.craftykittycrochet.com/2020/02/07/rose-granny-square-crochet-pattern/ Thanks so much!
Hydrangea Granny Square – Crochet Pattern – Crafty Kitty Crochet
June 5, 2020 at 6:43 pm
[…] the way, if you love floral patterns, check out my Rose Granny Square and Sunflower Granny Square patterns! And if you love granny squares in general, you might like my […]
Face Mask for Kids & Adults – Crochet Pattern ~ Crafty Kitty Crochet
June 26, 2020 at 7:57 pm
[…] Wedding Cake Pattern, and the rose on my Rose Gold mask is a teeny, tiny version of the rose in my Rose Granny Square Pattern! Just make the rose with a category “2” yarn (I used Lion Brand Vanna’s Glamour […]
Dreamy Daisy Granny Square Afghan – Crochet Pattern ~ Crafty Kitty Crochet
May 8, 2021 at 4:12 pm
[…] you enjoyed my Sunflower Square Afghan and my Rose Granny Square patterns (and I hope you did!) then I think you will love this fun, floral pattern. I love […]
mrsroyalqueenrgm
September 25, 2021 at 5:08 pm
OMG!!! I use my squares to make purses! Absolutely love how the holes are minimal. Very pretty work
Melissa
September 25, 2021 at 8:12 pm
That’s awesome, I’m so happy to hear it!!! Thank you so much for your kind compliments!!! It really makes my day to know you’re enjoying the pattern so much – thank you 🙂 ~ Melissa
mariaelena
February 3, 2022 at 3:48 am
hi can you tell me how to make the other type square that is on here on blanket. it shows the flower along side a square that is minus the flower thanks . god bless
Melissa
February 3, 2022 at 1:40 pm
Hi, thanks so much for asking!!! Yes, there’s a whole separate post/pattern for those granny squares. You can find it here: https://www.craftykittycrochet.com/2020/04/10/solid-granny-square-crochet-pattern/
Hope you enjoy the patterns and thanks again!!
Melissa
Rose Granny Square –
February 14, 2022 at 6:14 pm
[…] Free Pattern Available: Rose Granny Square […]
Crochet Granny Square Cardigan "Rose" » Colour Ceilidh Crochet
March 15, 2022 at 1:14 pm
[…] Your Crochet has some pretty Flower Garden Crochet Blanket ideas. Moara Crochet has a nice Crochet Rose Granny Square. Lastly, Crafty Kitty Crochet has a sweet Rose Granny Square Crochet Pattern. […]
Padrões de rosas de crochê grátis – Top 15 –
October 17, 2022 at 9:04 pm
[…] Meu Deus, que lindezas! Esses lindos quadrados de vovó texturizados são os mais fofos que eu já vi em um bom tempo. Ao confeccioná-los em uma de suas cores favoritas, você pode criar as mantas, mantas ou toalhas de mesa mais bonitas para quem você realmente ama, porque certamente levará algum tempo, mas os belos resultados valerão a pena. . Padrões de Crafty Kitty crochê […]
25 Free Crochet Granny Square Patterns (Easy PDF Pattern)
January 29, 2023 at 7:21 pm
[…] All you need is a size h-8 / 5 mm crochet hook, scissors, and a yarn needle to start! Show off your gorgeous creations as wall art, or use them to make decorative items that will last throughout the year. Try it out today – crafting rose granny squares will be fun! craftykittycrochet […]
Mother's Day Gift – 5 Pretty Rose FREE Crochet Patterns – I Good Ideas
April 4, 2023 at 5:50 pm
[…] 2: ROSE GRANNY SQUARE FREE PATTERN […]
38 Crochet Square Patterns – DIY & Crafts
January 4, 2025 at 5:21 pm
[…] This charming DIY guides you through crafting intricate rose motifs within granny squares, allowing you to infuse your blankets, cushions, or accessories with a touch of timeless elegance. […]