

Small Scholar Graduation Cap – Crochet Pattern
Celebrate the little graduate in your life with this adorable preschool graduation cap pattern! It’s easy and fun to make, and is the perfect way to commemorate your little one’s graduation. Since the pattern only uses a few basic stitches, this is a pattern that beginners can enjoy as well!
Pin it for later!
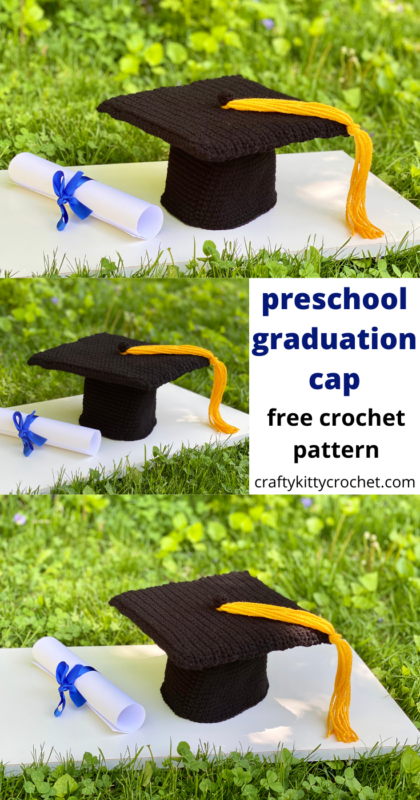
Preschool graduations are some of the cutest things to watch, ever! The little scholar in your life will look extra sharp wearing this homemade crocheted graduation cap on their big day!

The finished look of this cap is extremely close to that of a real graduation cap, yet the pattern itself is extremely easy to crochet and assemble. If you can single crochet and single crochet decrease, then you have all the skills you need to complete this project.
The yarn I used here is durable and versatile – Red Heart Super Saver in Black. Find it on Amazon HERE! It’s a staple in my stash, as it’s perfect for fashion, amigurumi, and more. I think this cap would look cute in other colors, too, but it’s also hard to beat a nice classic black graduation cap!
So who’s ready to commence with this commencement project? Let’s go!
Looking for an ad-free PDF copy of this pattern? You can purchase one in my shop HERE!
Supplies
Size G-6 / 4.0 mm crochet hook
1 skein of Red Heart Super Saver in Black
Small amounts of Red Heart Super Saver in Gold (about 7 yds)
Piece of cardboard (measuring at least 9 inches square)
Scissors
Yarn Needle
Straight pins (optional)
Pen for marking cardboard (optional)
Abbreviations
Beg = beginning
Ch = chain
Rep = repeat
Rnd(s) = round(s)
Sc = single crochet
Sc2tog = single crochet 2 together
Sl St = slip stitch
St(s) = stitch(es)
Gauge
4 sc and 4 rounds/rows= about 1 inch
Size
Cap circumference: about 19 inches; mortarboard: about 9 inches square
Instructions
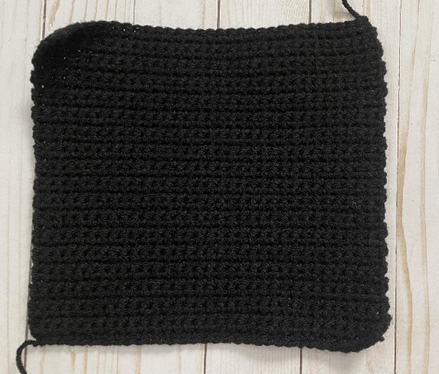
Mortarboard (Make 2)
With Black, Ch 33.
Row 1 – sc in each st across. Ch 1, turn (32 sc)
Rows 2 – 36 – rep Row 1. Do not ch 1 at end of Row 36. (32 sc per row)
Fasten off, leaving long tail for sewing.
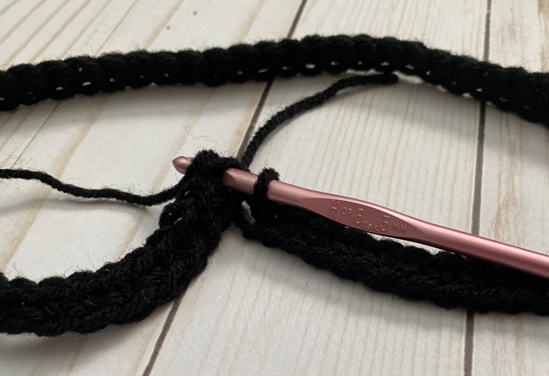
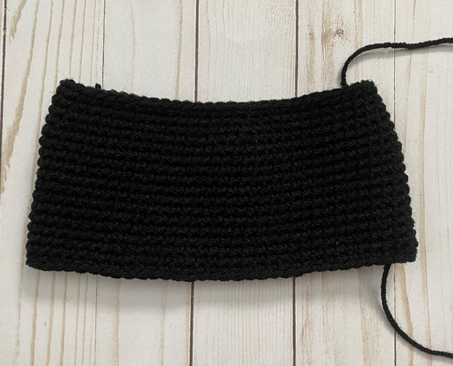
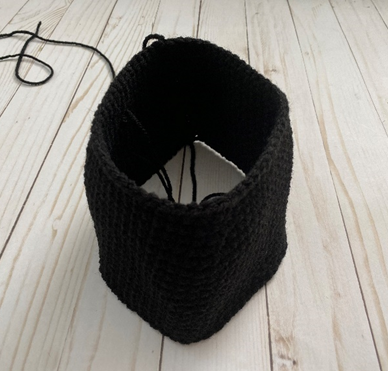
Cap
With Black, ch 69.
Rnd 1 – sc in each st across. Join with sl st to first sc of rnd. Do not turn; ch 1. (Use beg tail to attach small gap at bottom of piece.) (68 sc)
Rnd 2 – sc in each st across. Join with sl st to first sc of rnd, ch 1. Do not turn (68 sc)
Rnds 3 – 13 – rep Rnd 2. (68 sc per rnd)
Rnd 14 – sc in next 15 sts; sc2tog over next 2 sts. Rep 3 more times. Join with sl st to first sc of rnd, ch 1. Do not turn (64 sc)
Rnd 15 – sc in each st around. Join with sl st to first sc of rnd, ch 1. Do not turn (64 sc)
Rnd 16 – sc in next 14 sts; sc2tog over next 2 sts. Rep 3 more times. Join with sl st to first sc of rnd, ch 1. Do not turn (60 sc)
Rnd 17 – sc in each st around. Join with sl st to first sc of rnd. (60 sc)
Fasten off, leaving long tail for sewing.
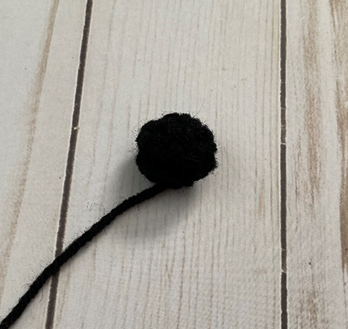
Button
This piece is worked in continuous rnds; do not join. You may wish to use a stitch marker and move it up at the beginning of each new rnd.
Rnd 1 – With Black, make a magic ring; 6 sc in ring. (6 sc)
Rnd 2 – sc in each st around. (6 sc)
Rnd 3 – [sc2tog over next 2 sts] 3 times. (3 sc)
Fasten off, leaving long tail for sewing.
Finishing
Sew Button to right side of one piece of Mortarboard.
Measure cardboard so that it is slightly less than the size of the Mortarboard pieces.
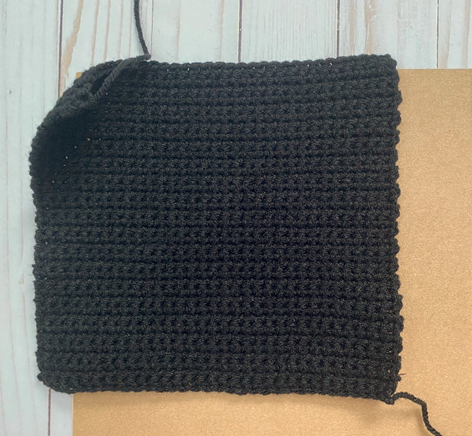
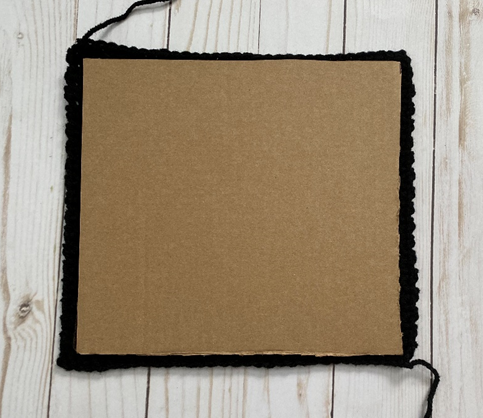
Place cardboard on wrong side of one piece of Mortarboard that does not have Button, and place the other piece of Mortarboard (with Button) on top of cardboard with Button facing the outside. Sew edges of Mortarboard pieces around cardboard. Weave in ends.
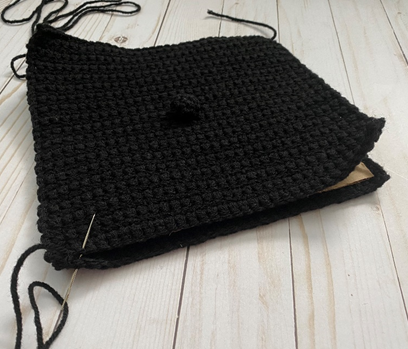
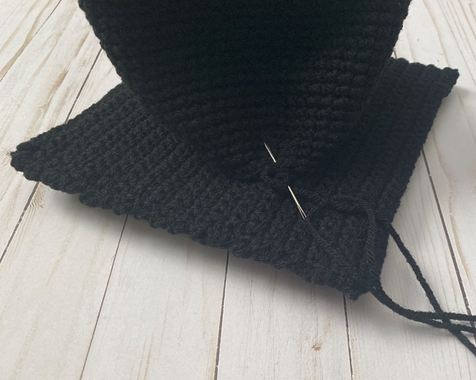
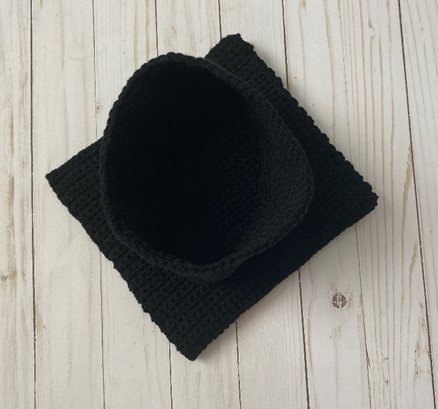
Place Cap in center of Mortarboard, on end opposite the Button side. Use straight pins to hold Cap in place, if desired. Sew Cap to Mortarboard. Weave in ends.
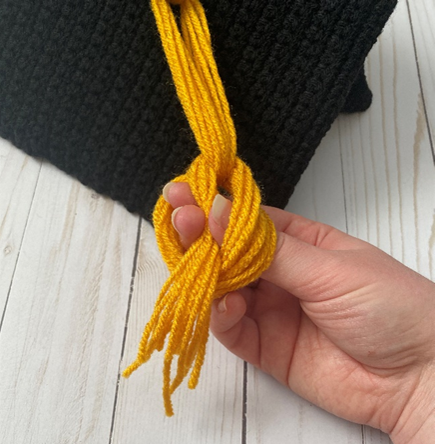
Tassels
Cut 7 strands of Gold, measuring 31 inches each. Fold in half and tie tightly around base of Button.
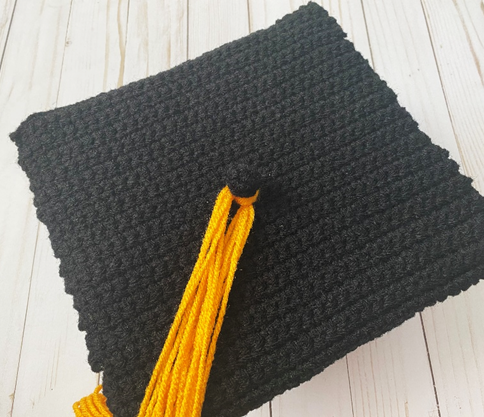
Place Tassel on desired side of Mortarboard, and tie Tassel into a slip knot as closely to the edge of Mortarboard as possible. Trim Tassel ends.
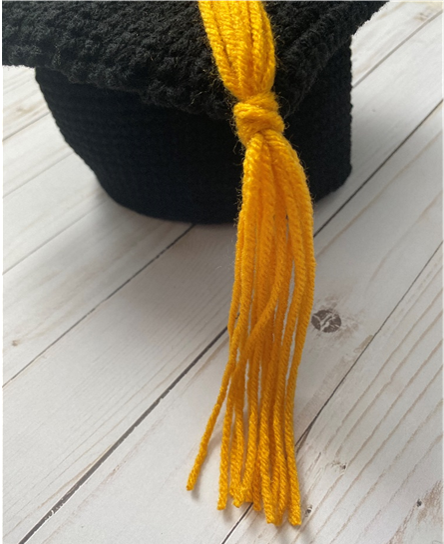
Here is the finished cap!


I hope you enjoyed crocheting this graduation cap along with me! If you love fun, free patterns, then please be sure to subscribe to my email list and follow me on social media. I have so many more fun patterns like this one coming soon!
Happy Crocheting!
COPYRIGHT: This pattern is owned by Crafty Kitty Crochet (Melissa Moore). Any reselling or distribution of this pattern is prohibited. Sale of items made using this pattern is welcomed, but I do ask that credit/a link be provided back to my site, craftykittycrochet.com

Comments (1)
Amazing Mini Graduation Cap free Crochet Amigurumi Pattern Ideas – Carolinamontoni.com
May 29, 2022 at 3:11 am
[…] Get Pattern […]