

Hydrangea Granny Square – Crochet Pattern
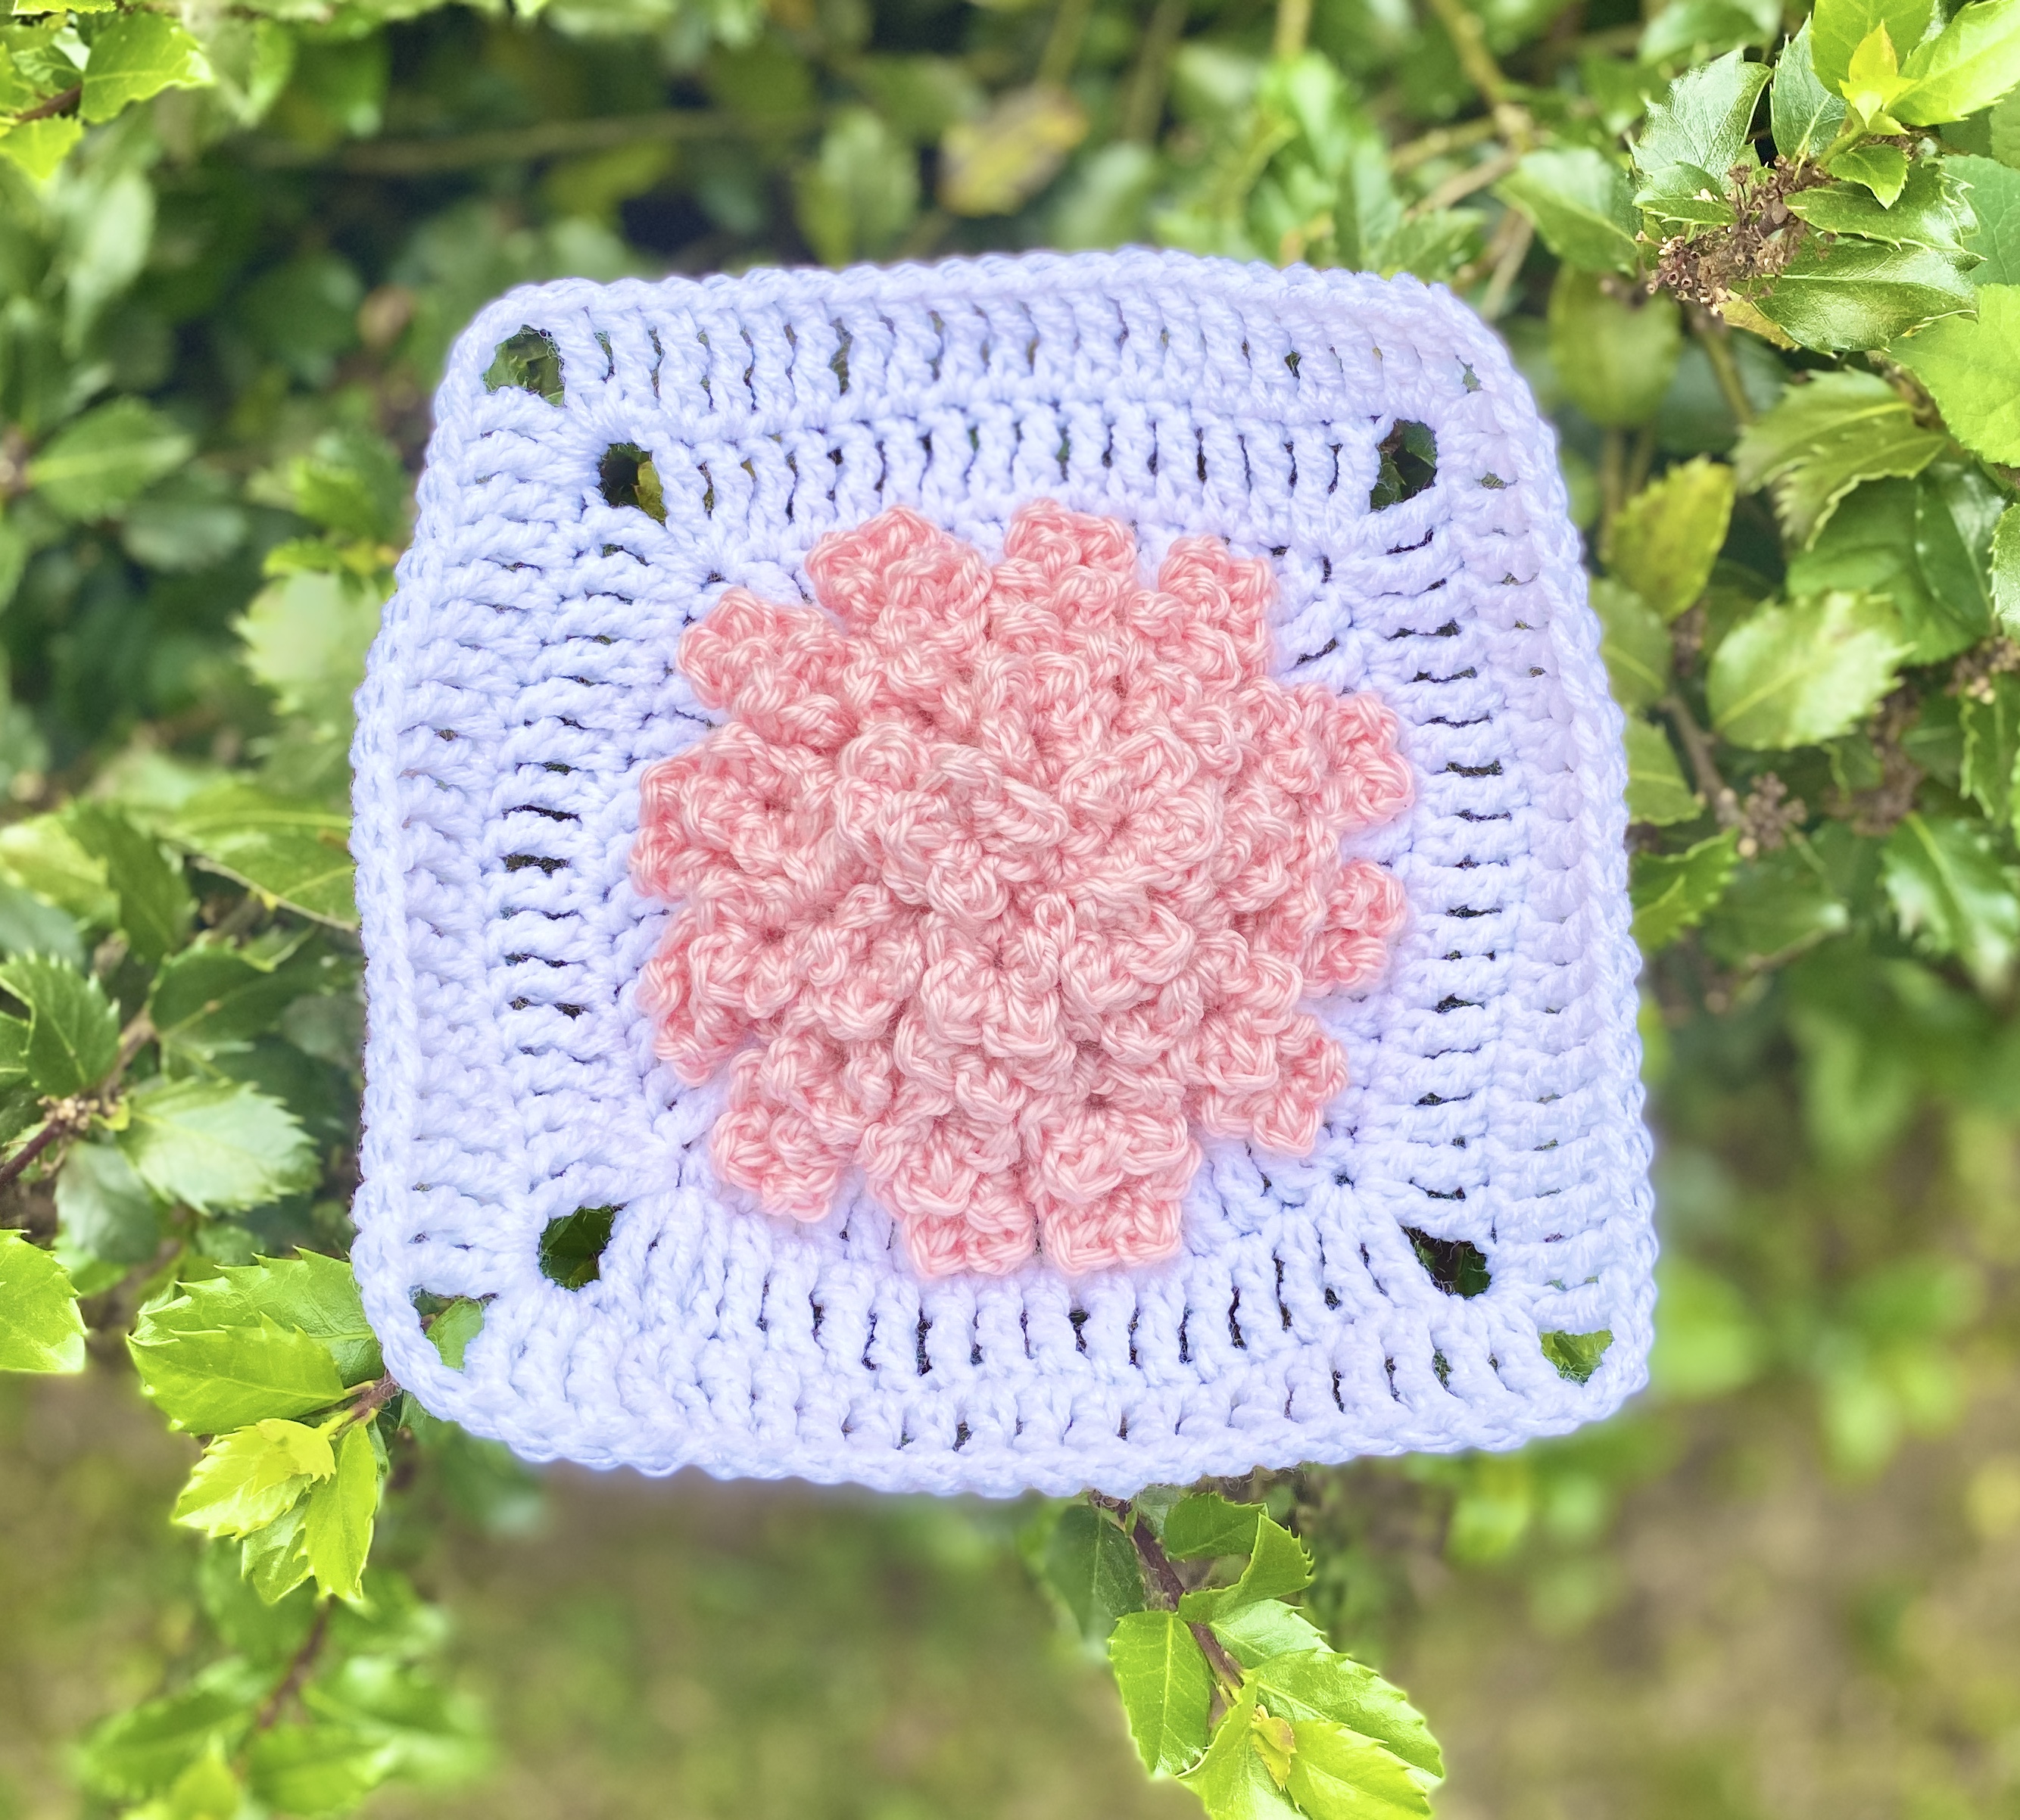
Watch your next crochet project bloom beautifully by working up one of these gorgeous and detailed hydrangea granny squares! Perfect for blankets and afghans, as well as a variety of other home decor projects, the textured squares are sure to add colorful floral fun to any project!
Pin it for later!
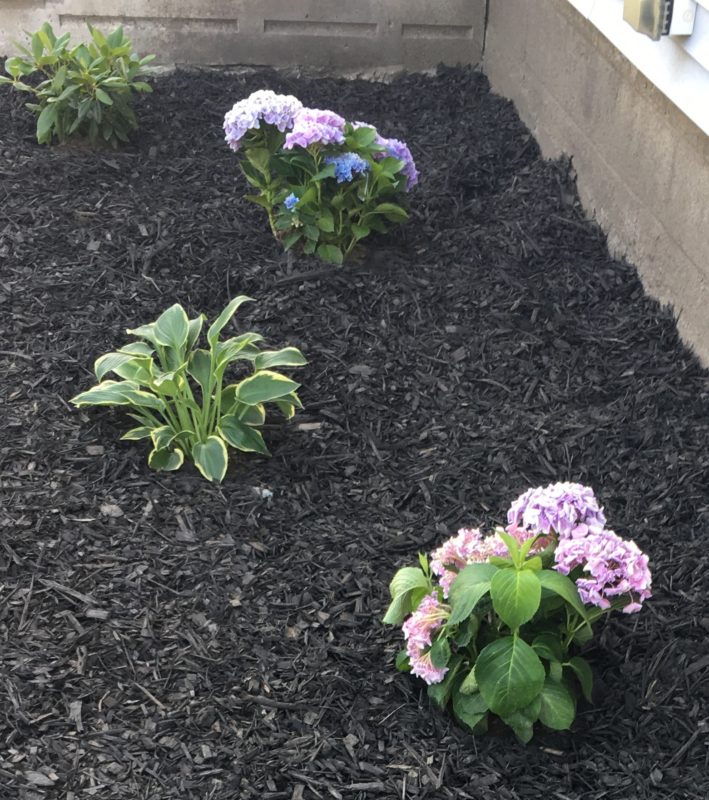
These floofy flowers are made to look like the real-life beauties that bloom in the summertime and brighten up our flower beds with vivid colors. I have a special place in my heart for hydrangeas, because they are among the first plants I ever planted in my flower beds a few years ago!
There’s so much to love about hydrangeas – the large, bold shape, the myriad of colors, and the big verdant leaves! These granny squares bring all the loveliness of hydrangeas right into your home. Because they’re so pretty to look at, why not snuggle up with a blanket made with a bunch of them?!
By the way, if you love floral patterns, check out my Rose Granny Square and Sunflower Granny Square patterns! And if you love granny squares in general, you might like my Paw Print Granny Square!
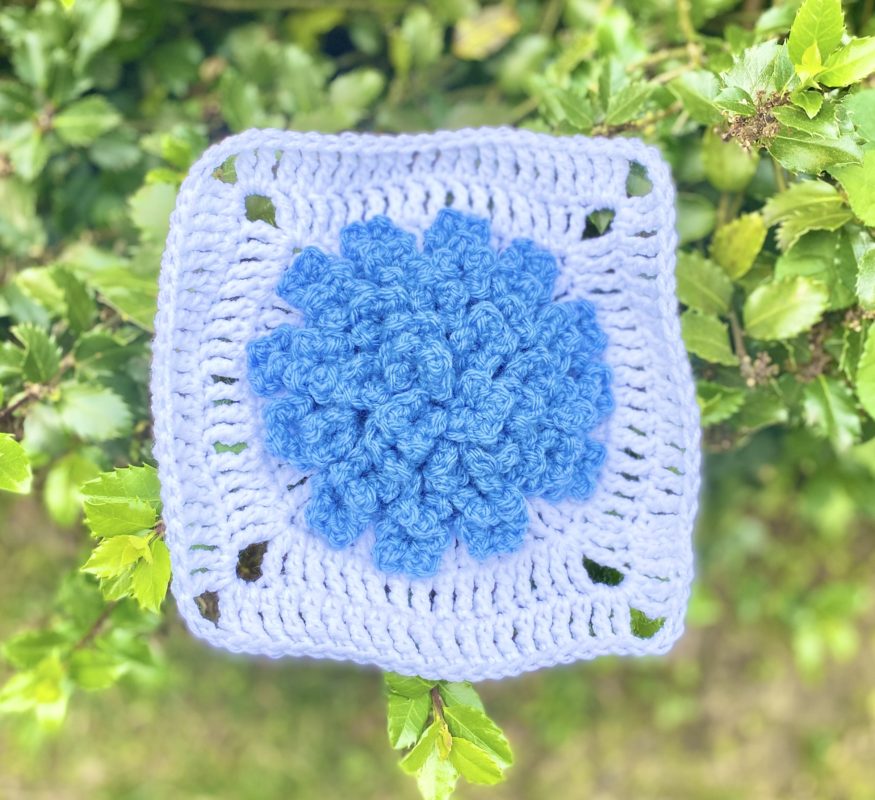
For me, hydrangeas are all about the gorgeous colors! So I felt pretty strongly about picking the perfect colors for these crocheted buds. I think Red Heart Super Saver in Light Blue is simply perfect to capture the essence of pale blue hydrangeas! Find Light Blue on Amazon HERE! Other colors I’m crazy about include Lion Brand Vanna’s Choice in Sky Blue (shown in the process photos in the pattern) and Lilac. Find Sky Blue on Amazon HERE
and Lilac on Amazon HERE
!
Oh, and guess what? I’m making these hydrangea granny squares into a special birthday gift for a cherished cousin of mine, so stay tuned for photos of my finished hydrangea blanket!!!
So who’s ready to plant some happiness with this fanciful floral crochet pattern? Let’s go!
(Psst! Looking for an ad-free PDF copy of the pattern? You can purchase one in my shop HERE!)
Supplies
Size H/8 5.0 mm crochet hook
1 skein of medium weight yarn in Main Color (photos below show Lion Brand Vanna’s Choice in Sky Blue, lavender shown is this brand in Lilac; pale blue is Red Heart Super Saver in Light Blue; pink is Caron Simply Soft in Soft Pink), 1 skein of medium weight yarn in Contrast Color (photos below show Red Heart Super Saver in White)
Stitch Markers (optional)
Yarn Needle
Scissors
Abbreviations
*= indicates beginning/end of a section to be repeated
Beg = beginning
BLO = back loop only
Ch = chain
Dc = double crochet
FLO = front loop only
Rem = remaining
Rep = repeat
Rnd(s) = round(s)
Sc = single crochet
Sl st = slip stitch
St(s) = stitch(es)
Tr = triple crochet
Gauge
1 petal = about 1 inch in height and width; 4 tr sts and 1 rnd = about 1 inch
Size
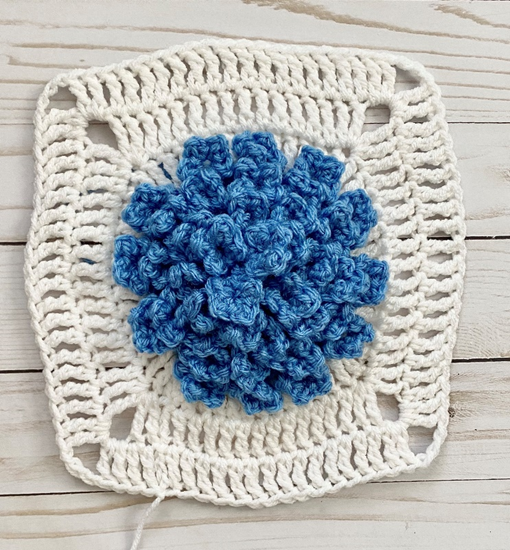
Finished square measures about 7.5 inches square; flower measures about 16 – 16.5 inches circumference
Notes
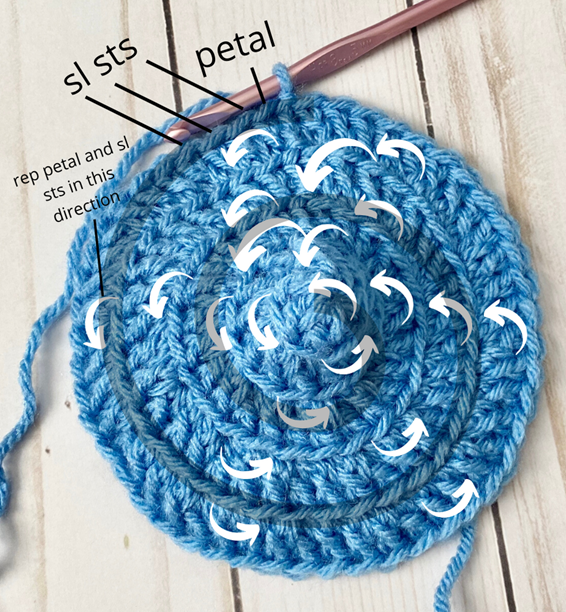
The flower is made by working in a counterclockwise spiral around entire piece, using loops from each round, starting from outwards and working inwards. Shown here is a diagram that illustrates the direction in which stitches are worked.
Instructions
Flower (optional: use stitch markers to mark beg of each new rnd for later)
Rnd 1 – With Main Color, make a magic ring. 6 dc in ring. Join with sl st to first dc of rnd. Ch 2 (6 dc)
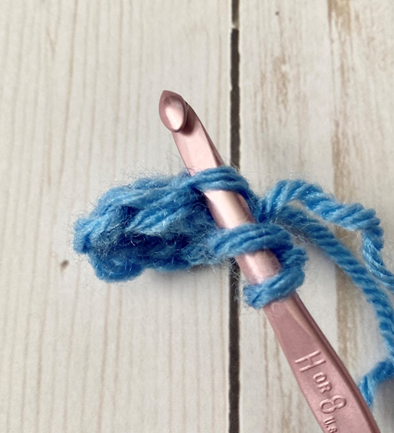
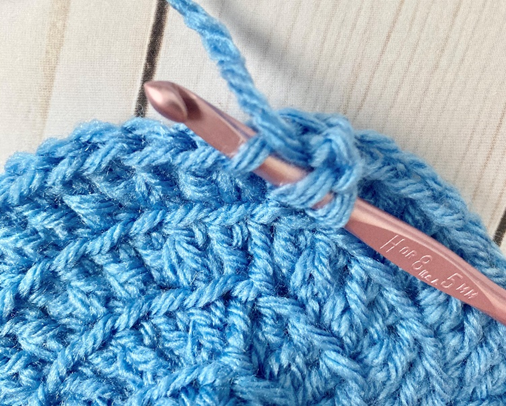
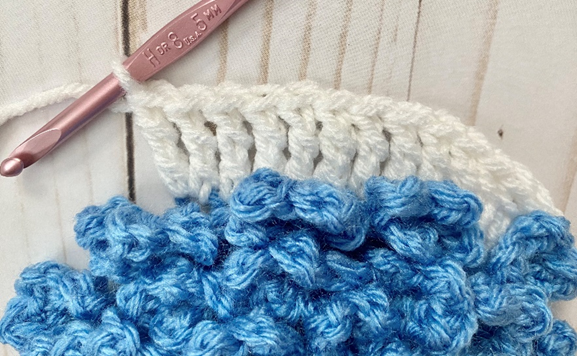
Rnd 2 – working in BLO (see photo below), 2 dc in each st around. Join with sl st to first dc of rnd. Ch 2 (12 dc)
Rnd 3 – Rep Rnd 2. (24 dc)
Rnd 4 – working in BLO, 2 dc in next st, dc in next st; rep around. Join with sl st to first dc of rnd Ch 2 (36 dc)
Rnd 5 – working in BLO, 2 dc in next st, dc in next 2 sts; rep around. Join with sl st to first dc of rnd (48 dc)
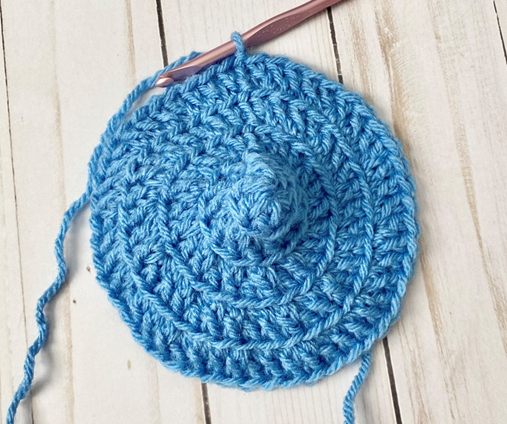
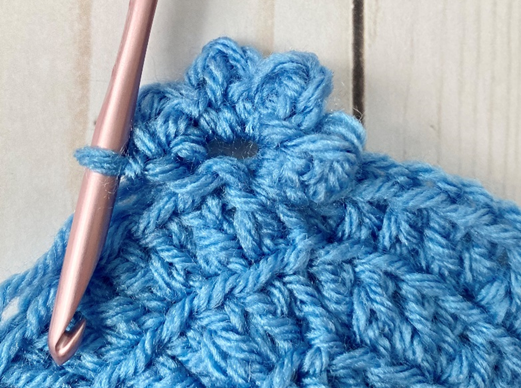
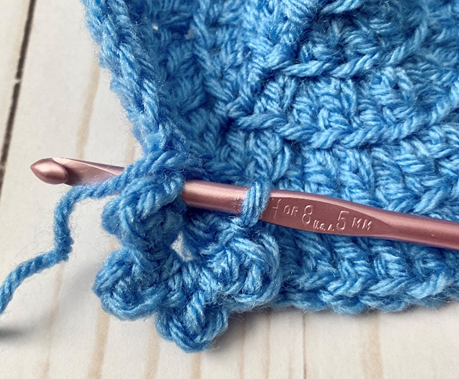
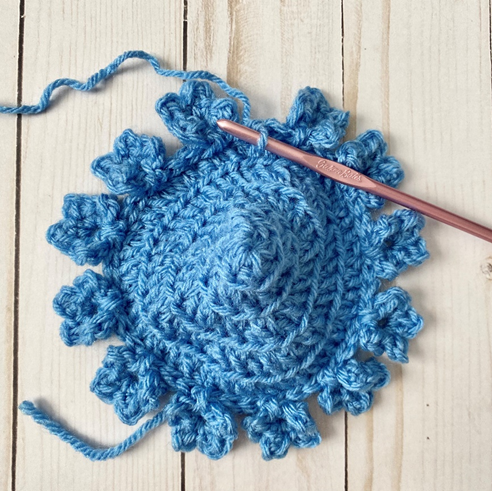
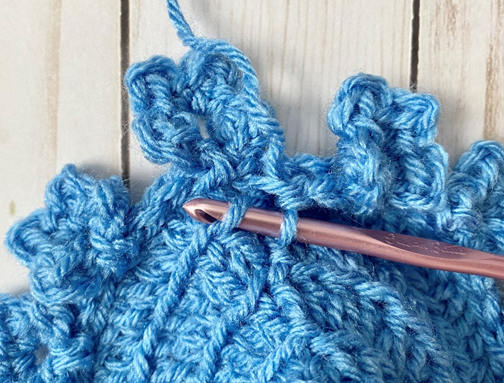
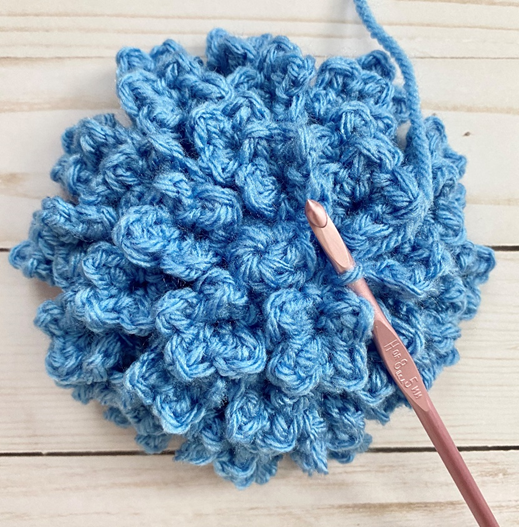
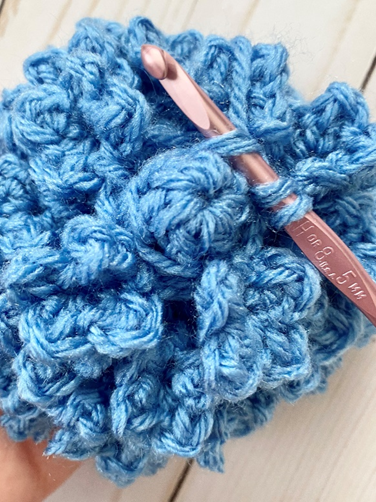
Rnd 6 – *working in FLO of sts from Rnd 5 (first photo below), [ch 2, dc, sl st] in same st 4 times (second, third and fourth photos below); rotate work around to make petal shape (fifth photo below), and sl st underneath petal (in same sl st you started in – sixth photo below) – petal made. Sl st in FLO of next 4 sts (seventh and eighth photos below).* Rep from * to * 10 more times. Rep one more petal in FLO of current st. Sl st in FLO of last 3 sts of rnd (ninth photo below). (12 petals)
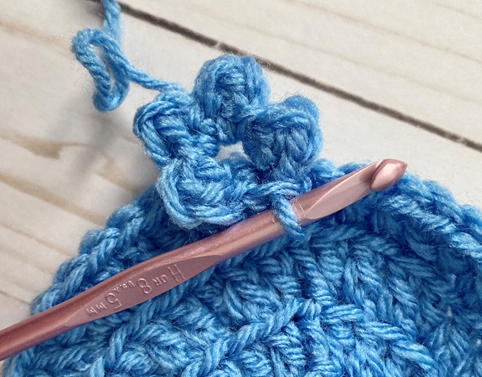
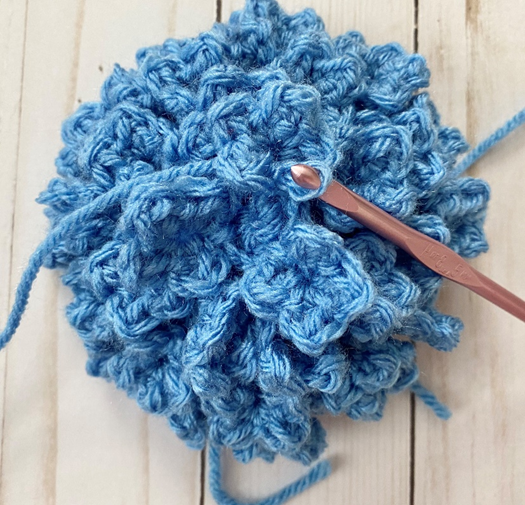
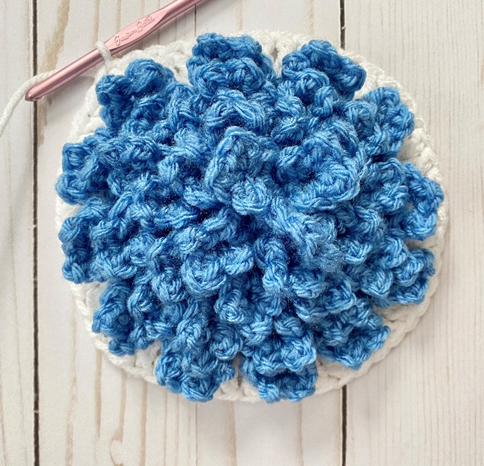
Rnd 7 – sl st to first rem loop of Rnd 4 (first photo below). *Working in rem loops, [ch 2, dc, sl st] in same st 4 times. Rotate work slightly to make petal shape, and sl st underneath petal (in same st you started in) – petal made. Sl st in rem loops of next 3 sts.* Rep from * to *10 more times. Rep one more petal in current st, and sl st in last 2 rem loops. (Second photo below shows finished rnd.) (12 petals)

Rnd 8 – sl st to first rem loop of Rnd 3 (first photo below). *Working in rem loops, [ch 2, dc, sl st] in same st 4 times. Rotate work slightly to make petal shape, and sl st underneath petal (in same st you started in) – petal made. Sl st in rem loops of next 3 sts.* Rep from * to * 7 more times. (Second photo below shows finished rnd.) (8 petals)
Rnd 9 – sl st to first rem loop of Rnd 2. *Working in rem loops, [ch 2, dc, sl st] in same st 4 times. Rotate work slightly to make petal shape, and sl st underneath petal (in same st you started in) – petal made. Sl st in rem loops of next 3 sts.* Rep from * to * 4 times. (4 petals)
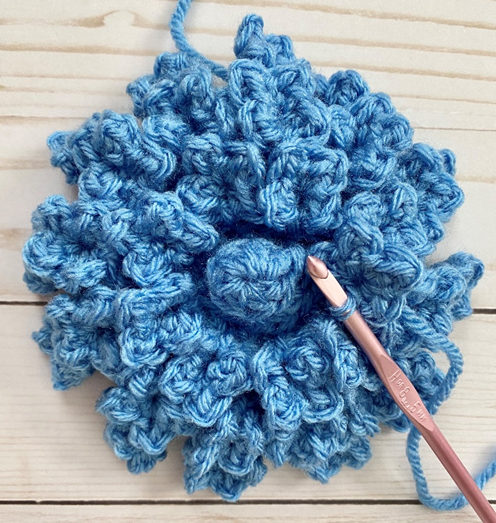
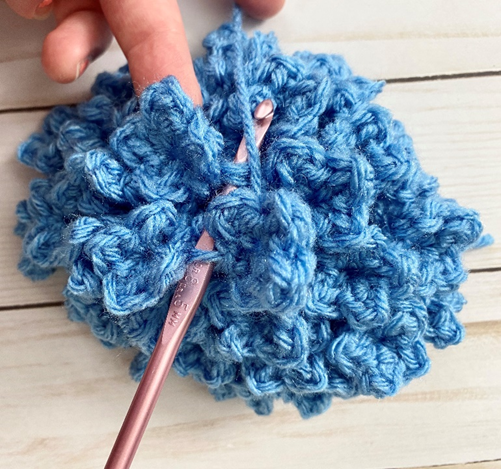
Rnd 10 – sl st to first rem loop of Rnd 1 (rem loops of Rnd 1 can be difficult to see at this point – it might help to push the piece towards you a bit from behind, making this rnd stick out a bit more – see first photo below). Working in rem loops, [ch 2, dc, sl st] in same st 4 times. Rotate work slightly to make petal shape, and sl st underneath petal (in same st you started in) – petal made. Sl st in rem loops of next 3 sts. Rep petal once more in current st. Sl st in next 2 rem loops. Rep petal once more. (Second photo below shows rnd after this step.) Sl st from current st into sl st across from current st to slightly close any rem gap left after the rnd (third photo below). (3 petals)
Fasten off Main Color.
Square
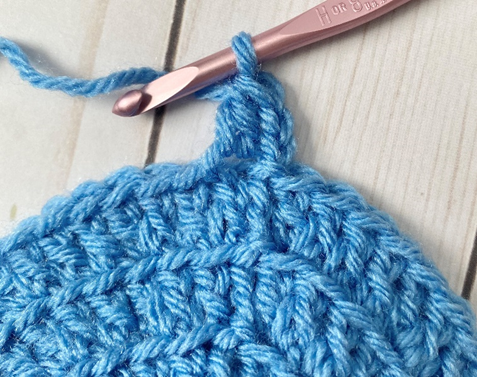
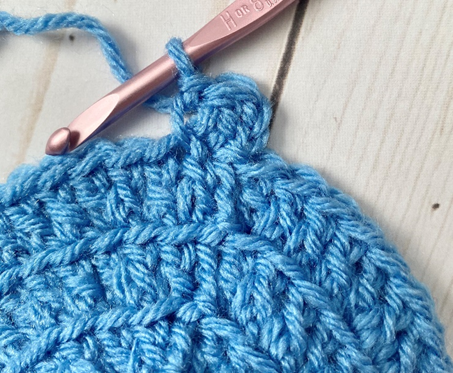
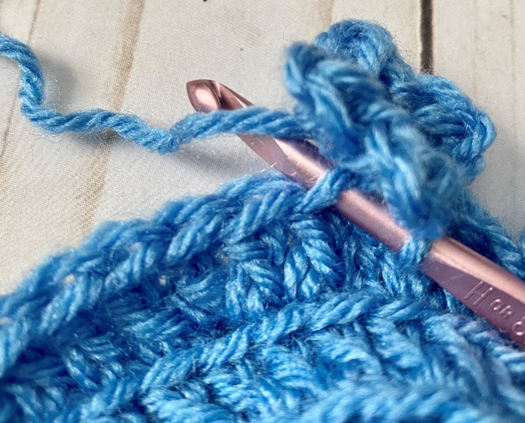
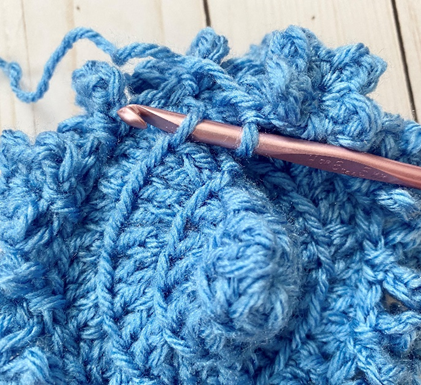
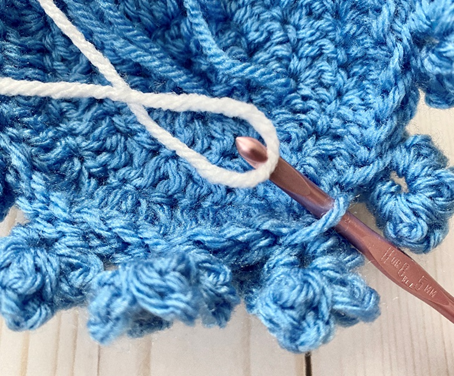
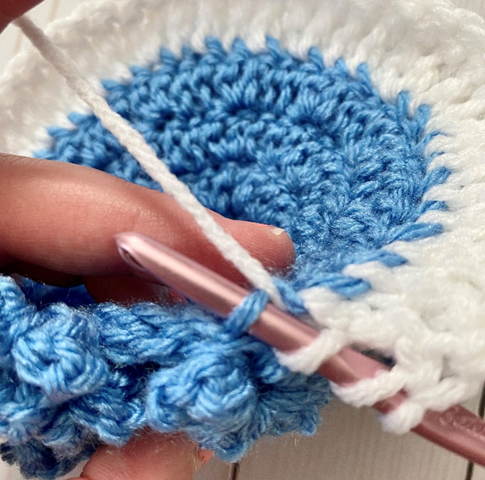
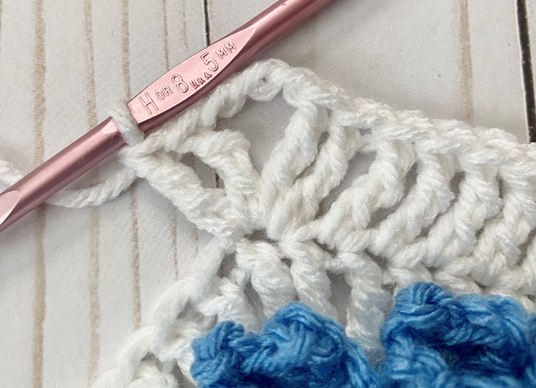
Rnd 1 – Attach Contrast Color in any rem back loops of Rnd 5 of Flower (first photo below), ch 3. Work in BLO of these rem loops (including rem loops behind petals – see second photo below), *tr in next 11 sts, 2 tr in next st.* (Third and fourth photos below show tr sts from two angles – underneath piece, and top of piece when laying flat.) Rep from * to * 3 more times. Join with sl st to first tr of rnd (52 tr)
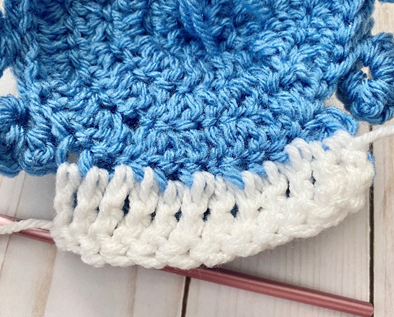
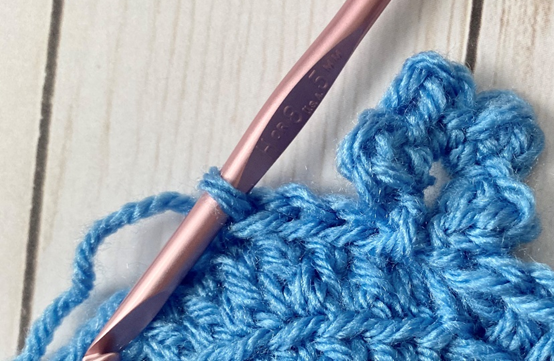
Rnd 2 – Ch 3, *[2 tr, ch 3, 2 tr – corner made – see first photo below] in next st, tr in next 12 sts.* Rep from * to * 3 more times. Join with sl st to first tr of rnd (64 tr)
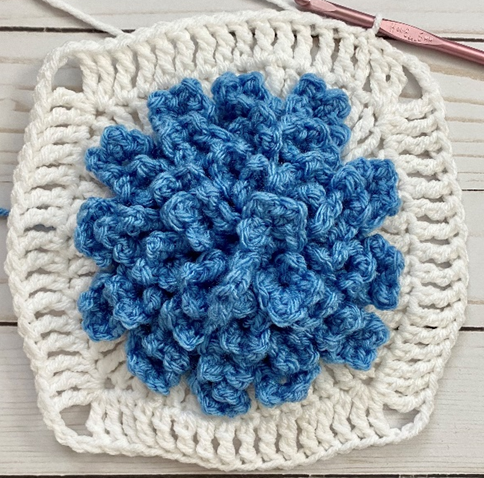
Rnd 3 – Ch 3, tr in next 14 sts. *[2 tr, ch 3, 2 tr – corner made] in next st, tr in next 16 sts.* Rep from * to * 2 more times. Rep corner once more, tr in last 2 sts. Join with sl st to first tr of rnd (80 tr)
Fasten off, weave in ends.
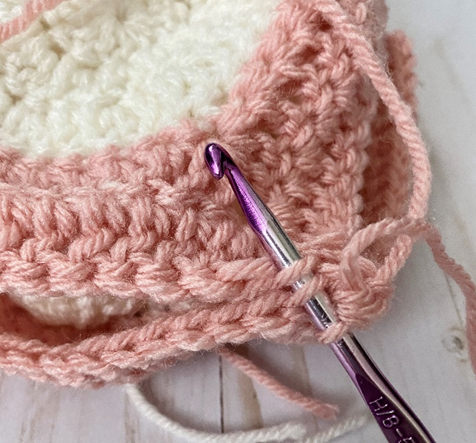
Assembling Squares
Place squares so that the right sides are facing each other. Working through BLO of square closest to you, and through FLO of square furthest away from you, sc across.
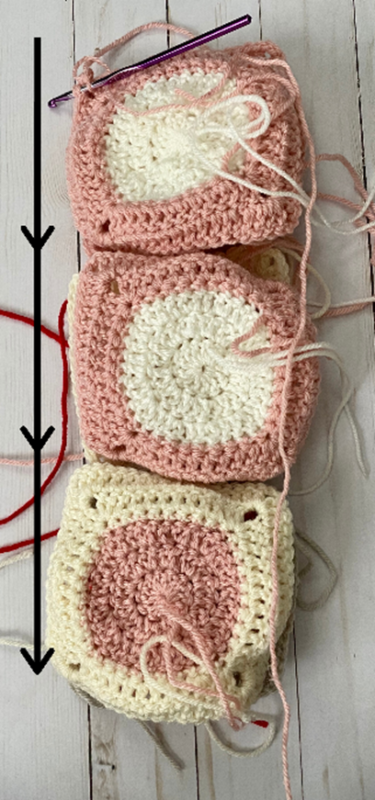
Rep this process with another two squares to make a longer row of squares. To add more rows, add squares along bottom of an existing row. Sc squares together along side edges to attach squares vertically. Weave in all ends.
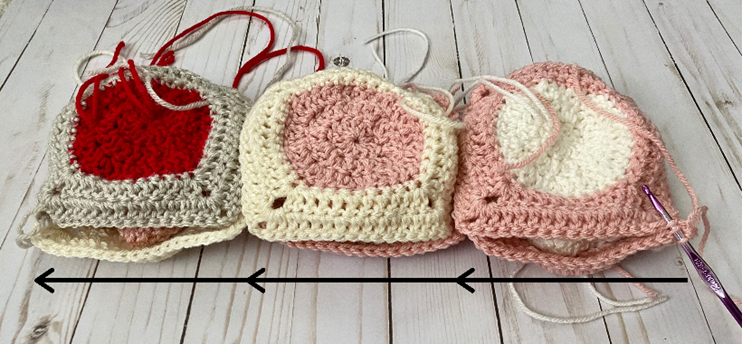
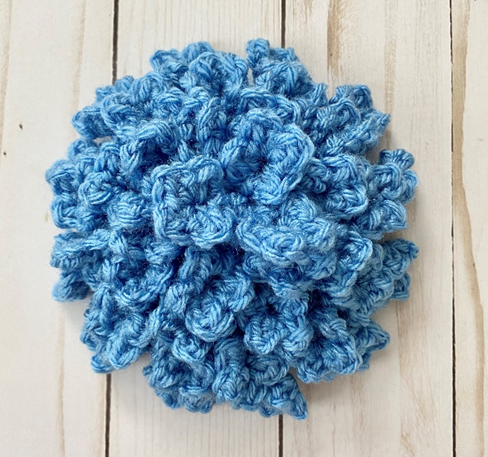
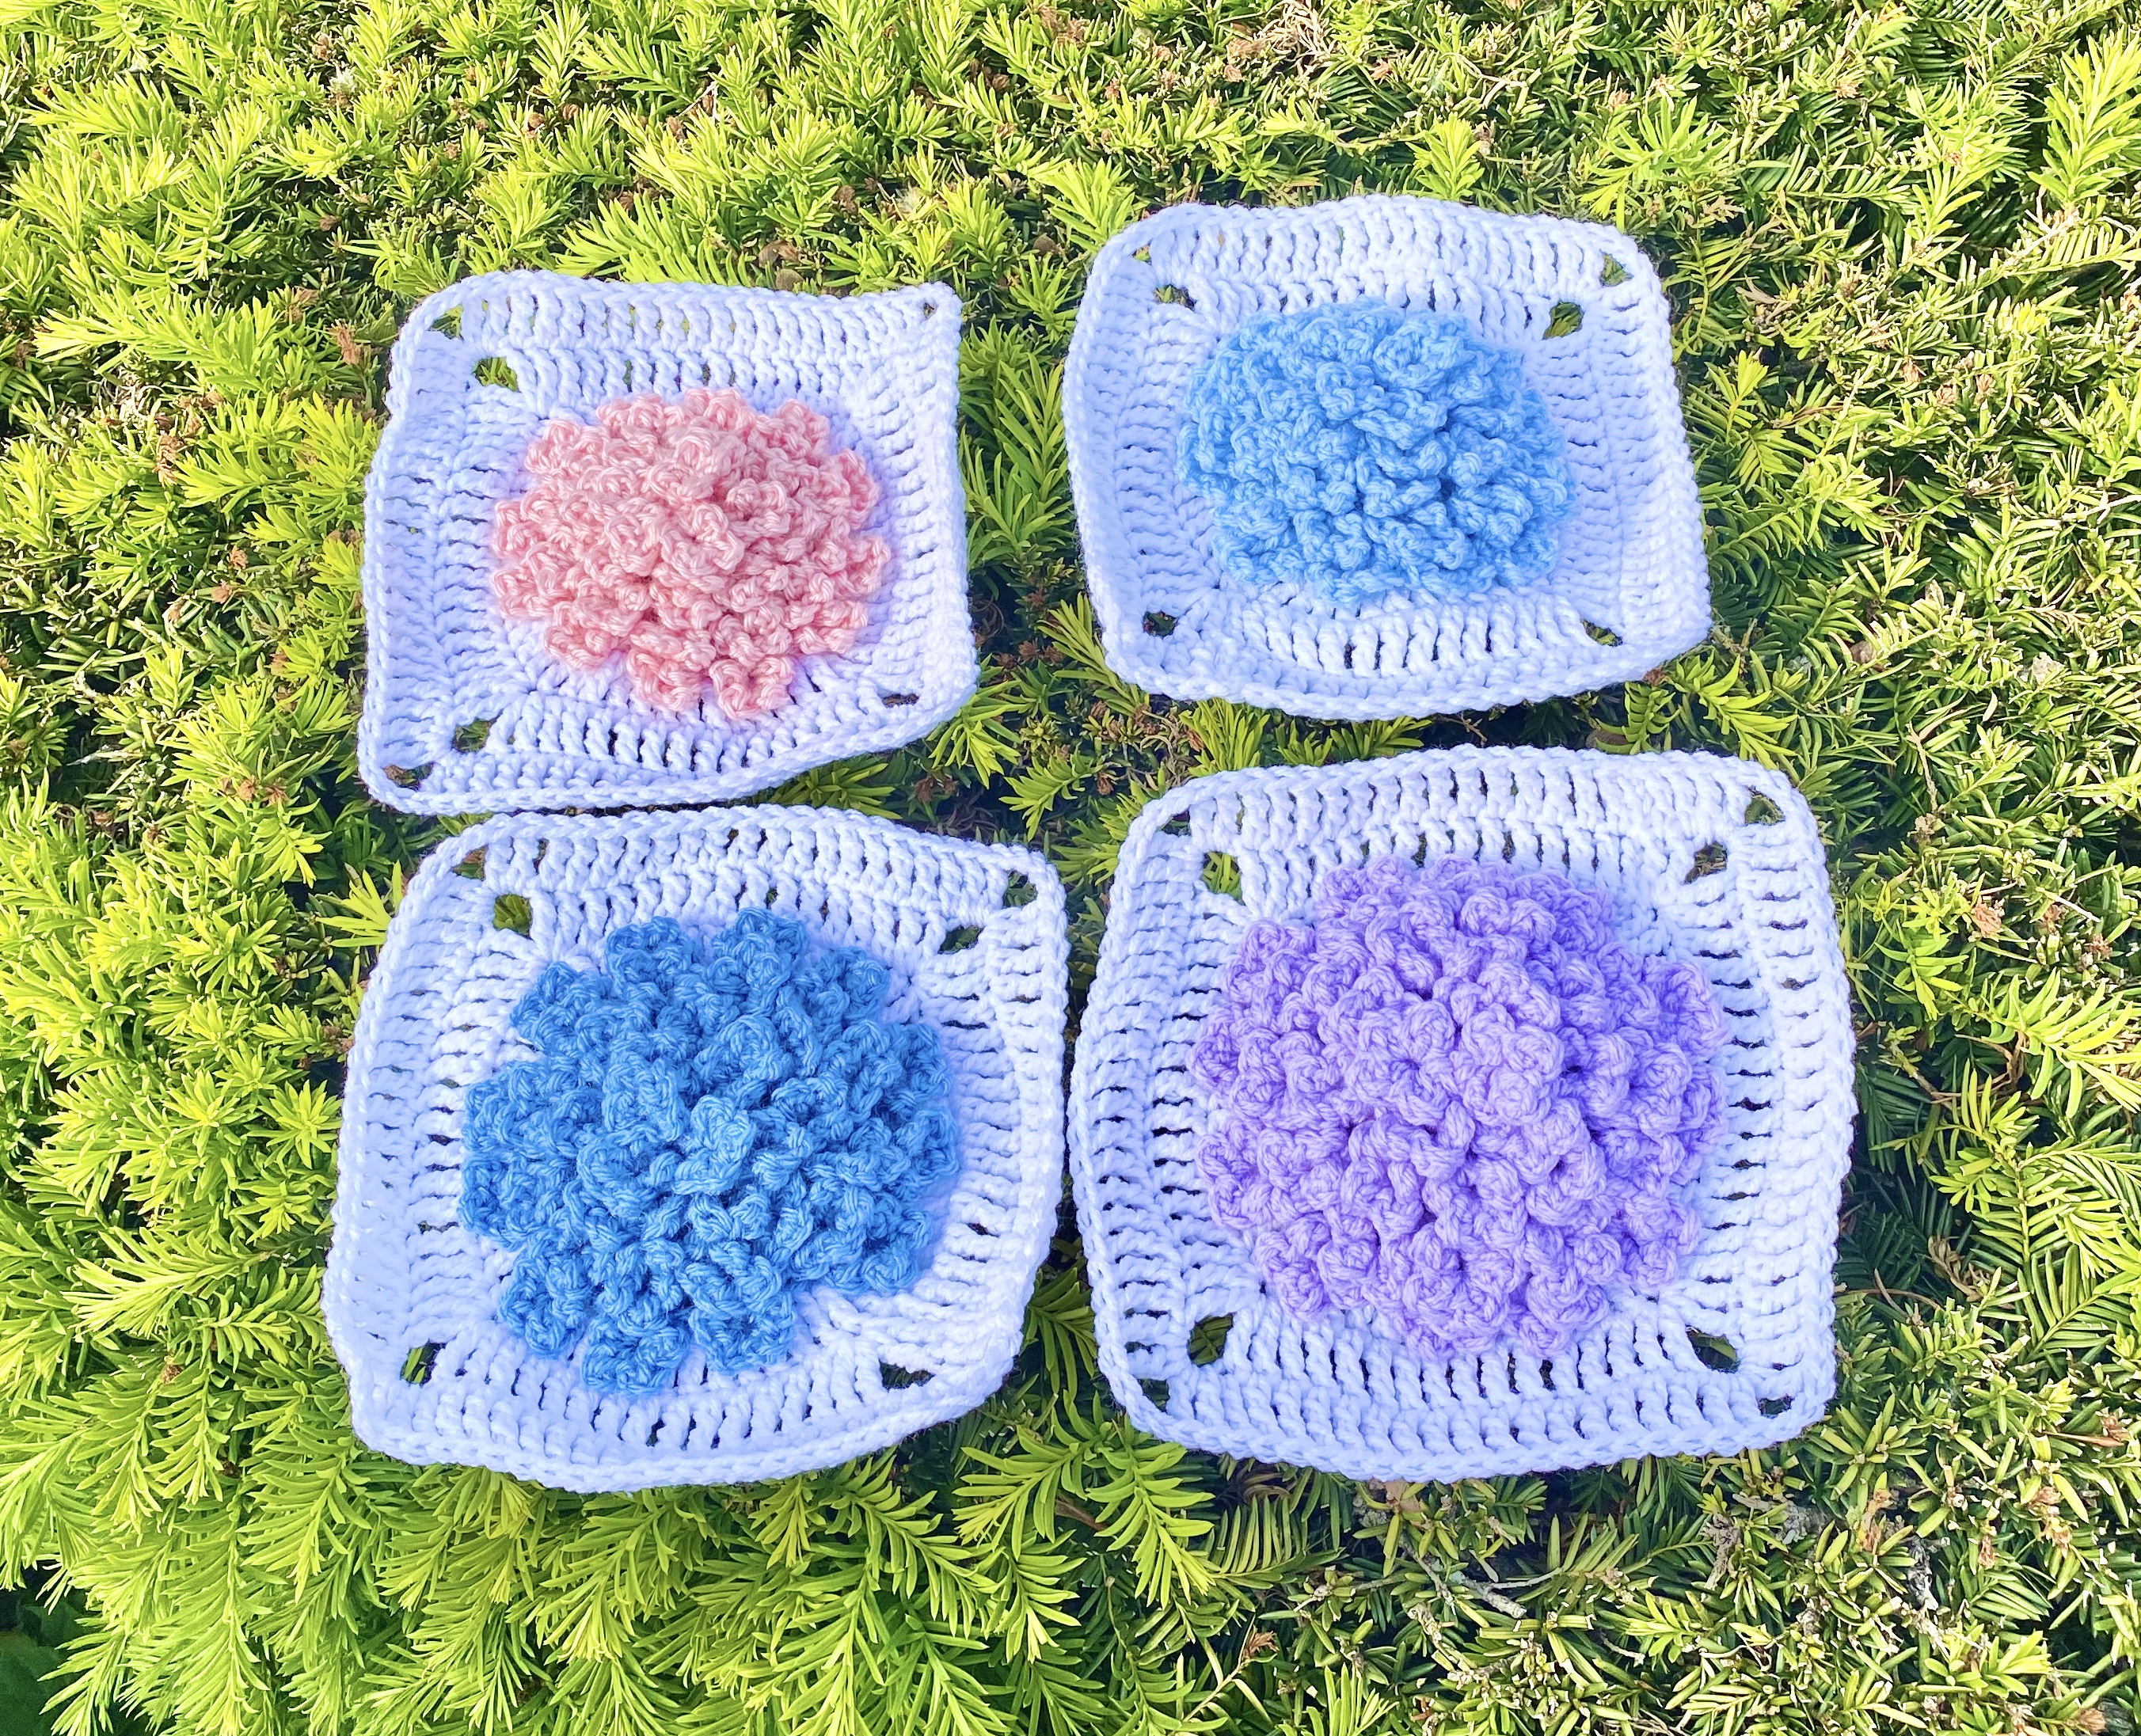
Here are the finished squares!
I hope you enjoyed crocheting these hydrangea granny squares along with me! If you love fun, free crochet patterns, then please be sure to subscribe to my email list and follow me on social media – I have so many more fun crochet patterns coming soon!
Happy Crocheting!
COPYRIGHT: This pattern is owned by Crafty Kitty Crochet (Melissa Moore). Any reselling or distribution of this pattern is prohibited. Sale of items made using this pattern is welcomed, but I do ask that credit/a link be provided back to my site, craftykittycrochet.com.
Comments (7)
Susan Kasmiskie
June 5, 2020 at 7:08 pm
These are lovely! Thank you for sharing your pattern.
Melissa
June 5, 2020 at 7:16 pm
Thank you so much Susan!!! I’m glad you like them! You’re so welcome and thank you for your kind compliments 🙂
Hyacinth Granny Square – Crochet Pattern – Crafty Kitty Crochet
June 19, 2020 at 4:26 pm
[…] hyacinths were part of a special birthday project I made for my cousin. I paired them with my Hydrangea Granny Squares (pattern HERE!) and some regular granny squares (pattern HERE – just replace all the stitches with triple […]
Francesca
September 4, 2020 at 6:26 pm
These are beautiful! I’m looking forward to trying the pattern. Are two full skeins of yarn used for a single square? Or will two skeins make multiple squares? Thank you!
Melissa
September 4, 2020 at 6:37 pm
Thank you Francesca, so glad you like them! That’s a good question! Two full skeins will make multiple squares, I just haven’t gotten around to adding yardage to all my patterns yet, sorry! Hope you love the pattern! ~ Melissa
mari
August 2, 2022 at 6:50 am
dont you perhaps have a video tutorial please?such a beautifull piece of work.
Melissa
August 3, 2022 at 6:23 pm
Thank you Mari! Unfortunately I don’t have a video tutorial filmed at the moment! Videos take me much longer than written patterns so I only have videos for a few of my patterns. Sorry about that! ~ Melissa