
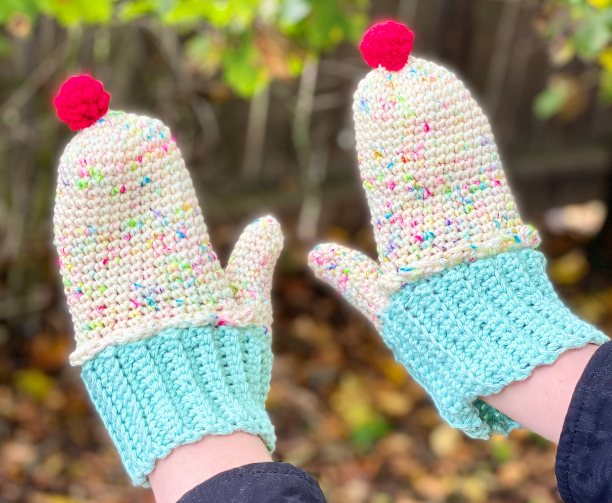
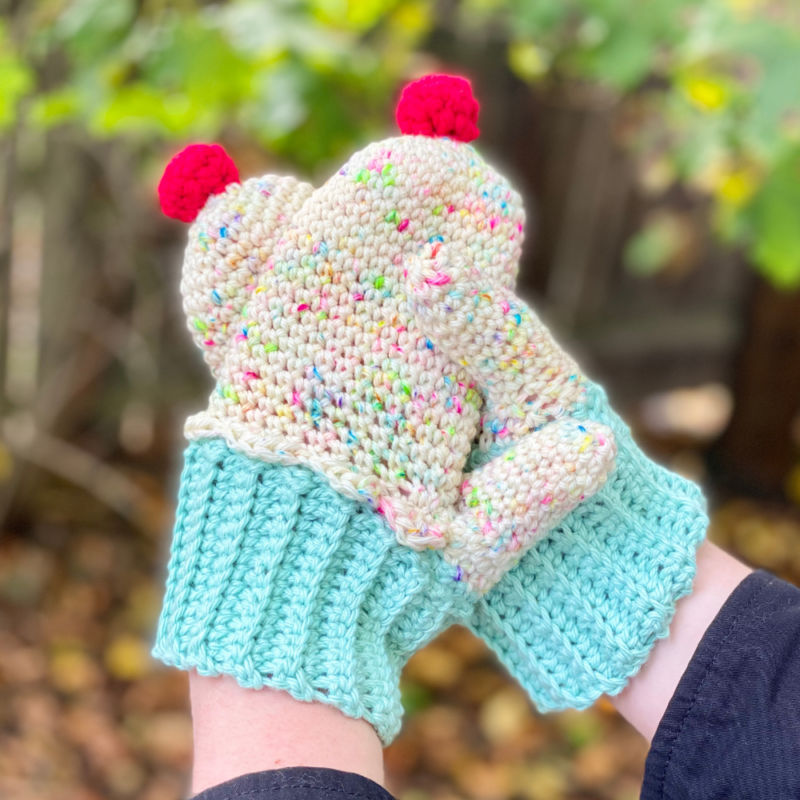
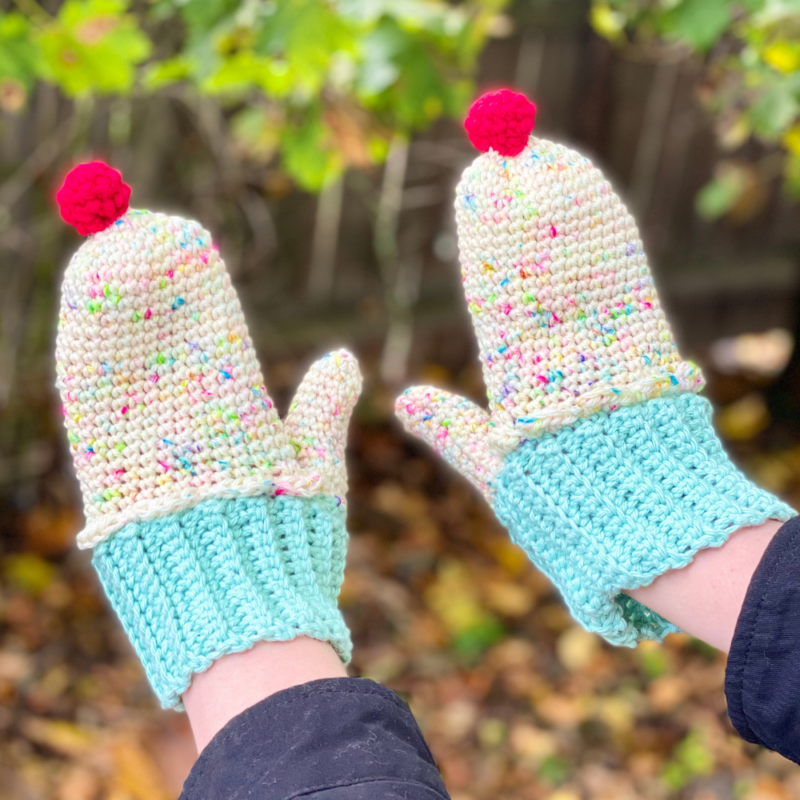
Cupcake Mittens for Kids & Adults – Crochet Pattern
Pin it for later!
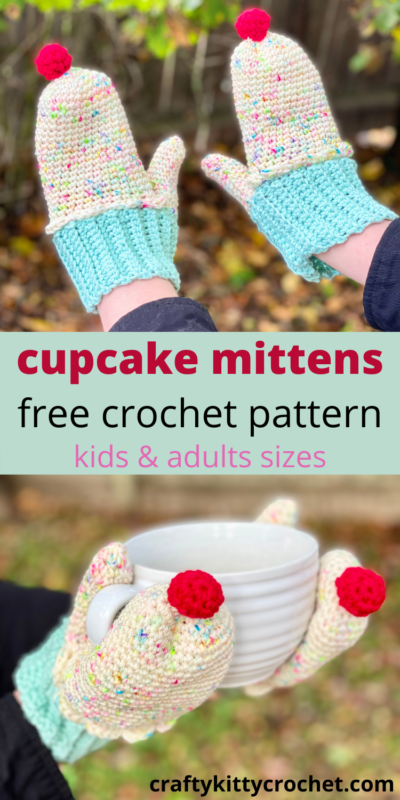
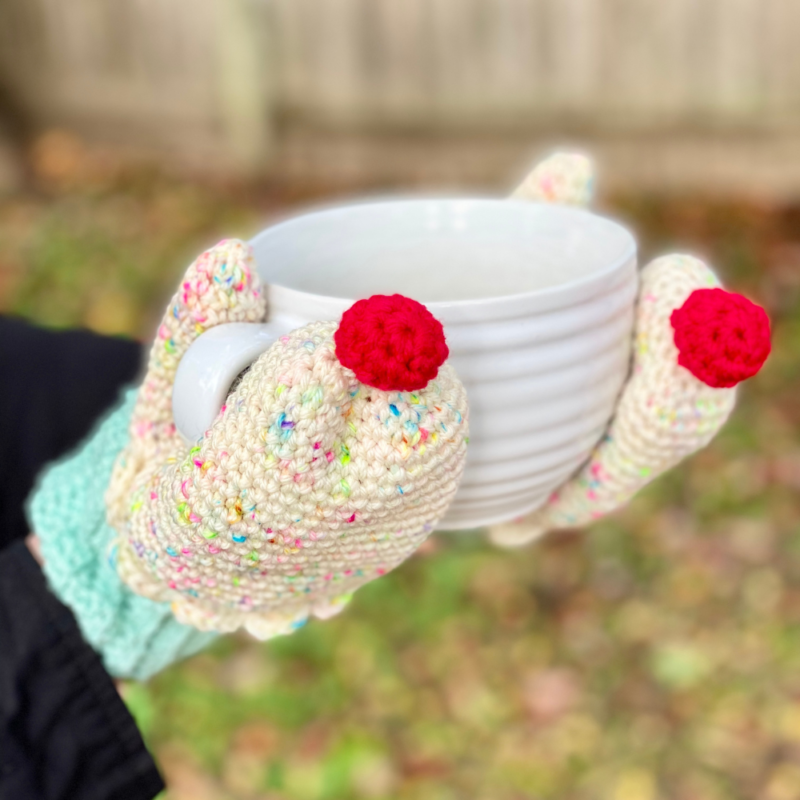
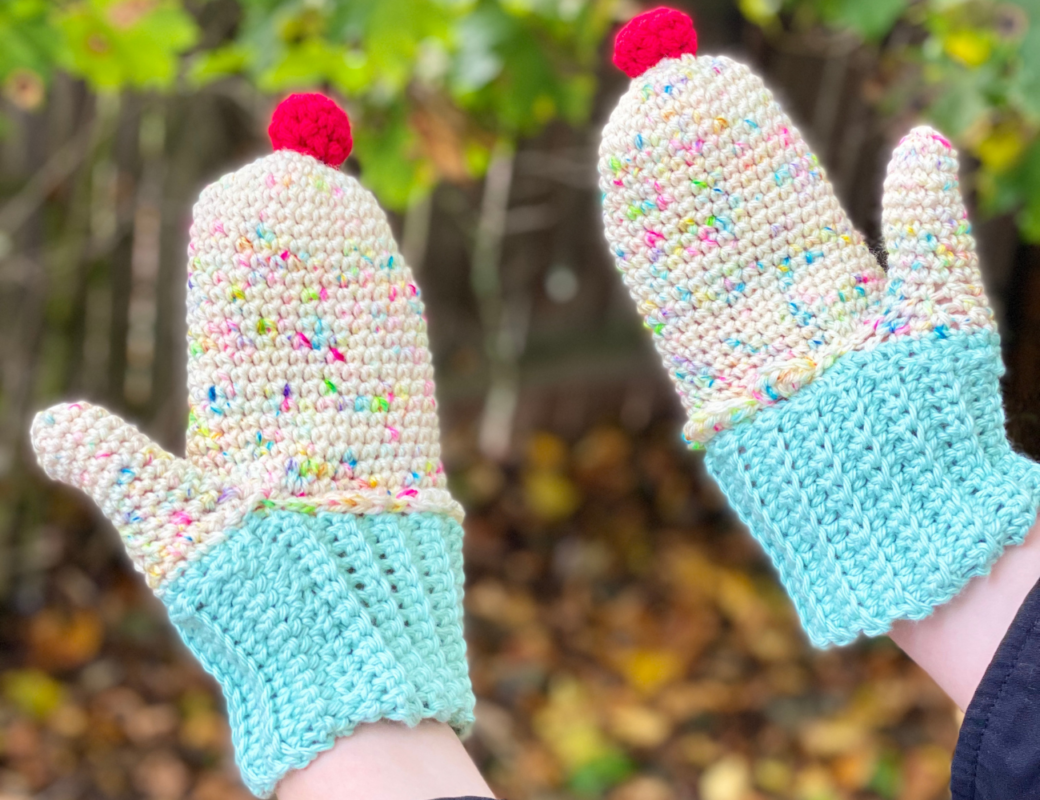
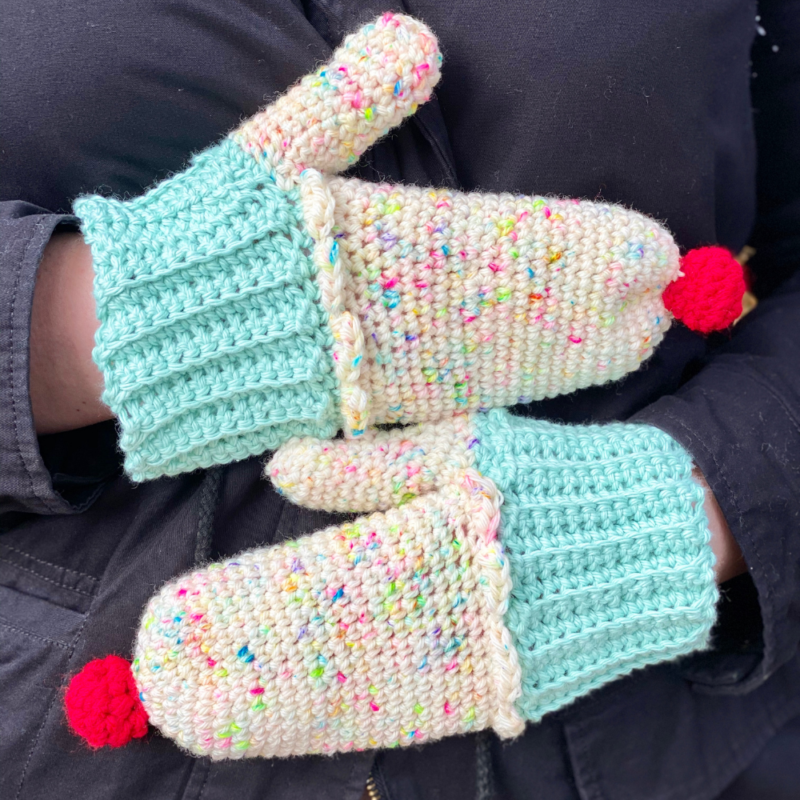
The arrival of Sweater Weather also means it’s Mitten Season, and what better way to keep your hands warm than with some cute and cozy cupcake mittens! These mittens are fun and easy to make, work up fairly quickly, and are the perfect unique gift for birthdays and the Christmas holidays! With both Kids and Adults sizes available in the pattern, you can make a pair for everyone on your gift list! Customize your mittens to have a “sprinkles” look, or in different frosting / cake colors – the possibilities are endless! Glam up your gloves this season with this adorable pattern!
Cupcake Mittens
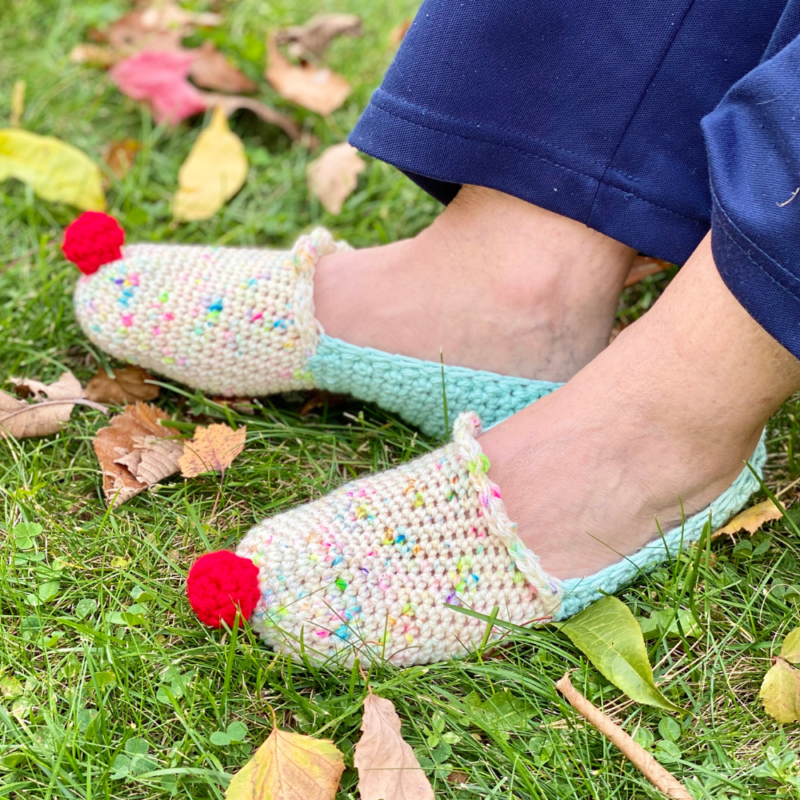
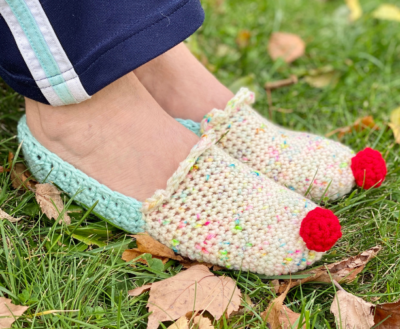
I’m a huge fan of crocheting food in general (as you can see from my Amigurumi Food patterns), but cupcakes are a personal fave of mine! Last week, I published a pattern for some Cupcake Slippers – a cozy, sweet treat for your feet for the upcoming winter months! This week, I’m keeping the cupcake party going (since tomorrow is my birthday!) with these Cupcake Mittens! The speckled yarn gives such a great visual of cake with “sprinkles”, and both the frosting and cake portions of the mitten are so highly customizable. To top it off – literally – are cherries on top of the mittens! These would make such great holiday gifts for any cupcake or dessert lovers, and I think they’re also absolutely perfect for birthdays! I’ll be wearing mine to celebrate my big day tomorrow!
The yarn I used for the frosting on the adult slippers is the absolute perfect yarn and shade – I Love Cake by The Lemonade Shop. For the frosting seen in the process photos, I used a yarn that is also a great “cake” yarn, but sadly, is discontinued! If you’re looking for alternatives, I highly recommend Lion Brand Ice Cream Cotton Blends. It’s not speckled, but comes in all kinds of dessert-themed shades and would make some really fun cupcake slippers! I also used a cotton blend for the “cake” parts of my slippers, so the two yarns would pair well.
Looking for an ad-free PDF copy of this pattern? You can find one in my shop HERE!
Supplies
Size H/8 5 mm crochet hook
About 150 – 175 yds of medium / worsted weight yarn in Frosting Color (speckled yarn works best for sprinkle effect)
- “I Love Cake” by The Lemonade Shop used in photo of modeled mittens
- “Rainbow Confetti” – Big Twist Sincerely used in process photos
About 75 – 100 yds of medium / worsted weight yarn in Cake Color
- “Opaline Green” – Mainstays 100% Cotton used in photo of modeled mittens
- “Pink” – Lion Brand Cotton 24/7 used in process photos
About 20-30 yds of medium / worsted weight yarn in red (Red Heart Super Saver in Cherry Red used in photos)
Yarn Needle
Scissors
Abbreviations
*= indicates beginning/end of a section to be repeated
BLO = back loop only
Ch = chain
FLO = front loop only
Hdc = half double crochet
Rem = remaining
Rep = repeat
Rnd(s) = round(s)
Sc = single crochet
Sc2tog = single crochet 2 together
Sk = skip
Sl St = slip stitch
St(s) = stitch(es)
Gauge
4 sc and 4 rnds/rows = about 1 inch
Size
Adult / Women’s Size – 8 inches circumference around widest part of palm, 8.5 inches total length
Kids’ Size – 7 inches circumference around widest part of palm, 7.5 inches total length
How to Make This
Instructions
Adults Size (make 2)
Hand/Frosting
This piece is worked in continuous rnds; do not join. You may wish to use a stitch marker and move it up at the beginning of each new rnd.
Rnd 1 – With Frosting Color, make a magic ring. 6 sc in ring (6 sc)
Rnd 2 – 2 sc in each st around. (12 sc)
Rnd 3 – 2 sc in next st, sc in next st; rep around. (18 sc)
Rnd 4 – 2 sc in next st, sc in next 2 sts; rep around. (24 sc)
Rnd 5 – 2 sc in next st, sc in next 3 sts; rep around. (30 sc)
Rnds 6 – 25 – sc in each st around. (30 sc per rnd)
Fasten off Frosting Color.
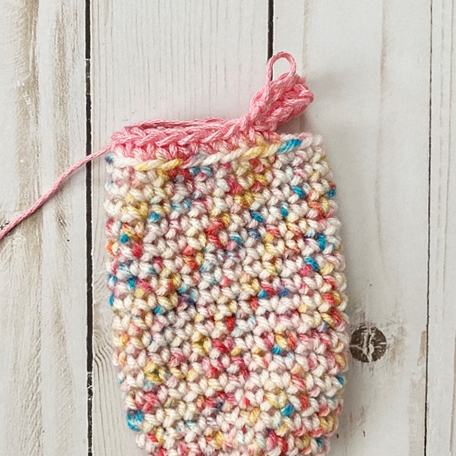
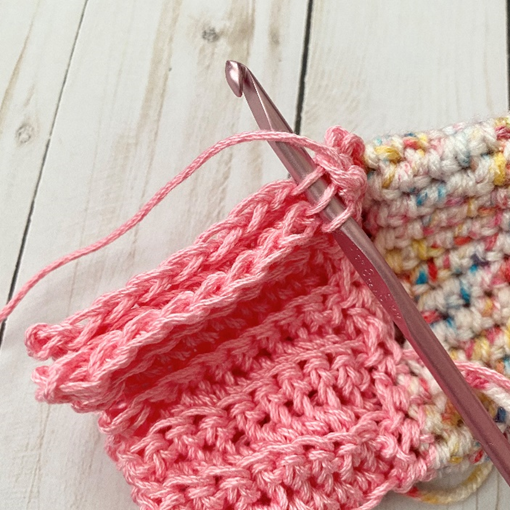
Thumbhole
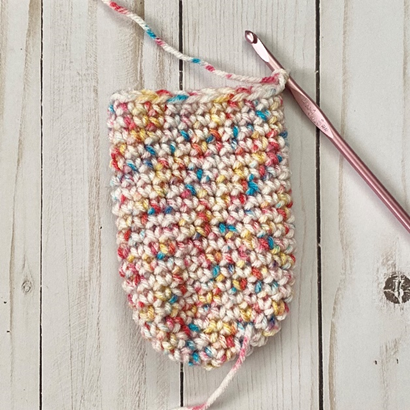
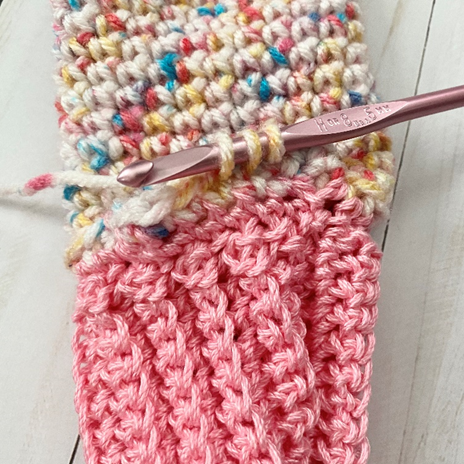
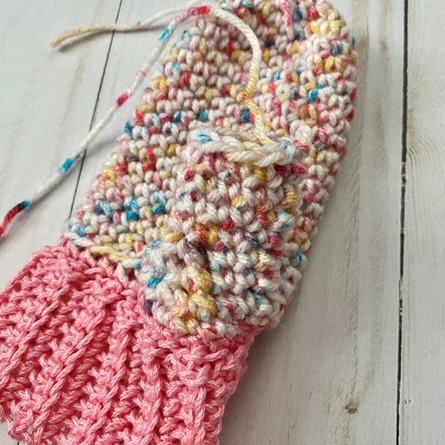
Attach Cake Color in BLO of next st (first photo below), ch 8 (second photo below). Sk 7 sts; sc in BLO of next st (third photo below), and in BLO of next 21 sts. Sc in next 8 ch sts. Sl st to first sc. Do not fasten off. (Fourth photo below shows finished process.) (30 sc)

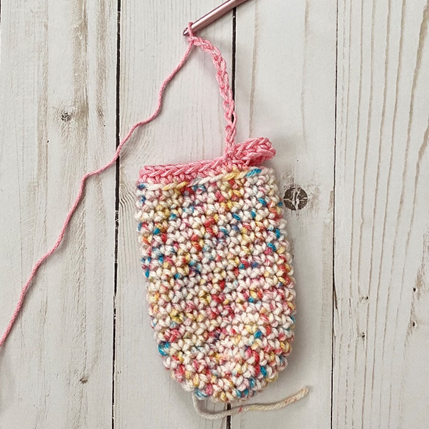
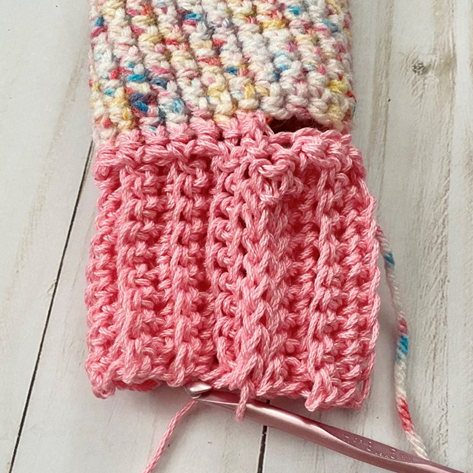
Wrist Cuff/Cake
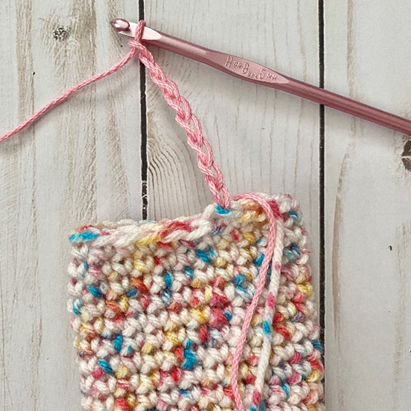
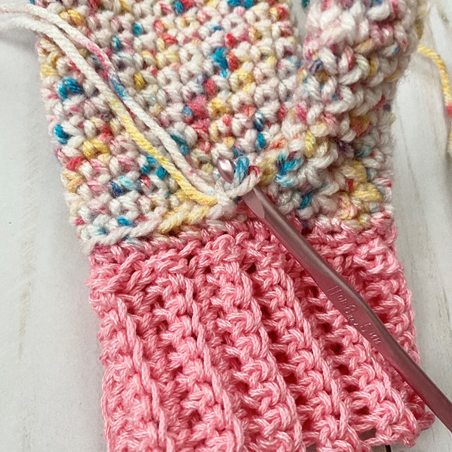
Ch 13 (first photo below).
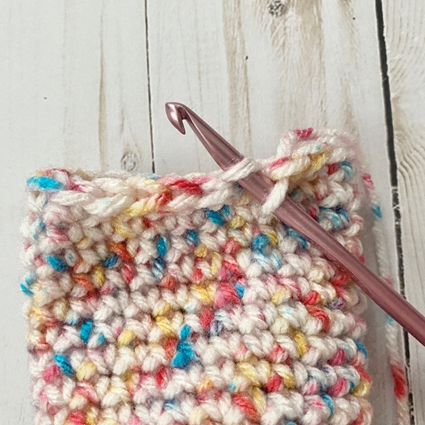
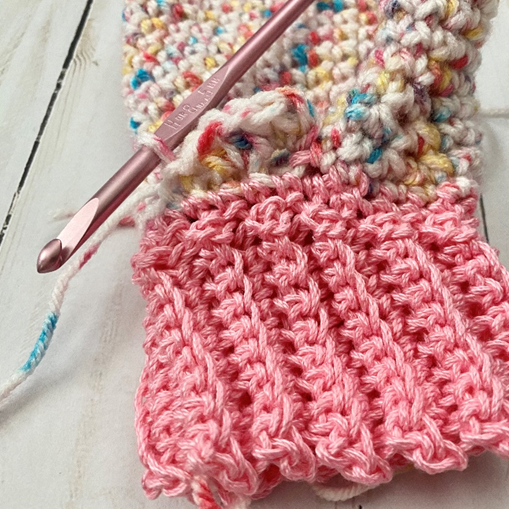
Row 1 – sc in each st across. Join with sl st to same st as beginning ch (second photo below). Sl st in next st. Ch 1, turn. (Third photo below shows finished process.) (12 sc)

Row 2 – working in BLO, sc in each st across. Ch 1, turn (12 sc)
Row 3 – working in BLO, sc in each st across. Join with sl st to same st that row was started in from Thumbhole rnd. Sl st in next st. Ch 1,turn. (12 sc)
Rows 4 – 29 – rep Rows 2 and 3.
Row 30 – Rep Row 2. Do not ch 1 at end of Row 30.
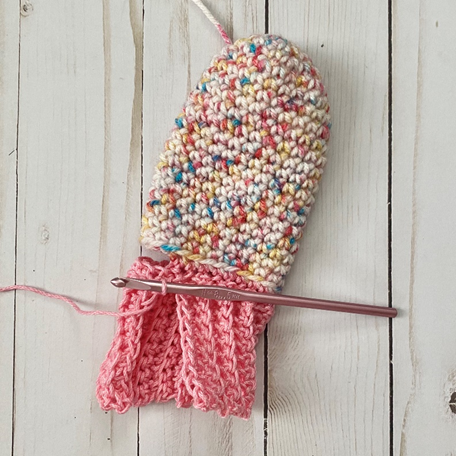
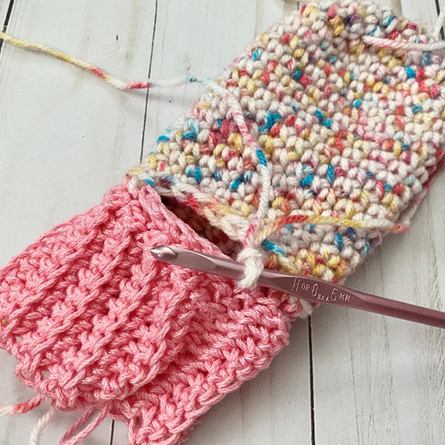
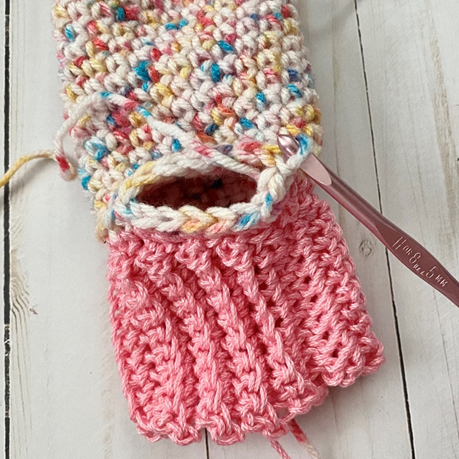
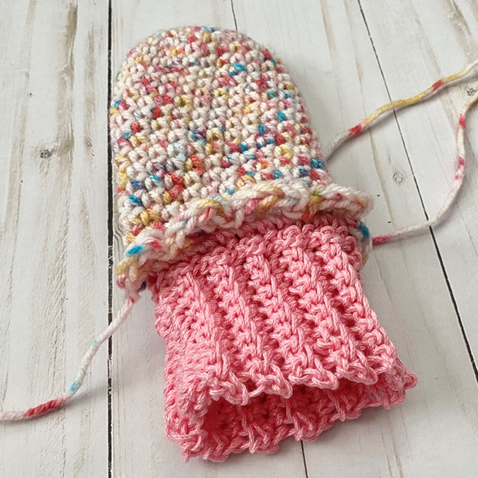
Attaching Cuff
Turn inside out. Place edges of Row 1 and Row 30 together. Working through BLO of row closest to you, and through FLO of row furthest away from you (first photo below), sl st in each st across. Turn right side out again. (Second photo shows finished process.)
Fasten off.
Thumb
Rnd 1 – Attach Frosting Color on right side of thumbhole made, ch 1 (first photo below). Evenly make 17 sc around. Join with sl st to first sc. Ch 1. (Second photo shows finished round.) (17 sc)
Rnd 2 – Sc in next 3 sts. Sc2tog (see photo below) twice. Sc in rem 10 sts. Join with sl st to first sc. Ch 1 (15 sc)
Rnd 3 – Sc in next 3 sts. Sc2tog twice. Sc in rem 8 sts. Join with sl st to first sc. Ch 1 (13 sc)
Rnd 4 – Sc in next 3 sts. Sc2tog over next 2 sts. Sc in rem 8 sts. Join with sl st to first sc. Ch 1 (12 sc)
Rnds 5 – 12 – sc in each st around. (12 sc per rnd)
Rnd 13 – sc2tog around. (6 sc)
Fasten off, leaving long tail for sewing rem gap from Rnd 13.
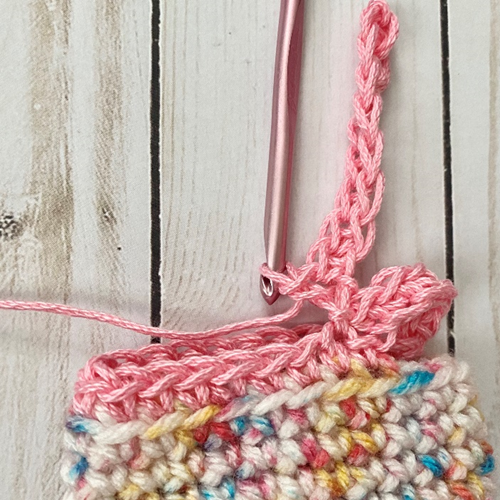
Frosting Swirls
Attaching Frosting Color in FLO of rem st from Thumbhole rnd that is to the left of Thumb (see first photo below), ch 1. *2 hdc in next 2 sts, sl st in next 2 sts (second photo below).* Rep from * to * 5 more times. 2 hdc in next 2 sts, sl st in next st. (Third photo below shows finished rnd.) (7 frosting swirls)
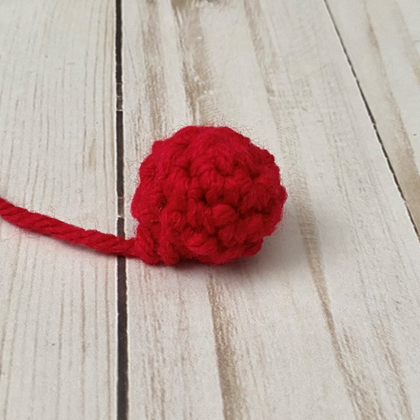
Cherry
Rnd 1 – with Cherry Red, make a magic ring. 6 sc in ring. (6 sc)
Rnd 2 – 2 sc in each st around. (12 sc)
Rnd 3 – sc in each st around. Stuff with red yarn. (12 sc)
Rnd 4 – sc2tog in each st around. (6 sc)
Rnd 5 – sc2tog over next 2 sts. Leave rem sts unworked. (5 sc)
Fasten off, leaving long tail for sewing and closing rem gap from Rnd 5. (First photo below shows finished Cherry.)
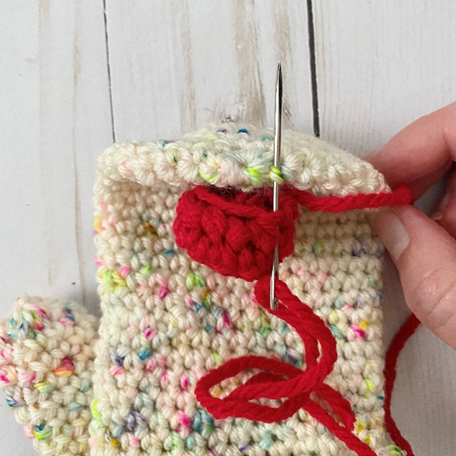
Sew Cherry to Slipper near Rnd 1 of Hand / Frosting (second photo). Weave in all ends.
Kids Size (make 2)
Hand/Frosting
Refer to Adults Size for photos of processes.
Rnds 1 – 4 – Rep Rnds 1- 4 of Adults Size.
Rnds 5 – 20 – sc in each st around. (24 sc)
Fasten off Frosting Color.
Thumbhole
Refer to Adults Size for photos of processes.
Attach Cake Color in BLO of next st, ch 7. Sk 6 sts; sc in BLO of next st (third photo below), and in BLO of next 16 sts. Sc in next 7 ch sts. Sl st to first sc. Do not fasten off. (24 sc)
Wrist Cuff/Cake
Refer to Adults Size for photos of processes.
Ch 10.
Row 1 – sc in each st across. Join with sl st to same st as beginning ch. Sl st in next st. Ch 1, turn. (9 sc)
Row 2 – working in BLO, sc in each st across. Ch 1, turn (9 sc)
Row 3 – working in BLO, sc in each st across. Join with sl st to same st that row was started in from Thumbhole rnd. Sl st in next st. Ch 1,turn. (9 sc)
Rows 4 – 23 – rep Rows 2 and 3; at the end of Row 23, only sl st to same st that row was started in from Thumbhole rnd and do not ch 1.
Attaching Cuff
Refer to Adults Size.
Thumb
Refer to Adults Size for photos of processes.
Rnd 1 – Attach Frosting Color on right side of thumbhole made, ch 1. Evenly make 15 sc around. Join with sl st to first sc. Ch 1. (15 sc)
Rnd 2 – Sc in next 2 sts. Sc2tog twice. Sc in rem 9 sts. Join with sl st to first sc. Ch 1 (13 sc)
Rnd 3 – Sc in next 2 sts. Sc2tog twice. Sc in rem 7 sts. Join with sl st to first sc. Ch 1 (11 sc)
Rnd 4 – Sc in next 2 sts. Sc2tog over next 2 sts. Sc in rem 7 sts. Join with sl st to first sc. Ch 1 (10 sc)
Rnds 5 – 8 – sc in each st around. (10 sc per rnd)
Rnd 9 – sc2tog around. (5 sc)
Fasten off, leaving long tail for sewing rem gap from Rnd 9.
Frosting Swirls
Refer to Adults Size for photos of processes.
Attaching Frosting Color in FLO of rem st from Thumbhole rnd that is to the left of Thumb (see first photo below), ch 1. *2 hdc in next 2 sts, sl st in next 2 sts.* Rep from * to * 4 more times. 2 hdc in next 2 sts, sl st in same st. (6 frosting swirls)
Cherry
Refer to Adults Size.
Here are the finished mittens!
I hope you enjoyed crocheting these mittens along with me today! If you love fun, free patterns like this one, please be sure to subscribe to my email list to stay up to date with all my latest designs:
Also, please be sure to follow me on social media, and tag me in finished photos of your items made from my patterns, so that I can see your lovely work!
Don’t forget to pin it for later HERE!
And you can find that ad-free PDF pattern HERE!
Happy Crocheting!
COPYRIGHT: This pattern is owned by Crafty Kitty Crochet (Melissa Moore). Any reselling or distribution of this pattern is prohibited. Sale of items made using this pattern is welcomed, but I do ask that credit/a link be provided back to my site, craftykittycrochet.com.
Comments (2)
Adorable Fun Crochet Mittens For Kids – 1001 Patterns
October 3, 2022 at 6:43 pm
[…] original free pattern on craftykittycrochet.com, or read more about […]
25+ Gorgeous and Free Crochet Gloves and Mittens – love. life. yarn.
October 20, 2023 at 3:14 pm
[…] Click here for the free crochet pattern! […]