
Darling Daisy Bunny Basket – Crochet Pattern
Pin it for later!
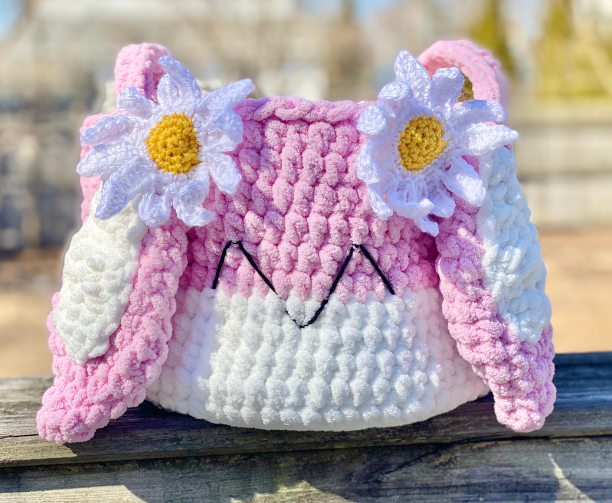
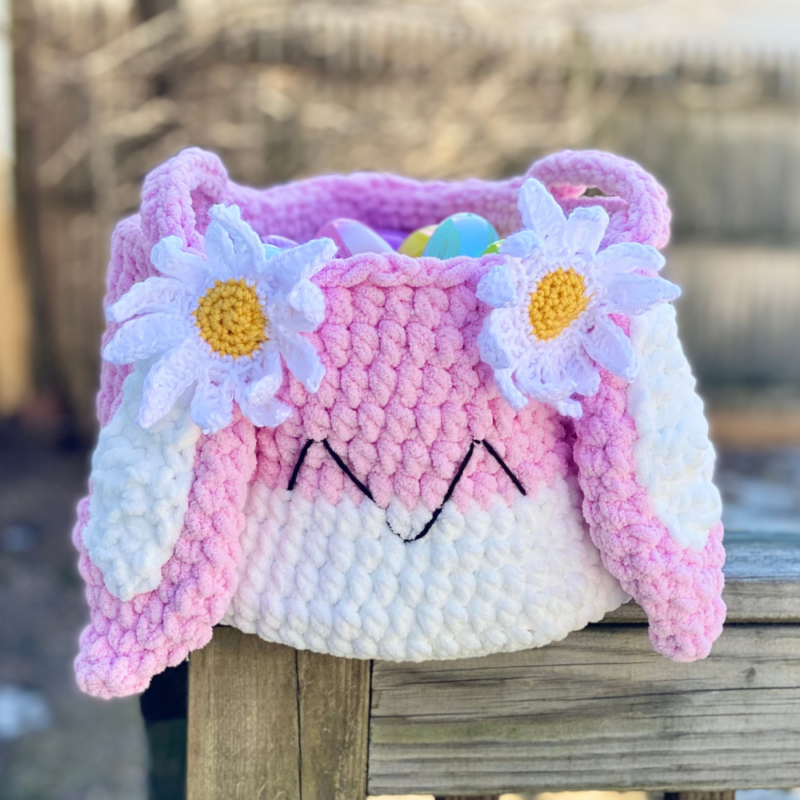
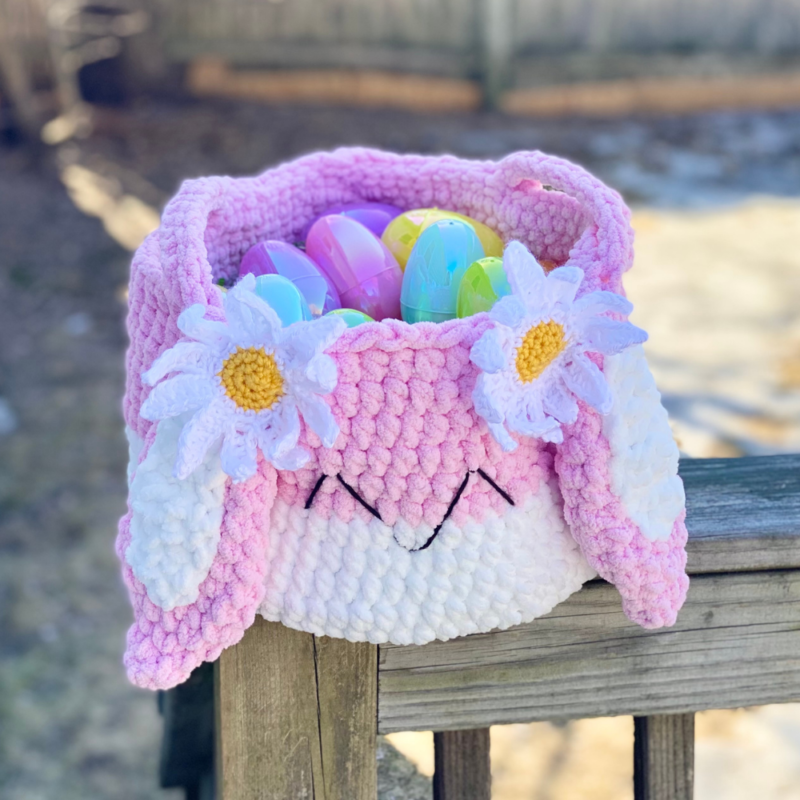
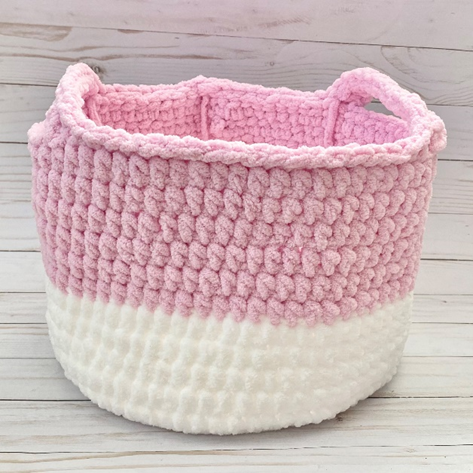
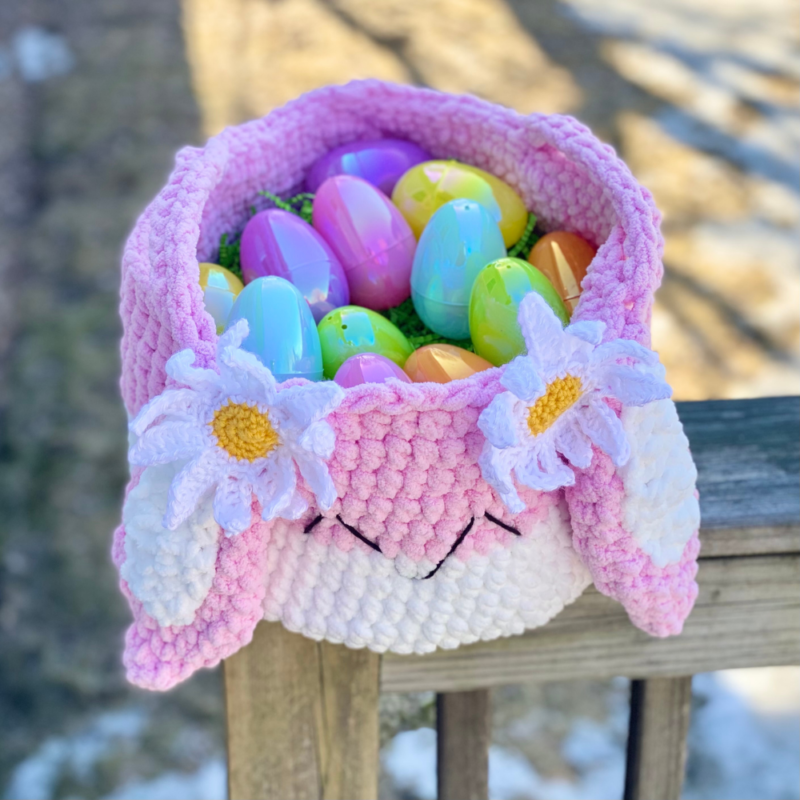
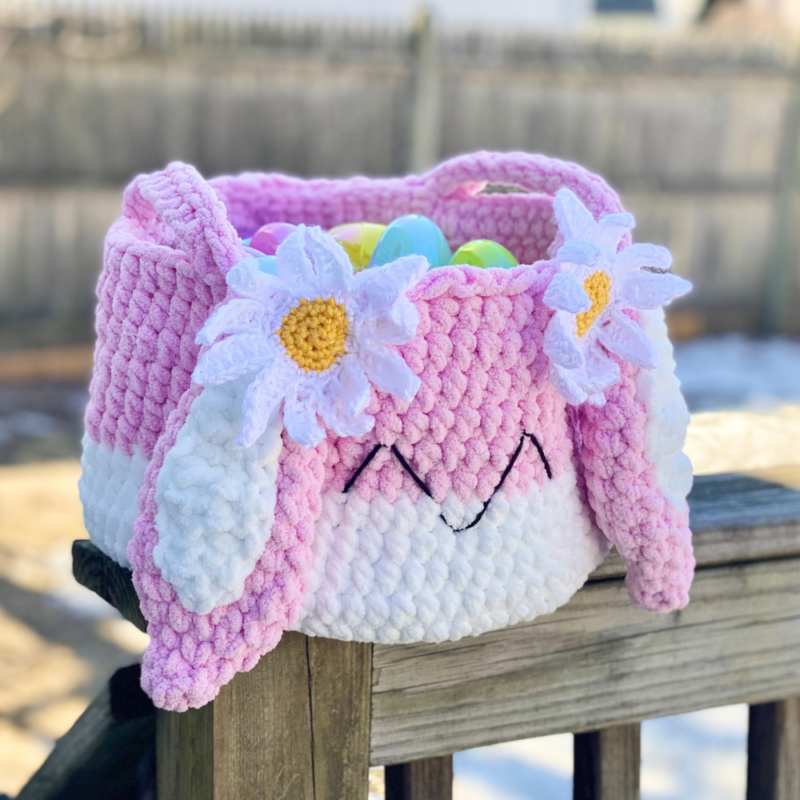
Just in time for Easter, here’s an adorable and easy to make DIY basket that is sure to brighten up any gift! And it’s not just for the holidays – use this sweet rabbit basket for home decor and storage all year round! It’s the perfect accent to a kids’ room, nursery, craft room, home office, etc. And if you are using it as an Easter basket, it doesn’t get much more springy that this happy little bunny with daisies on its ears! And best of all, the pattern is easy, has plenty of photos, and works up quickly due to the bulky Bernat Blanket yarn. It’s a win-win!
Darling Daisy Bunny Basket
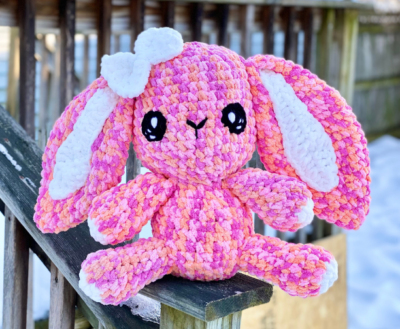
Recently I started getting more into basket crocheting, and I have to say that I’m really enjoying it! You might remember my Penguin Basket from the holidays, and I even got to make a Unicorn Basket for the Underground Crafter in February as a guest post! And who could forget last year’s Mermaid Easter Basket. Since I had so much fun making last week’s Spring Sherbet Bunny Amigurumi, I thought I’d go ahead and whip up a fun and fast bunny basket pattern. Combine that with some daisy designs I’ve been working on, and you’ve got one springy little bunny basket!
Speaking of having fun with patterns, I’ve been having lots of fun with Bernat Blanket lately! The yarn I used for this pattern just screams spring. Find it on Amazon:
Looking for the ad-free PDF? You can find one in my shop HERE!
Supplies
Size L/11 – 8 mm crochet hook
Size 7 – 4.5 mm crochet hook
Bernat Baby Blanket (10.5 oz) in Baby Pink and White (super bulky; about 125 yds needed of each)
Caron Simply Soft in White (about 75 yds needed) and Sunshine (about 10 yds needed)
Small amount of medium weight black yarn
Fiberfill stuffing
Scissors
Yarn Needle with large eye
Abbreviations
*= indicates beginning/end of a section to be repeated
BLO = back loop only
Ch = chain
Dc = double crochet
Hdc = half double crochet
Rep = repeat
Rnd(s) = round(s)
Sc = single crochet
Sc2tog = single crochet 2 together
Sk = skip
Sl St = slip stitch
St(s) = stitch(es)
Gauge
Exact gauge is not essential to this project
Size
About 8 inches tall by 11.5 inches wide
How to Make This
Instructions
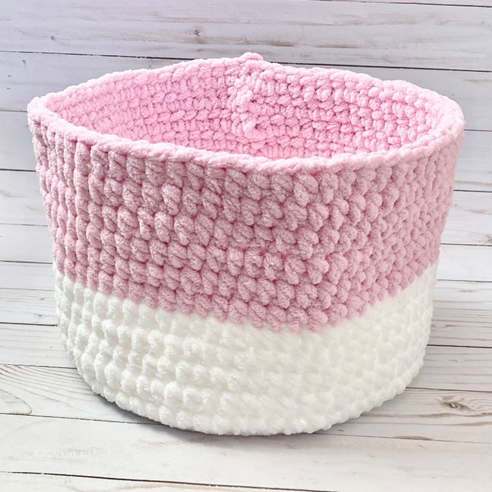
Basket
With L hook and White blanket yarn, ch 2.
Rnd 1 – 10 hdc in first st. Join with sl st to first hdc, ch 2. (10 hdc)
Rnd 2 – 2 hdc in each st around. Join with sl st to first hdc, ch 2. (20 hdc)
Rnd 3 – 2 hdc in next st, hdc in next st; rep around. Join with sl st to first hdc, ch 2. (30 hdc)
Rnd 4 – 2 hdc in next st, hdc in next 2 sts; rep around. Join with sl st to first hdc, ch 2. (40 hdc)
Rnd 5 – 2 hdc in next st, hdc in next 3 sts; rep around. Join with sl st to first hdc, ch 2. (50 hdc)
Rnd 6 – 2 hdc in next st, hdc in next 4 sts; rep around. Join with sl st to first hdc, ch 2. (60 hdc)
Rnd 7 – 2 hdc in next st, hdc in next 5 sts; rep around. Join with sl st to first hdc, ch 2. (70 hdc)
Rnd 8 – working in BLO, hdc in each st around. Join with sl st to first hdc, ch 2. (70 hdc)
Rnds 9 – 13 – hdc in each st around. In last st, switch to Pink. Join with sl st to first hdc, ch 2. (70 hdc)
Rnds 14 – 19 – hdc in each st around. Join with sl st to first hdc, ch 2. Do not ch 2 at end of Rnd 19. (70 hdc)
Handles
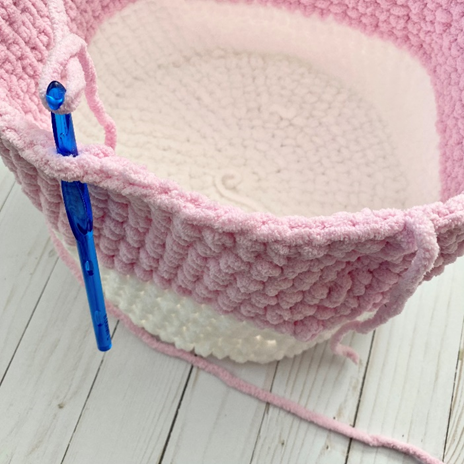
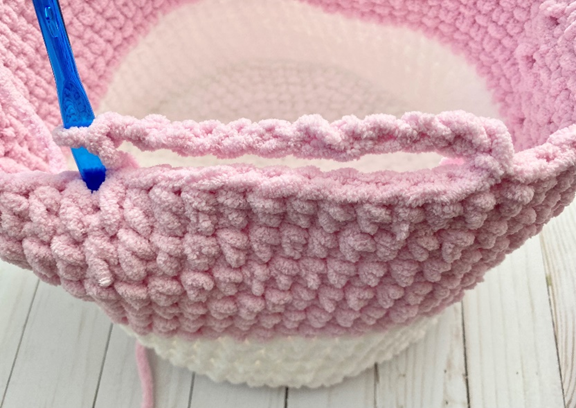
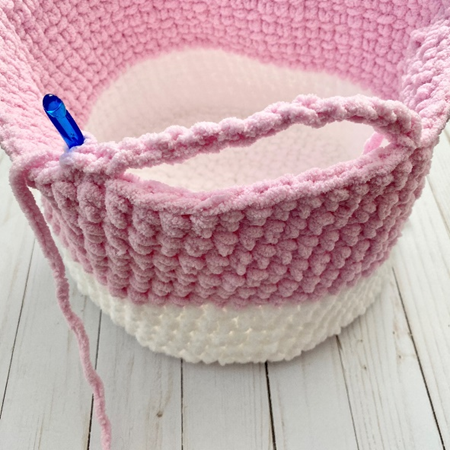
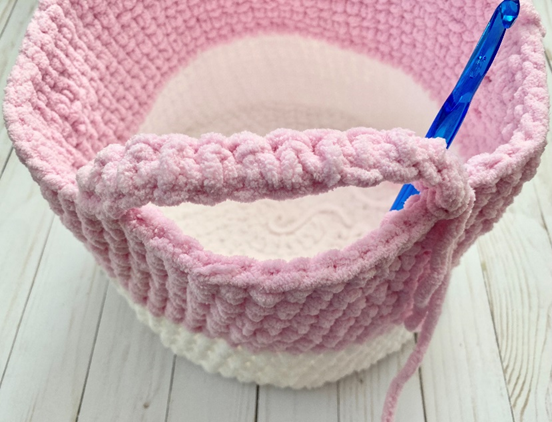
With L hook, attach Pink 12 sts from last st of Rnd 19 on Basket (first photo below), ch 12 (second photo below). Sk 11 sts, sl st in next st (third photo below), and sl st in st after that (fourth photo below).
Row 1 – Ch 1, turn. Sc in each st across. Sl st to next st on Basket (fifth photo below). (11 sc)
Fasten off. Rep on other side, counting 12 sts in opposite direction of last st of Rnd 19 on Basket.

Edging
With L hook, attach Pink near last st of Rnd 19 on Basket, ch 1, sk next st. Loosely sl st in each st around. Join with sl st to first sl st. (69 sl sts)
Fasten off. (Sixth photo above shows finished Handles and Edging.)
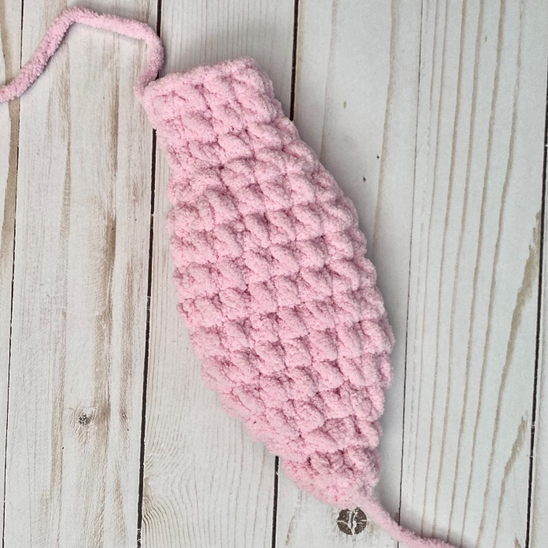
Outer Ear (Make 2)
This piece is worked in continuous rnds; do not join. You may wish to use a stitch marker and move it up at the beginning of each new rnd.
Rnd 1 – With L hook and Pink, make a magic ring. 6 sc in ring. (6 sc)
Rnd 2 – Sc in each st around. (6 sc)
Rnd 3 – 2 sc in next st, sc in next st; rep around. (9 sc)
Rnd 4 – 2 sc in next st, sc in next 2 sts; rep around. (12 sc)
Rnd 5 – 2 sc in next st, sc in next 3 sts; rep around. (15 sc)
Rnds 6 – 9 – sc in each st around. (15 sc)
Rnd 10 – sc2tog over next 2 sts, sc in next 3 sts; rep around. (12 sc)
Rnd 11 – sc2tog over next 2 sts, sc in next 2 sts; rep around. (9 sc)
Rnds 12 – 14 – sc in each st around. (9 sc)
Fasten off, leaving long tail for sewing. (Photo below shows finished piece.)
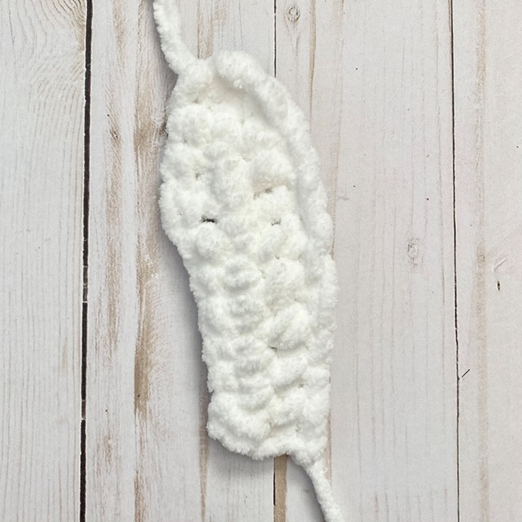
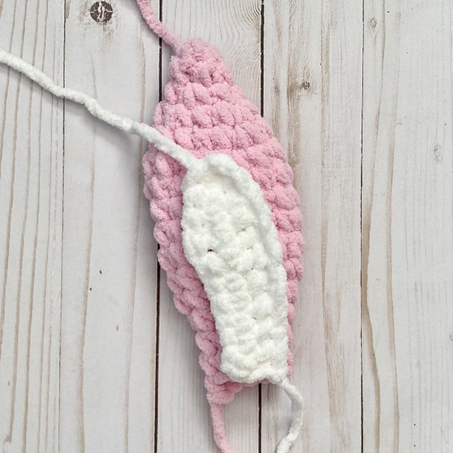
Inner Ear (make 2)
With L hook and White blanket yarn, Ch 11.
Row 1 – in 2nd ch from hook, sc. Hdc in next 2 sts. Dc in next 2 sts. Hdc in next 2 sts. Sc in last 3 sts. Ch 1, turn. (4 sc, 4 hdc, 2 dc)
Row 2 – sc in next 3 sts. Hdc in next 2 sts. Dc in next 2 sts. Hdc in next 2 sts. Sc in last st. (4 sc, 4 hdc, 2 dc)
Fasten off, leaving long tail for sewing. (Photo below shows finished piece.)
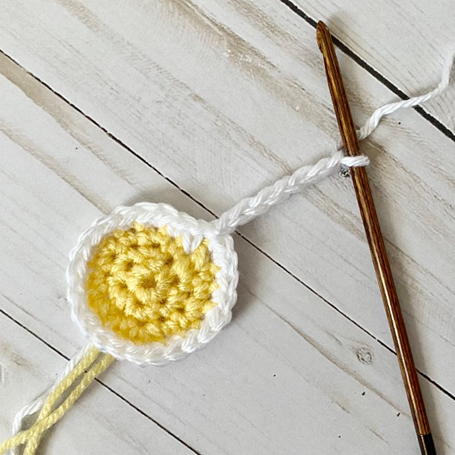
Daisy (make 2)
Rnds 1 – 2 are worked in continuous rnds; do not join. You may wish to use a stitch marker and move it up at the beginning of each new rnd.
Rnd 1 – With 7 hook and Sunshine, make a magic ring. 6 sc in ring. (6 sc)
Rnd 2 – 2 sc in each st around. (12 sc)
Rnd 3 – 2 sc in next st, sc in next st; rep around. (18 sc)
Rnd 4 – 2 sc in next st, sc in next 2 sts; rep around. Attach White (Caron yarn) in last st. (24 sc)
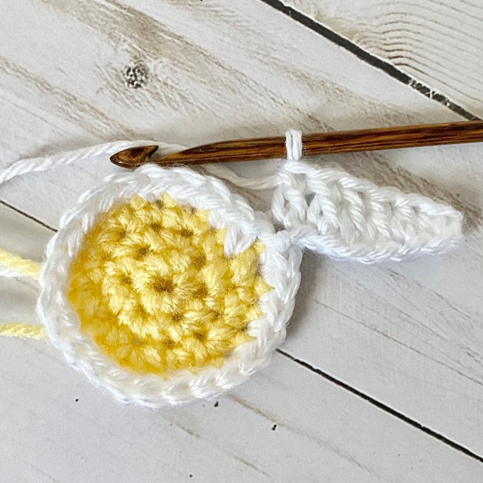
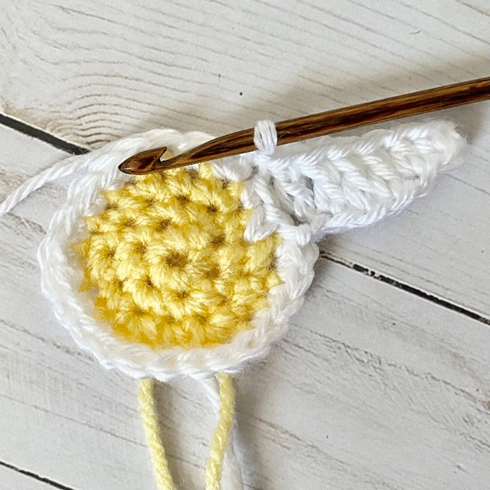
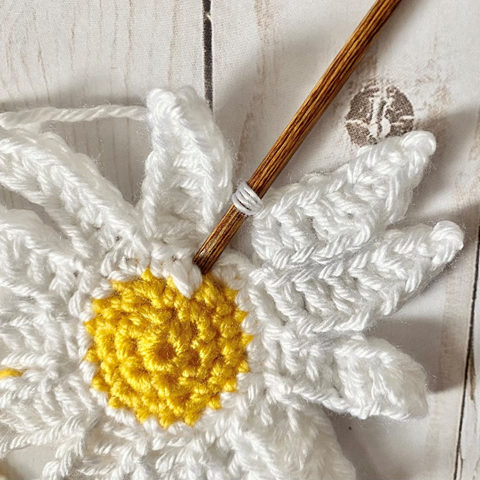
Rnd 5 – Sl st into next st. *Ch 7 (first photo below). Working back down ch, in 2nd ch from hook, sc. Hdc in next st. Dc in next 4 sts. (See second photo below.) Working into sts from Rnd 4, sk next st, sl st in next (third and fourth photos below).* Rep from * to * 11 more times; for 12th and last petal, make second sl st where first sl st of rnd was made (before first ch-7 – see fifth photo below). (12 petals)
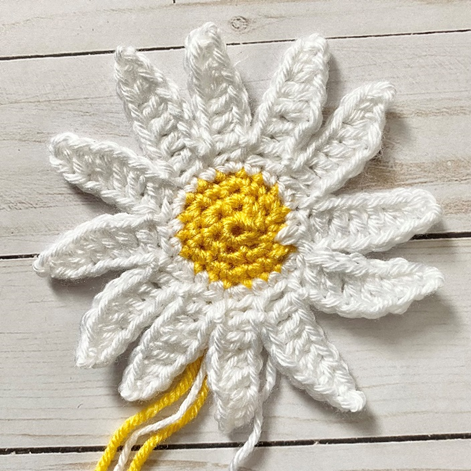
Fasten off, leaving long tail for sewing. (Sixth photo below shows finished piece.)
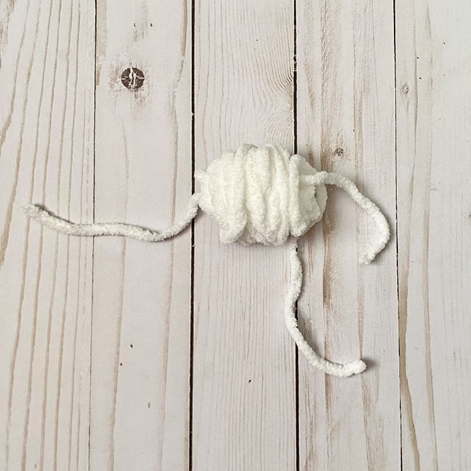
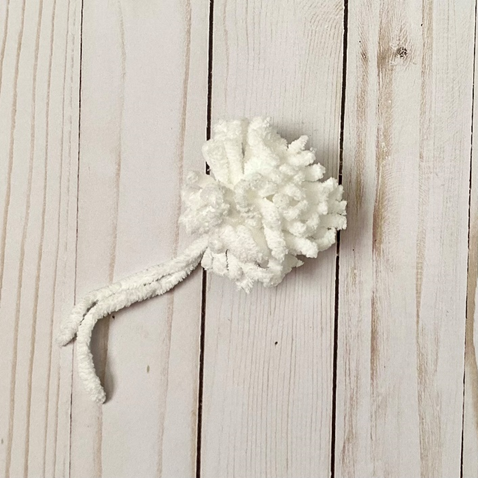
Cotton Tail
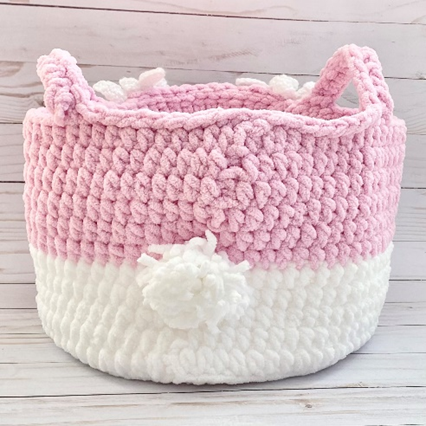
Wrap White around index finger or another small, long object. Carefully remove and set aside. Cut a piece of White that is approx.. 3 times longer than size of current pom pom. Carefully weave it through center of pom pom (first photo below). Tie several tight knots to secure. Cut pom pom at side opposite knot. Trim pom pom. Leave knotted tail for sewing to Bunny. (Second photo below shows finished piece.)
Finishing
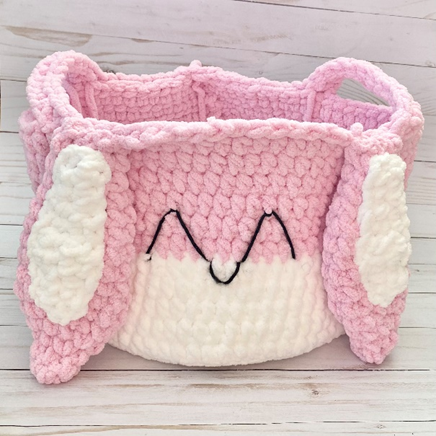
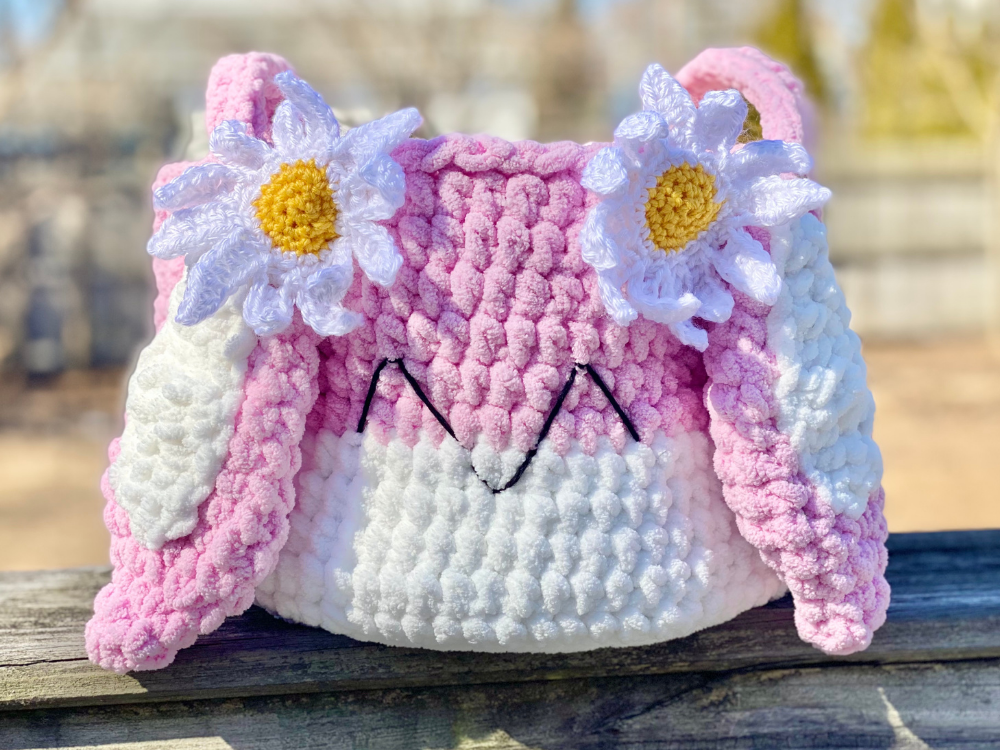
Sew Inner Ears to Outer Ears (first photo below). Place each Ear near a Handle and sew onto Basket (second photo). With Black, sew two upside down V’s between Ears, near border of White/Pink sections, for Eyes. Sew small V underneath for Nose. (See third photo.) Sew a Daisy near the top of each Ear. (See fourth photo.) Sew Cotton Tail to back of Basket, near border of White/Pink section. (See fifth photo.)
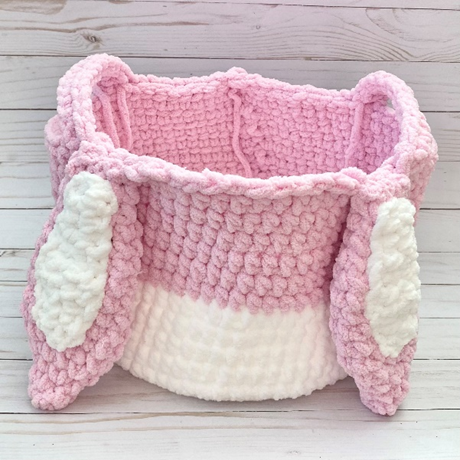
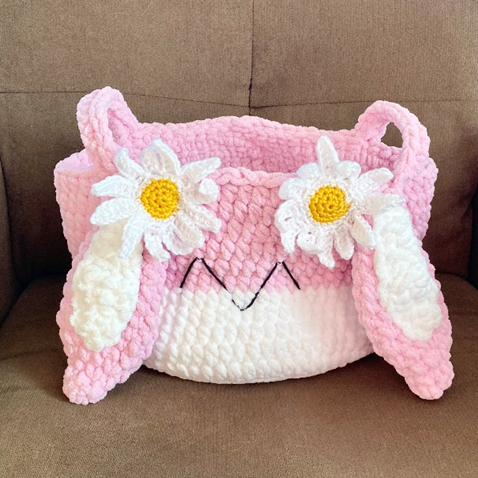
Here is the finished basket!

I hope you enjoyed crocheting this bunny basket along with me today. If you love fun, free patterns like this one, then please be sure to sign up for my email list to keep up to date with all my latest designs:
Also, please be sure to follow me on social media, and tag me in photos of your finished projects made from my patterns, so I can see your lovely work!
Don’t forget to pin it for later HERE!
And you can find that ad-free PDF pattern HERE!
Happy Crocheting!
COPYRIGHT:
This pattern is owned by Crafty Kitty Crochet (Melissa Moore). Any reselling or distribution of this pattern is prohibited. Sale of items made using this pattern is welcomed, but I do ask that credit/a link be provided back to my site, craftykittycrochet.com.

Comments (10)
Linda Evers
April 2, 2022 at 7:22 pm
How did you get it so it doesn’t collapse
Melissa
April 2, 2022 at 8:59 pm
Hi Linda! The stitches need to be very tight in order for it to stand up straight – so if you are a bit more of a loose crocheter and the stitches are not standing up properly, you might want to go down a hook size and add an extra increase round at the beginning (when you’re making the bottom) and add a few more rounds at the end to make up the sizing. Hope that helps!! ~ Melissa
Irene
October 10, 2022 at 2:54 pm
What’s the fiberfill stuffing for
Melissa
October 10, 2022 at 6:05 pm
Hi Irene! It can be used to slightly stuff the ears but that’s really not necessary since they look pretty good just pressed flat! 🙂
Cutest FREE Easter Crochet Bunny Basket Patterns – I Good Ideas
March 30, 2023 at 6:30 pm
[…] 3: DAISY BUNNY BASKET FREE PATTERN […]
10 Crochet Spring Basket Free Patterns
March 21, 2026 at 3:15 pm
[…] Craftykittycrochet […]
10 Crochet Spring Basket Free Patterns – 101Patterns
April 10, 2026 at 8:27 am
[…] Craftykittycrochet […]
24 Crochet Animal Baskets Free Patterns
June 6, 2026 at 3:34 am
[…] excels in home decor, storage, and gifting, look no further than this charming design created by Melissa. Its whimsical appearance makes it a delightful addition to any room while serving multiple uses […]
24 Crochet Animal Baskets Free Patterns
June 6, 2026 at 3:49 am
[…] you’re in search of a pattern that serves multiple purposes, look no further than the Darling Daisy Bunny Basket designed by Melissa. It’s perfect for home decor, storage, or as a thoughtful […]
10 Free Crochet Patterns for Spring Baskets – Mini Hooks
June 17, 2026 at 6:17 am
[…] Craftykittycrochet […]