
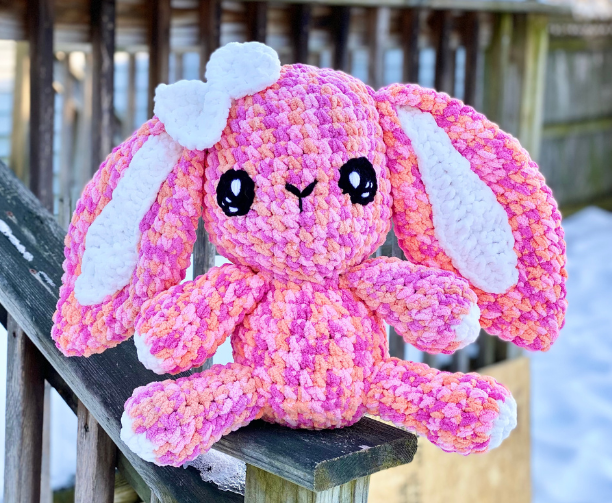
Spring Sherbet Bunny – Amigurumi Crochet Pattern
Pin it for later!
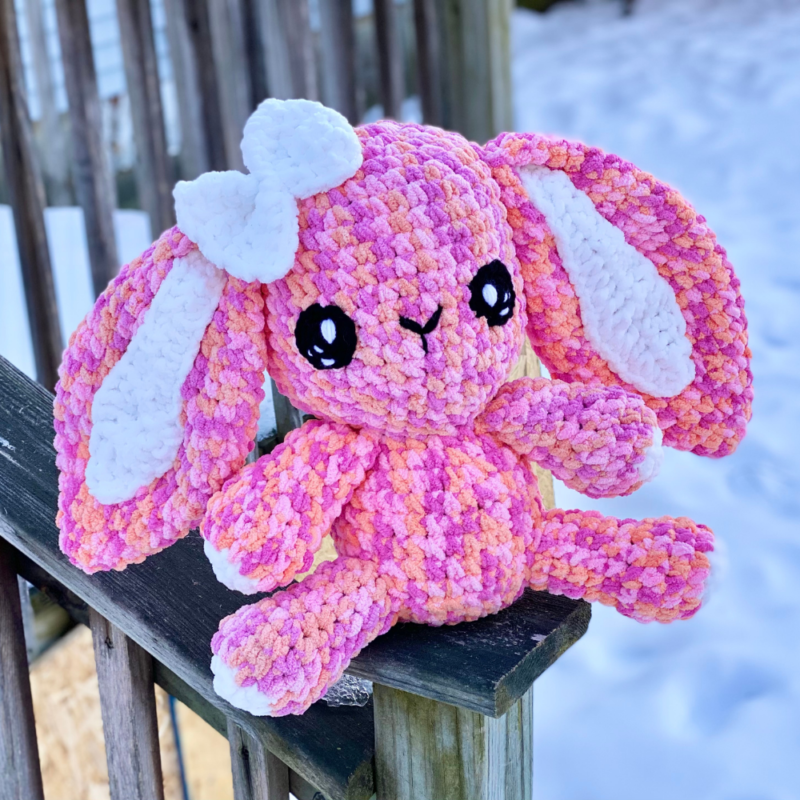
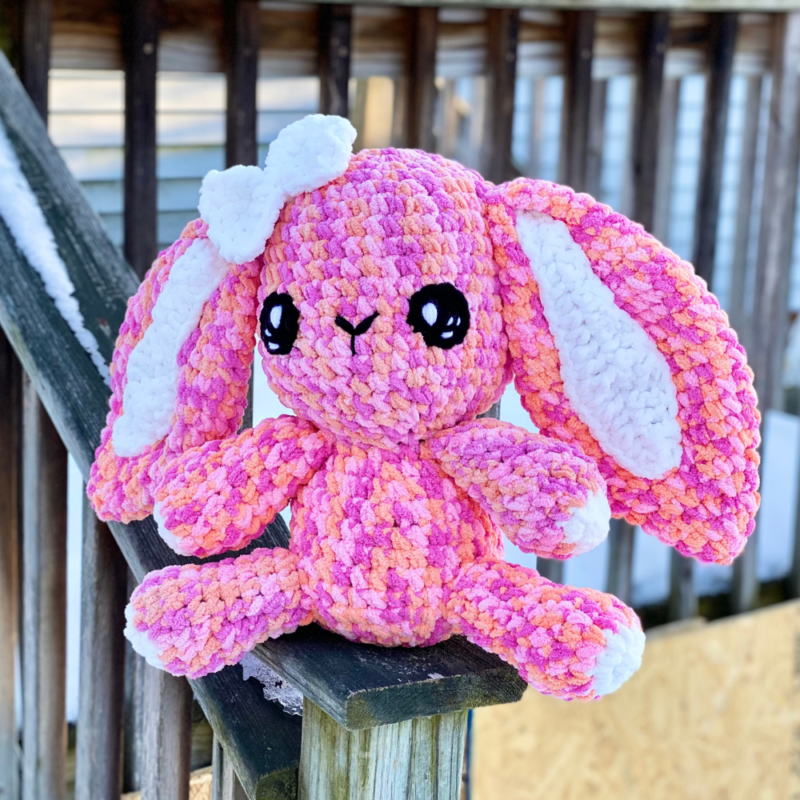
Bring on the spring sweetness with this adorable amigurumi bunny pattern! This cute rabbit is a large, soft plush that kids of all ages can appreciate! What a great Easter gift or kids’ toy it would make – and it’s also the perfect gift for anyone in your life who loves bunnies and cute, kawaii animals! The pattern is easy, and although the finished piece is large, the super bulky yarn does all the work here – so it’s still a fast and fun pattern that you can make in a weekend! With this bright bunny around, it will really feel like spring has sprung!
Spring Sherbet Bunny
I came up with this cute little bunny based on my own countdown to spring! Living in upstate NY can be tough during the winter, even though I don’t really mind the snow. But spending more time outside because of a new puppy, combined with coming up on that time of year where winter has been dragging on for a while, have really given me spring fever! Fall still has my heart when it comes to a favorite season, but spring is close to being tied! I love everything about the mild weather, fun pastels, and cute Easter animals that this season has to offer. (If you love spring too, be sure to check out another Amigurumi Bunny pattern of mine, my Amigurumi Sheep, and my Cherry Blossom Hat and Scarf patterns!)
One of my favorite things about this bunny’s look is the fun , soft multi-colored yarn it’s made out of! This kind of softness and texture is signature to Bernat Baby Blanket yarn. And the fun blend of colors is perfect for a cute Easter bunny! You can get this color way – “Peachy” – on Amazon:
On March 5, 2021, I’m honored that this bunny was featured in the Springtime Crochet Blog Hop by Crochets by Trista! You can still purchase the PDF (see below); but to find other fun patterns on their feature day, as well as check out fun designs and support some really talented crocheters, head over to her blog hop HERE!
Looking for the ad-free PDF pattern? You can find one in my shop HERE!

Supplies
L-11 / 8 mm hook
G-6 / 4.25 mm hook
4 skeins of Bernat Baby Blanket in Peachy (super bulky; 3.5 oz size; 344 yds used)
1 skein of Bernat Blanket in White (super bulky; 10.5 oz size; about 75 yds used)
Small amount of Red Heart Super Saver in Black and White
Fiberfill stuffing
Yarn Needle with large eye
Scissors
Abbreviations
Ch = chain
Dc = double crochet
Hdc = half double crochet
Sc = single crochet
Sc2tog = single crochet 2 together
St(s) = stitch(es)
Rem = remaining
Rep = repeat
Rnd(s) = round(s)
Tr = triple crochet
Gauge
Exact gauge is not essential to this project.
Size
About 15 inches length by 20 inches width (including ears)
How to Make This
Instructions
Head/Body
This piece is worked in continuous rnds; do not join. You may wish to use a st marker and move it up at the beginning of each new rnd.
Rnd 1 – with L hook and Peachy, make a magic ring. 6 sc in ring. (6 sc)
Rnd 2 – 2 sc in each st around. (12 sc)
Rnd 3 – 2 sc in next st, sc in next st; rep around. (18 sc)
Rnd 4 – 2 sc in next st, sc in next 2 sts; rep around. (24 sc)
Rnd 5 – 2 sc in next st, sc in next 3 sts; rep around. (30 sc)
Rnd 6 – 2 sc in next st, sc in next 4 sts; rep around. (36 sc)
Rnd 7 – 2 sc in next st, sc in next 5 sts; rep around. (42 sc)
Rnds 8 – 16 – sc in each st around. Begin stuffing. (42 sc)
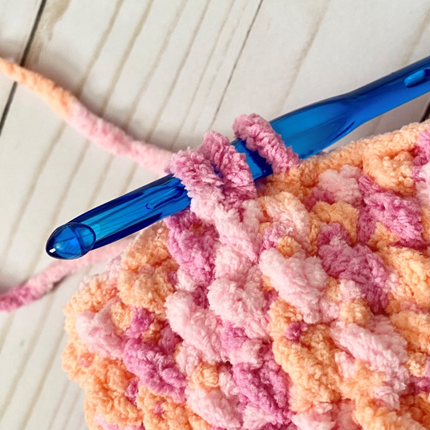
Rnd 17 – sc2tog (first photo below) over next 2 sts, sc in next 5 sts; rep around. (36 sc)
Rnd 18 – sc2tog over next 2 sts, sc in next 4 sts; rep around. (30 sc)
Rnd 19 – sc2tog over next 2 sts; sc in next 3 sts; rep around. (24 sc)
Rnd 20 – sc2tog over next 2 sts; sc in next 2 sts; rep around. Continue stuffing. (18 sc)
Rnd 21 – 2 sc in next st, sc in next 2 sts; rep around. (24 sc)
Rnd 22 – 2 sc in next st, sc in next 3 sts; rep around. (30 sc)
Rnd 23 – 2 sc in next st, sc in next 4 sts; rep around. (36 sc)
Rnds 24 – 30 – sc in each st around. Continue stuffing. (36 sc)
Rnd 31 – sc2tog over next 2 sts, sc in next 4 sts; rep around. (30 sc)
Rnd 32 – sc2tog over next 2 sts; sc in next 3 sts; rep around. (24 sc)
Rnd 33 – sc2tog over next 2 sts; sc in next 2 sts; rep around. (18 sc)
Rnd 34 – sc2tog over next 2 sts; sc in next st; rep around. Finish stuffing. (12 sc)
Rnd 35 – sc2tog over next 2 sts; rep around. (6 sc)
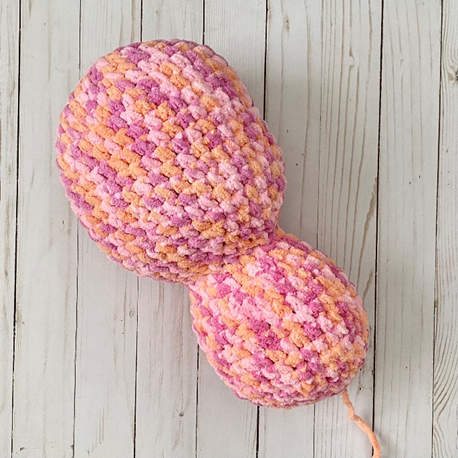
Rnd 36 – sc2tog over next 2 sts. Leave rem sts unworked. (Second photo below shows finished piece at this stage.) (5 sc)
Fasten off, leaving tail to sew rem gap from end of Rnd 36.
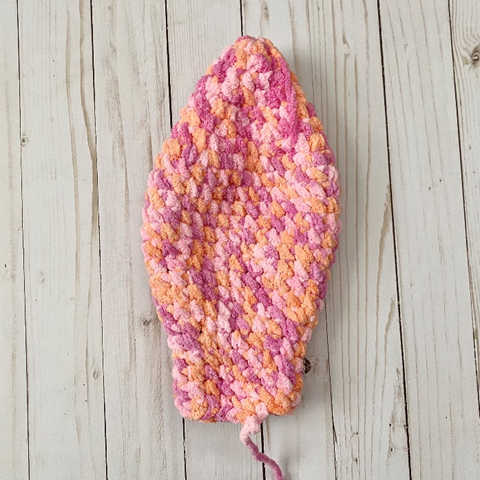
Outer Ear (make 2)
This piece is worked in continuous rnds; do not join. You may wish to use a st marker and move it up at the beginning of each new rnd.
Rnd 1 – with L hook and Peachy, make a magic ring. 6 sc in ring. (6 sc)
Rnd 2 – 2 sc in each st around. (12 sc)
Rnd 3 – sc in each st around. (12 sc)
Rnd 4 – 2 sc in next st, sc in next st; rep around. (18 sc)
Rnd 5 – sc in each st around. (18 sc)
Rnd 6 – 2 sc in next st, sc in next 2 sts; rep around. (24 sc)
Rnd 7 – sc in each st around. (24 sc)
Rnd 8 – 2 sc in next st, sc in next 3 sts; rep around. (30 sc)
Rnd 9 – 15 – sc in each st around. (30 sc)
Rnd 16 – sc2tog over next 2 sts; sc in next 3 sts; rep around. (24 sc)
Rnds 17 – 19 – sc in each st around. (24 sc)
Rnd 20 – sc2tog over next 2 sts; sc in next 2 sts; rep around. (18 sc)
Rnds 21 – 24 – sc in each st around. (18 sc)
Fasten off, leaving long tail for sewing. (First photo below shows finished piece.)
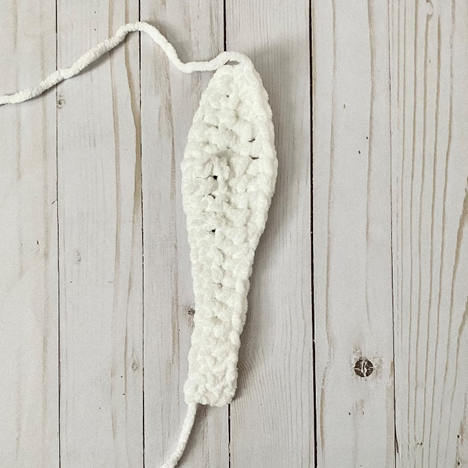
Inner Ear (make 2)
With L hook and White, ch 20.
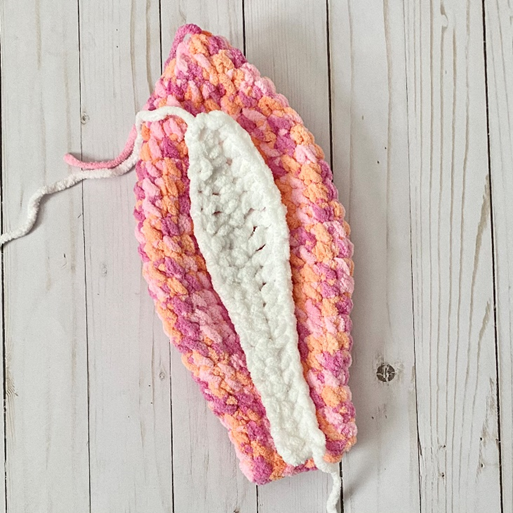
Row 1 – in 2nd ch from hook, sc. Hdc in next 2 sts. Dc in next 2 sts. Tr in next 2 sts. Dc in next 2 sts. Hdc in next 2 sts. Sc in next 8 sts. Ch 1, turn. (9 sc, 4 hdc, 4 dc, 2 tr)
Row 2 – Sc in next 8 sts. Hdc in next 2 sts. Dc in next 2 sts. Tr in next 2 sts. Dc in next 2 sts. Hdc in next 2 sts. Sc in last st. (9 sc, 4 hdc, 4 dc, 2 tr)
Fasten off, leaving long tail for sewing. (Photo below shows finished piece.)
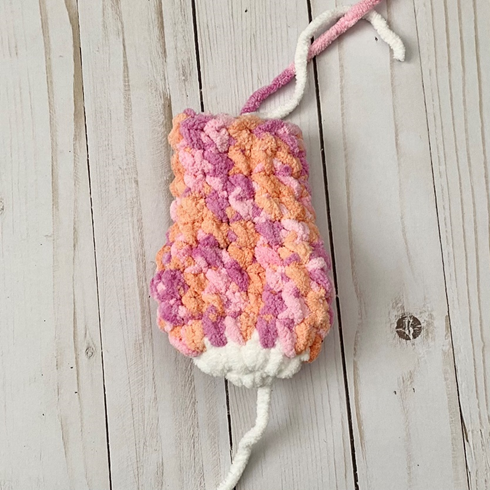
Arm/Leg (make 4)
This piece is worked in continuous rnds; do not join. You may wish to use a st marker and move it up at the beginning of each new rnd.
With L hook and White, make a magic ring. 6 sc in ring. (6 sc)
Rnd 2 – 2 sc in each st around. Change to Peachy in last st. (12 sc)
Rnd 3 – 2 sc in next st, sc in next st; rep around. (18 sc)
Rnds 4 – 5 – sc in each st around. (18 sc)
Rnd 6 – sc2tog over next 2 sts, sc in next st; rep around. (12 sc)
Rnds 7 – 11 – sc in each st around. (12 sc)
Fasten off, leaving long tail for sewing.
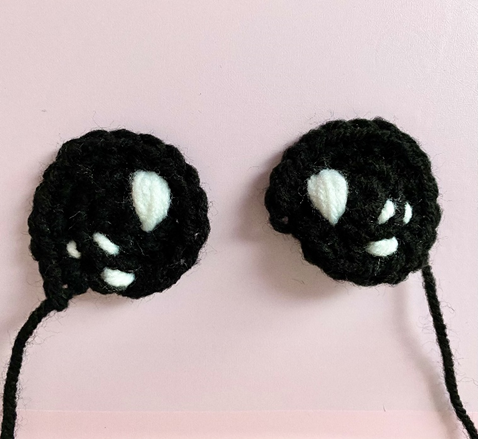
Eye (make 2)
This piece is worked in continuous rnds; do not join. You may wish to use a st marker and move it up at the beginning of each new rnd.
Rnd 1 – With G hook and Black, make a magic ring. 6 sc in ring (6 sc)
Rnd 2 – 2 sc in each st around. (12 sc)
Rnd 3 – 2 sc in next st, sc in next st; rep around. (18 sc)
Fasten off, leaving long tail for sewing.
Eye Sparkles
With White on yarn needle, make several white vertical lines and a few horizontal lines, as well as some smaller lines to the side. Tie off White ends on back of eye.
Bow
With L hook and White, ch 11.
Row 1 – sc in 2nd ch from hook and in each st across. Ch 1, turn (10 sc)
Row 2 – sc in each st across. Ch 1, turn (10 sc)
Rows 3 – 8 – rep Row 2. Do not ch 1 at end of Row 8.
Fasten off, leaving long tail for sewing.
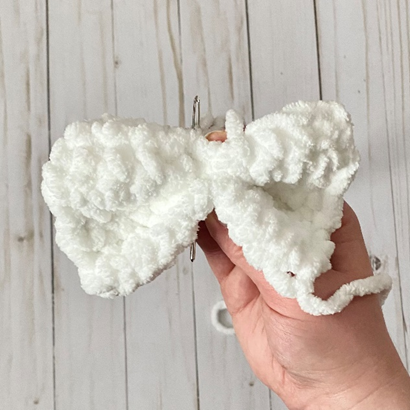
Bow Shaping
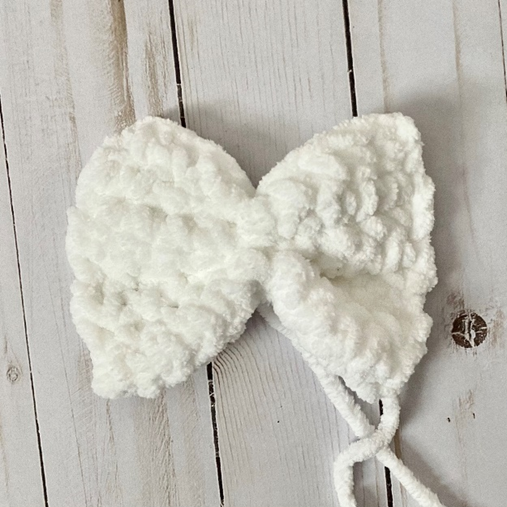
Carry end to middle of piece. Cinch Bow in center and sew through several times to secure shape (first photo below; second photo below shows piece after this process). Leave rem tail for sewing to Bunny.
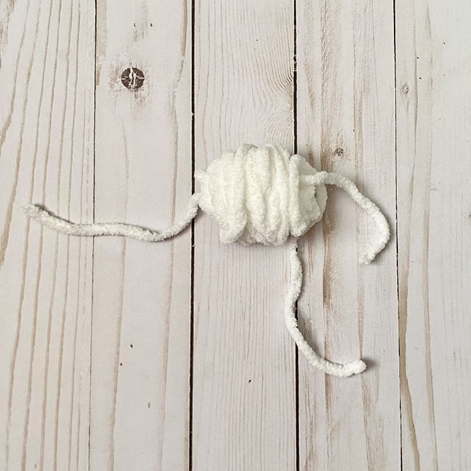
Cotton Tail
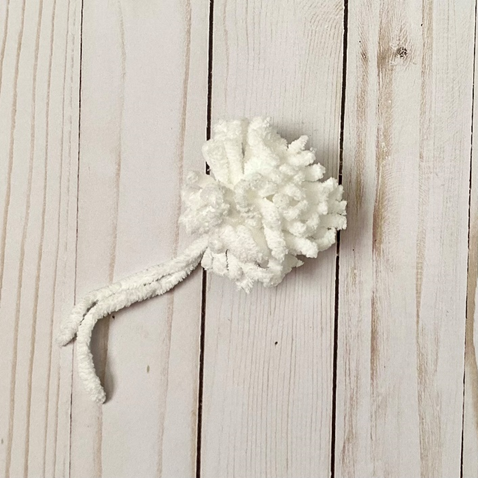
Wrap White around index finger or another small, long object. Carefully remove and set aside. Cut a piece of White that is approx.. 3 times longer than size of current pom pom. Carefully weave it through center of pom pom (first photo below). Tie several tight knots to secure. Cut pom pom at side opposite knot. Trim pom pom. Leave knotted tail for sewing to Bunny. (Second photo below shows finished piece.)
Finishing
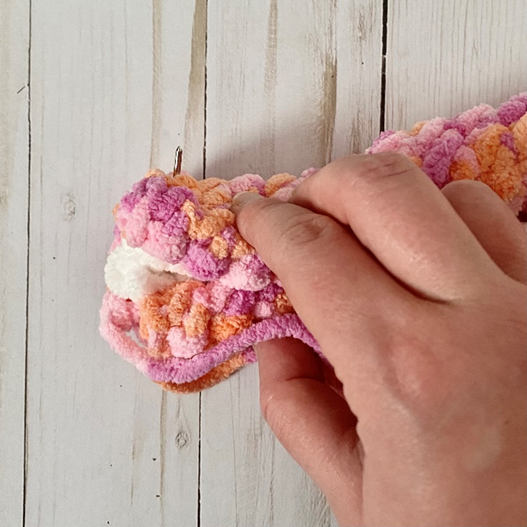
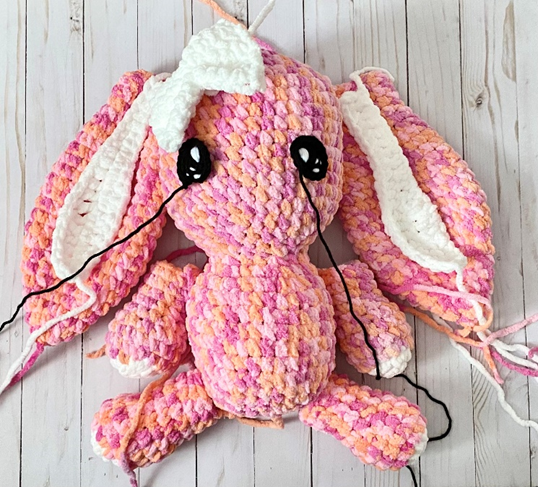
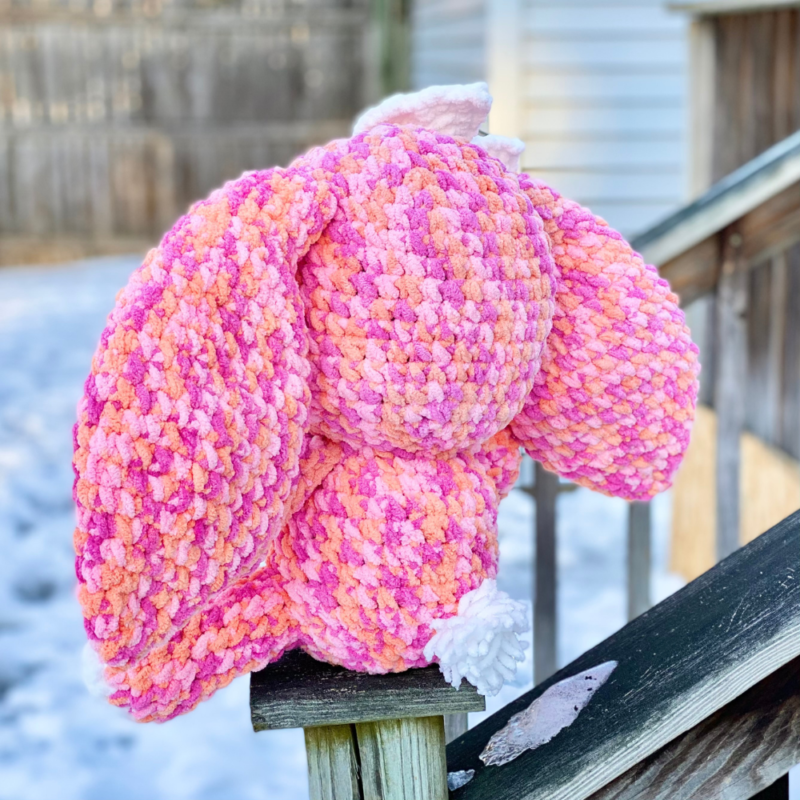
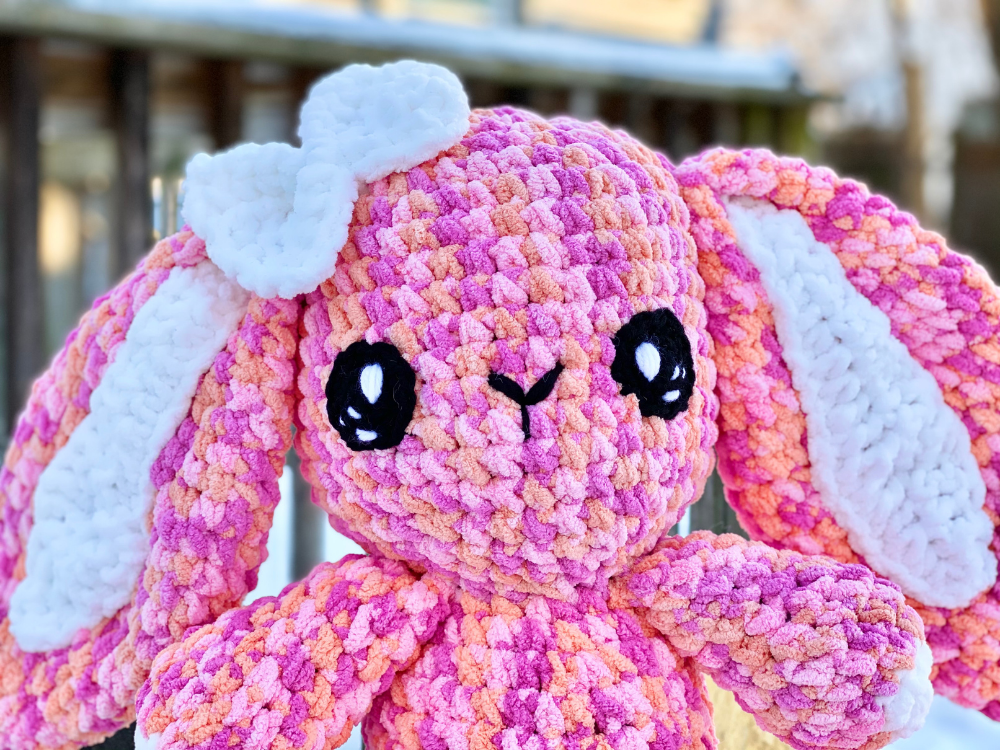
Sew Inner Ear to Outer Ear (first photo below). Fold Ears in half at end (second photo below). Stuff Arms/Legs; press ends flat before sewing to Body (third photo below). Arrange pieces as seen in fourth photo below. Sew Ears, Bow, and Eyes to Head. Sew Arms/Legs to Body. With Black on needle, make “v” shape below eyes, and a vertical line underneath, for Nose/Mouth. Sew Cotton Tail to back/bottom of Body. Weave in all ends and/or tie off knots and hide knots inside sts.

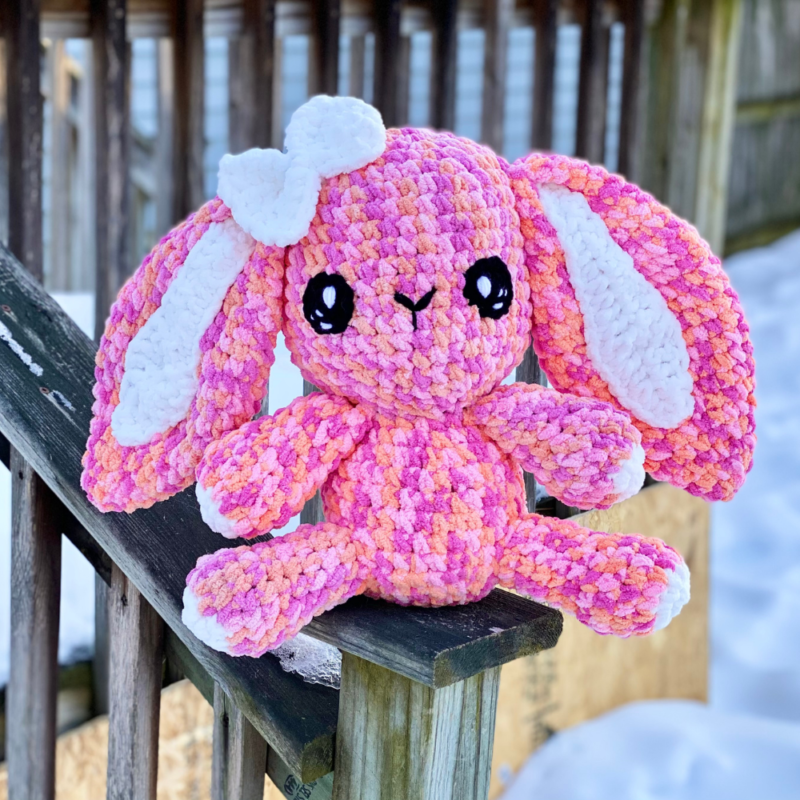
Here’s the finished Bunny!
I hope you enjoyed crocheting this bunny along with me today. If you love fun, free patterns like this one, then please be sure to sign up for my email list to keep up to date with all my latest designs:
Also, please be sure to follow me on social media, and tag me in photos of your finished projects made from my patterns, so I can see your lovely work!
Don’t forget to pin it for later HERE!
And you can find that ad-free PDF pattern HERE!
Happy Crocheting!
COPYRIGHT:
This pattern is owned by Crafty Kitty Crochet (Melissa Moore). Any reselling or distribution of this pattern is prohibited. Sale of items made using this pattern is welcomed, but I do ask that credit/a link be provided back to my site, craftykittycrochet.com.
Comments (4)
Springtime Crochet Blog Hop – Crochets By Trista
March 5, 2021 at 11:50 am
[…] Crafty Kitty Crochet – Spring Sherbet Bunny […]
Darling Daisy Bunny Basket – Crochet Pattern ~ Crafty Kitty Crochet
March 12, 2021 at 10:46 pm
[…] forget last year’s Mermaid Easter Basket. Since I had so much fun making last week’s Spring Sherbet Bunny Amigurumi, I thought I’d go ahead and whip up a fun and fast bunny basket pattern. Combine that with […]
25 Free Crochet Bunny Patterns (Rabbit Amigurumi Pattern)
March 16, 2023 at 10:52 am
[…] You can add the finishing touches using red heart super saver yarn in black and white and bernat blanket yarn in white. Gather your L-11/8mm and G-6/4.25mm hooks plus fiberfill stuffing and start crocheting! Get creative with colors for a personalized touch – make this adorable bunny today! craftykittycrochet […]
Crochet Bunny Pattern Free (25 Amigurumi Rabbit Patterns) – Diy Folly
May 14, 2025 at 12:52 pm
[…] image source […]