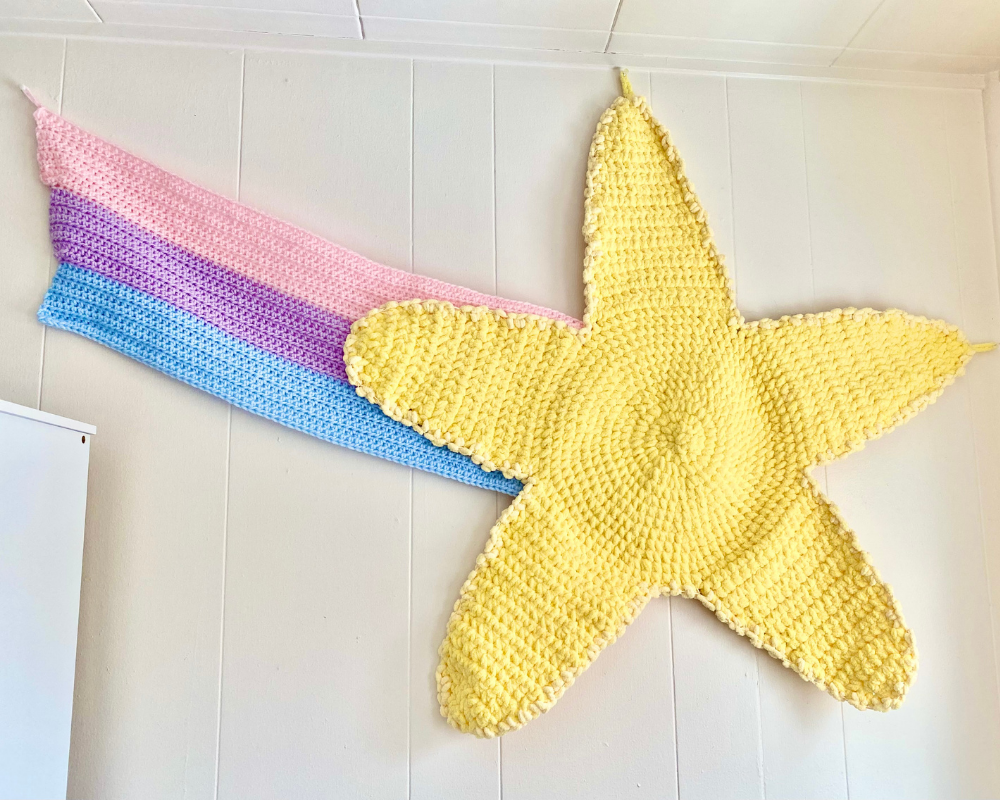
Shooting Star Wall Hanging – Crochet Pattern
Pin it for later!
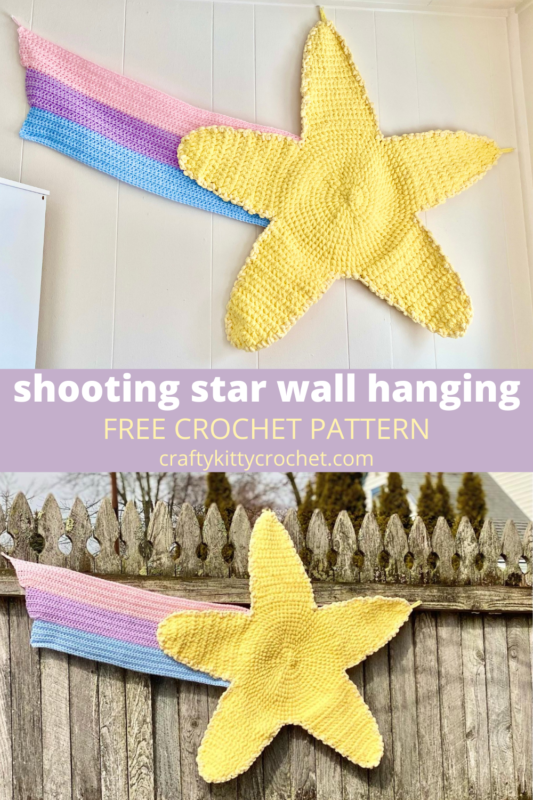
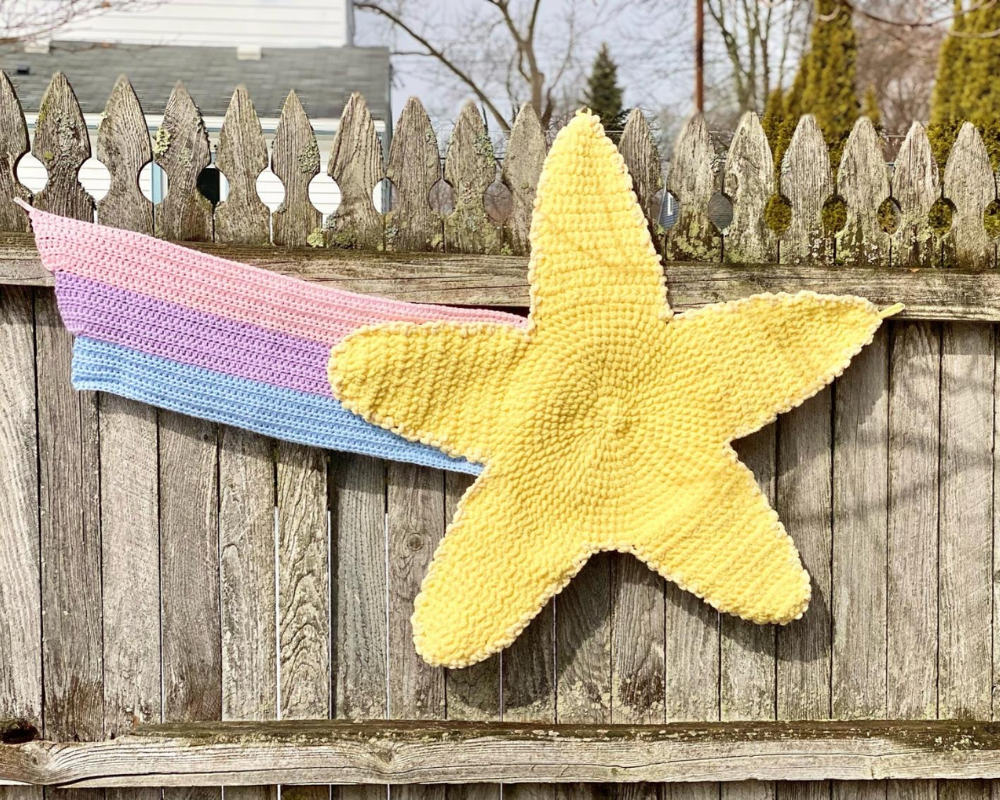
Get ready to make a wish! This Shooting Star Wall Hanging is cute and fun to make, and makes one magical piece of decor! Use it as the perfect accent in a kids’ room, nursery, craft room, home office, and more! The soft, pastel colors will add cheer to any room, and for an added touch, you can add string lights and/or a string of mini clothespins for hanging photos! There are so many possibilities when it comes to this piece. The pattern is easy and does not take long considering the size of the star due to the bulky yarn used. So you can make one of these fun wall hangings for yourself, or as a gift, fairly fast!
Shooting Star Wall Hanging
Recently I’ve been getting more into crocheted wall decor, such as my Rainbow Wall Hanging from a few weeks ago. My craft room walls are white, which is a good choice to enhance the attic lighting. But I also wanted my decor to be bright and cheery, so I decided to make some versatile wall hangings – they look great on their own, and are also perfect for using to hang photos! They’re a bit more unique than your average picture frame, so it’s a great way to make a stand-out accent that serves multiple purposes in the room.
And speaking of multi-purpose, this would also make a super cute accent rug in the room of your choice! It’s just large enough to look great in front of a small piece of furniture, but not so large that it will take an extended amount of time to make. And if you love magical, kawaii patterns that are perfect for making for kids of all ages, be sure to check out my other patterns HERE! From blankets to hats to amigurumi, I’m always working on something cute and fun!
I credit much of the soft, sweet look of this wall hanging to the perfectly toned and incredibly soft yarn I used for the pattern! Bernat Baby Blanket in Baby Yellow is a great “star” color, not to mention being super soft and squishy to work with! Get some on Amazon:
Looking for the ad-free PDF? You can find one in my shop HERE!
Supplies
Size L-11 / 8 mm crochet hook
Size H-8 / 5 mm crochet hook
1 10.5 oz skein of Bernat Baby Blanket in Baby Yellow (Super Bulky; almost entire skein used – about 210 yds)
1 skein of Red Heart Super Saver in Baby Pink (medium weight, about 150 yds used)
1 skein each of Big Twist Value in Soft Purple and Cornflower Blue (medium weight, about 150 yds used each)
Bernat Baby Pom Pom in Sunny Yellow (Super Bulky, about 45 yds used)
Yarn Needle with large eye
Scissors
Abbreviations
Ch = chain
Hdc = half double crochet
Hdc3tog = half double crochet 3 together
Rem = remaining
Rep = repeat
Rnd(s) = round(s)
Sc = single crochet
Sc2tog = single crochet 2 together
Sl St = slip stitch
St(s) = stitch(es)
Gauge
Exact gauge is not essential to this project.
Size
About 32 inches in length and width, not including tail
Notes
Pattern calls for small hanging loops to be made on top and sides of piece – this is because weight of yarn causes piece to slouch instead of hanging flat against a wall. Alternatively, you could make a flat backing for the piece using cardboard or plastic canvas, or by attaching craft wire around edges. Using wall hanging adhesive strips throughout back of piece could also be an alternative to this.

How to Make This
Instructions
Center of Star
This piece is worked in continuous rnds; do not join. You may wish to use a stitch marker and move it up at the beginning of each new rnd.
Rnd 1 – With Baby Yellow and L hook, make a magic ring. 6 sc in ring. (6 sc)
Rnd 2 – 2 sc in each st around. (12 sc)
Rnd 3 – rep Rnd 2. (24 sc)
Rnd 4 – sc in each st around. (24 sc)
Rnd 5 – 2 sc in next st, sc in next st; rep around. (36 sc)
Rnd 6 – sc in each st around. (36 sc)
Rnd 7 – 2 sc in next st, sc in next 2 sts; rep around. (48 sc)
Rnd 8 – sc in each st around. (48 sc)
Rnd 9 – 2 sc in next st, sc in next 3 sts; rep around. (60 sc)
Rnd 10 – sc in each st around. (60 sc)
Rnd 11 – 2 sc in next st, sc in next 4 sts; rep around. (72 sc)
Rnd 12 – sc in each st around. (72 sc)
Rnd 13 – 2 sc in next st, sc in next 5 sts; rep around. (84 sc)
Do not fasten off; move on to Star Points.
Star Points
Row 1 – sc in next 15 sts. Ch 1, turn (15 sc)
Rows 2 – 5 – rep Row 1. (15 sc)
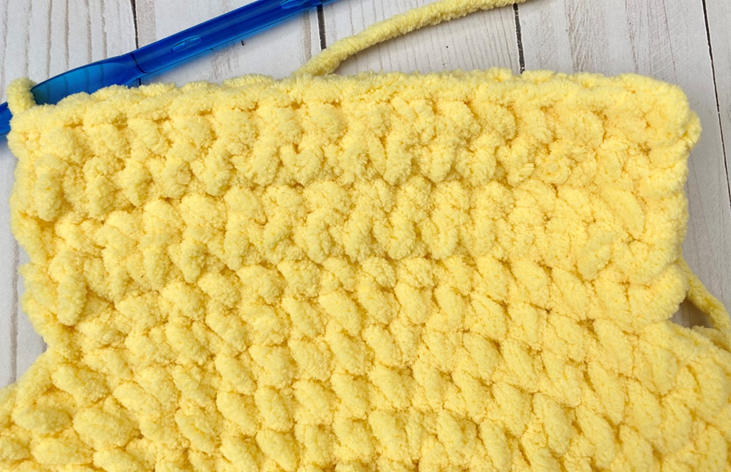
Row 6 – sc2tog over next 2 sts (see photo below). Sc in next 11 sts. Sc2tog over last 2 sts. Ch 1, turn (13 sc)

Rows 7 – 10 – sc in each st across. Ch 1, turn (13 sc)
Row 11 – sc2tog over next 2 sts. Sc in next 9 sts. Sc2tog over last 2 sts. Ch 1, turn (11 sc)
Rows 12 – 14 – sc in each st across. Ch 1, turn (11 sc)
Row 15 – sc2tog over next 2 sts, sc in next 7 sts. Sc2tog over last 2 sts. Ch 1, turn (9 sc)
Rows 16 – 17 – sc in each st across. Ch 1, turn (9 sc)
Row 18 – sc2tog over next 2 sts. Sc in next 5 sts. Sc2tog over last 2 sts. Ch 1, turn (7 sc)
Row 19 – sc2tog over next 2 sts. Sc in next 3 sts. Sc2tog over last 2 sts. Ch 1, turn (5 sc)
Row 20 – sc2tog over next 2 sts. Sc in next st. Sc2tog over last 2 sts. (3 sc)
Fasten off, leaving tail.
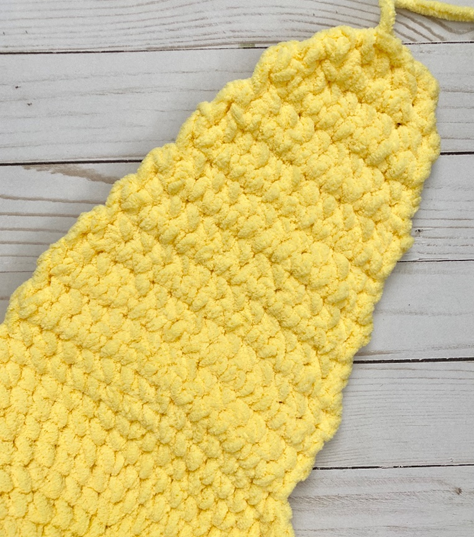
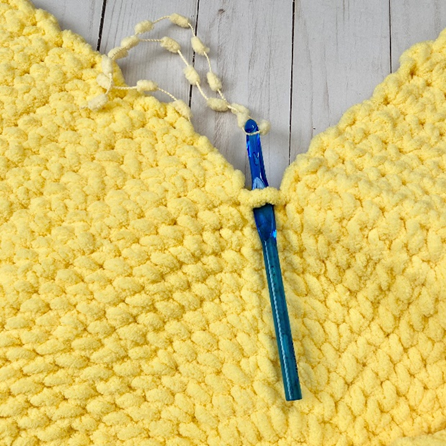
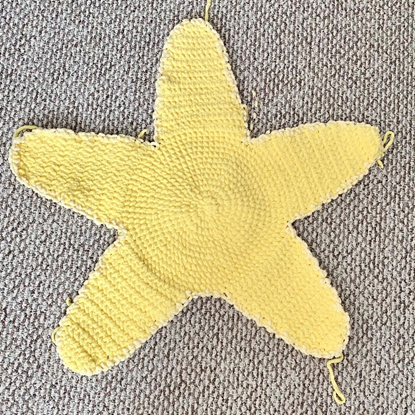
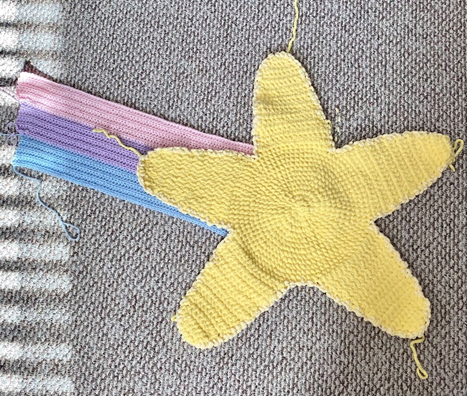
Attach Baby Yellow on Center of Star, skipping 1 st next to most recently made Star Point (first photo below). Rep above steps 4 more times to complete Star Points. There should be 5 rem sts between last and first Star Points made when finished. Small tail is needed on Top and Right Star Points to make a loop for hanging. (Second photo below shows finished piece at this stage.)
Star Edging
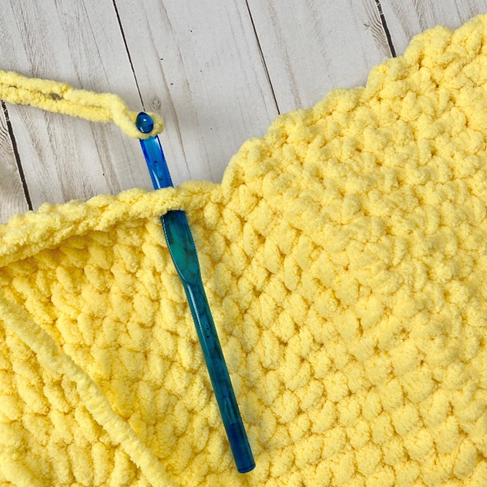
With L hook, join Sunny Yellow in a st between Star Points, ch 1. Sc 22 up one side, sc in 3 sts from last rnd of Star Point, and sc 22 down other side. Sl st in st between current Star Point and next (first photo below).
Rep above steps to complete Edging on rest of piece. Sc in 5 sts between Bottom Points. Join with sl st to first st of Edging. (Second photo below shows finished piece at this stage.)
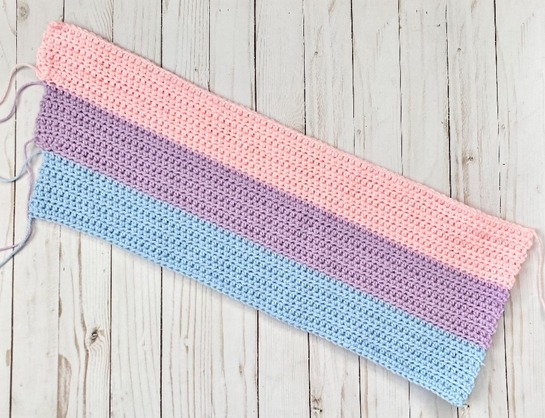
Tail
With H hook and Baby Pink, ch 82.
Row 1 – hdc in 3rd ch from hook, and in each st across. Ch 2, turn (80 hdc)
Row 2 – hdc in each st across. Ch 2, turn (80 hdc)
Rows 3 – 7 – rep Row 2. Ch 2, turn (80 hdc)
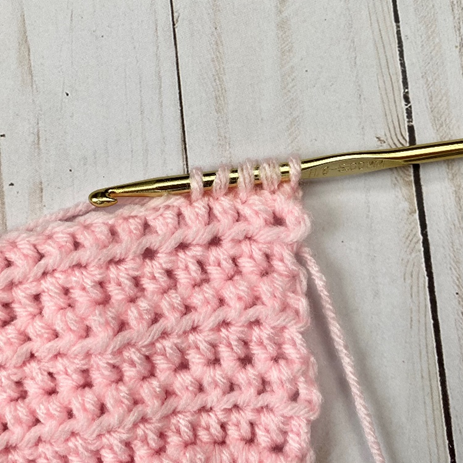
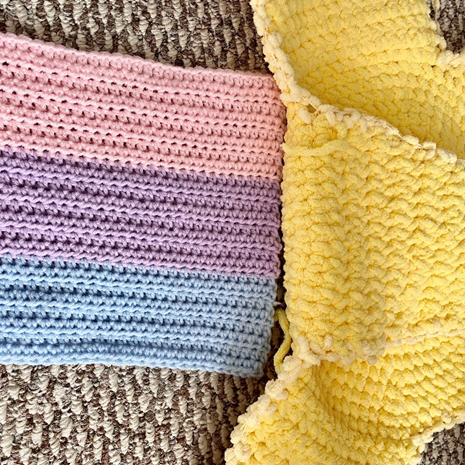
Row 8 – hdc in next 74 sts. Hdc3tog over next 3 sts (see photo below). Hdc3tog again over last 3 sts, changing to Soft Purple in last step of st. Ch 2, turn (76 hdc)
Rows 9 – 15 – hdc in each st across. Ch 2, turn (76 hdc)
Row 16 – hdc in next 70 hdc. Hdc3tog over next 3 sts. Hdc3tog again over last 3 sts, changing to Cornflower Blue in last step of st. Ch 2, turn (72 hdc)
Rows 17 – 24 – hdc in each st across. Ch 2, turn (do not ch 2 at end of Row 24). (72 hdc)
Fasten off.
Finishing
Using Baby Yellow, arrange Tail behind left Star Point as seen in photo below and sew to left Star Point.
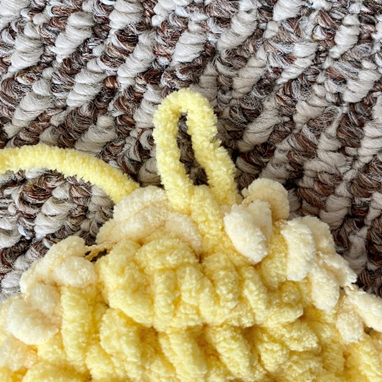
To make loops for hanging, pull large loop through tips of top and right Star Points (see first photo below). Pull rest of tail through loop and secure a knot. Weave in rem ends. (Second photo below shows finished loop.)

Join Baby Pink to top edge of Tail, ch 1 and pull loop to form a hanging loop. Fasten off. Weave in all ends.
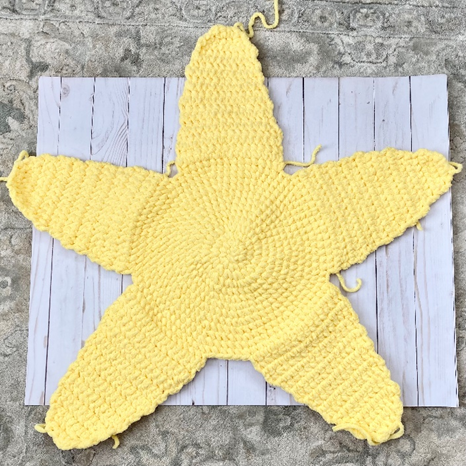
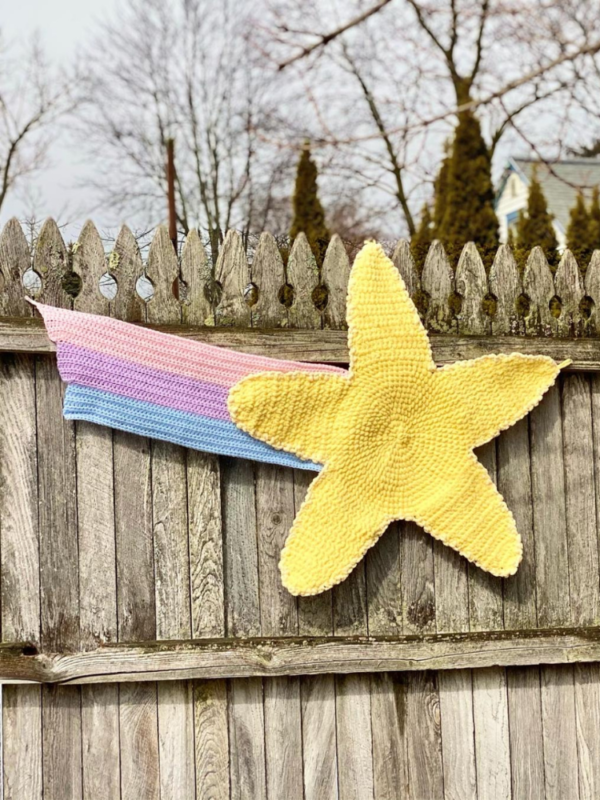
Here is the finished Shooting Star!
I hope you enjoyed crocheting this wall hanging along with me today. If you love fun, free patterns like this one, then please be sure to sign up for my email list to keep up to date with all my latest designs:
Also, please be sure to follow me on social media, and tag me in photos of your finished projects made from my patterns, so I can see your lovely work!
Don’t forget to pin it for later HERE!
And you can find that ad-free PDF pattern HERE!
Happy Crocheting!
COPYRIGHT:
This pattern is owned by Crafty Kitty Crochet (Melissa Moore). Any reselling or distribution of this pattern is prohibited. Sale of items made using this pattern is welcomed, but I do ask that credit/a link be provided back to my site, craftykittycrochet.com.