
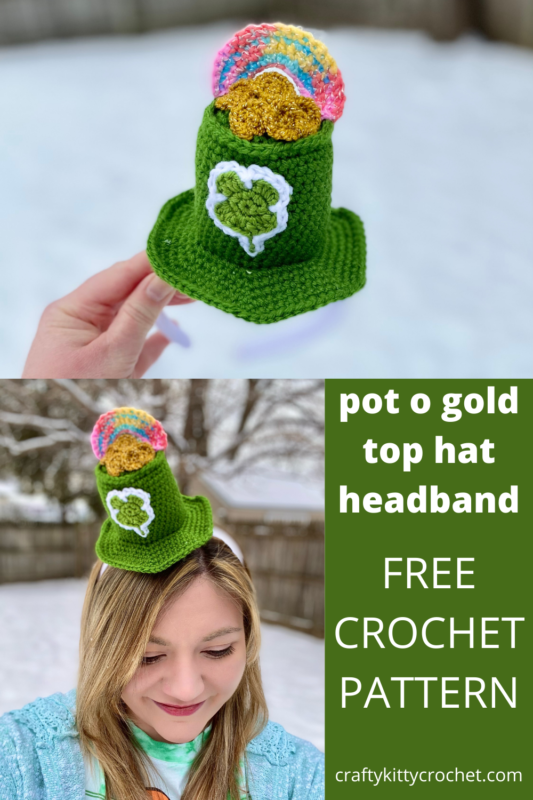
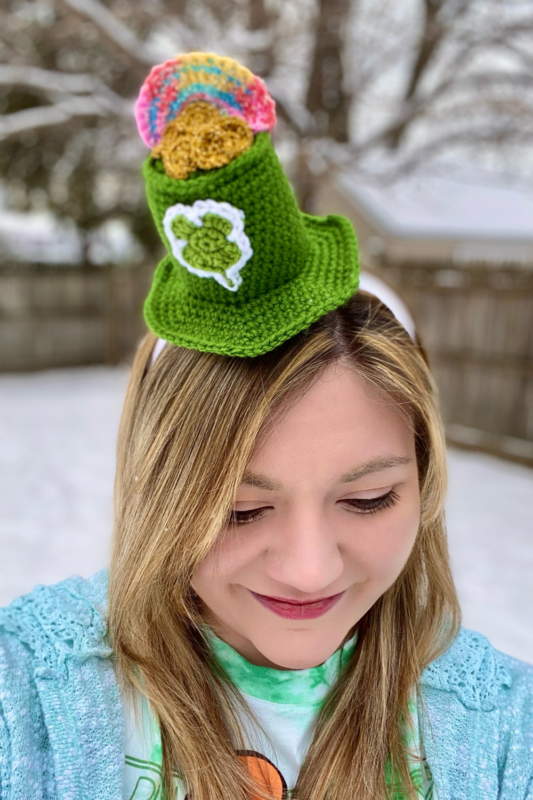
Lucky Pot o Gold Top Hat Headband – Crochet Pattern
Pin it for later!
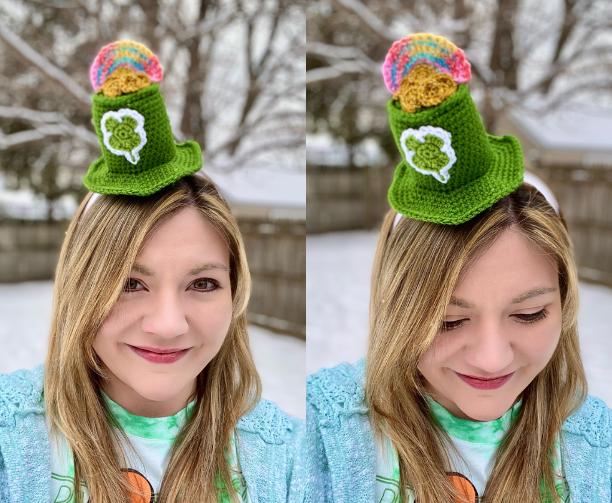
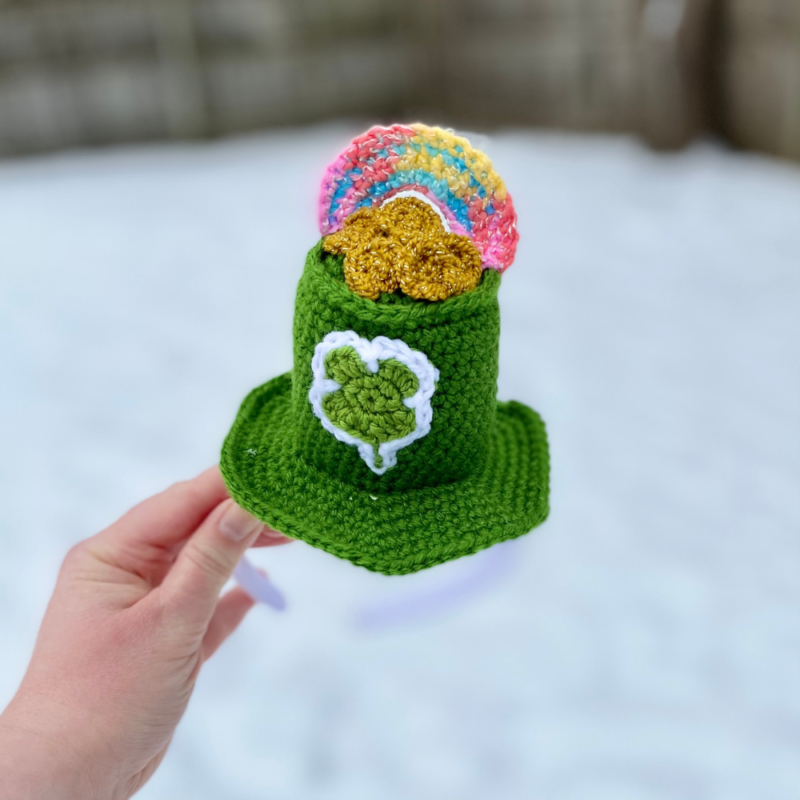
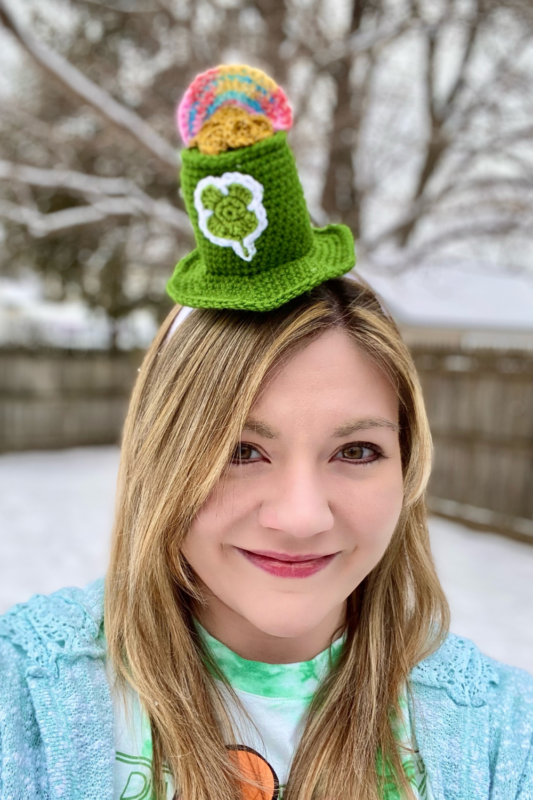
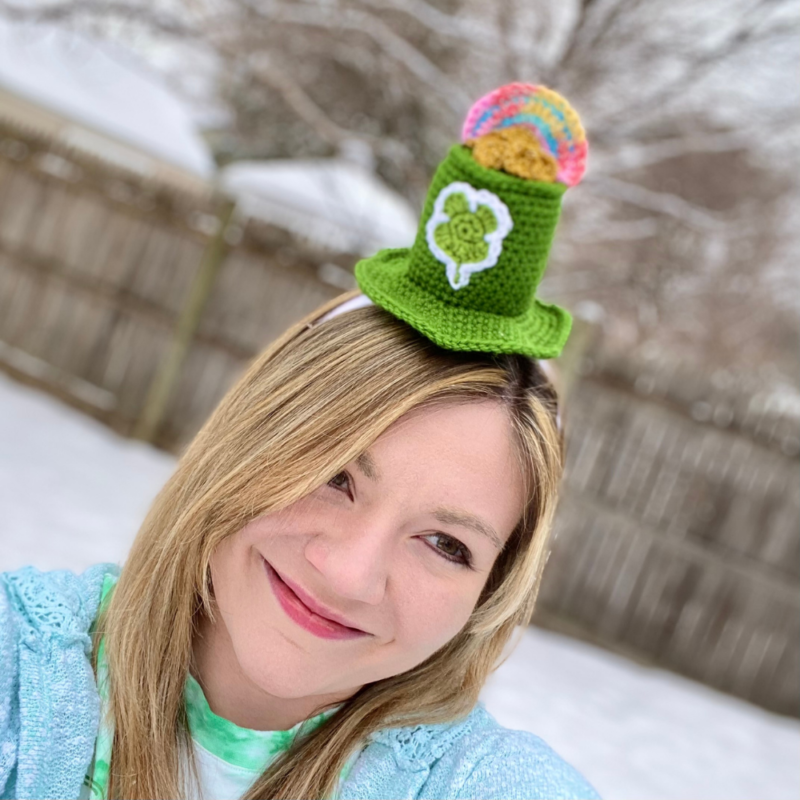
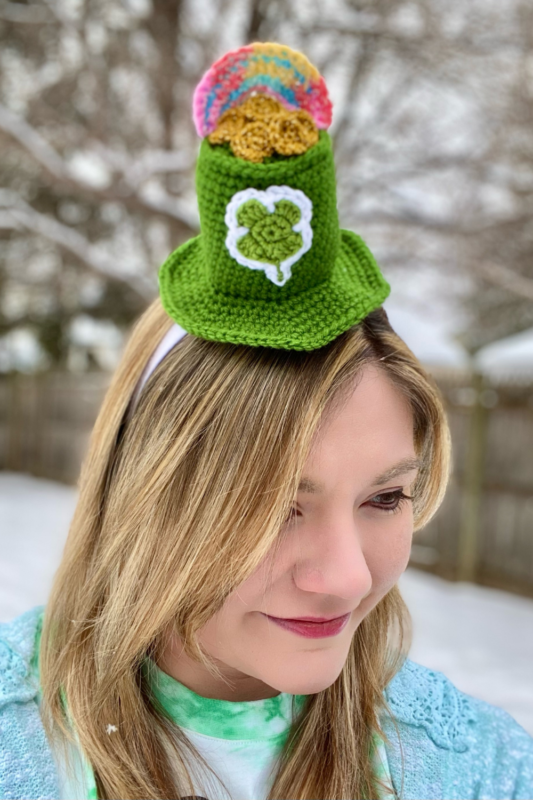
Make your St. Patrick’s Day even luckier with this adorable and easy to make top hat fascinator headband! It doesn’t use much yarn, works up quickly, and is sure to be a hit at virtual parties, school celebrations, and more! Made to look like a cross between a leprechaun hat and a pot of gold, this cute accessory has it all – shiny gold “coins”, a rainbow, and a fun shamrock applique! Kids and adults alike can enjoy this one-size, fun and unique headband! What a great idea for photo ops! The possibilities are endless!
Lucky Pot o Gold Top Hat Headband
If you’ve been browsing around my blog for a while, you know that I love holidays and headbands! So why not combine the two in the luckiest way possible for St. Patty’s Day? You might remember my Witch Top Hat Headband from Halloween, and my Hot Cocoa Mug Top Hat from Christmas. I’m starting to think I should make these fun hat headbands for each holiday! They are one size, so you can make them for everyone you know. The cute details on this top hat make it so fun – yet the design is really simple and easy to make! It’s a win-win for your St. Patrick’s Day wardrobe!
When it comes to really deep, verdant greens that are perfect for St. Patrick’s Day, you can’t go wrong with the lovely “Kelly Green” by Lion Brand Vanna’s Choice! I used it for this pattern and love the results. It manages to be a bright jewel tone without being too light, bright or neon. Find some on Amazon:
Looking for the ad-free PDF pattern? You can purchase one in my shop HERE!
Supplies
Size D-3 / 3.25 mm crochet hook
Medium weight yarn in green – about 105 yds; yarn used in photos is Lion Brand Vanna’s Choice in Kelly Green
Medium weight yarn in lighter green – about 25 yds; yarn used in photos is Lion Brand Vanna’s Choice in Fern
Medium weight yarn in White – about 50 yds needed for Headband and Shamrock
Medium or Light yarn in rainbow/multi colors – about 25 yds; yarn used in photos is Bernat Baby Coordinates in Candy Baby
Medium or Light yarn in gold – about 25 yds; yarn used in photos is Lion Brand Vanna’s Glamour in Gold
Fiberfill stuffing
Scissors
Yarn Needle
Plastic Craft Headband
Abbreviations
*= indicates beginning/end of a section to be repeated
Beg = beginning
BLO = back loop only
Ch = chain
Dc = double crochet
FLO = front loop only
Rem = remaining
Rep = repeat
Rnd(s) = round(s)
Sc = single crochet
Sc2tog = single crochet 2 together
Sk = skip
Sl st = slip stitch
St(s) = stitch(es)
Gauge
Exact gauge is not essential to this project
Size
Hat measures about 4 – 5 inches in height (not including rainbow)
How To Make This
Instructions
Hat Base
This piece is worked in continuous rnds; do not join. You may wish to use a stitch marker and move it up at the beg of each new rnd.
Rnd 1 – with Kelly Green, make a magic ring. 6 sc in ring. (6 sc)
Rnd 2 – 2 sc in each st around. (12 sc)
Rnd 3 – 2 sc in next st, sc in next st; rep around. (18 sc)
Rnd 4 – 2 sc in next st, sc in next 2 sts; rep around. (24 sc)
Rnd 5 – 2 sc in next st, sc in next 3 sts; rep around. (30 sc)
Rnd 6 – 2 sc in next st, sc in next 4 sts; rep around. (36 sc)
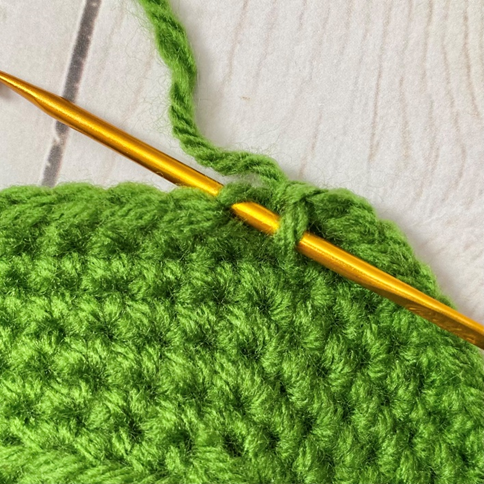
Rnd 7 – working in BLO (first photo below), 2 sc in next st, sc in next 5 sts; rep around. (42 sc)
Rnd 8 – 2 sc in next st, sc in next 6 sts; rep around. (48 sc)
Rnd 9 – 2 sc in next st, sc in next 7 sts; rep around. (54 sc)
Rnd 10 – 2 sc in next st, sc in next 8 sts; rep around. (60 sc)
Rnd 11 – 2 sc in next st, sc in next 9 sts; rep around. (66 sc)
Rnd 12 – 2 sc in next st, sc in next 10 sts; rep around. (72 sc)
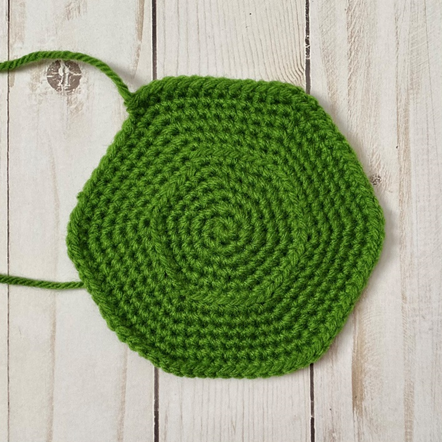
Fasten off. (Second photo below shows finished piece.)
Hat Body
This piece is worked in continuous rnds; do not join. You may wish to use a stitch marker and move it up at the beg of each new rnd.
Rnd 1 – In rem loops of Rnd 7, attach Kelly Green and ch 1. Sc in each st around. (36 sc)
Rnds 2 – 14 – sc in each st around. (36 sc)
Rnd 15 – working in FLO, sc in each st around. (36 sc)
Fasten off. Begin stuffing. (Photo below shows finished piece.)

Hat Top
This piece is worked in continuous rnds; do not join. You may wish to use a stitch marker and move it up at the beg of each new rnd.
Rnd 1 – In rem sts of Rnd 15 of Mug, attach Kelly Green and ch 1. Sc2tog over next 2 sts, sc in next 4 sts; rep around. (30 sc)
Rnd 2 – sc2tog over next 2 sts, sc in next 3 sts; rep around. (24 sc)
Rnd 3 – sc2tog over next 2 sts, sc in next 2 sts; rep around. (18 sc)
Rnd 4 – sc2tog over next 2 sts, sc in next st; rep around. Finish stuffing (do not overstuff). (12 sc)
Rnd 5 – sc2tog around. (6 sc)
Rnd 6 – sc2tog over next 2 sts. Leave rem sts unworked. (5 sc)
Fasten off, leaving long tail for sewing closed rem gap from Rnd 5. (Photo below shows finished piece.)
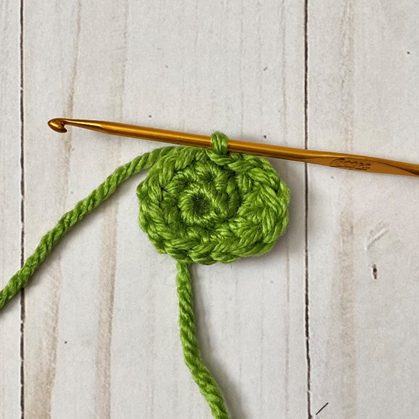
Shamrock
Rnd 1 – With Fern, make a magic ring. 6 sc in ring (6 sc)
Rnd 2 – 2 sc in each st around. (12 sc)
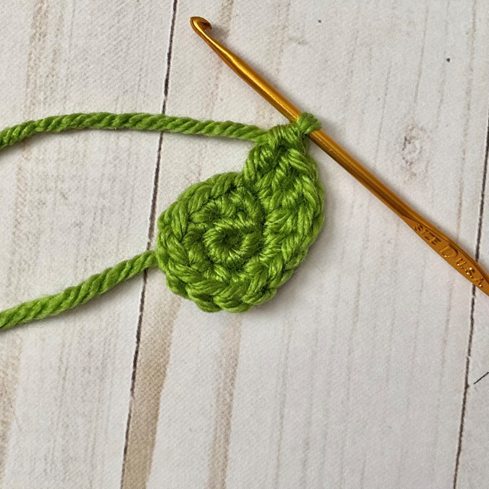
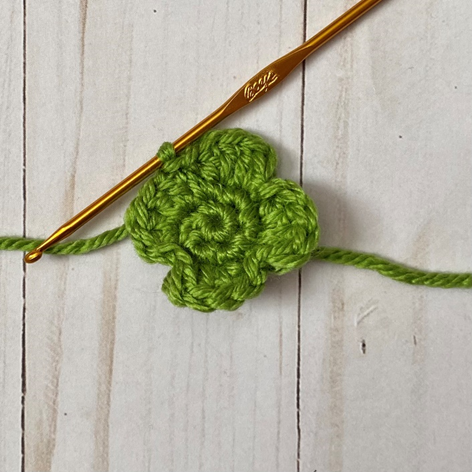
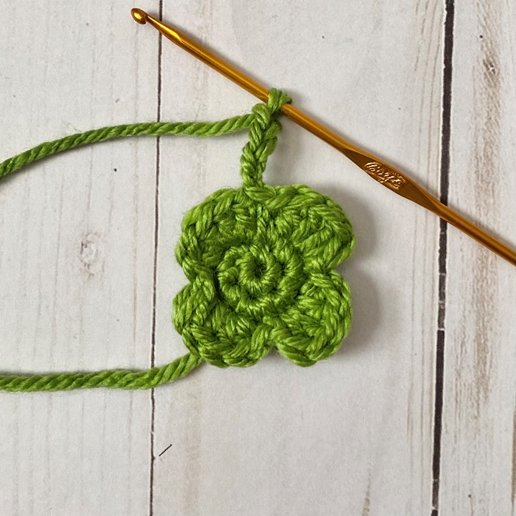
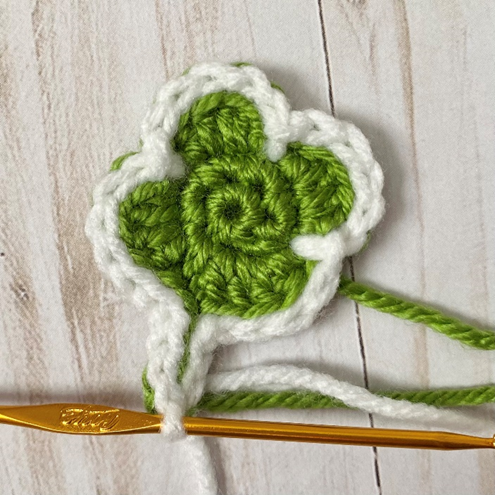
Rnd 3 – *2 dc in next 2 sts (first photo below), sl st in same st. Sl st in next st (second photo below).* Rep from * to * 3 more times (third photo below). Ch 4 (fourth photo below). Join White, turn. (8 dc)
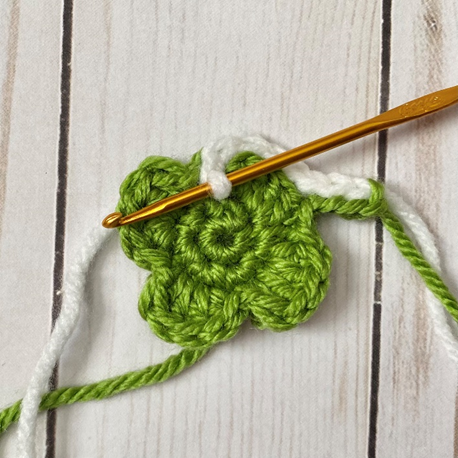
Rnd 4 – Sl st in next 3 chs. Sl st in BLO of each st around, and between clovers (fifth photo below). Sl st in other side of 3 chs from Rnd 3. Join with sl st to to first st of rnd. (31 sl sts)
Fasten off, leaving long tail for sewing. (Sixth photo shows finished piece.)
Gold (make 5 or as many as desired)
This piece is worked in continuous rnds; do not join. You may wish to use a stitch marker and move it up at the beg of each new rnd.
Rnd 1 – with Gold, make a magic ring. 6 sc in ring. (6 sc)
Rnd 2 – 2 sc in each st around. (12 sc)
Fasten off, leaving long tail for sewing.

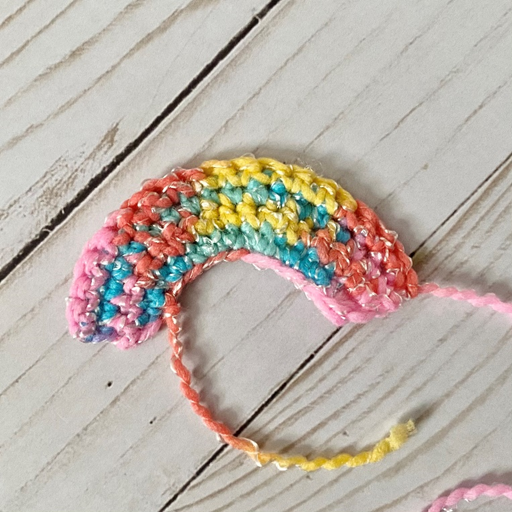
Rainbow
With Candy Baby, ch 10.
Row 1 – 2 sc in each st across. Ch 1, turn (18 sc)
Rows 2 – 4 – sc in each st across. Ch 1, turn. Do not ch 1 at end of Row 4. (18 sc)
Fasten off, leaving long tail for sewing.
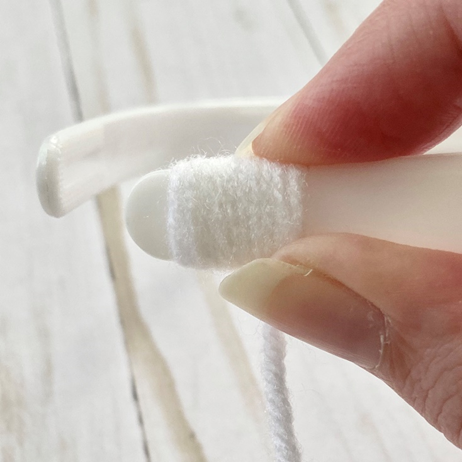
Headband
Starting at one end of plastic crafts headband, place a small section of desired yarn color on inside of headband.
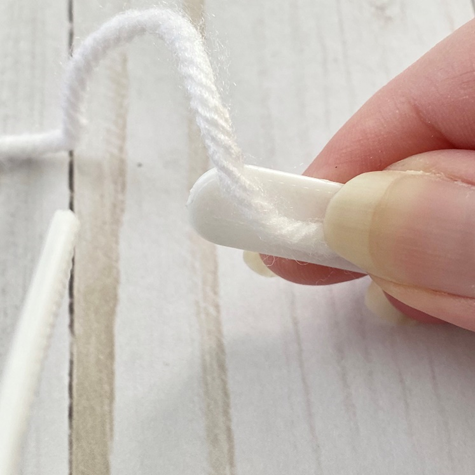
Begin wrapping around this section, and continue wrapping around rest of headband. Wrap tightly, pushing yarn down occasionally to keep work tight.
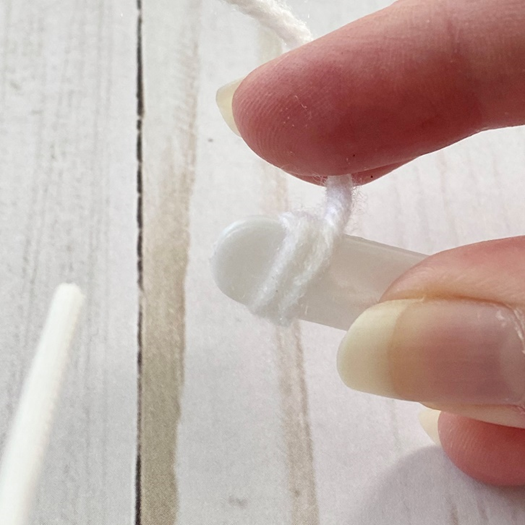
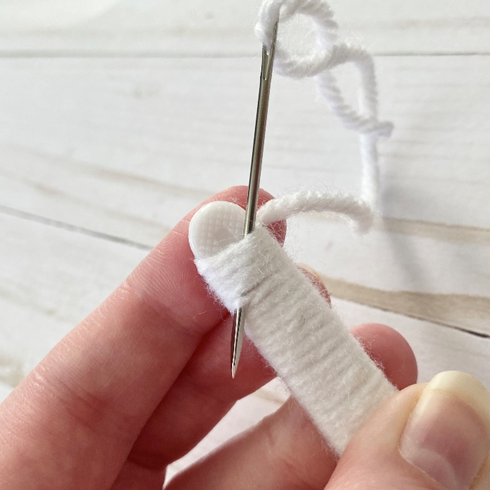
When only about a half a centimeter of the headband remains on the other end, fasten off, leaving a long tail. Holding wrapped yarn in place, thread needle with tail and weave it through 1-2 centimeters of wrapped yarn at the edge of the headband.
Finishing
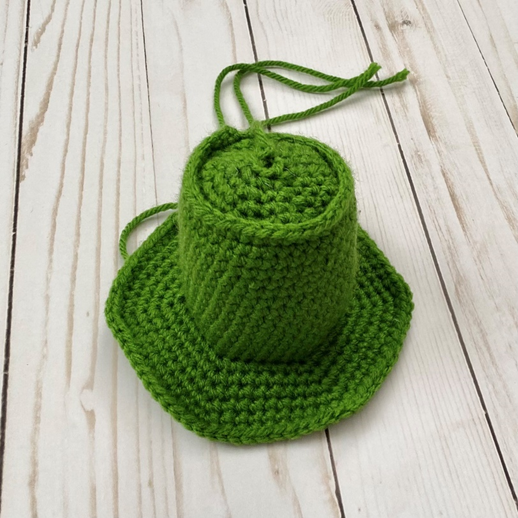
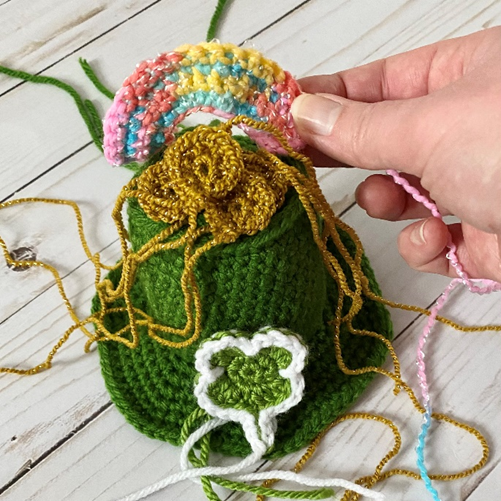
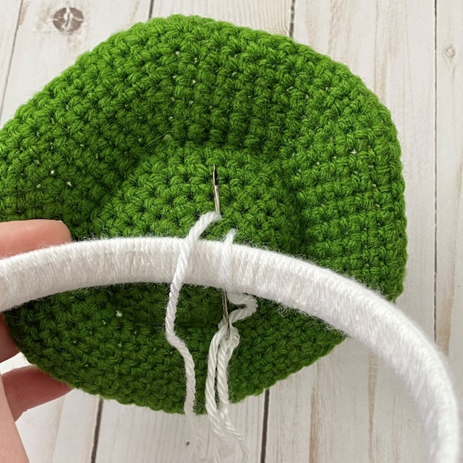
Arrange pieces as seen in first photo below. Sew Shamrock to Top Hat. Sew Gold pieces to top of Top Hat, sewing only centers so that coins are still distinguishable. Sew Rainbow behind Gold. Sew Top Hat to Headband (second photo below). Weave in all ends and/or tie off knots and hide inside sts.
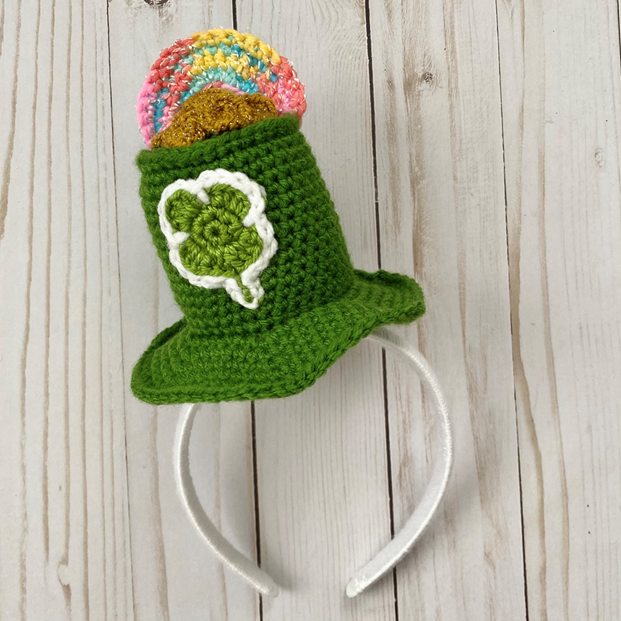
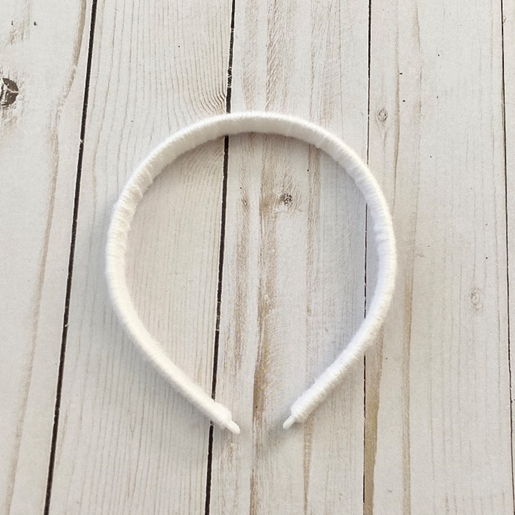
Here is the finished Headband!
I hope you enjoyed crocheting this headband with me today! If you love fun, free patterns like this one, then please be sure to subscribe to my email list to keep up to date with all my latest patterns”
And please be sure to follow me on social media, and tag me in photos of finished projects made from my designs, so I can see your lovely work!
Don’t forget to pin it for later HERE!
And that ad-free PDF pattern can be found HERE!
Happy Crocheting!
COPYRIGHT: This pattern is owned by Crafty Kitty Crochet (Melissa Moore). Any reselling or distribution of this pattern is prohibited. Sale of items made using this pattern is welcomed, but I do ask that credit/a link be provided back to my site, craftykittycrochet.com.
Comments (2)
Lucky "Pot o Gold" Top Hat Headband Crochet Pattern!
February 5, 2023 at 5:08 pm
[…] Here is the pattern link […]
12 Unique Free Crochet Patterns for St. Patrick’s Day Celebration – Chloe Crochet
June 27, 2026 at 7:03 am
[…] craftykittycrochet […]