
Witch Hat Headband – Crochet Pattern
Pin it for later!
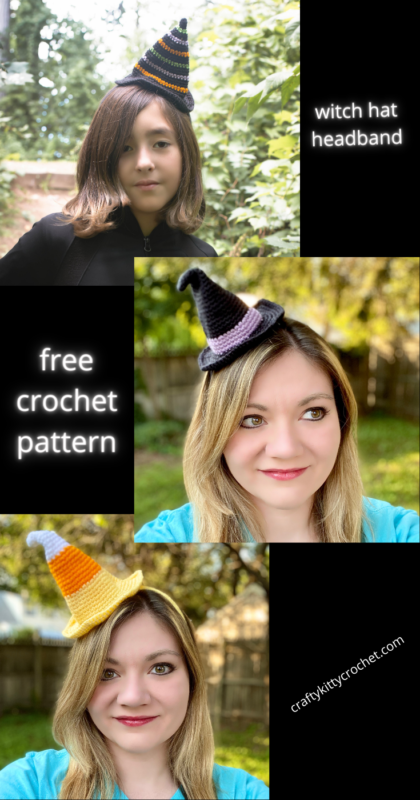
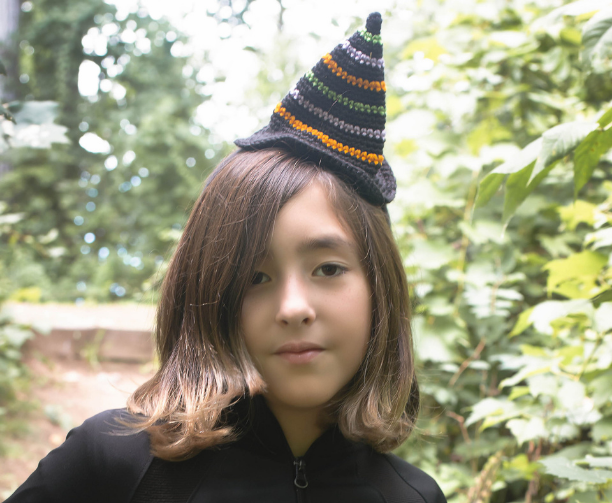
Brew up some fun this Halloween with this adorable and versatile Witch Hat Headband! It’s great for kids and adults, uses very little yarn (making it a great stashbuster), and is easy to make! What a great DIY costume accessory – customize yours to be a classic Witch Hat design, a festive Striped pattern, or even a Candy Corn! The pattern is easy and guides you through the steps with lots of photos.
Witch Hat Headband
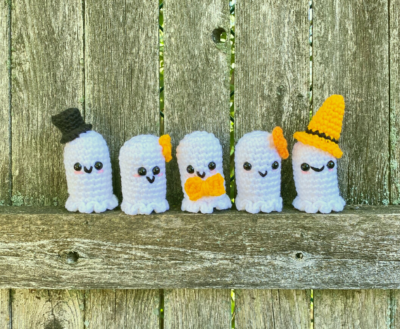
If you’ve been following my blog for a while, you might be familiar with my Candy Corn Witch Hat and Wicked Stripes Witch Hat. They’re full sized witch hats that are so fun to make! But I wanted to design something that was a cross between a witch hat and a fascinator. Enter the Witch Hat Headband – perfect for leftover yarns in your stash, and great as a last-minute costume accessory! It’s a very basic design that works up quickly and can be customized in lots of different ways. Follow the instructions in the pattern to make just a few different kids of Hats: Striped, Classic, and Candy Corn!
This pattern doesn’t use much yarn, but a few of the designs do call for Red Heart Super Saver in Black. This is a Halloween color must-have! Think of how many cute headbands you can make with just one skein! Stock up on this yarn on Amazon HERE!
Looking for an ad-free PDF copy of this pattern? You can purchase one in my shop HERE!
Supplies
Size D/3 – 3.25 mm crochet hook
Medium weight yarn
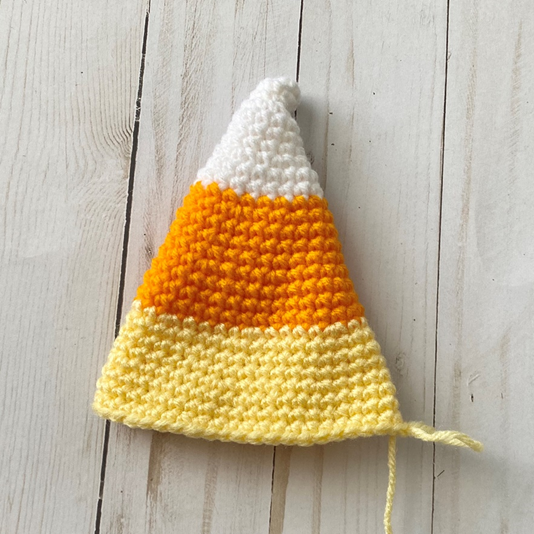
- Candy Corn Witch Hat: Red Heart Super Saver in White (15 yds), Pumpkin (25 yds), Lemon (50 yds)
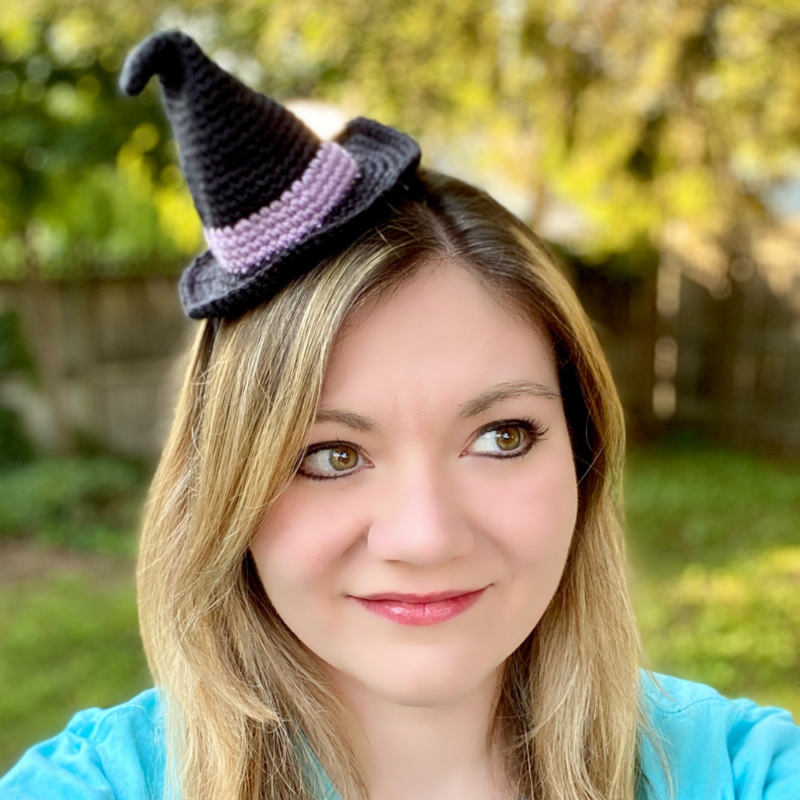
- Plain Hat with Band: Red Heart Super Saver in Black (70 yds) and Orchid (20 yds)
- Striped Hat: Red Heart Super Saver in Black (80 yds), a few yds each of Spring Green, Orchid, and Pumpkin for stripes
- About 50 yds needed to wrap around headband (Black for Striped and Plain hats; Lemon for Candy Corn)
Plastic craft headband (1 per hat)
Yarn Needle
Scissors
Abbreviations
FLO = front loop only
Rep = repeat
Rnd(s) = round(s)
Sc = single crochet
St(s) = stitch(es)
Gauge
Exact gauge is not essential to this project.
Size
Finished hat measures about 4.5 – 5 inches in length
How to Make This
Instructions
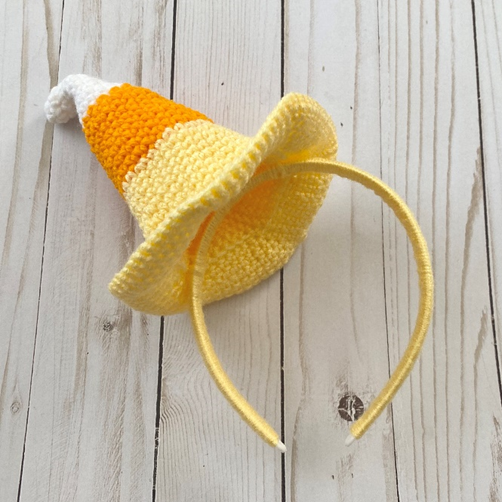
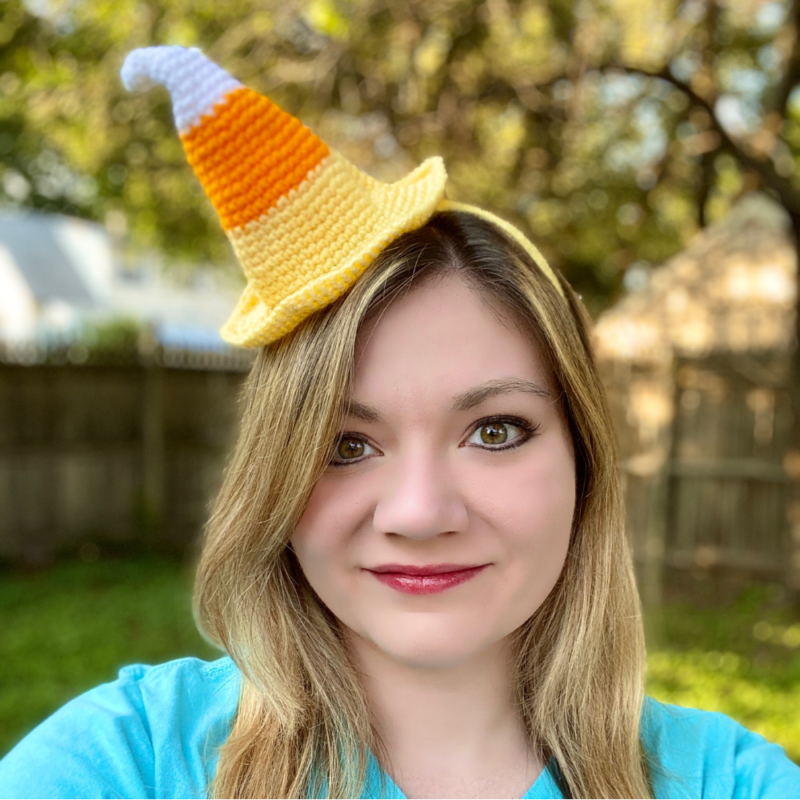
Candy Corn Hat
This piece is worked in continuous rnds; do not join. You may wish to use a stitch marker and move it up at the beginning of each new rnd.
Rnd 1 – With White, make a magic ring. 6 sc in ring. (6 sc)
Rnds 2 – 4 – sc in each st around. (6 sc per rnd)
Rnd 5 – 2 sc in each st around. (12 sc)
Rnds 6 – 8 – sc in each st around. (12 sc per rnd)
Rnd 9 – 2 sc in next st, sc in next; rep around. (18 sc)
Rnds 10 – 11 – sc in each st around. Change to Orange in last st. (18 sc per rnd)
Rnd 12 – sc in each st around. (18 sc)
Rnd 13 – 2 sc in next st, sc in next 2 sts; rep around. (24 sc)
Rnds 14 – 16 – sc in each st around. (24 sc per rnd)
Rnd 17 – 2 sc in next st, sc in next 3 sts; rep around. (30 sc)
Rnds 18 – 20 – sc in each st around. (30 sc per rnd)
Rnd 21 – 2 sc in next st, sc in next 4 sts; rep around. Change to Yellow in last st. (36 sc)
Rnds 22 – 24 – sc in each st around. (36 sc per rnd)
Rnd 25 – 2 sc in next st, sc in next 5 sts; rep around. (42 sc)
Rnds 26 – 28 – sc in each st around. (42 sc)
Do not fasten off.
Brim
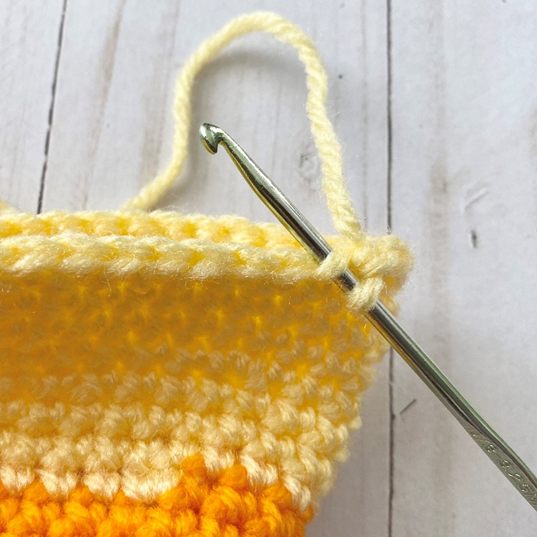
Rnd 29 -Working in FLO (see first photo below), 2 sc in next st, sc in next 6 sts; rep around. (48 sc)
Rnd 30 – 2 sc in next st, sc in next 7 sts; rep around. (54 sc)
Rnd 31 – 2 sc in next st, sc in next 8 sts; rep around. (60 sc)
Rnd 32 – 2 sc in next st, sc in next 9 sts; rep around. (66 sc)
Rnd 33 – 2 sc in next st, sc in next 10 sts; rep around. (72 sc)
Rnd 34 – 2 sc in next st, sc in next 11 sts; rep around. (78 sc)
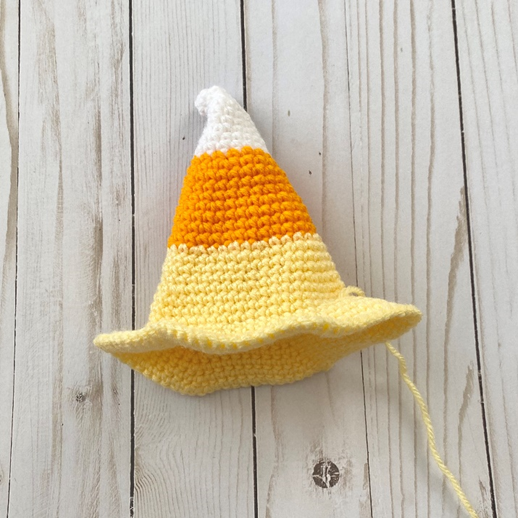
Fasten off. (Second photo below shows finished hat)
Black Hat with Band
Rep instructions for Candy Corn Hat, but complete Rnds 1 – 24 in Black, Rnds 25 – 28 in Purple, and Rnds 29 – 34 in Black.
Striped Hat
Rep instructions for Candy Corn Hat, but complete in following color scheme:
Rnds 1 – 4: Black
Rnd 5: Spring Green
Rnds 6 – 8: Black
Rnd 9: Orchid
Rnds 10 – 12: Black
Rnd 13: Pumpkin
Rnds 14 – 16: Black
Rnd 17: Spring Green
Rnds 18 – 20: Black
Rnd 21: Orchid
Rnds 22 – 24: Black
Rnd 25: Pumpkin
Rnds 26 – 34: Black
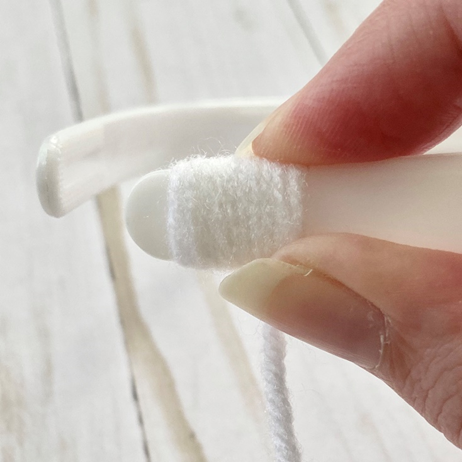
Headband
Starting at one end of plastic crafts headband, place a small section of desired yarn color on inside of headband.
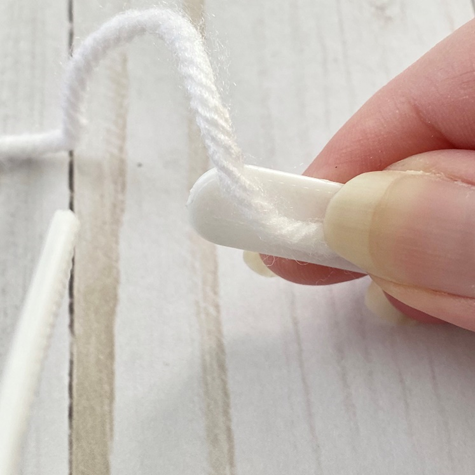
Begin wrapping around this section, and continue wrapping around rest of headband. Wrap tightly, pushing yarn down occasionally to keep work tight.
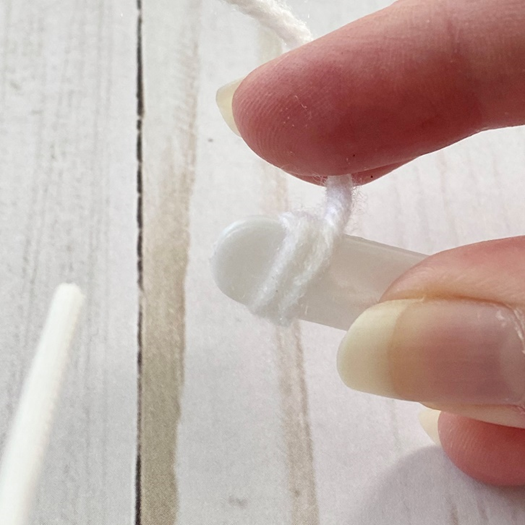
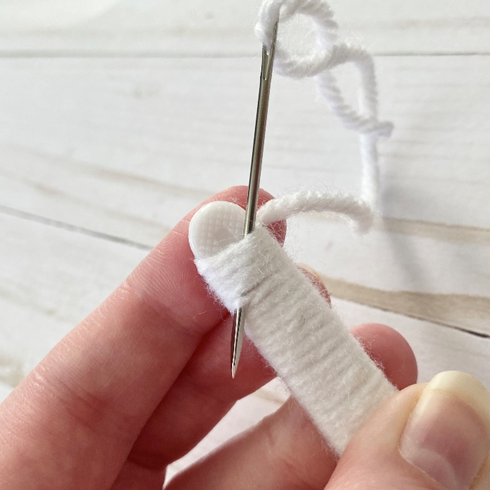
When only about a half a centimeter of the headband remains on the other end, fasten off, leaving a long tail. Holding wrapped yarn in place, thread needle with tail and weave it through 1-2 centimeters of wrapped yarn at the edge of the headband.
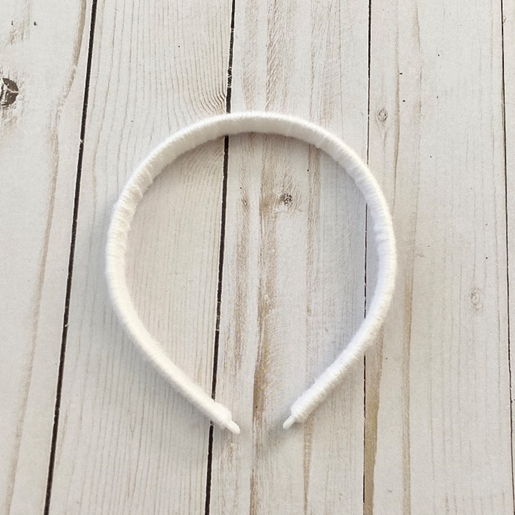
Finishing
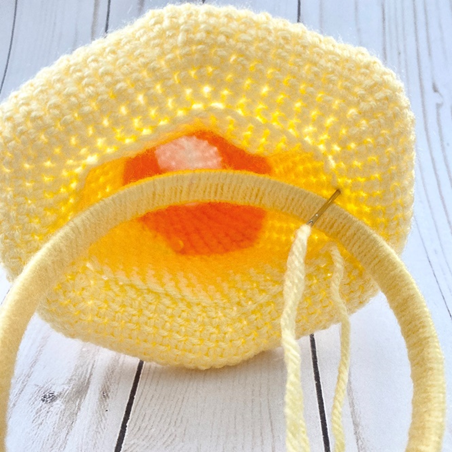
Sew Hat to Headband through sts near Rnd 29 of Hat. Weave in all ends.
Here are the finished headbands!
I hope you enjoyed crocheting these Witch Hats along with me today! If you love fun, free patterns like this one, then please be sure to subscribe to my email list to keep up to date with all my latest designs:
Also, please be sure to follow me on social media and tag me in photos of items you’ve made from my patterns so that I can see your lovely work!
Don’t forget to pin this for later HERE!
And you can find that ad-free PDF copy of the pattern HERE!
Happy Crocheting!
COPYRIGHT: This pattern is owned by Crafty Kitty Crochet (Melissa Moore). Any reselling or distribution of this pattern is prohibited. Sale of items made using this pattern is welcomed, but I do ask that credit/a link be provided back to my site, craftykittycrochet.com.

Comments (4)
Unicorn Headband – Crochet Pattern ~ Crafty Kitty Crochet
September 11, 2020 at 6:40 pm
[…] at the last minute)! I’ve already been having some headband fun, as you can see from my Witch Hat Headband pattern, so I thought I’d make one that was full of the beauty and magic of a unicorn! […]
Fox & Cat Ear Headbands – Crochet Pattern ~ Crafty Kitty Crochet
September 18, 2020 at 7:17 pm
[…] You’ve probably guessed this if you’ve been reading my blog for a while, but I am obsessed with Halloween! Between the natural beauty of the season and the spooky fun that the Halloween holiday brings, I find myself totally immersing myself in the season this year (which is probably evident in the patterns I’ve been publishing, like my Pumpkin Messy Bun Beanie and Pumpkin Spice Latte Amigurumi!). Even though Halloween will look a little different this year, there’s no reason we can’t still dress up in costumes that are so cute, it’s scary! That’s how I came up with the idea to make cute little animal headbands. (I’ve also made other Halloween headbands, like my Unicorn Headband and Witch Hat Headbands!) […]
Lucky Pot o Gold Top Hat Headband – Crochet Pattern ~ Crafty Kitty Crochet
February 19, 2021 at 10:31 pm
[…] not combine the two in the luckiest way possible for St. Patty’s Day? You might remember my Witch Top Hat Headband from Halloween, and my Hot Cocoa Mug Top Hat from Christmas. I’m starting to think I should […]
6 Magical Crochet Witch Hat Patterns For Halloween – The Yarn Crew
September 15, 2022 at 8:00 am
[…] GO TO FREE PATTERN […]