
Softie Animal Backpacks – Crochet Pattern
Pin it for later!

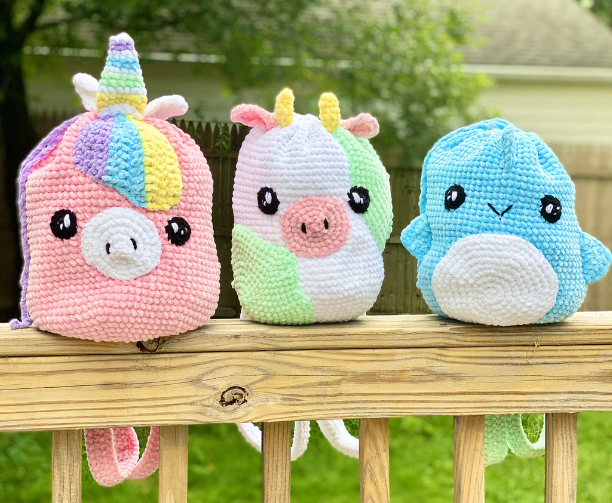
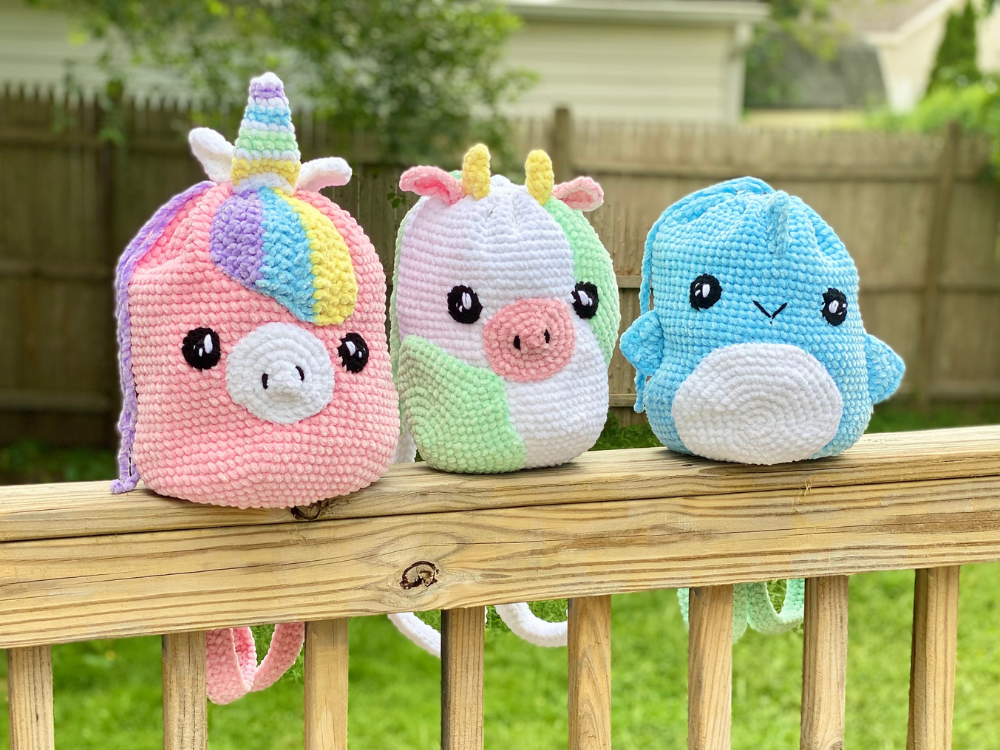
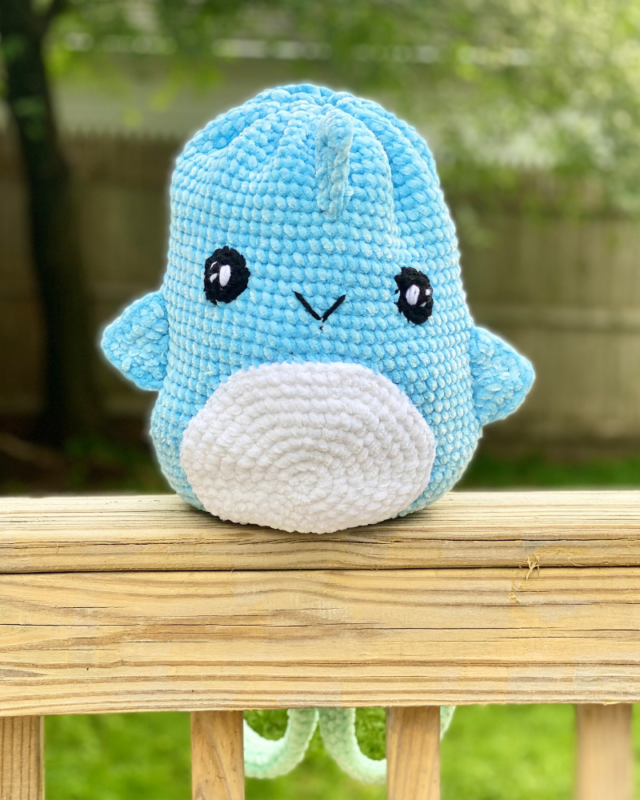
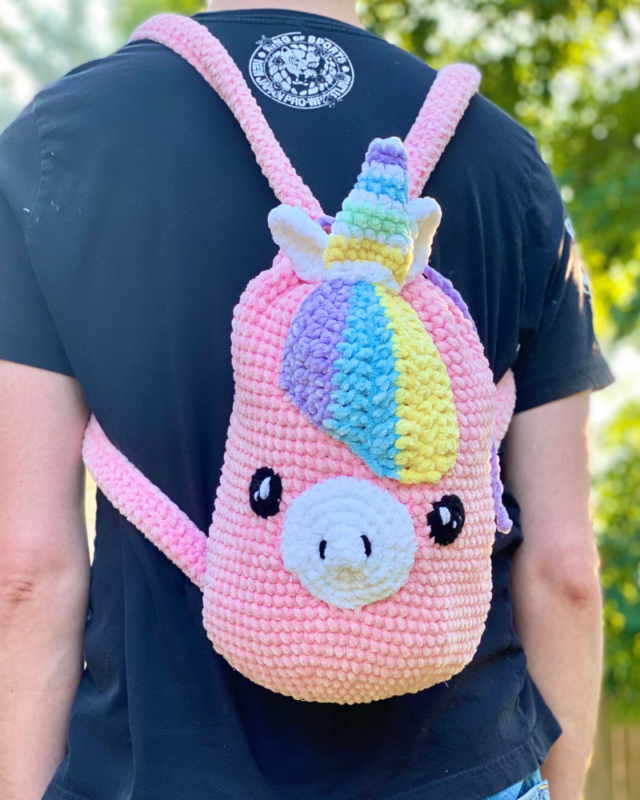
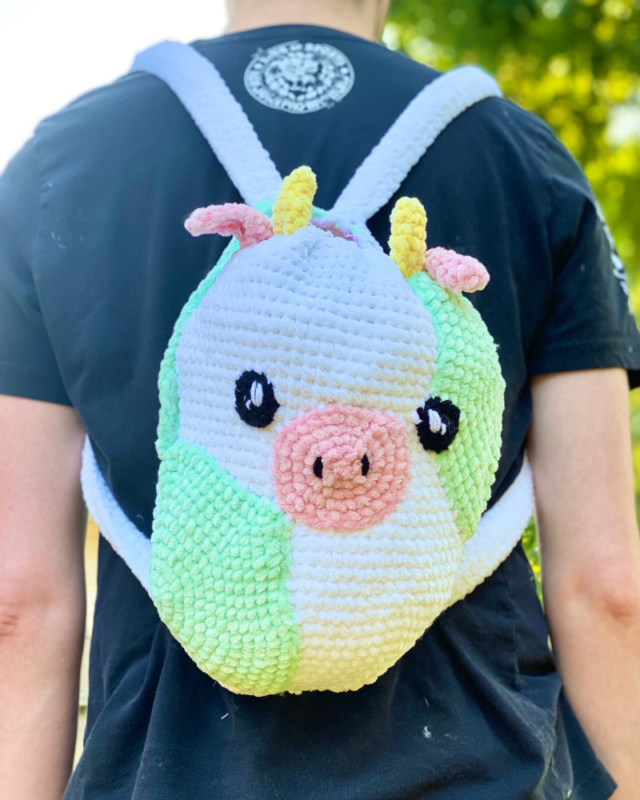
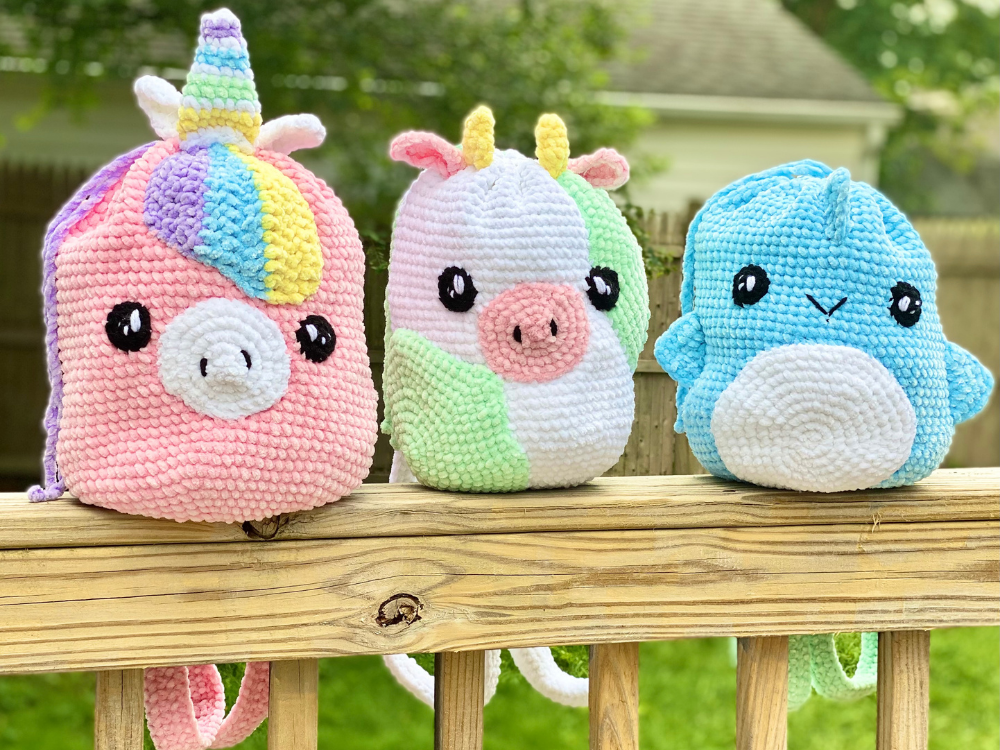
It’s back to school time, so why not go back in style? These soft, cute amigurumi backpacks are perfect for kids of all ages! If you’re a fan of the cute style of stuffed animal popularized by Squishmallows, then you will love the designs for this Unicorn, Cow and Shark. Made using chenille yarn, they are cozy yet durable. And best of all, the pattern is easy since the shapes and stitches in the pattern are very basic! Send your little one back to class in style – and / or use these as adorable accessories for travel! These bags are bright colorful, and perfect for holding all your most essential accessories!
Softie Animal Backpacks
If you’ve been following my blog for a while, then you know that I love amigurumi! I love the look, style, and just about everything associated with this particular category of crochet. But I also like to mix things up once in a while and make unique accessories that have the same style as amigurumi, but with a functional twist! Since the simplistic look of certain kawaii stuffed animals that are popular today has a sort of bag-like shape anyway, I figured this would be the perfect time to crochet some critters for back to school! And so, the softie backpack designs were born. I couldn’t resist making a unicorn, and I’ve been seeing way too much cute cow stuff out there, and as I designed these, it was close to shark week. So that’s how I came up with these three particular designs! If you like these backpacks, be sure to let me know what other kinds of animals you’d like to see!
The yarn I used for these backpacks is a Dollar Tree exclusive called Premier Just Chenille. However, Premier offers other similar yarns such as Parfait, which would be a great substitute for these backpacks! Find some on Amazon:
Looking for an ad-free PDF copy of this pattern? You can find one in my shop HERE!
Supplies
Size H/8 5.0 mm crochet hook
- Unicorn (all yarns are bulky weight unless otherwise notated):
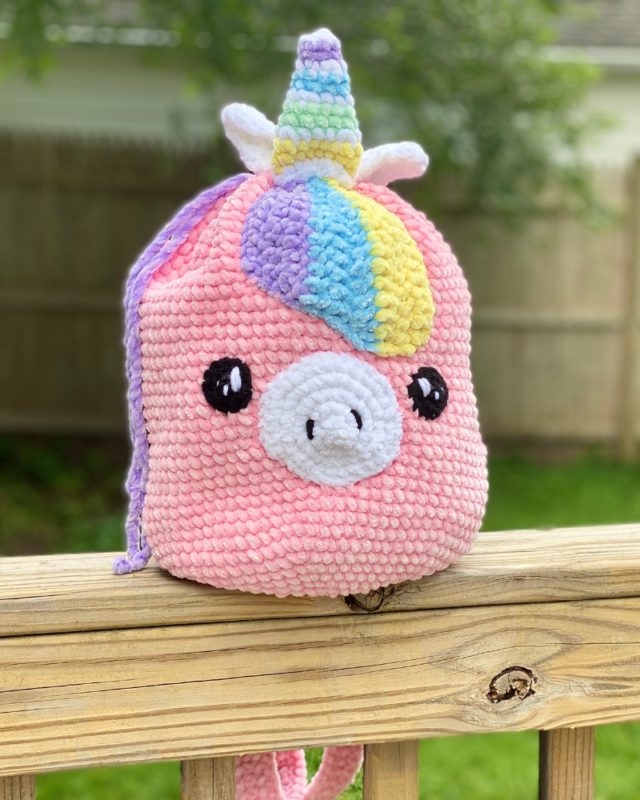
• Main color (3 skeins of Premier Just Chenille in Pink shown in photos) – 195 yds
• Snout color (1 skein of Premier Just Chenille in White shown in photos) – 65 yds
• Mane colors (1 skein each of Premier Just Chenille in Lavender, Blue and Yellow shown in photos) – about 50 yds each
• Ear color (1 skein of Premier Just Chenille in White shown in photos) – about 25 yds
• Horn colors (1 skein each of Premier Just Chenille in White, Lavender, Yellow and Blue shown in photos) – about 15-25 yds each
• Drawstring color (1 skein of Premier Just Chenille in Lavender shown in photos) – about 5 yds
• Strap Color (2 skeins of Premier Just Chenille in Pink shown in photos) – about 150 yds
• Eye and snout finishing – medium weight (1 skein each of Red Heart Super Saver in Black and White shown in photos) – about 10 yds of Black, less than a yd of White - Shark (all yarns are bulky weight unless otherwise notated):
• Main color (3 skeins of Premier Just Chenille in Blue shown in photos) – 195 yds
• Fin color (1 skein of Premier Just Chenille in Blue shown in photos) – 30 yds
• Belly color (1 skein of Premier Just Chenille in Blue shown in photos) – 50 yds
• Drawstring color (1 skein of Premier Just Chenille in Blue shown in photos) – about 5 yds
• Strap Color (2 skeins of Premier Just Chenille in Blue shown in photos) – about 150 yds
• Eye and smile – medium weight (1 skein each of Red Heart Super Saver in Black and White shown in photos) – about 10 yds of Black, less than a yd of White - Cow (all yarns are bulky weight unless otherwise notated):
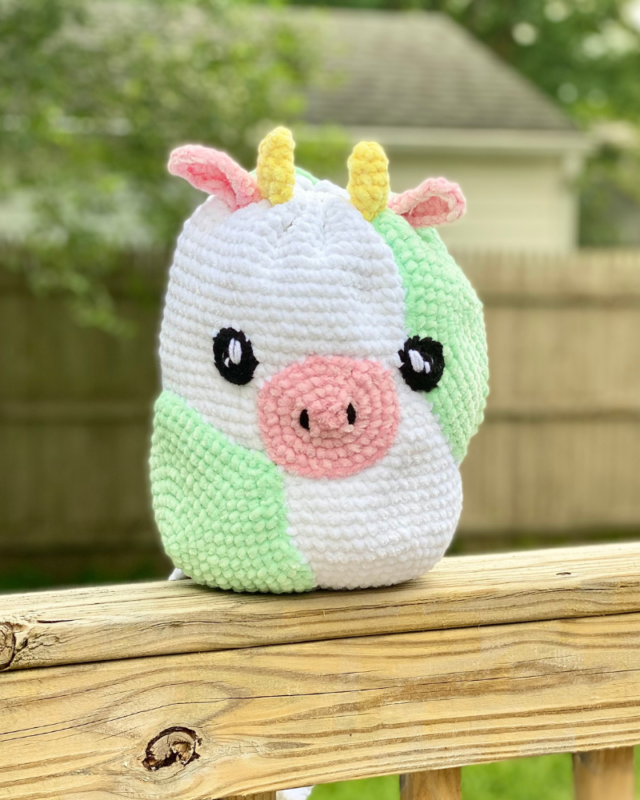
• Main color (3 skeins of Premier Just Chenille in White shown in photos) – 195 yds
• Snout color (1 skein of Premier Just Chenille in Pink shown in photos) – 65 yds
• Ear color (1 skein of Premier Just Chenille in Pink shown in photos) – about 25 yds
• Horn color (1 skein of Premier Just Chenille in Yellow shown in photos) – 25 yds
• Drawstring color (1 skein of Premier Just Chenille in Mint shown in photos) – about 5 yds
• Spot color (2 skeins of Premier Just Chenille in Mint shown in photos) – 100 yds
• Eye and snout finishing – medium weight (1 skein each of Red Heart Super Saver in Black and White shown in photos) – about 10 yds of Black, less than a yd of White
Yarn needle with large eye
Scissors
Abbreviations
*= indicates beginning/end of a section to be repeated
Beg = beginning
Ch = chain
Dc = double crochet
Hdc = half double crochet
Rep = repeat
Rnd(s) = round(s)
Sc = single crochet
Sc2tog = single crochet 2 together
Sk = skip
Sl st = slip stitch
St(s) = stitch(es)
Gauge
3 sc and 3 rows = about 1 inch
Size
About 10 inches in length
Notes
Premier Just Chenille, the yarn used in the photos shown here, is classified as Super Bulky. However, it has a closer consistency to Bulky Weight. Substitutes for this yarn that should have a similar weight and produce a similar size are Premier Parfait and Bernat Velvet.
How to Make This
Instructions
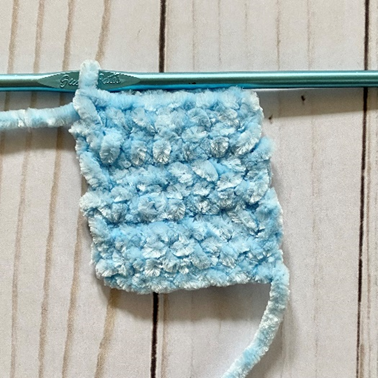
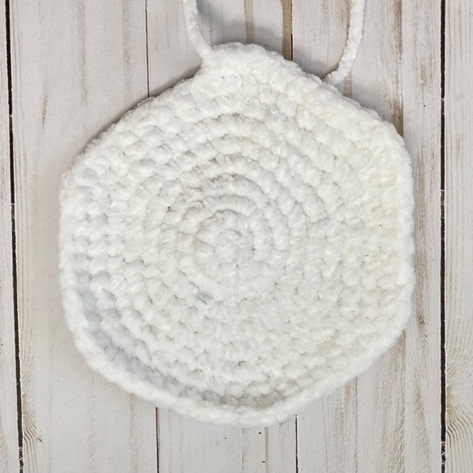
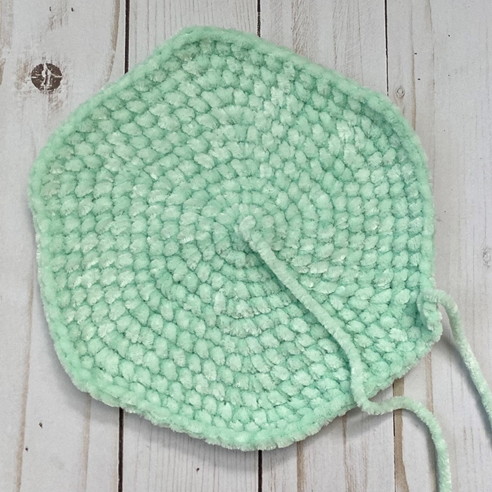
Backpack Base (use for all designs – photos show Pink for Unicorn, Blue for Shark, and White for Cow – or main color of choice)
This piece is worked in continuous rnds; do not join. You may wish to use a st marker and move it up at the beg of each new rnd.
Rnd 1 – With main color, make a magic ring. 6 sc in ring. (6 sc)
Rnd 2 – 2 sc in each st around. (12 sc)
Rnd 3 – *2 sc in next st, sc in next st*; rep from * to * around. (18 sc)
Rnd 4 – *2 sc in next st, sc in next 2 sts*; rep from * to * around. (24 sc)
Rnd 5 – *2 sc in next st, sc in next 3 sts*; rep from * to * around. (30 sc)
Rnd 6 – *2 sc in next st, sc in next 4 sts*; rep from * to * around. (36 sc)
Rnd 7 – *2 sc in next st, sc in next 5 sts*; rep from * to * around. (42 sc)
Rnd 8 – *2 sc in next st, sc in next 6 sts*; rep from * to * around. (48 sc)
Rnd 9 – *2 sc in next st, sc in next 7 sts*; rep from * to * around. (54 sc)
Rnd 10 – *2 sc in next st, sc in next 8 sts*; rep from * to * around. (60 sc)
Rnd 11 – *2 sc in next st, sc in next 9 sts*; rep from * to * around. (66 sc)
Rnd 12 – *2 sc in next st, sc in next 10 sts*; rep from * to * around. (72 sc)
Rnds 13 – 42 – sc in each st around. (72 sc per rnd)
Rnd 43 – *sc2tog over next 2 sts, sc in next 8 sts*; rep from * to * around. (54 sc)
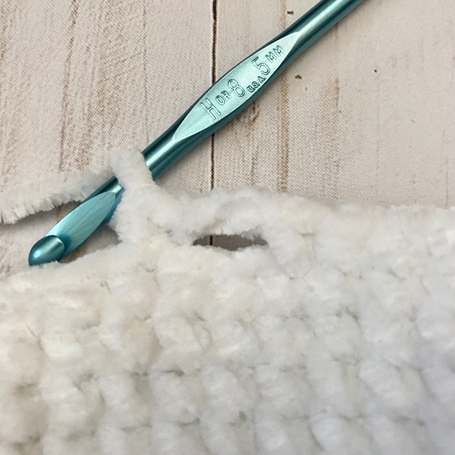
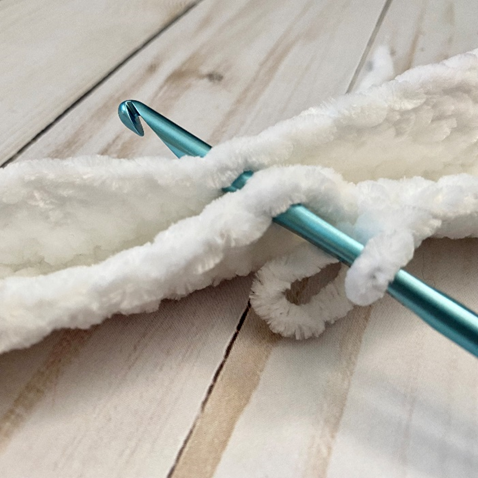
Rnd 44 – to make loophole for Drawstring, *ch 2, sk next 2 sts, sc in next st (first photo below)*. Rep from * to * 17 more times. (18 loops)
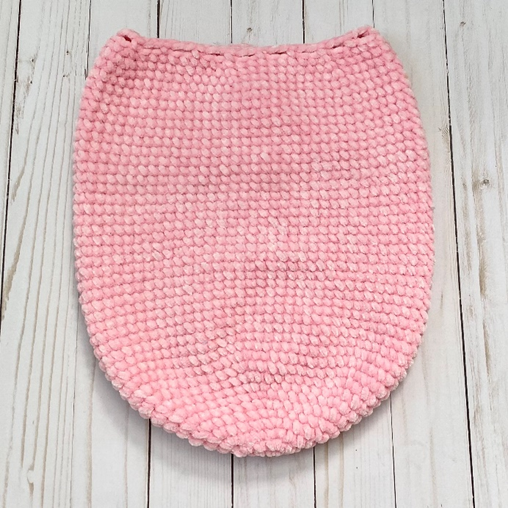
Fasten off. Second photo shows finished piece.
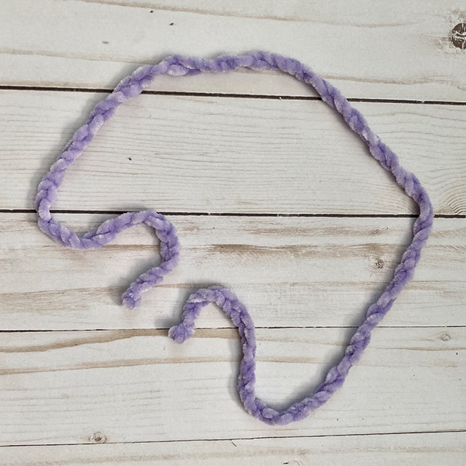
Drawstring (use for all designs – photos show Lavender for Unicorn, Blue for Shark, Mint for Cow)
With main color or desired contrast color, ch 80.
Fasten off, trim ends and tie knots close to each end. Photo below shows finished piece.
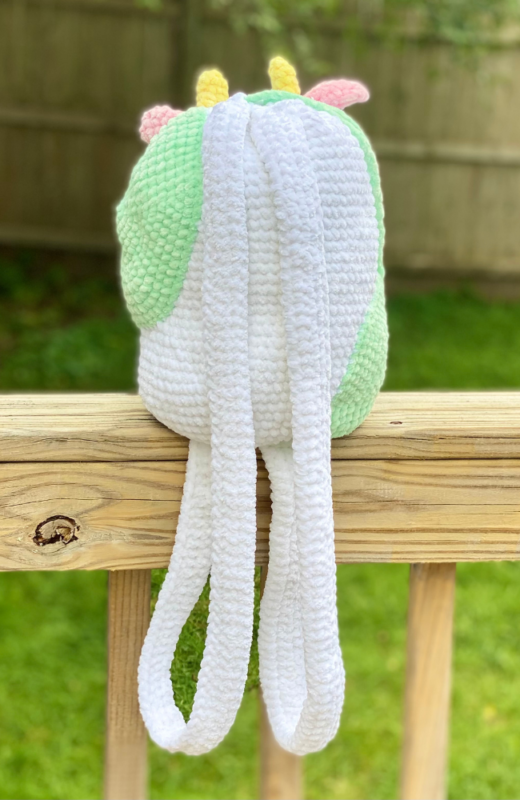
Strap (make 2; use for all designs – photos show Pink for Unicorn, Mint for Shark, and White for Cow)
With main Color or desired Contrast Color, ch 96.
Row 1 – sc in 2nd ch from hook, and in each st across. Ch 1, turn (95 sc)
Row 2 – sc in each st across. Ch 1, turn (95 sc)
Rows 3 – 7 – rep Row 2.
Shaping
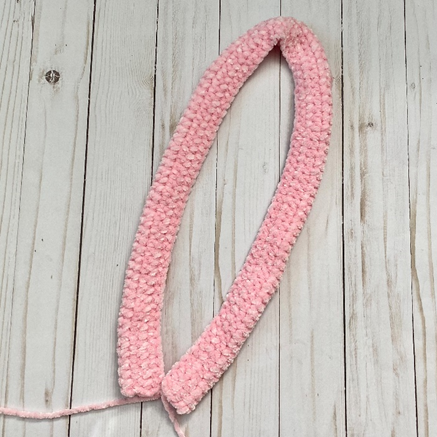
Fold piece in half, lengthwise. Working through both side edges, sc in each st across to join (first photo below).
Fasten off, leaving long tail for sewing. Second photo below shows finished piece.
Eye (make 2 – use for all designs)
This piece is worked in continuous rnds; do not join. You may wish to use a st marker and move it up at the beg of each new rnd.
Rnd 1 – With Black, make a magic ring. 6 sc in ring. (6 sc)
Rnd 2 – 2 sc in each st around. (12 sc)
Fasten off, leaving long tail for sewing.
Finishing
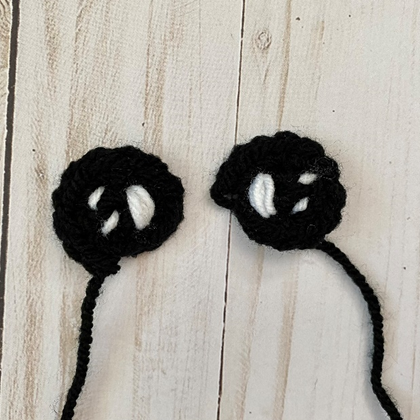
With White, sew several vertical lines near outer edge of each Eye. Sew several smaller lines near opposite edges. Tie off White ends and end from beginning of rnd on back of piece. Photo shows finished pieces.
Unicorn Snout
This piece is worked in continuous rnds; do not join. You may wish to use a st marker and move it up at the beg of each new rnd.
Rnd 1 – With contrast color of choice (White used in photos), make a magic ring. 6 sc in ring. (6 sc)
Rnd 2 – 2 sc in each st around. (12 sc)
Rnd 3 – *2 sc in next st, sc in next st*; rep from * to * around. (18 sc)
Rnd 4 – *2 sc in next st, sc in next 2 sts*; rep from * to * around. (24 sc)
Rnd 5 – *2 sc in next st, sc in next 3 sts*; rep from * to * around. (30 sc)
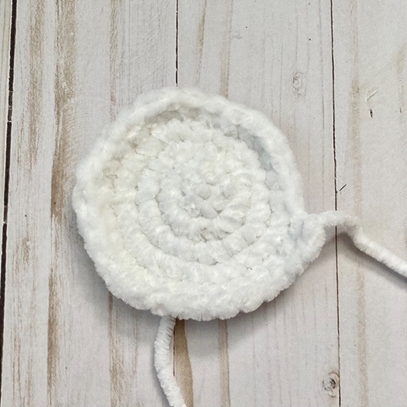
Fasten off, leaving long tail for sewing. Photo below shows piece at this stage.
Finishing
With Black on Needle, make two small vertical lines in center of Snout, spaced apart a few sts. Tie off ends on back of Snout.
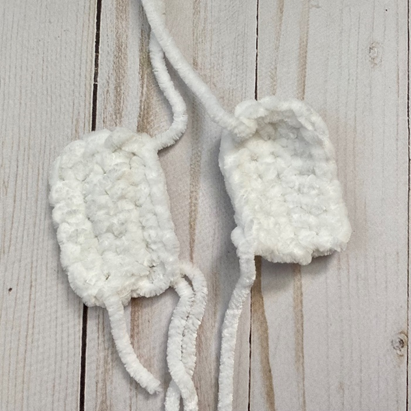
Unicorn Ear (make 2)
With contrast color of choice (White used in photos), ch 7.
Row 1 – sc in 2nd ch from hook, and in each st across. Ch 1, turn (6 sc)
Rows 2 – 6 – sc in each st across. Ch 1, turn (6 sc per row)
Edging
Evenly make 2 hdc across top of piece (first photo below). (3 hdc)
Fasten off, leaving long tail for sewing. Second photo below shows finished pieces.

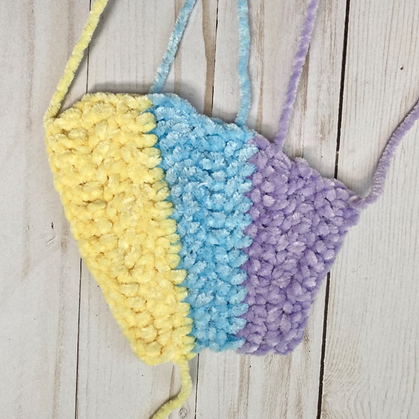
Unicorn Mane
(After switching colors, fasten off previous color, leaving long tail for sewing.)
With first color of choice (Lavender used in photos), ch 11.
Row 1 – sc in 2nd ch from hook and in next 2 sts. Hdc in next 3 sts. Dc in next 4 sts. Ch 2, turn (3 sc, 3 hdc, 4 dc)
Row 2 – Dc in next 4 sts. Hdc in next 3 sts. Sc in last 3 sts. Ch 1, turn (4 dc, 3 hdc, 3 sc)
Row 3 – sc in next 3 sts. Hdc in next 3 sts. Dc in next 3 sts. Make 3 dc in last st; in last dc, change to next color (Blue shown in photos). Ch 2, turn (3 sc, 3 hdc, 6 dc)
Row 4 – dc in next 6 sts, hdc in next 3 sts, sc in last 3 sts. Ch 1, turn (6 dc, 3 hdc, 3 sc)
Row 5 – sc in next 3 sts, hdc in next 3 sts, dc in last 6 sts. Ch 2, turn (3 sc, 3 hdc, 6 dc)
Row 6 – make 3 dc in first st, dc in next 5 sts. Hdc in next 3 sts, sc in last 3 sts; in last st, change to next color (Yellow shown in photos). Ch 1, turn (8 dc, 3 hdc, 3 sc)
Row 7 – sc in next 3 sts, hdc in next 3 sts, dc in last 8 sts. Ch 2, turn (3 sc, 3 hdc, 8 dc)
Row 8 – Dc in next 8 sts, hdc in next 3 sts, sc in last 3 sts. Ch 1, turn (8 dc, 3 hdc, 3 sc)
Row 9 – rep Row 7.
Fasten off, leaving long tail for sewing. Photo below shows finished piece.
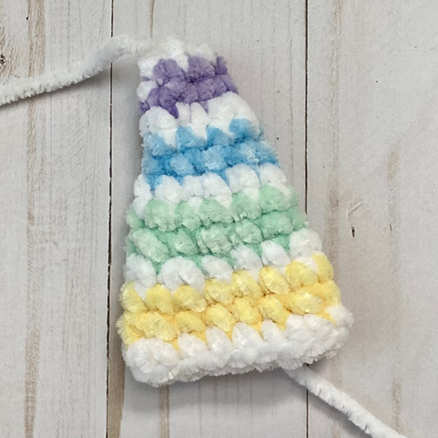
Unicorn Horn
This piece is worked in continuous rnds; do not join. You may wish to use a st marker and move it up at the beg of each new rnd.
Rnd 1 – With first contrast color of choice (White used in photos), make a magic ring. 6 sc in ring. In last st, change to next contrast color (Lavender used in photos). (6 sc)
Rnds 2 – 3 – sc in each st around. In last st of Rnd 3, change to previous contrast color (White used in photos). (6 sc)
Rnd 4 – *2 sc in next st, sc in next st*; rep from * to * around. In last st, change to next contrast color (Blue used in photos). (9 sc)
Rnds 5 – 6 – sc in each st around. In last st of Rnd 6, change to previous contrast color (White used in photos). (9 sc)
Rnd 7 – *2 sc in next st, sc in next 2 sts*; rep from * to * around. In last st, change to next contrast color (Mint used in photos). (12 sc)
Rnds 8 – 9 – sc in each st around. In last st of Rnd 9, change to previous contrast color (White used in photos). (12 sc)
Rnd 10 – *2 sc in next st, sc in next 3 sts*; rep from * to * around. In last st, change to next contrast color (Yellow used in photos). (15 sc)
Rnds 11 – 12 – sc in each st around. In last st, change to previous contrast color (White used in photos). (15 sc)
Rnd 13 – *2 sc in next st, sc in next 4 sts*; rep from * to * around. Join with sl st to first st of rnd. (18 sc)
Fasten off, leaving long tail for sewing. Photo below shows finished piece.
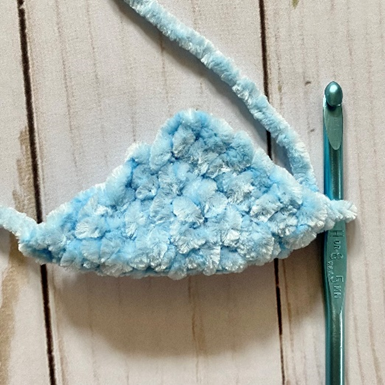
Shark Fin (make 3)
With main color of choice (Blue used in photos), ch 7.
Row 1 – sc in 2nd ch from hook, and in each st across. Ch 1, turn (6 sc)
Rows 2 – 6 – sc in each st across. Ch 1, turn. (First photo below shows piece at this stage.) (6 sc per row)
Shaping
Fold piece diagonally to make a triangle shape (second photo below). Sc through both sides of piece, making 4 sts evenly up first side. 3 sc at tip of piece. Evenly 4 sc down other side. (11 sc)
Fasten off, leaving long tail for sewing.
Shark Belly
This piece is worked in continuous rnds; do not join. You may wish to use a st marker and move it up at the beg of each new rnd.
Rnd 1 – With Main color, make a magic ring. 6 sc in ring. (6 sc)
Rnd 2 – 2 sc in each st around. (12 sc)
Rnd 3 – *2 sc in next st, sc in next st*; rep from * to * around. (18 sc)
Rnd 4 – *2 sc in next st, sc in next 2 sts*; rep from * to * around. (24 sc)
Rnd 5 – *2 sc in next st, sc in next 3 sts*; rep from * to * around. (30 sc)
Rnd 6 – *2 sc in next st, sc in next 4 sts*; rep from * to * around. (36 sc)
Rnd 7 – *2 sc in next st, sc in next 5 sts*; rep from * to * around. (42 sc)
Rnd 8 – *2 sc in next st, sc in next 6 sts*; rep from * to * around. (48 sc)
Rnd 9 – *2 sc in next st, sc in next 7 sts*; rep from * to * around. (54 sc)
Fasten off, leaving long tail for sewing. Photo shows finished piece.
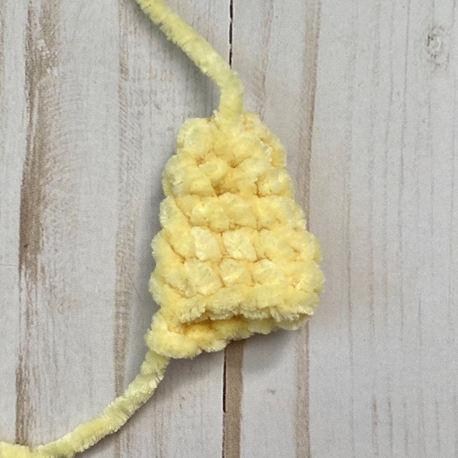
Cow Horn (make 2)
This piece is worked in continuous rnds; do not join. You may wish to use a st marker and move it up at the beg of each new rnd.
Rnd 1 – With contrast color of choice, make a magic ring. 6 sc in ring. (6 sc)
Rnds 2 – 3 – sc in each st around. (6 sc per rnd)
Rnd 4 – *2 sc in next st, sc in next st*; rep from * to * around. (9 sc)
Rnds 5 – 6 – sc in each st around.
Fasten off, leaving long tail for sewing. First photo below shows finished piece.
Cow Snout
Rep Instructions from Unicorn Snout using contrast color of choice (Pink used in photos). Pull piece width-wise after finished to make more of an oval shape. Photo below shows finished piece.
Cow Ear (make 2)
Rep Instructions for Unicorn Ears using desired contrast color of choice (Pink used in photos.)
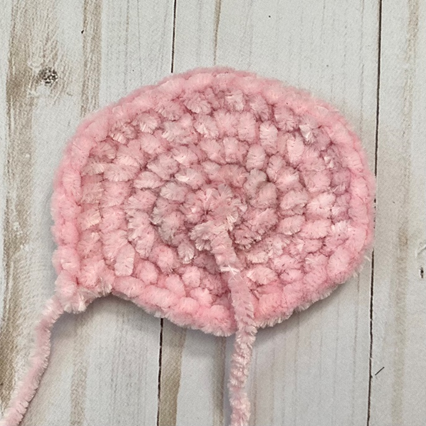
Spot (make 2)
This piece is worked in continuous rnds; do not join. You may wish to use a st marker and move it up at the beg of each new rnd.
Rnd 1 – With contrast color of choice (Mint used in photos), make a magic ring. 6 sc in ring. (6 sc)
Rnd 2 – 2 sc in each st around. (12 sc)
Rnd 3 – *2 sc in next st, sc in next st*; rep from * to * around. (18 sc)
Rnd 4 – *2 sc in next st, sc in next 2 sts*; rep from * to * around. (24 sc)
Rnd 5 – *2 sc in next st, sc in next 3 sts*; rep from * to * around. (30 sc)
Rnd 6 – *2 sc in next st, sc in next 4 sts*; rep from * to * around. (36 sc)
Rnd 7 – *2 sc in next st, sc in next 5 sts*; rep from * to * around. (42 sc)
Rnd 8 – *2 sc in next st, sc in next 6 sts*; rep from * to * around. (48 sc)
Rnd 9 – *2 sc in next st, sc in next 7 sts*; rep from * to * around. (54 sc)
Rnd 10 – *2 sc in next st, sc in next 8 sts*; rep from * to * around. (60 sc)
Rnd 11 – *2 sc in next st, sc in next 9 sts*; rep from * to * around. (66 sc)
Rnd 12 – *2 sc in next st, sc in next 10 sts*; rep from * to * around. (72 sc)
Fasten off, leaving long tail for sewing. Photo shows finished piece.
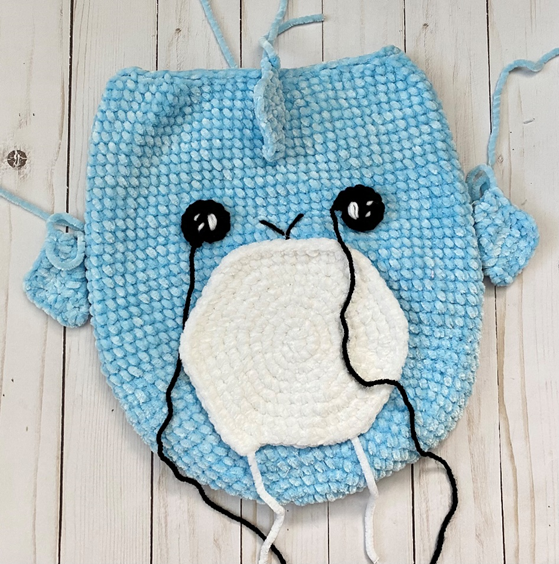
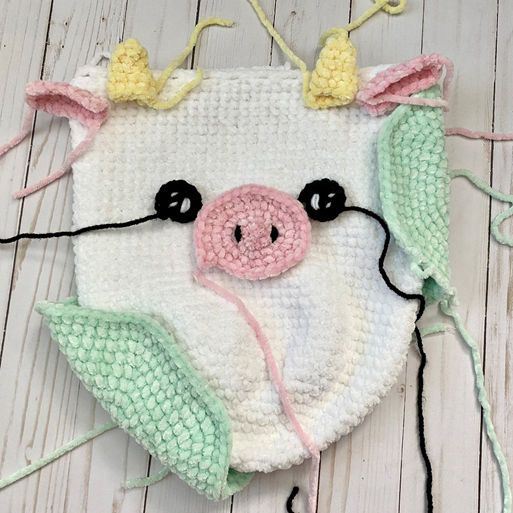
Finishing
Arrange pieces on respective designs as seen in photos below. Sew pieces in place. For Shark, make a small “v” between Eyes for Smile using Black.
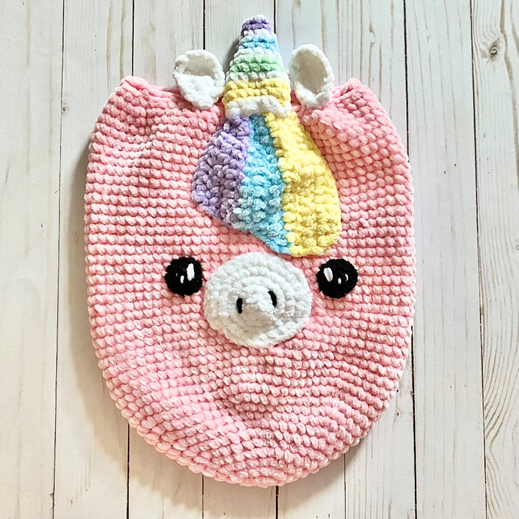
Sew Straps on back of respective design, aligning them as seen in photo below.

Weave in all ends.
Here are the finished backpacks!

I hope you enjoyed crocheting these backpacks along with me today. If you love fun, free patterns like this one, then please be sure to sign up for my email list to keep up to date with all my latest designs:
Also, please be sure to follow me on social media, and tag me in photos of your finished projects made from my patterns, so I can see your lovely work!
Don’t forget to pin it for later HERE!
And you can find that ad-free PDF pattern HERE!
Happy Crocheting!
COPYRIGHT:
This pattern is owned by Crafty Kitty Crochet (Melissa Moore). Any reselling or distribution of this pattern is prohibited. Sale of items made using this pattern is welcomed, but I do ask that credit/a link be provided back to my site, craftykittycrochet.com.
Comments (3)
Amigurumi Cherry Blossom Cow – Crochet Pattern ~ Crafty Kitty Crochet
April 1, 2022 at 8:21 pm
[…] are so much fun to crochet, as I found out with my Softie Animal Backpacks! There are so many cute variations of cows that have become popular – strawberry, chocolate milk, […]
15 Crochet Backpack Patterns For Campers – Craftsy
September 21, 2023 at 4:19 am
[…] Click Here […]
The Best Back to School Knit and Crochet Patterns Collection
November 12, 2024 at 3:58 pm
[…] Softie Animal Backpacks – Crochet Pattern […]