
Plushie Pumpkins – Crochet Pattern
Pin it for later!
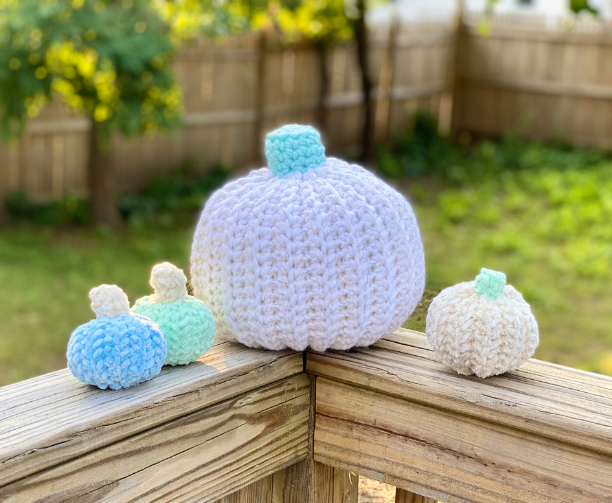
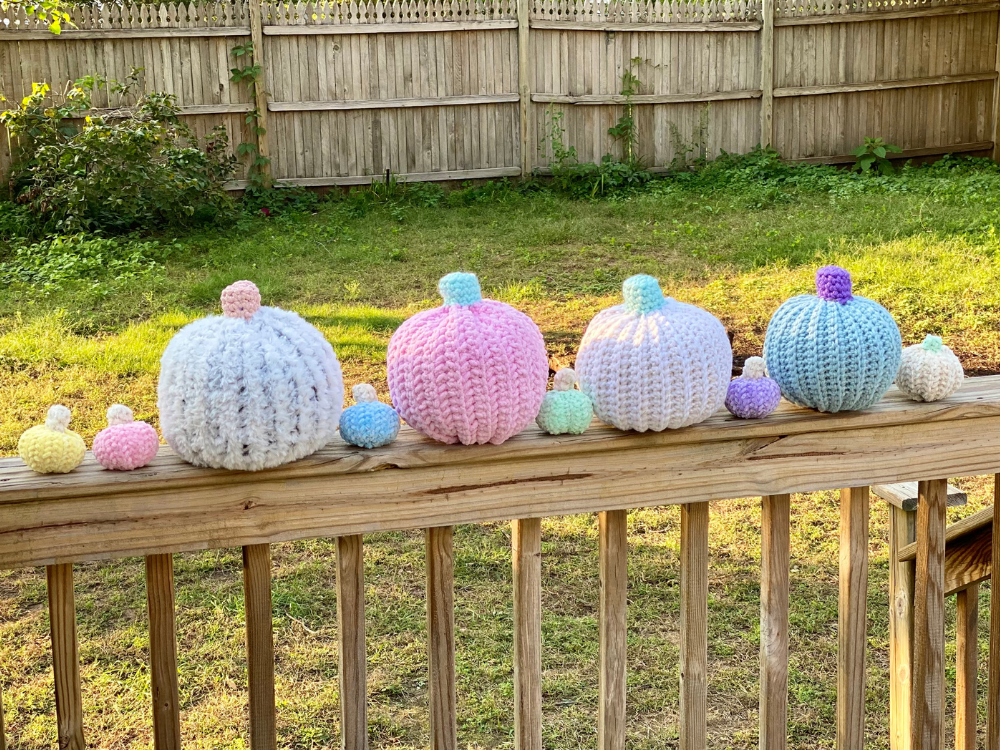
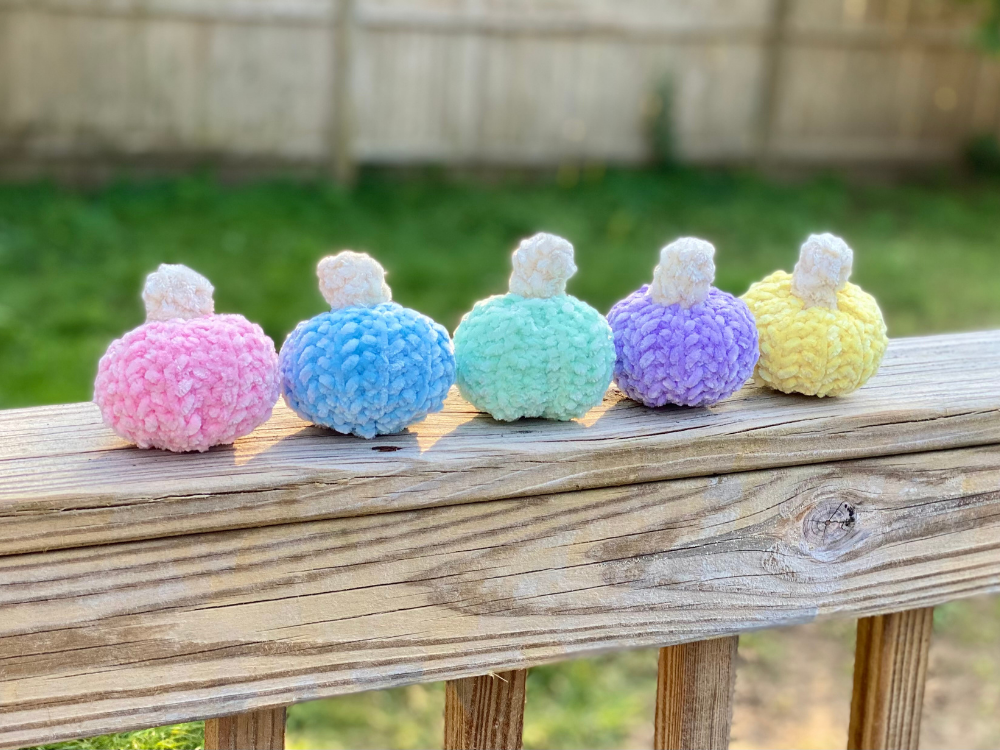
It’s pumpkin season! Brighten your fall with these soft, cozy, plushie pumpkins! They are fun and easy to crochet and work up so fast. Make a whole pumpkin patch in just a weekend! They are perfect as home decor and gifts for the autumn season! Make them in sparkly jewel tones, pastels, netural colors, or spooky Halloween classic colors. The possibilities are endless, and the results are large and small fluffy, chunky pumpkins that are personalized to your tastes! This is sure to be your favorite go-to fall and Halloween crochet pattern!
Plushie Pumpkins
If you’ve been reading my blog for a while, then you know that I’m a self-proclaimed fall-natic. Autumn is my favorite season for so many reasons – the chill in the air, the beautiful foliage, the thrill of spooky season, and last but not least, my almost-Halloween birthday! A few years ago I came up with a fun and easy pumpkin design: my Easy Peasy Pumpkins. They’re cute, fun, fast, and range from traditional to slightly rustic. This year, I decided to jump in on the blanket / bulky yarn craze and make some softie versions! I was so happy with the results – it really feels like the possibilities are endless when it comes to texture and color combos! They can be made in two sizes – large and small. What kinds of pumpkins will you make?
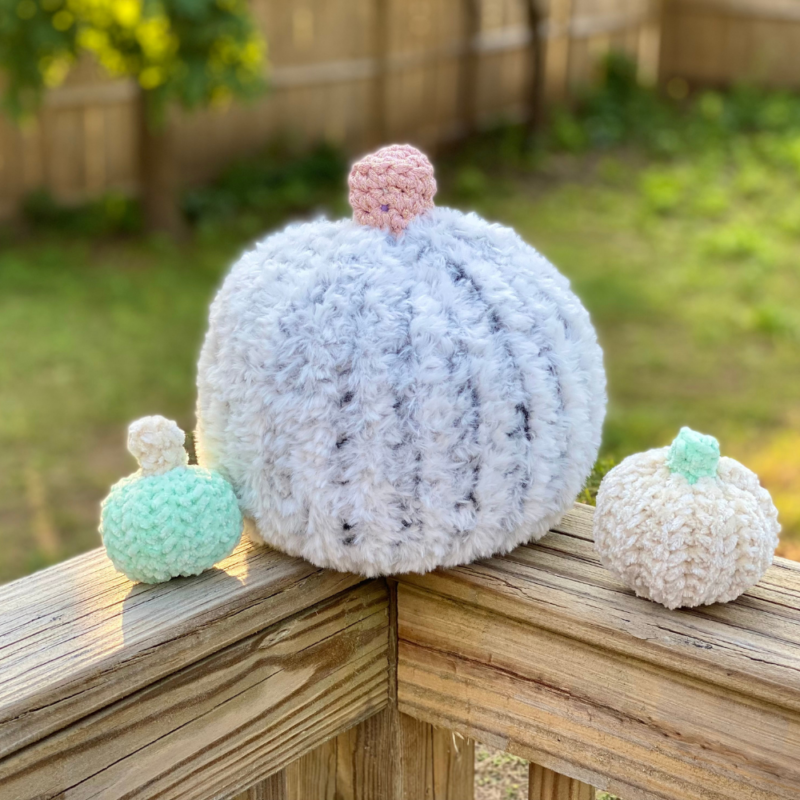
The way these pumpkins turn out depends a lot on the yarn you use. That’s what makes it so fun to mix and match styles, textures and colors! My personal faves for this were using Bernat Blanket yarn, Lion Brand Wool Ease Thick and Quick, and Bernat Velvet yarn. Find them on Amazon!
Looking for the ad-free PDF copy of this pattern? Find one in my shop HERE!
Supplies
Size L-11 / 8 mm crochet hook
Size H-8 / 5.00 mm crochet hook
Super bulky yarn for large pumpkin (about 150 yds of Main Color, 20 yds of Stem Color)
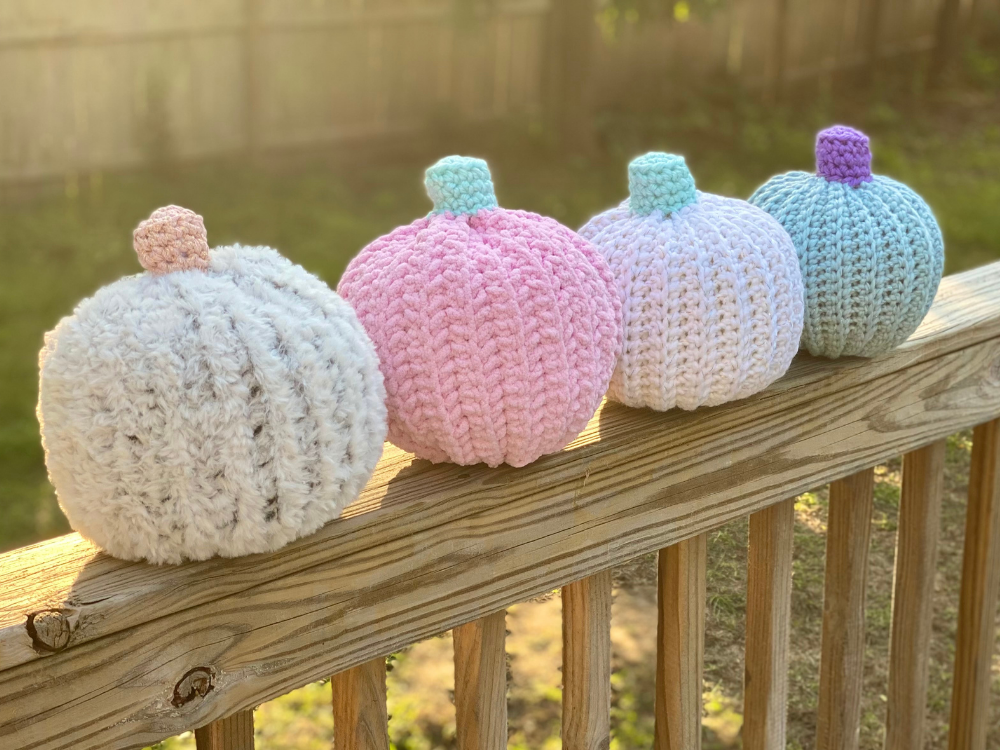
- Used in photos: Lion Brand Wool Ease in Celebration (white sparkle pumpkin) and Mystical (blue sparkle pumpkin); Bernat Blanket in Baby Pink (pink pumpkin), Lion Brand Go For Faux Thick & Quick in Chinchilla (white fur pumpkin); Lion Brand Hometown USA in Louisville Julep (teal stem) and Minneapolis Purple (purple stem); Paintbox Yarns Recycled Metallic Ribbon in Pink Shimmer (pink stem)
Bulky Yarn for small pumpkin (about 75 yds of Main Color, 10 yds of Stem Color)
- Used in photos: Bernat Velvet in Soft Sunshine (beige pumpkin and beige stems); Premier Just Chenille in Yellow, Pink, Blue, Lavender and Mint (pastel pumpkins and green stem on beige pumpkin)
Fiberfill stuffing
Yarn needle with large eye
Scissors
Abbreviations
BLO = back loop only
Ch = chain
FLO = front loop only
Rem = remaining
Rep = repeat
Rnd(s) = round(s)
Sc = single crochet
Sl st = slip stitch
St(s) = stitch(es)
Gauge
Exact gauge is not essential to this project.
Size
Large Pumpkin: about 25-27 inches around depending on super bulky yarn used; Small Pumpkin: about 10-12 inches around depending on bulky yarn used
How to Make This
Instructions
Large Pumpkin
With Super Bulky yarn and L hook, Ch 23.
Row 1 – sc in 2nd ch from hook and in each st across. Ch 1, turn (22 sc)
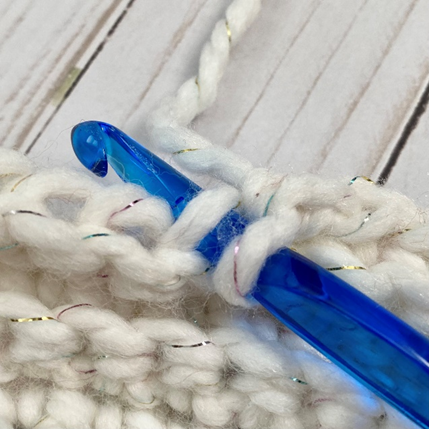
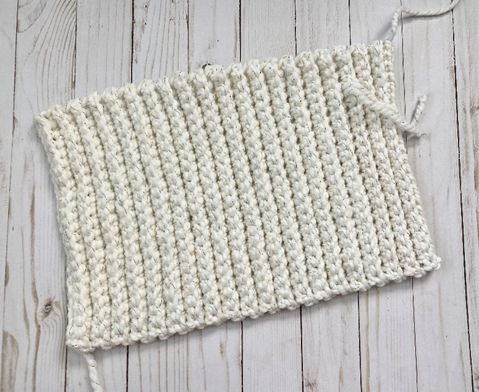
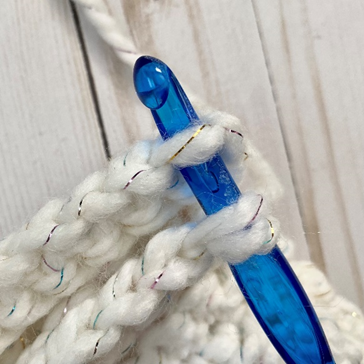
Rows 2 – 40 – working in BLO (first photo below), sc in each st across. Ch 1, turn. Do not ch 1 at end of Row 40. (22 sc per row)
Fasten off, leaving long tail for sewing. (Second photo shows piece at this point.)
Small Pumpkin
With Bulky yarn and H hook, Ch 12.
Row 1 – sc in 2nd ch from hook and in each st across. Ch 1, turn (11 sc)
Rows 2 – 20 – working in BLO, sc in each st across. Ch 1, turn. Do not ch 1 at end of Row 20. (11 sc per row)
Fasten off, leaving long tail for sewing.
Large Pumpkin Stem
This piece is worked in continuous rnds; do not join. You may wish to use a stitch marker and move it up at the beginning of each new rnd.
Rnd 1 – with Super Bulky yarn and L hook, make a magic ring; 6 sc in ring. (6 sc)
Rnd 2 – 2 sc in each st around. (12 sc)
Rnd 3 – working in BLO, sc in each st around. (12 sc)
Rnds 4 – 5 – sc in each st around. (12 sc)
Fasten off, leaving long tail for sewing.
Small Pumpkin Stem
This piece is worked in continuous rnds; do not join. You may wish to use a stitch marker and move it up at the beginning of each new rnd.
Rnd 1 – with Bulky yarn and H hook, make a magic ring; 6 sc in ring. (6 sc)
Rnd 2 – working in BLO, sc in each st around. (6 sc)
Rnds 3 – 4 – sc in each st around. (6 sc)
Fasten off, leaving long tail for sewing.
Finishing
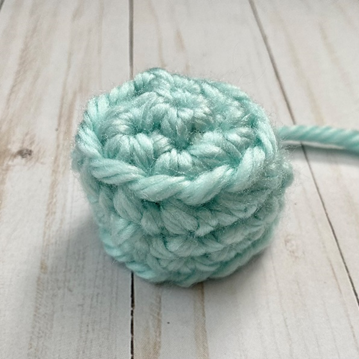
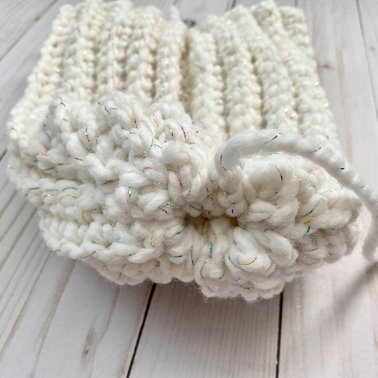
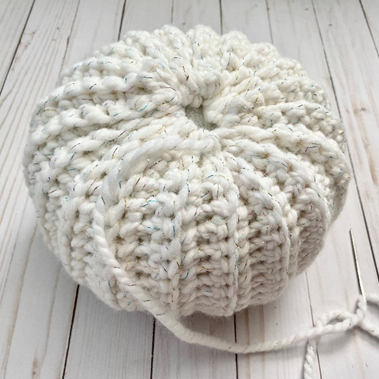
Turn piece inside out and fold in half with right sides facing each other. Working through BLO of edge closest to you, and FLO of edge furthest away from you (first photo below), sl st across piece. Do not fasten off. (Second photo below shows piece at this point.)

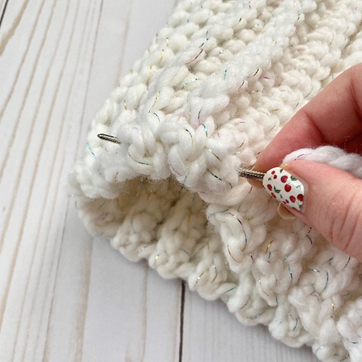
Turn piece right side out. With long tail left over from attaching sides, gather several sts on bottom edge of Pumpkin on yarn needle. Continue around and pull tightly to cinch closed. Sew a knot to secure. Sew any rem gap closed with rem tail.
Stuff Pumpkin generously. Continue stuffing as top of Pumpkin is cinched in next step, if necessary.
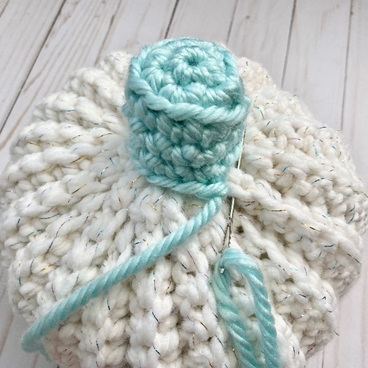
Rep process used to cinch bottom of Pumpkin on top edge of Pumpkin. Pull to close, but leave a small gap for inserting Stem. Sew a knot to secure.
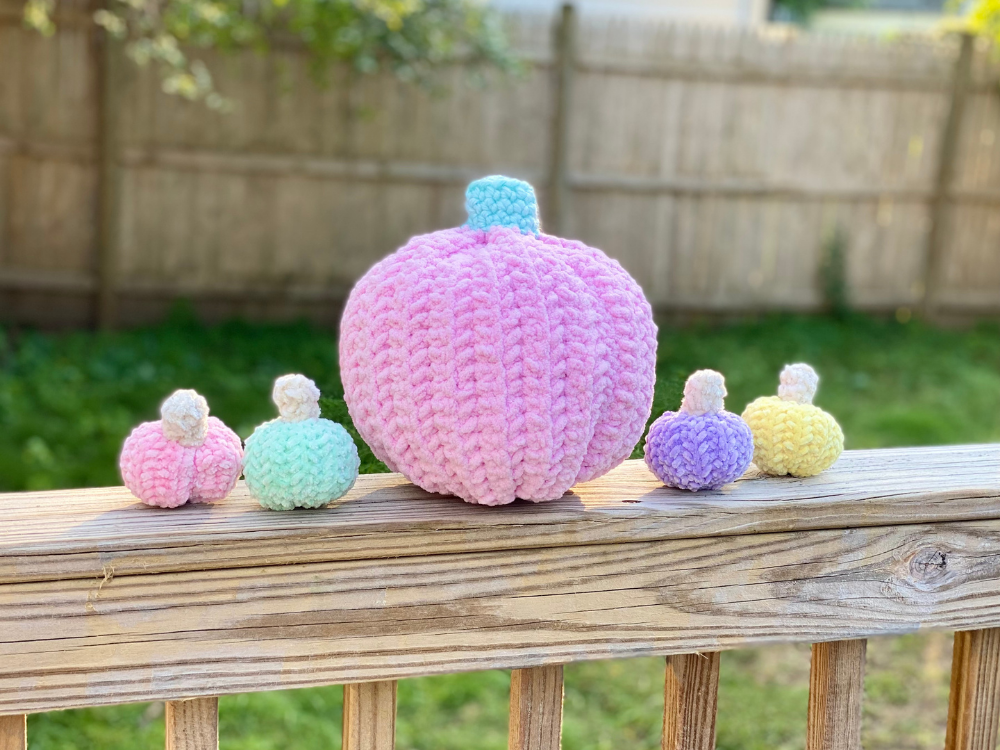
Here are the finished pumpkins!


I hope you enjoyed crocheting these pumpkins along with me today. If you love fun, free patterns like this one, then please be sure to sign up for my email list to keep up to date with all my latest designs:
Also, please be sure to follow me on social media, and tag me in photos of your finished projects made from my patterns, so I can see your lovely work!
Don’t forget to pin it for later HERE!
And you can find that ad-free PDF pattern HERE!
Happy Crocheting!
COPYRIGHT:
This pattern is owned by Crafty Kitty Crochet (Melissa Moore). Any reselling or distribution of this pattern is prohibited. Sale of items made using this pattern is welcomed, but I do ask that credit/a link be provided back to my site, craftykittycrochet.com.
Comments (2)
33 Amazing Crochet Pumpkin Patterns to make for Spoopy Season!
October 14, 2021 at 3:43 am
[…] Plushie Pumpkins Free Pattern […]
15 Free Crochet Plushie Patterns For Babies – Craftsy
October 24, 2022 at 4:37 am
[…] Click Here […]