Sweater Weather Scarf – Crochet Pattern
Pin it for later!
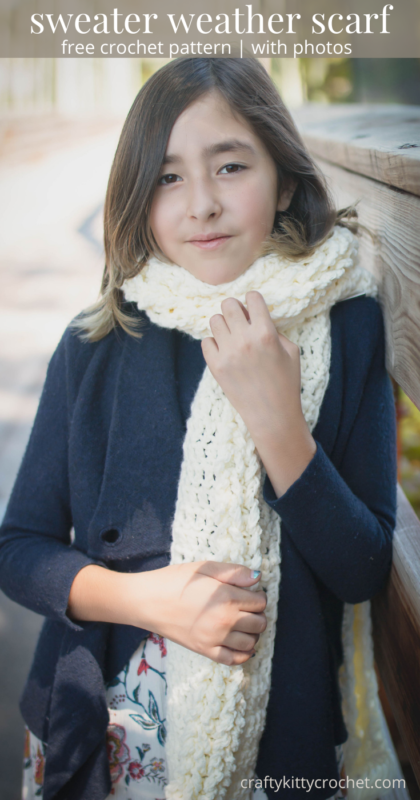
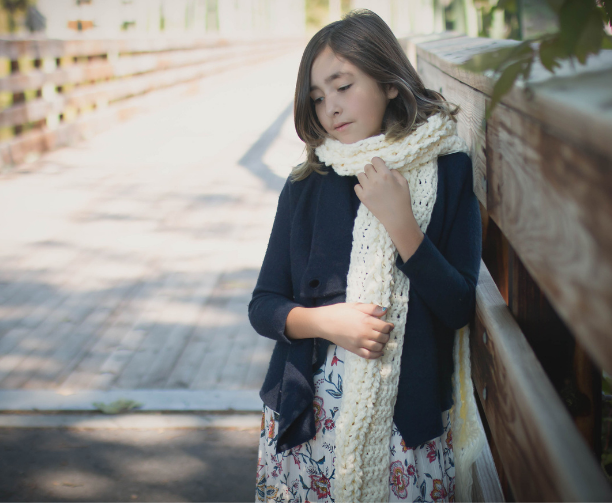
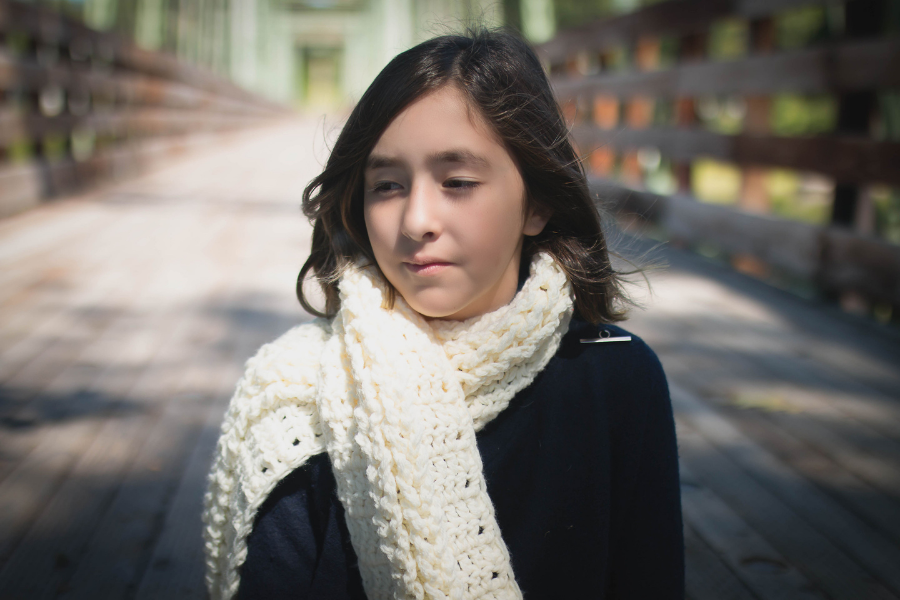
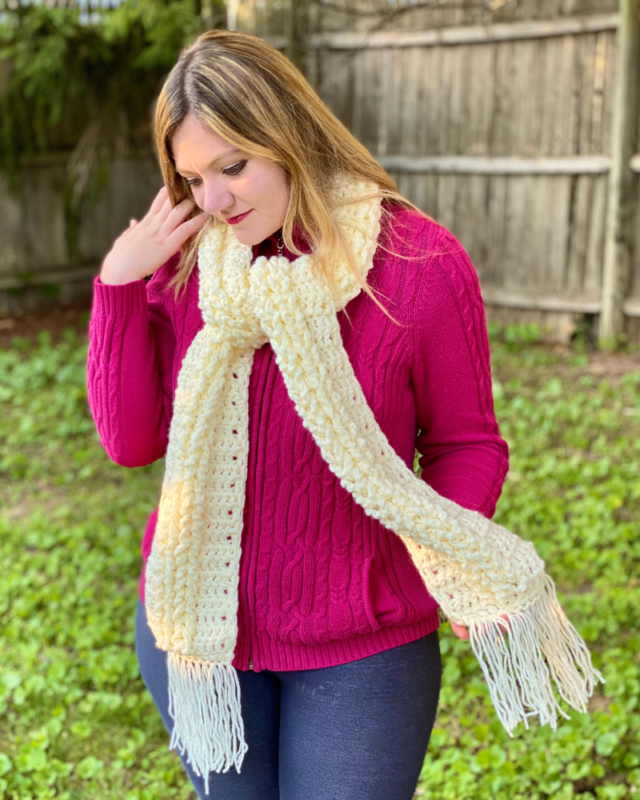
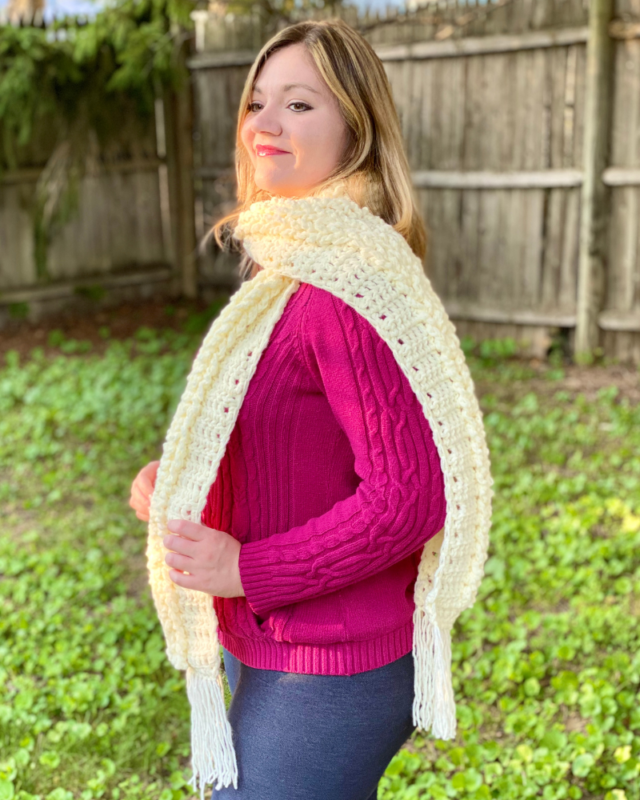
Meet my Sweater Weather Scarf: a cozy, chunky, cabled scarf that is perfect for gifting and daily wear during fall and winter! The easy to make faux cables give it the look of your favorite sweater, but it works up much faster than a sweater – so you can add this one to your weekend project list! The scarf can be customized in so many different colors – so you can make one for everyone on your holiday gift list! It’s a classic, comfy scarf that’s perfect for women, men, kids, etc. Whether you want to make a bunch or are just looking for a last-minute gift idea, this pattern is for you!
Sweater Weather Scarf
Recently I became obsessed with faux crochet cables, which you might recall from my Sweater Weather Blanket Pattern! These chain stitch cables are so simple to make, and add such a lovely texture and definition to crochet projects. I especially like them because they resemble a classic cable-knit sweater. It’s such a great way to portray a cozy, comfy look! Whether it’s a blanket or a scarf, adding the cables just makes me want to snuggle up with coffee, cider or cocoa and stare out the window at the leaves in the fall, or snow in the winter. This scarf is a stylish way to stay warm, and would be so easy and fun to make as holiday gifts!
If this pattern looks a little familiar, it might be because you’ve seen it over at E’Claire Makery! I had the honor of being a guest blogger on her blog last month!
As you might recall from my Sweater Weather Blanket, I love to use two strands of Lion Brand Pound of Love for my faux cable projects! Antique White, the colorway used here, is just an absolutely perfect cream color. This yarn manages to be soft and durable, yet not too thick or thin for a medium yarn. You can find some on Amazon:
Looking for an ad-free PDF copy of this pattern? You can purchase one in my shop HERE!

Supplies
Size M/N-13 – 9 mm crochet hook
1 skein of Lion Brand Pound of Love in Antique White (about 1000 yds) or similar medium weight yarn
Scissors
Yarn Needle
Abbreviations
*= indicates the beginning/end of a section to be repeated
Ch = chain
Dc = double crochet
Rep = repeat
Sc = single crochet
Sl St = slip stitch
St(s) = stitch(es)
Gauge
2 dc and 1 row = about 1 inch
Size
About 95 inches length (before stretch/fringe)
Notes
Pattern is worked up using 2 strands of yarn at once.
Ch 2 at the beginning of each row does not count as a stitch.
This pattern uses chain stitches to make faux “cables” throughout the piece. The steps to make a Cable Loop are described in the first row, and are thereafter referred to as Cable Loops throughout the pattern.
The loops can be seen on one side of the fabric only. When working on the side that does not show the loops, the loops for that row are pushed toward the other side of the fabric.
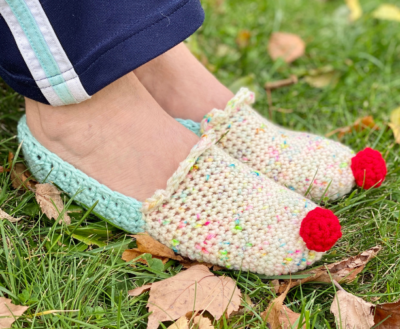
Pattern includes instructions for adding optional fringe; you may wish to skip this step or instead add pom poms to ends.
How to Make This
Instructions
With 2 strands of Antique White, ch 13.
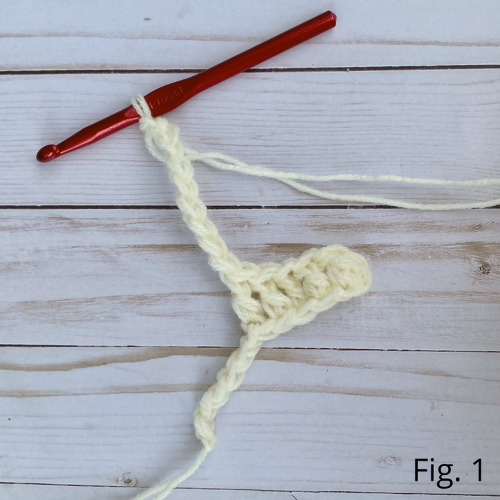
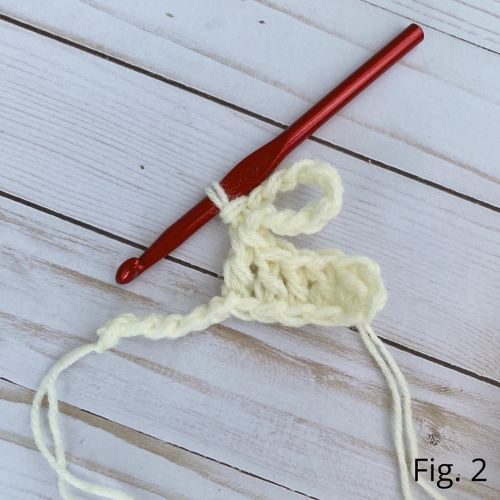
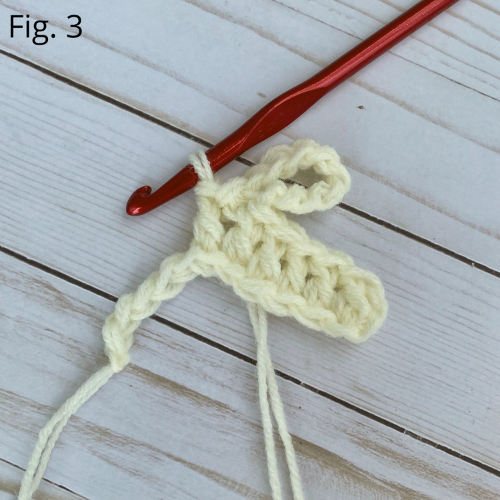
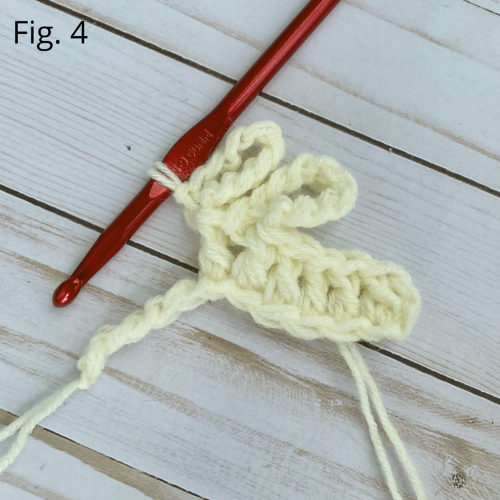
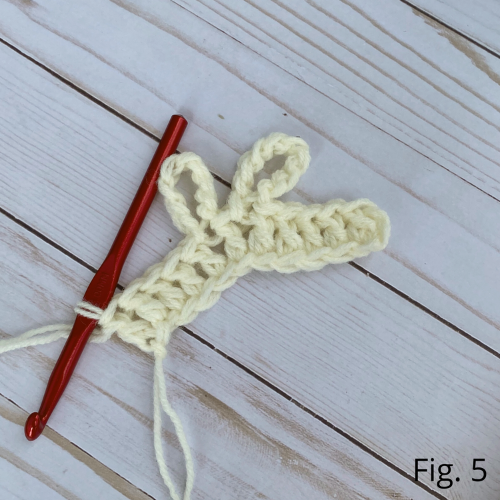
Row 1 – Dc in 3rd ch from hook, and in next 4 sts. Ch 9, sl st to first ch (cable loop made – see Figs. 1 and 2). Dc in next st (Fig. 3). Make another cable loop (Fig. 4), dc in last 5 sts (Fig. 5). Ch 2, turn (2 cable loops, 11 dc)
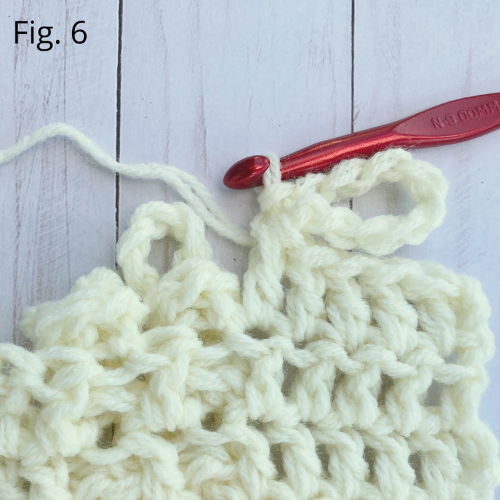
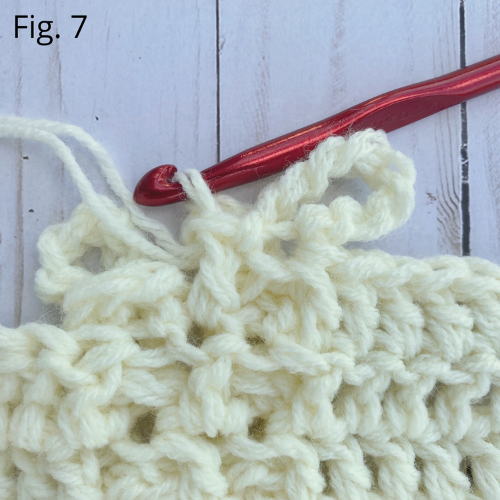
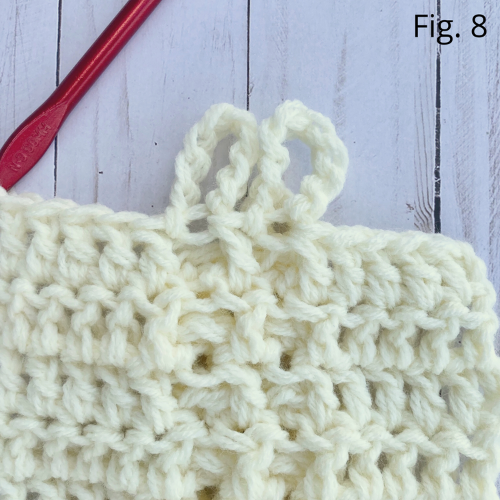
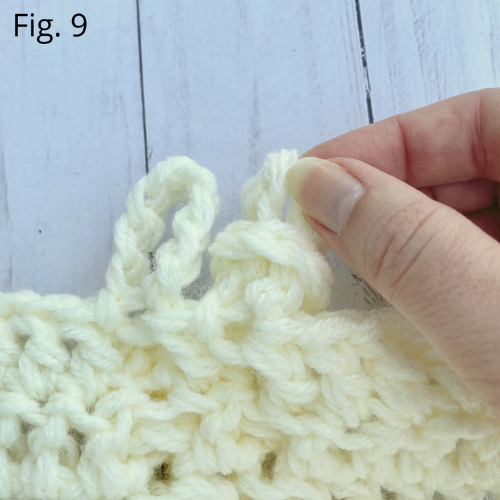
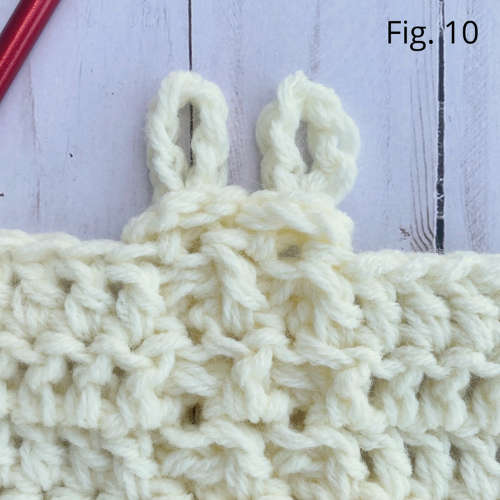
Row 2 – Dc in next 5 sts. *Make a cable loop. Working with cable loop from previous row behind, dc in next st (Figs. 6 and 7).* Rep from * to * to make another cable loop and another dc. Pull current cable loops through the ones below them from the previous row. Dc in last 4 sts. (See Figs. 8, 9, and 10.) Ch 2, turn (2 cable loops, 11 dc; there should be 5 dc on either side of the loops, with 1 dc between the loops)
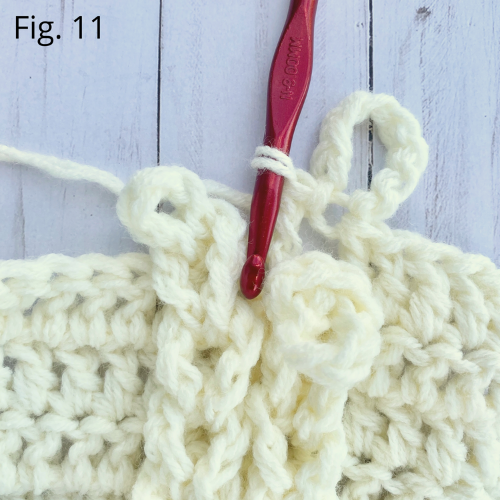
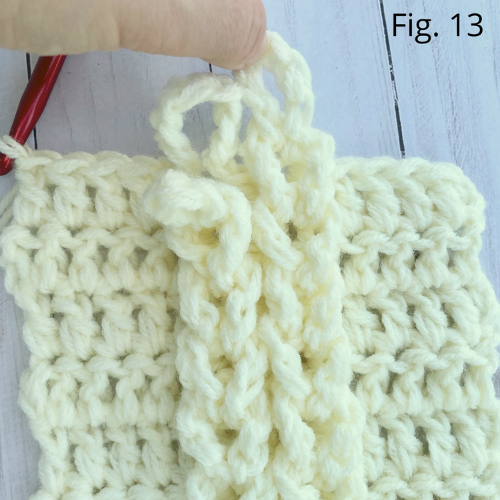
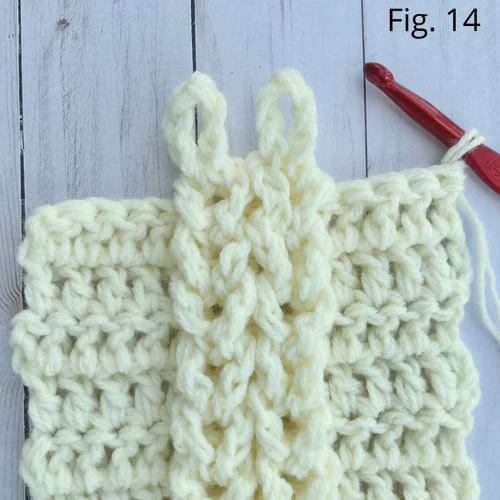
Row 3 – Dc in next 5 sts. *Make a cable loop. Working with cable loop from previous row in front (see Fig. 11), dc in next st.* Rep from * to * to make another cable loop and another dc (Fig. 12). Dc in last 4 sts. Pull current cable loops through the ones below them from the previous row (Figs. 13 and 14). Ch 2, turn (2 cable loops, 11 dc; there should be 5 dc on either side of the loops, with 1 dc between the loops)

Rows 4 – 95 – Rep Rows 2 and 3.
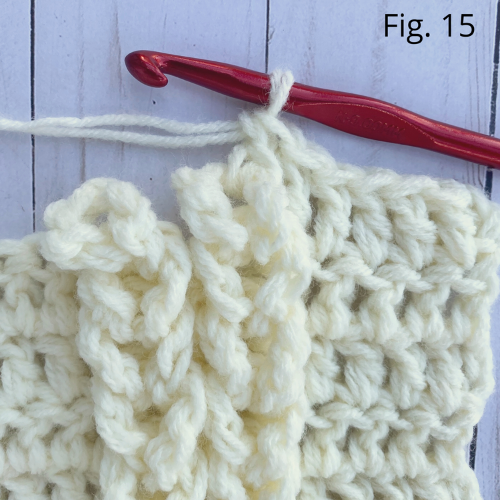
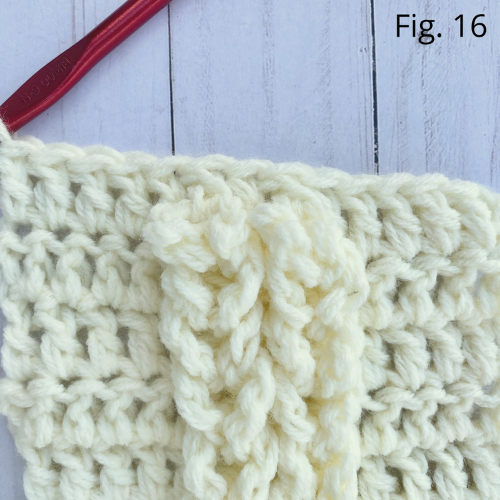
Row 96 – Dc in next 5 sts. Dc through next cable loop (see Fig. 15), dc in next st. Dc through next cable loop, dc in last 5 sts (Fig. 16). Do not fasten off. (13 dc)
Edging
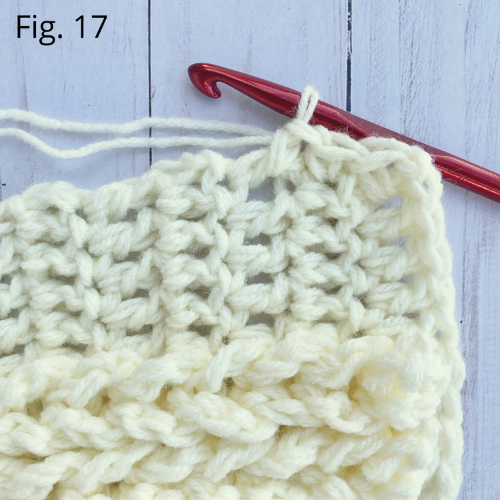
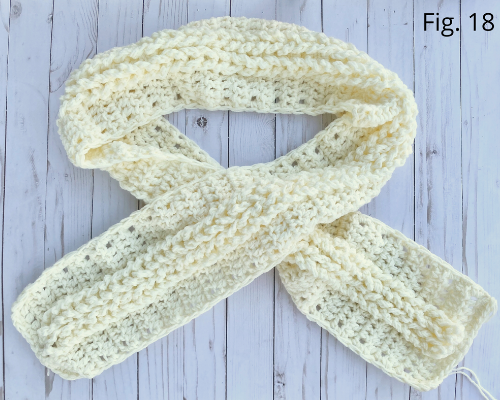
Ch 1. Working around side of Scarf, evenly make 92 sc down side (Fig. 17). Sc across bottom of Scarf. Working up other side of Scarf, evenly make 92 sc. Sc across top of scarf, join with sl st to first sc of Edging. (Fig. 18 shows finished Edging.) (206 sc)
Fasten off, weave in ends.
Fringe (optional)
Cut 52 pieces of yarn, about 9-10 inches in length. Fold 2 pieces in half and attach through a sc st of top or bottom edge; rep across all sts on top and bottom edges. Trim to make even.
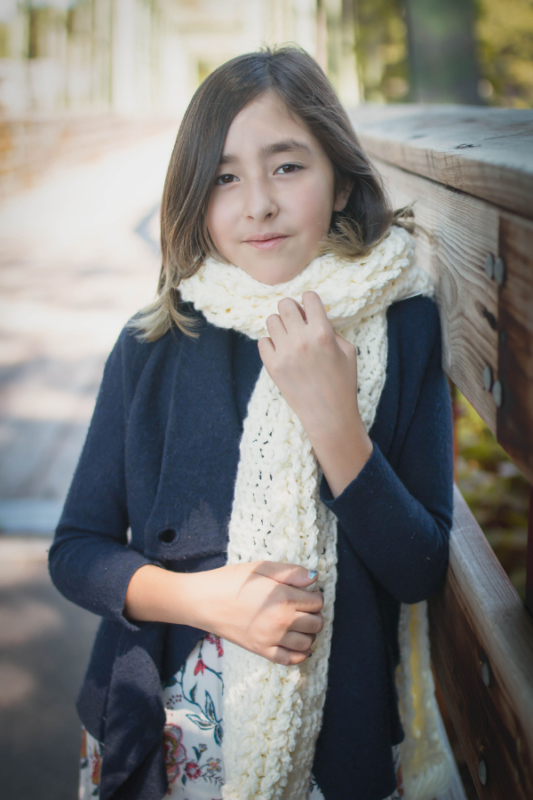
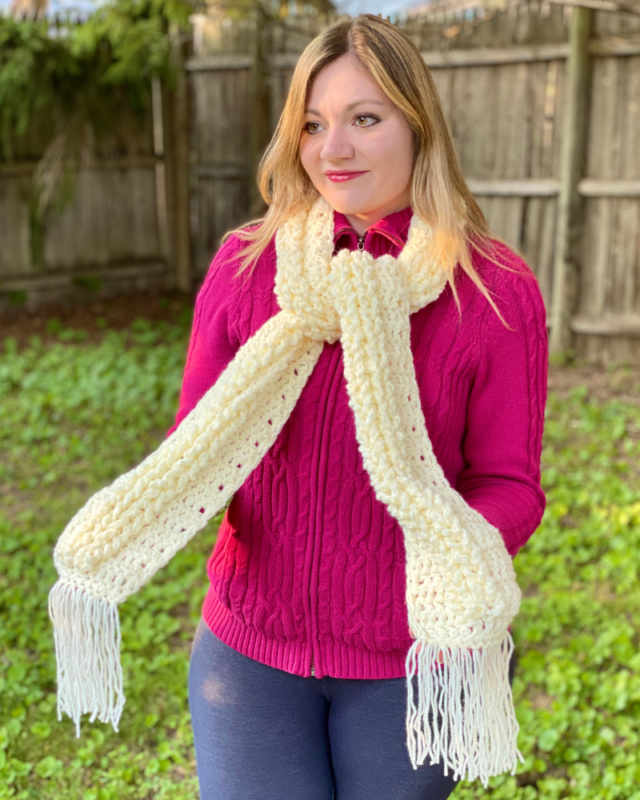
Here is the finished scarf!
I hope you enjoyed crocheting this scarf along with me! If you love fun, free crochet patterns like this one, please be sure to subscribe to my email list:
Also, please be sure to follow me on social media, and tag me in posts of your finished items, so that I can see your lovely work!!
Don’t forget to pin it for later HERE!
And you can find that ad-free pattern HERE!
Happy Crocheting!
COPYRIGHT: This pattern is owned by Crafty Kitty Crochet (Melissa Moore). Any reselling or distribution of this pattern is prohibited. Sale of items made using this pattern is welcomed, but I do ask that credit/a link be provided back to my site, craftykittycrochet.com.