
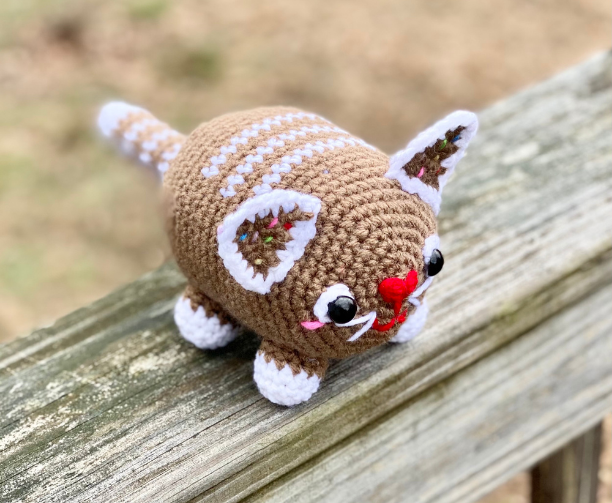
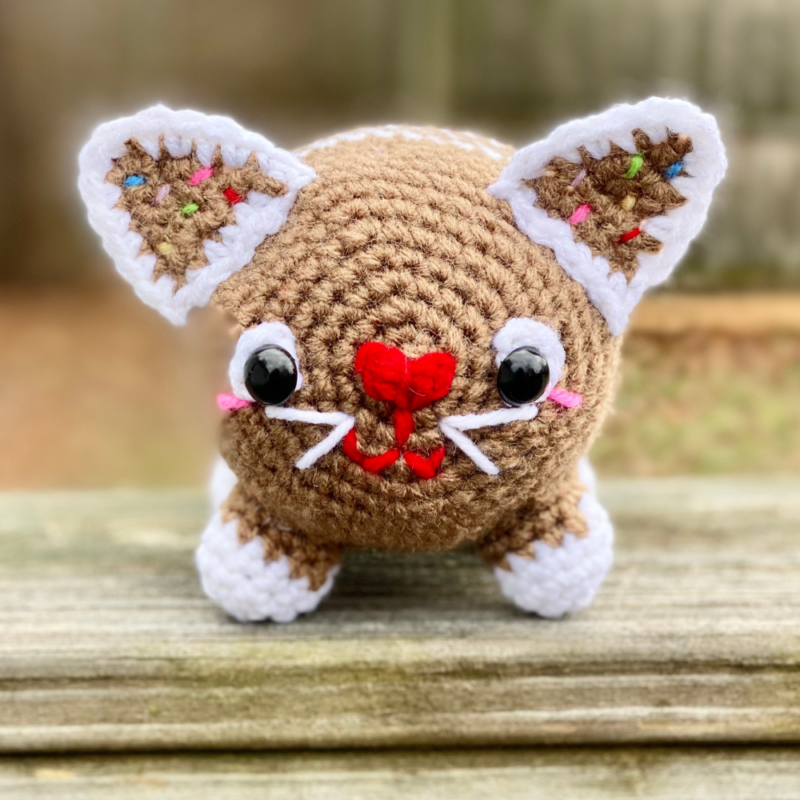
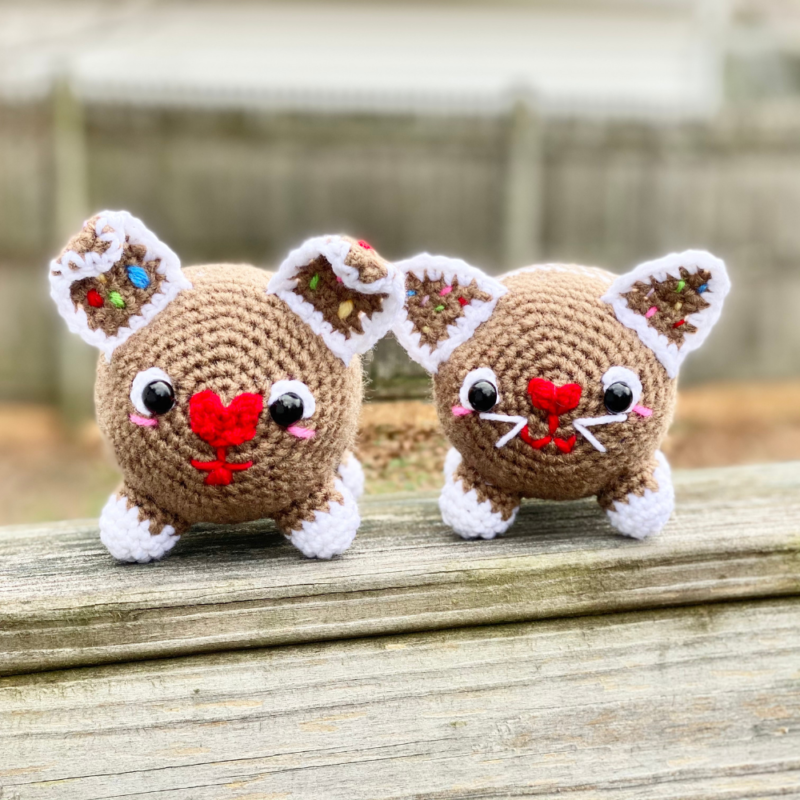
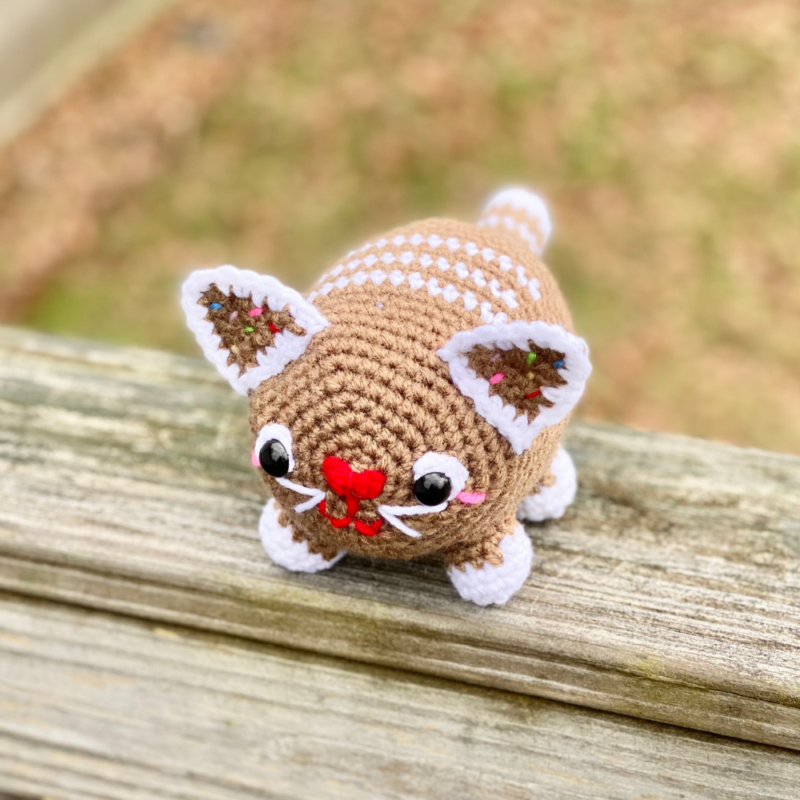
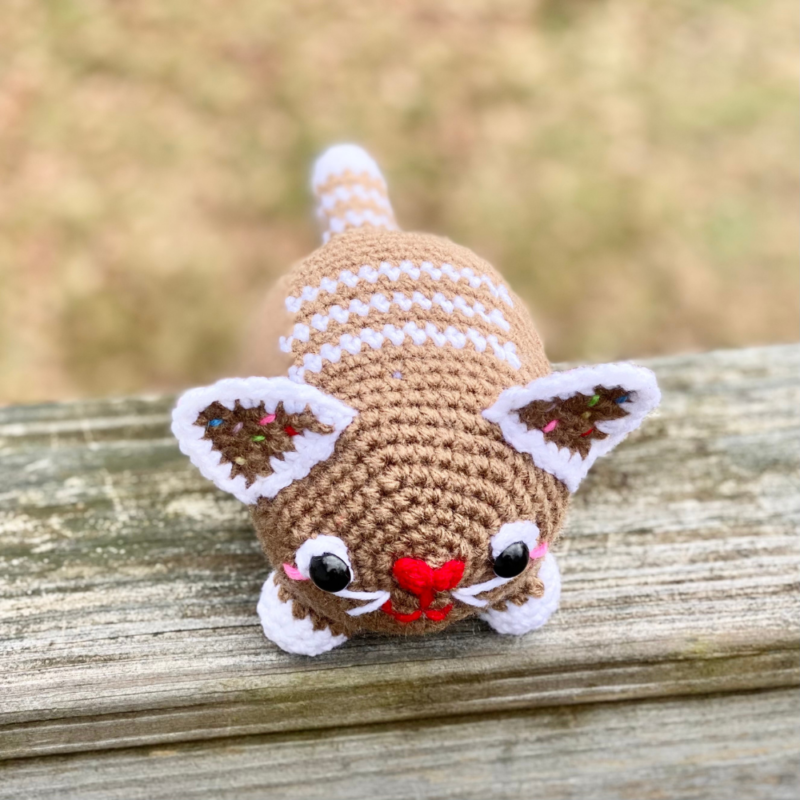
Amigurumi Gingerbread Cat – Crochet Pattern
Pin it for later!
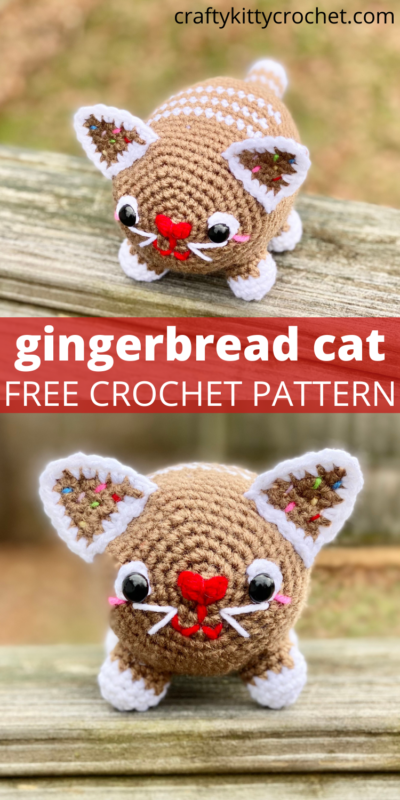
Make the holidays a little sweeter with this adorable amigurumi Gingerbread Cat! Perfect for pet lovers, cat lovers, or anyone who appreciates amigurumi style, this little kitten works up quickly and is fun to make. What a great stocking stuffer this would make! Crochet one for your whole holiday gift list, and/or make a few for yourself to use as fun, candy-themed Christmas decor anywhere in the house! The possibilities are endless!
Amigurumi Gingerbread Cat
This kitty is the perfect companion to my Amigurumi Gingerbread Dog pattern! Together, they make one adorable and scrumptious holiday duo! I recently adopted a pet myself (see more about that on the Gingerbread Dog pattern page), so making animal amigurumi has taken on a whole new meaning to me. That’s why I wanted to design some fun, Christmas themed pieces that are not only cute, but perfect for the pet lover in your life!
When it comes to the “gingerbread” look, there is one yarn that remains my all-time favorite: Red Heart Super Saver in Cafe Latte! And good news, you can find some on Amazon:
Looking for the ad-free PDF pattern? You can purchase one in my shop HERE!
Supplies
Size D/5 3.25 mm crochet hook
1 skein each of Red Heart Super Saver in
- White (about 50 yds)
- Café Latte (about 100 yds)
- Small amounts of Cherry Red, Delft Blue, Pretty in Pink, Spring Green, Lemon, and Orchid
1 pair 15 mm safety eyes
Fiberfill stuffing
Scissors
Yarn needle
Abbreviations
Beg = beginning
Ch = chain
Rem = remaining
Rep = repeat
Rnd(s) = round(s)
Sc = single crochet
Sc2tog = single crochet 2 together
Sl St = slip stitch
St(s) = stitch(es)
Size
About 6 inches in length (not including tail)
Gauge
Exact gauge is not essential to this project.
How to Make This
Instructions
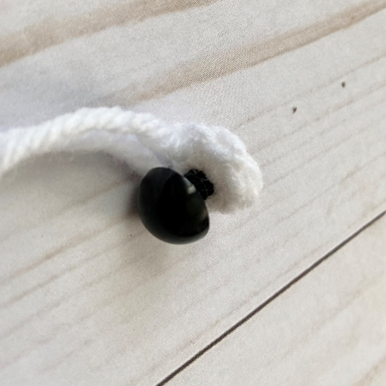
Eye Piece (make 2)
With White, ch 2.
Row 1 – 3 sc in 2nd ch from hook. (3 sc)
Fasten off, leaving long tail for sewing.
Head/Body
This piece is worked in continuous rnds; you may wish to use a stitch marker and move it up at the beg of each new rnd.
Rnd 1 – with Café Latte, make a magic ring. 6 sc in ring (6 sc)
Rnd 2 – 2 sc in each st (12 sc)
Rnd 3 – 2 sc in next st, sc in next. Rep around (18 sc)
Rnd 4 – 2 sc in next st, sc in next 2 sts. Rep around (24 sc)
Rnd 5 – 2 sc in next st, sc in next 3 sts. Rep around. (30 sc)
Rnd 6 – 2 sc in next st, sc in next 4 sts. Rep around (36 sc)
Rnd 7 – 2 sc in next st, sc in next 5 sts. Rep around (42 sc)
Rnd 8 – 2 sc in next st, sc in next 6 sts. Rep around (48 sc)
Rnds 9 – 13 – sc in each st around. Change to White in last st of Rnd 13 (48 sc)
Rnd 14 – sc in next 12 sts; change to Café Latte. Sc in rem 36 sts around (48 sc)
Rnds 15 – 16 – sc in each st around. Change to White in last st of Rnd 16 (48 sc per rnd)
Rnd 17 – rep Rnd 14. (48 sc)
Rnds 18 – 19 – sc in each st around. Change to White in last st of Rnd 19 (48 sc per rnd)
Rnd 20 – rep Rnd 14. (48 sc)
Rnds 21 – 26 – sc in each st around. (48 sc per rnd)
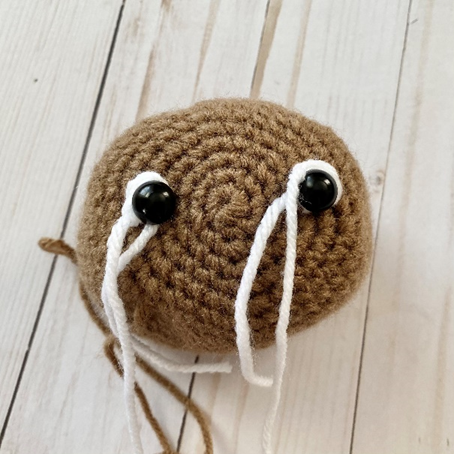
Attach safety eyes (placing eyes through small gaps from beg of Eye Pieces). Begin stuffing.
Rnd 27 – Sc2tog over next 2 sts, sc in next 6 sts; rep around (42 sc)
Rnd 28 – Sc2tog over next 2 sts, sc in next 5 sts; rep around (36 sc)
Rnd 29 – Sc2tog over next 2 sts, sc in next 4 sts; rep around (30 sc)
Rnd 30 – Sc2tog over next 2 sts, sc in next 3 sts; rep around (24 sc)
Rnd 31 – Sc2tog over next 2 sts, sc in next 2 sts; rep around (18 sc)
Rnd 32 – Sc2tog over next 2 sts, sc in next st; rep around. (12 sc)
Keep stuffing. Do not fasten off.
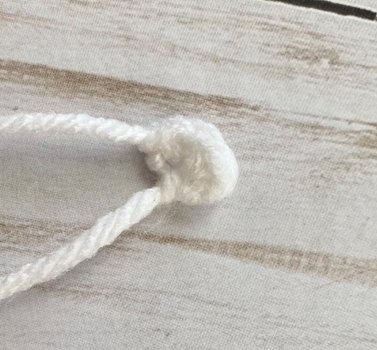
Tail
Rnds 1 – 2 – Sc in each st around. Change to White in last st (12 sc per rnd)
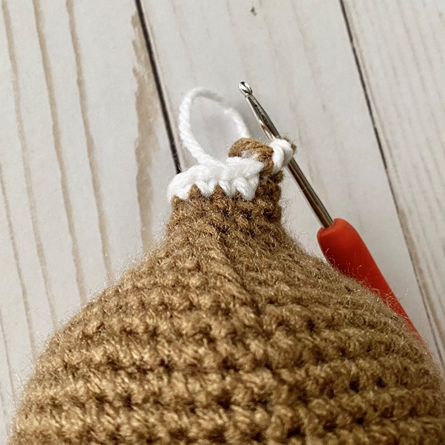
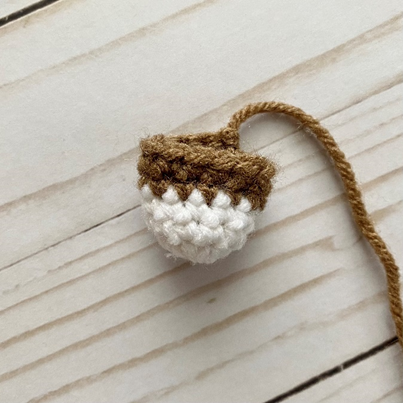
Rnd 3 – sc in each st around. Change to Café Latte in last st (first photo below). (12 sc per rnd)
Rnds 4 – 9 – Rep Rnds 1 – 3. (12 sc per rnd)
Rnds 10 – 11 – Rep Rnds 1 – 2. (12 sc per rnd)
Rnds 12 – 14 – sc in each st around. Finish stuffing. (10 sc per rnd)
Rnd 15 – sc2tog around. (5 sc)
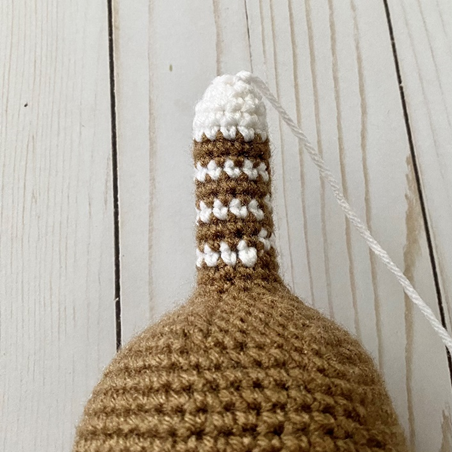
Fasten off, leaving long tail. Sew rem gap closed with tail. (Second photo below shows finished piece.)
Ear (make 2)
With Café Latte, Ch 2.
Row 1 – 2 sc in 2nd ch from hook. Ch 1, turn (2 sc)
Row 2 – 2 sc in first st, 2 sc last st. Ch 1, turn (4 sc)
Row 3 – Sc in each st across. Ch 1, turn (4 sc)
Row 4 – 2 sc in first st, sc in next 2 sts, 2 sc in last st. Ch 1, turn (6 sc)
Row 5 – rep Row 3. Join White in last st. (6 sc)
Edging
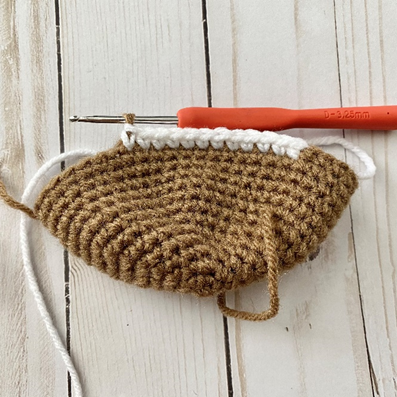
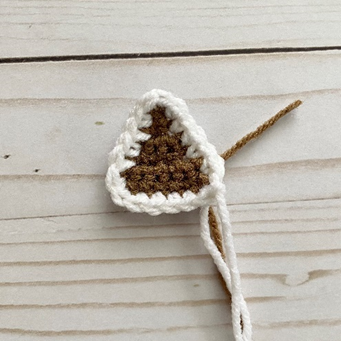
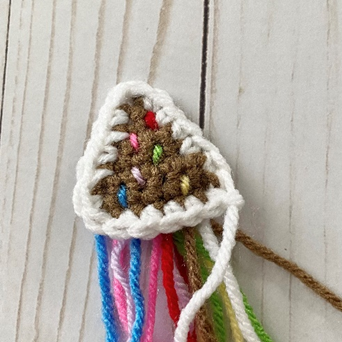
Sc evenly around entire piece, making 2 sc at “tip” of ear. Join with sl st to where you began crocheting around piece. Fasten off, leave long tail for sewing. (First photo below shows piece at this stage.)
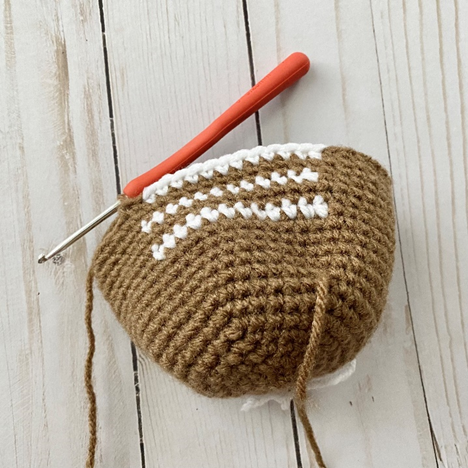
Candy
With Cherry Red, Delft Blue, Pretty in Pink, Spring Green, Lemon, and Orchid, sew a few small vertical lines inside each Ear. Fasten off, weave in ends on back of Ears. (Second photo below shows finished piece.)
Nose
With Cherry Red, ch 3. Sl st to first ch. Ch 2, sl st back into to first ch.
Fasten off, leaving long tail for sewing.
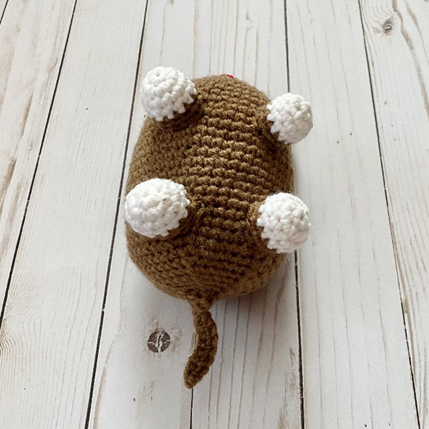
Feet (make 4)
This piece is worked in continuous rnds; you may wish to use a stitch marker and move it up at the beg of each new rnd.
Rnd 1 – with White, make a magic ring. 6 sc in ring (6 sc)
Rnd 2 – 2 sc in each st (12 sc)
Rnds 3 – 4 – sc in each st around. Change to Café Latte in last st of Rnd 4. (12 sc)
Rnds 5 – 6 – rep Rnds 3 – 4 (do not change colors at end of Rnd 6). (12 sc)
Fasten off, leaving long tail for sewing to Body.
Finishing
Sew Nose between Eyes. Use Cherry Red to make two small “v” shapes next to each other for Smile. Using Pretty in Pink, sew small horizontal lines underneath Eyes for Blush. Line up Ears with Eyes and sew to Head. Use White to make Whiskers on either side of Nose/Mouth. Sew down edges of Eye Pieces to face (Head). Stuff Feet and sew to bottom of Body. Tie off ends and hide knots inside sts of Head/Body.
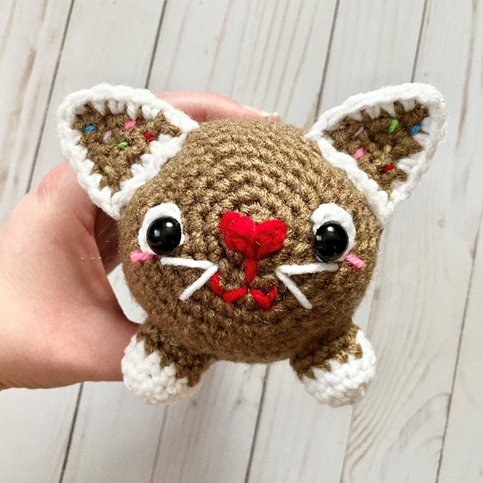
Here is the finished Gingerbread Cat!
I hope you enjoyed crocheting this cat along with me! If you love fun, free patterns like this one, please be sure to subscribe to my email list to stay up to date with all my latest patterns:
And please also be sure to follow me on social media, and tag me in photos of your projects made from my patterns, so I can see your lovely work!
Don’t forget to pin it for later HERE!
And that ad-free PDF can be found HERE!
Happy Crocheting!
COPYRIGHT: This pattern is owned by Crafty Kitty Crochet (Melissa Moore). Any reselling or distribution of this pattern is prohibited. Sale of items made using this pattern is welcomed, but I do ask that credit/a link be provided back to my site, craftykittycrochet.com.

Comments (2)
Gingerbread Jellyfish Amigurumi – Crochet Pattern ~ Crafty Kitty Crochet
November 23, 2021 at 12:20 pm
[…] know that I LOVE combining one element with another – i.e. food with animals. My Gingerbread Dog, Gingerbread Cat, and Pumpkin Pie Turtle are great examples! It’s cute, quirky, and makes for an extremely unique […]
Amigurumi Hearty Penguin – Crochet Pattern ~ Crafty Kitty Crochet
December 23, 2021 at 3:37 pm
[…] past, I’ve used “heart” shaped appendages for some of my amis, such as my Gingerbread Dog and Cat, Puppy Love, and Smitten Kitten patterns – I loved the result! So I decided to add as many hearts […]