
Amigurumi Hearty Penguin – Crochet Pattern
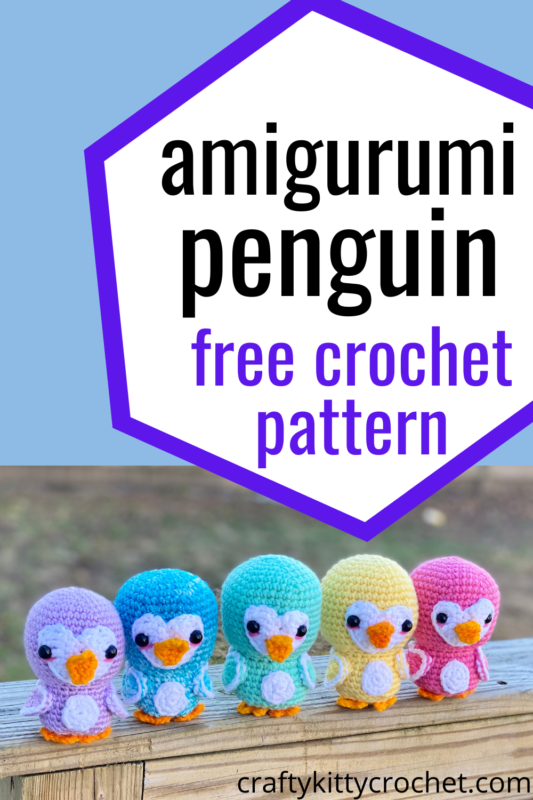
Pin it for later!
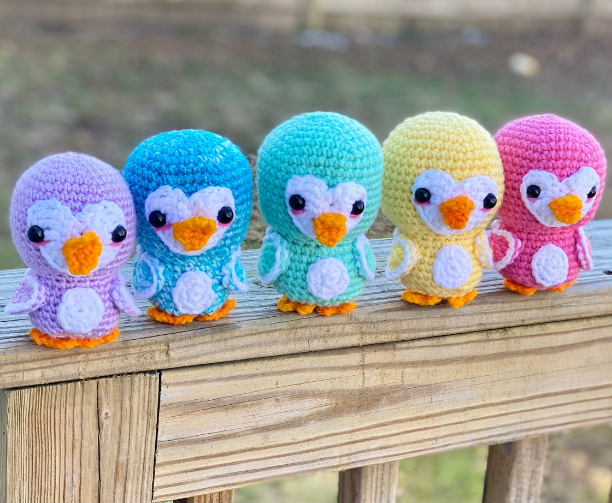
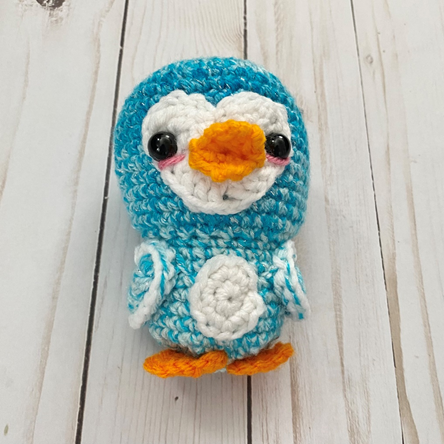
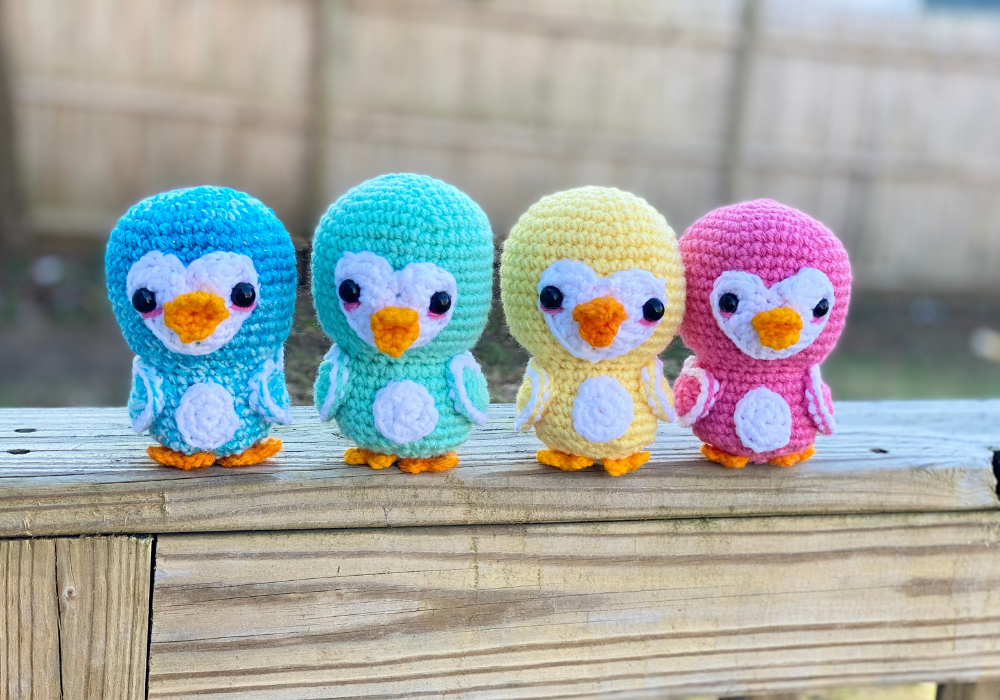
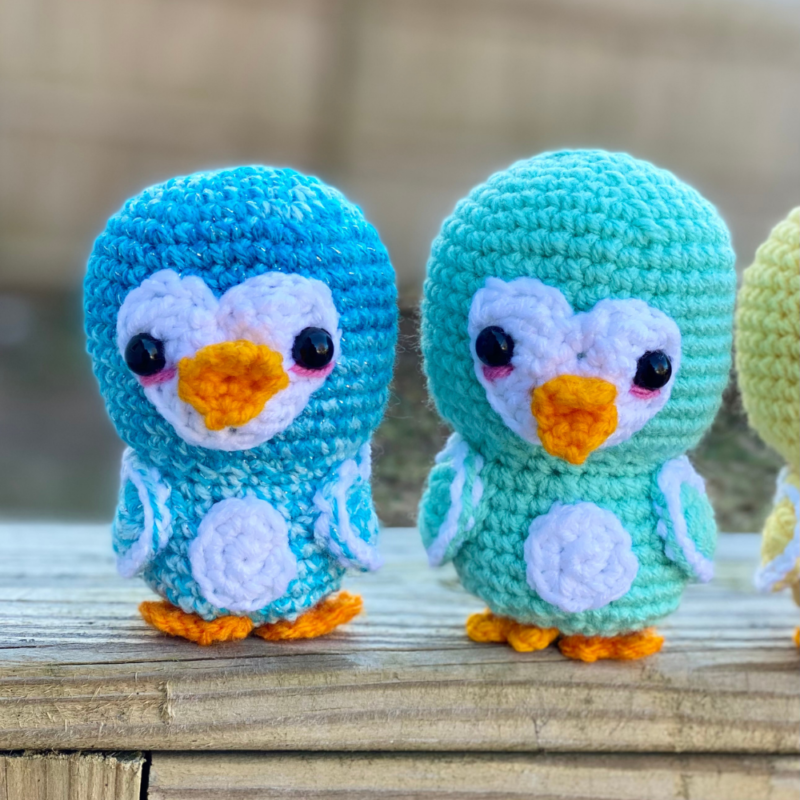
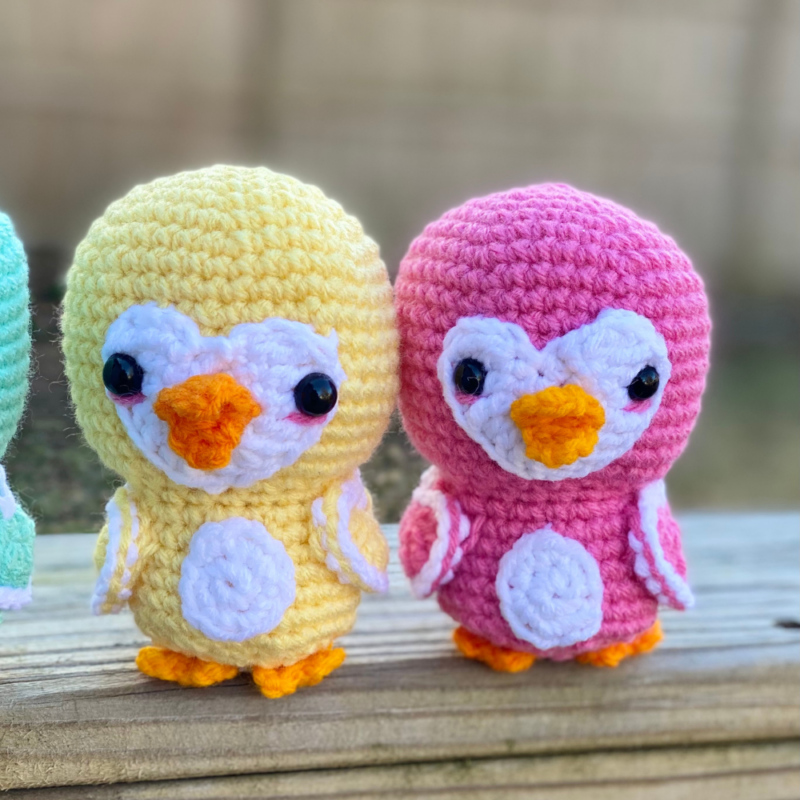
What makes these amigurumi penguins so hearty? Well, it’s not just that they’re durable little toys – it’s because the face and wings are heart-shaped! These tiny penguins are so cute, chibi, and extremely fast and easy to make! They’d be great gifts for the holidays, Valentine’s Day, or any occasion for someone you love. How about using them as kawaii office or bedroom decor? They’re perfect as mini plushies! Customize them in a rainbow of colors – the possibilities are endless!
Amigurumi Hearty Penguins
Initially, I really just wanted to make some itty bitty penguins for winter. And the more I thought about it, the more I wanted to do something to make them stand out from a typical amigurumi! In the past, I’ve used “heart” shaped appendages for some of my amis, such as my Gingerbread Dog and Cat, Puppy Love, and Smitten Kitten patterns – I loved the result! So I decided to add as many hearts as possible to these little critters. Oh yes, and of course I had to make them in rainbow colors! Hearts, rainbows and penguins – how can you go wrong?
Don’t forget your fiberfill stuffing when making your penguin friends! One bag will make a whole army of tiny penguins. Find some on Amazon:
Looking for the ad-free PDF version of this pattern? You can find it in my shop HERE!
Supplies
Size D-3 / 3.25 mm crochet hook
Medium weight yarn in main color – about 75 yds
*Used in photos: Red Heart Super Saver in Perfect Pink and Lemon, Craftsmart Value in Mint, Caron Simply Soft in Orchid; Nicole Stitch Studio in Arctic Blue (discontinued); Caron Cakes in Macaron (green portion of cake)
Medium weight yarn in white – about 30 yds
*Used in photos: Red Heart Super Saver in White
Medium weight yarn in orange – about 20 yds
*Used in photos: Red Heart Super Saver in Pumpkin
Medium weight yarn in pink for blush – less than 1 yd
*Red Heart Super Saver in Perfect Pink used in photos
1 pair of 10 mm safety eyes
Fiberfill stuffing
Yarn needle
Scissors
Abbreviations
*= indicates beginning/end of a section to be repeated
[] = indicates set of instructions to be completed separately as one piece
Ch = chain
Dc = double crochet
FLO = front loop only
Rem = remaining
Rep = repeat
Rnd(s) = round(s)
Sc = single crochet
Sc2tog = single crochet 2 together
Sc3tog = single crochet 3 together
Sl st = slip stitch
St(s) = stitch(es)
Tr = triple crochet
Gauge
Exact gauge is not essential to this project.
Size
4 – 4.5 inches length (depending on thickness of medium weight yarn used – i.e. Red Heart Super Saver is thicker than Caron Simply Soft)
How to Make This
Instructions
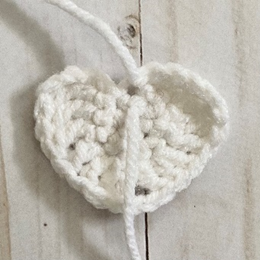
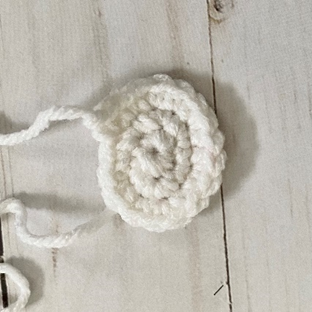
Heart Face Patch
Rnd 1: with white yarn, make a magic ring. 6 sc in ring (6 sc)
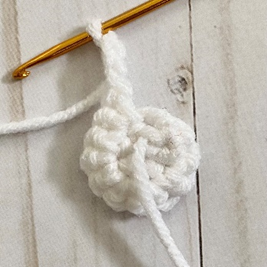
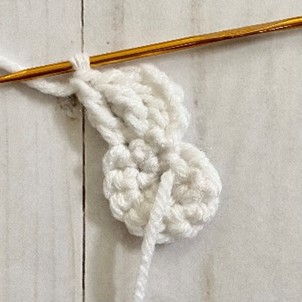
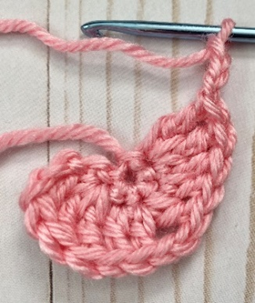
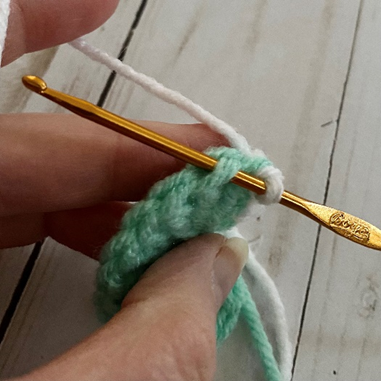
Rnd 2: 2 sc in each st around. Ch 3 (first photo below), turn (12 sc)
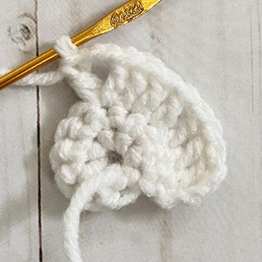
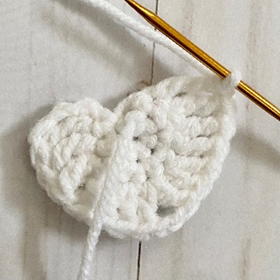
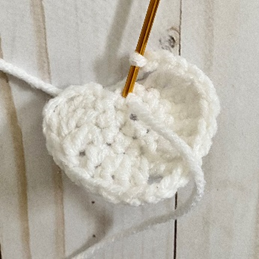
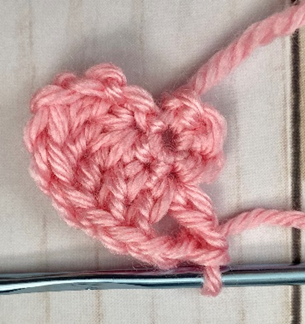
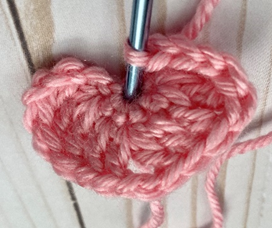
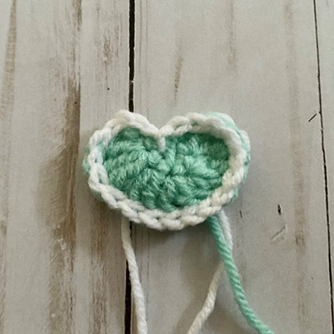
Rnd 3: tr in next 3 sts (second photo). Dc in next st. 2 dc in next st. [Dc, ch 2, dc – third photo] in next st. 2 dc in next st. Dc in next st. Tr in next 3 sts (fourth photo). Ch 3, sl st to last st (fifth photo).
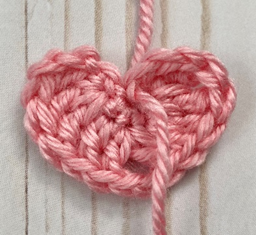
Fasten off, leaving long tail for sewing. (Sixth photo shows finished piece.)
Head/Body
This piece is worked in continuous rnds. You may wish to use a stitch marker and move it up at the beginning of each new rnd.
Rnd 1: with main color, make a magic ring. 6 sc in ring (6 sc)
Rnd 2: 2 sc in each st (12 sc)
Rnd 3: *2 sc in next st, sc in next. Rep from * to * around (18 sc)
Rnd 4: *2 sc in next st, sc in next 2 sts.* Rep from * to * around (24 sc)
Rnd 5: *2 sc in next st, sc in next 3 sts.* Rep from * to * around. (30 sc)
Rnd 6: *2 sc in next st, sc in next 4 sts.* Rep from * to * around (36 sc)
Rnd 7: *2 sc in next st, sc in next 5 sts.* Rep from * to * around (42 sc)
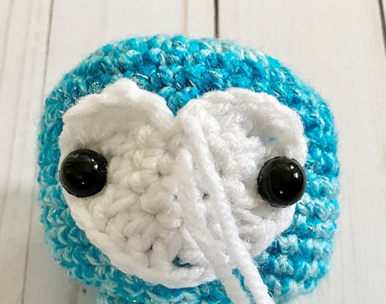
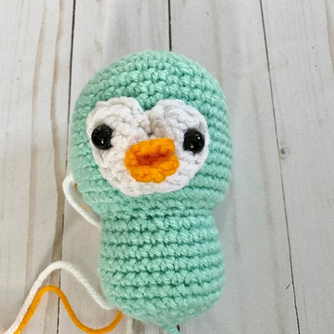
Rnds 8 – 17: sc in each st around. Attach safety eyes through Heart Face Patch on Head (first photo below). Begin stuffing. (42 sc)
Rnd 18: *Sc2tog over next 2 sts.* Rep from * to * around (21 sc)
Rnd 19: sc2tog over next 2 sts. Sc in rem sts around. (20 sc)
Rnd 20: sc in each st around. (20 sc)
Rnd 21: *2 sc in next st, sc in next st*; rep from * to * around. (30 sc)
Rnds 22 – 26: sc in each st around. Continue stuffing. (30 sc)
Rnd 27: *2 sc in next st, sc in next 4 st*; rep from * to * around. (36 sc)
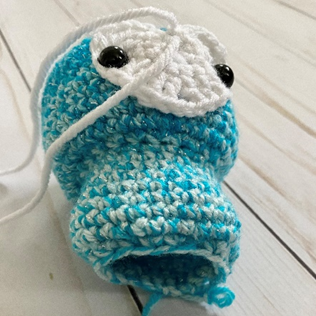
Rnd 28: *Sc2tog over next 2 sts.* Rep from * to * around (second photo below). Finish stuffing. (18 sc)
Rnd 29: *Sc2tog over next 2 sts, sc in next st*; rep from * to * around. (12 sc)
Rnd 30: *Sc2tog over next 2 sts.* Rep from * to * around. (6 sc)
Rnd 31: Sc2tog over next 2 sts. Leave rem sts unworked. (5 sc)
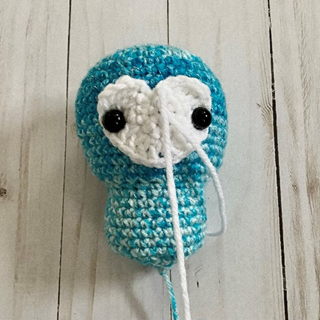
Fasten off, leaving long tail for sewing closed gap from Rnd 31. (Third photo shows finished piece.)
Heart Wing (make 2)
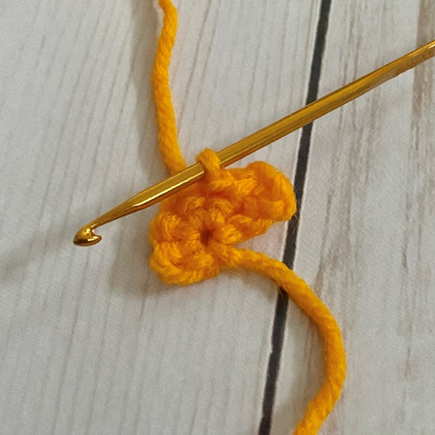
Rnd 1: With main color, make a magic ring, 6 sc in ring. Ch 3, turn.
Rnd 2: 3 tr in first st. Dc in next st. [Dc, ch 2, dc] in next st. Dc in next st. 3 tr in next st. Ch 3, skip last st and sl st into small hole in center of magic ring. Pull beginning end to close hole. Fasten off, leaving long tail for sewing.

Edging
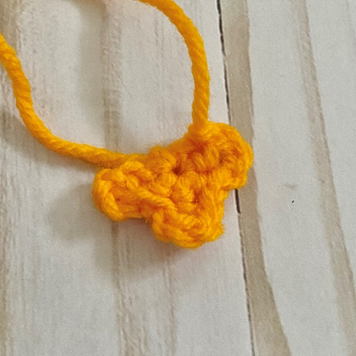
Join White in first ch from beginning ch of Rnd 1. Ch 1. Sl st in next 2 chs. Working in FLO (first photo below), sl st around entire piece, including ch from [dc, ch 1, dc] of Rnd 2, and in chs from ending ch 3 of Rnd 2. Join with sl st to center of Rnd 1. (19 sl sts)
Fasten off; weave in all ends except one left over from Rnd 2. (Second photo shows finished piece.)
Beak
With orange yarn, ch 2.
Row 1: 3 sc in 2nd ch from hook. Ch 1, turn (3 sc)
Rows 2 – 3: sc in each st across. Ch 1, turn. (3 sc)
Row 4: sc3tog (first photo below) over next 3 sts. Ch 1, turn (1 sc)
Row 5: sc in next st. (1 sc)
Fasten off, leaving long tail for sewing. (Second photo shows finished piece.)


Feet (make 2)
With orange yarn, ch 2.
Row 1: 5 sc in 2nd ch from hook. Ch 3, turn. (5 sc)
Row 2: Sl st in next 2 sts. Ch 3, sl st in next 2 sts (first photo below). Ch 3, sl st in last st.
Fasten off, leaving long tail for sewing. (Second photo below shows finished piece.)
Belly Patch
This piece is worked in continuous rnds. You may wish to use a stitch marker and move it up at the beginning of each new rnd.
Rnd 1 – with white yarn, make a magic ring. 6 sc in ring (6 sc)
Rnd 2 – 2 sc in each st (12 sc)
Fasten off, leaving long tail for sewing. Pull slightly at both ends to give an oval shape.
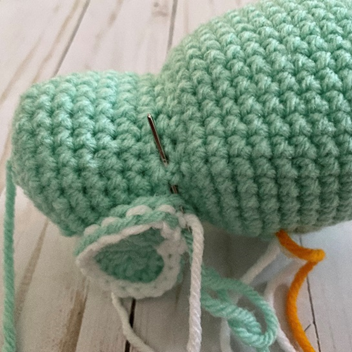
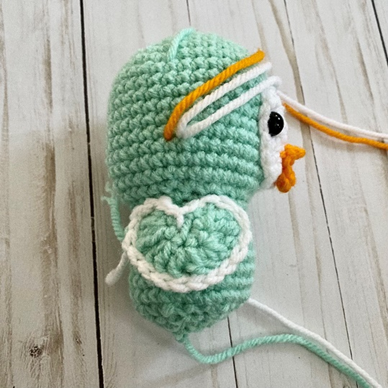
Finishing
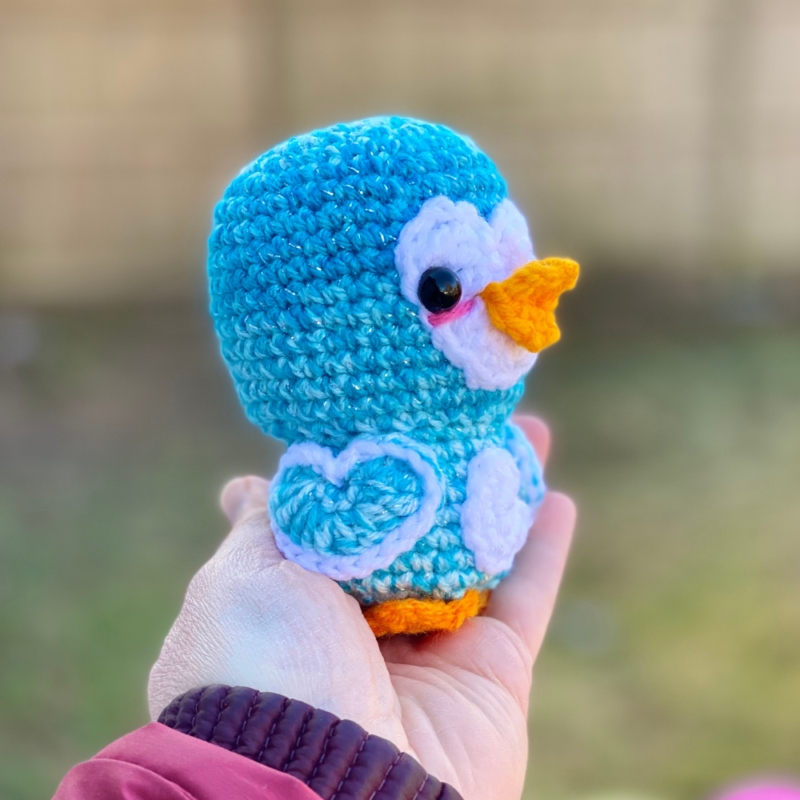
Sew down Heart Face Patch around edges to attach to Head. Fold Beak in half and sew to center of Heart Face Patch, between safety eyes (first photo below). Working through rem back loops of Rnd 3 of Heart Wings (second photo below), sew Heart Wings to sides of Body (sew down only top and upper sides of Heart Wings for unattached “flapping” appearance of Wings – third photo). Sew Belly Patch to center of Body. Sew Feet to bottom of Body.
Weave in all ends and/or tie off knots and hide inside sts. (Fourth photo shows finished piece.)
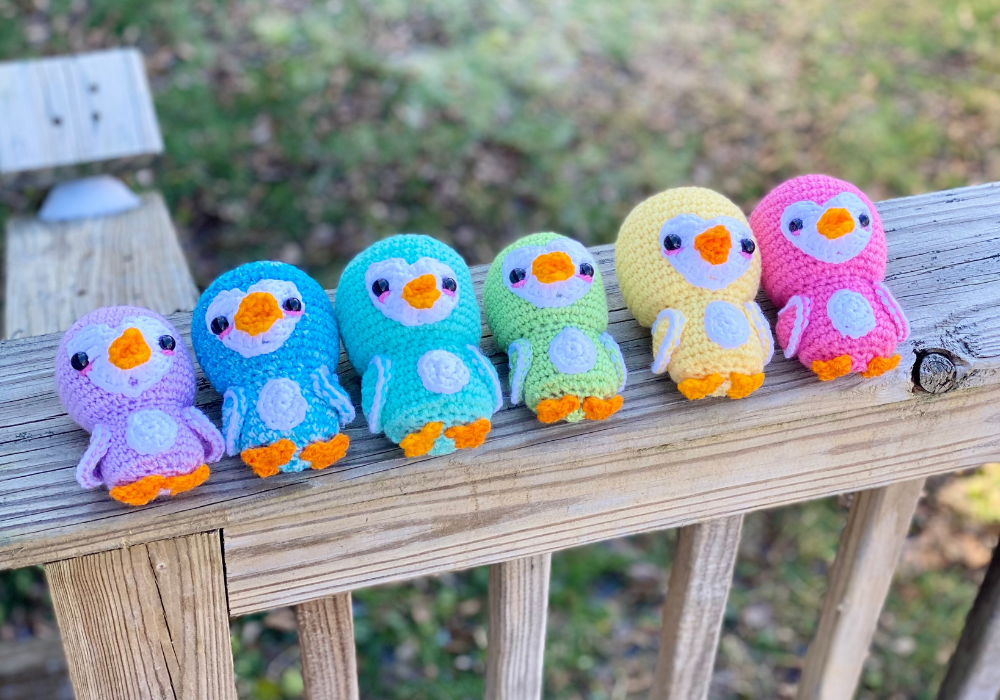
Here is the finished penguin!

I hope you enjoyed crocheting this penguin along with me today. If you love fun, free patterns like this one, then please be sure to sign up for my email list to keep up to date with all my latest designs:
Also, please be sure to follow me on social media, and tag me in photos of your finished projects made from my patterns, so I can see your lovely work!
Don’t forget to pin it for later HERE!
And you can find that ad-free PDF pattern HERE!
Happy Crocheting!
COPYRIGHT:
This pattern is owned by Crafty Kitty Crochet (Melissa Moore). Any reselling or distribution of this pattern is prohibited. Sale of items made using this pattern is welcomed, but I do ask that credit/a link be provided back to my site, craftykittycrochet.com.
Comments (3)
Amigurumi Hearty Mushrooms – Crochet Pattern ~ Crafty Kitty Crochet
June 28, 2022 at 3:03 pm
[…] I decided to customize my mushrooms with a heart motif – something you may remember from my Hearty Penguins! They turned out incredibly cute! Once I had made one, it really “spored” me on to make a whole […]
Amigurumi Hearty Penguin Patrón libre de ganchillo – Flor amarilla
July 15, 2023 at 6:33 am
[…] y Patrón Gratis: Gatito astuto de ganchillo; o Compra en […]
Crochet Penguins: 20 Adorable Designs for Winter Gifts and Decor
January 20, 2026 at 6:00 am
[…] More at: Crafty Kitty CrochetFREE […]