
Amigurumi Golden Puppy – Crochet Pattern
Pin it for later!
I’ve got a golden puppy!!! Well, a golden retriever (or lab) crochet pattern, that is! This adorable amigurumi is fast, easy, soft, cute, and the absolute best gift there is for any dog lover (especially if they have a golden)! I have a golden retriever puppy myself, and I can tell you how thrilled I’d be to receive this sweet, tiny crochet version of my beloved pet! It’s also a great decor piece if you have a plushie collection, and is an awesome soft toy, as well! If you’re looking for an easy chunky yarn ami pattern that is heart-meltingly cute, then you’ve found it!
Golden Puppy
Many of you who follow me on social media and/or read my blog know that my sweet little girl, Buffy, pops up in my crochet news quite a bit! Last year, I made the Pretty Paws Pet Bandana and Buffy was kind enough to model it for me (in exchange for treats and pets, of course). Buffy is also the namesake for one of my fave Retro Stripes projects to date: an amigurumi dragon that you may know as Buffy the Baby Dragon! We may have just adopted her last year, but Buffy has already quickly taken the center stage of my whole life. So of course I just had to express my love for her in crochet form!
The yarn I used for this pattern, a Dollar Tree exclusive, is a great low-cost chenille yarn that has about the thickness of a Bulky weight yarn. A great alternative would be Bernat Velvet or Premier Parfait, which you can find on Amazon!
Looking for the ad-free PDF version of this pattern? You can find it in my shop HERE!
Supplies
Size 7 – 4.5 mm crochet hook for Regular Size
Size L-11 / 8 mm crochet hook for Large Size
Premier Just Chenille in Yellow (or other bulky weight yarn [note that this yarn is classified as Super Bulky weight, but actually has the weight of most Bulky weight yarns])
- 1 skein / 65 yds for Regular Size, 6 skeins / 360 yds for Large Size
Red Heart Super Saver in Black (medium weight)
- Less than 1 yd for Regular Size
- About 20 yds for Large Size
Red Heart Super Saver in White for Large Size (used for eye sparkles)
- Less than 1 yd
Red Heart Soft Baby Steps in Strawberry
- Less than 1 yd for Regular Size
- About 10 yds for Large Size
1 pair of 10 mm safety eyes for Regular Size
Fiberfill stuffing
Yarn needle (one with large eye if making Large Size)
Scissors
Abbreviations
*= indicates beginning/end of a section to be repeated
Ch = chain
Rem = remaining
Rep = repeat
Rnd(s) = round(s)
Sc = single crochet
Sc2tog = single crochet 2 together
Sl St = slip stitch
St(s) = stitch(es)
Gauge
Exact gauge is not essential to this project.
Size
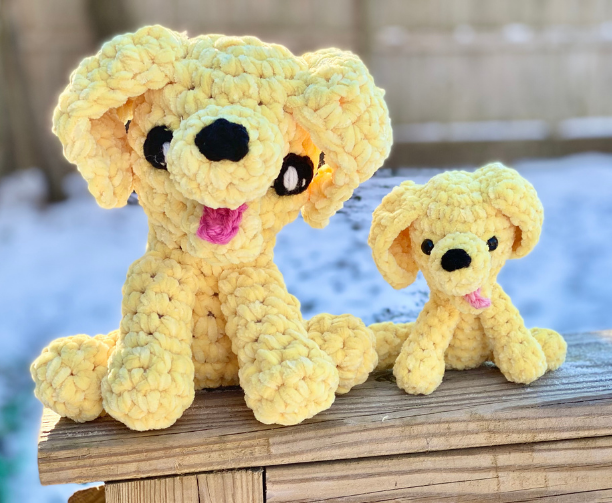
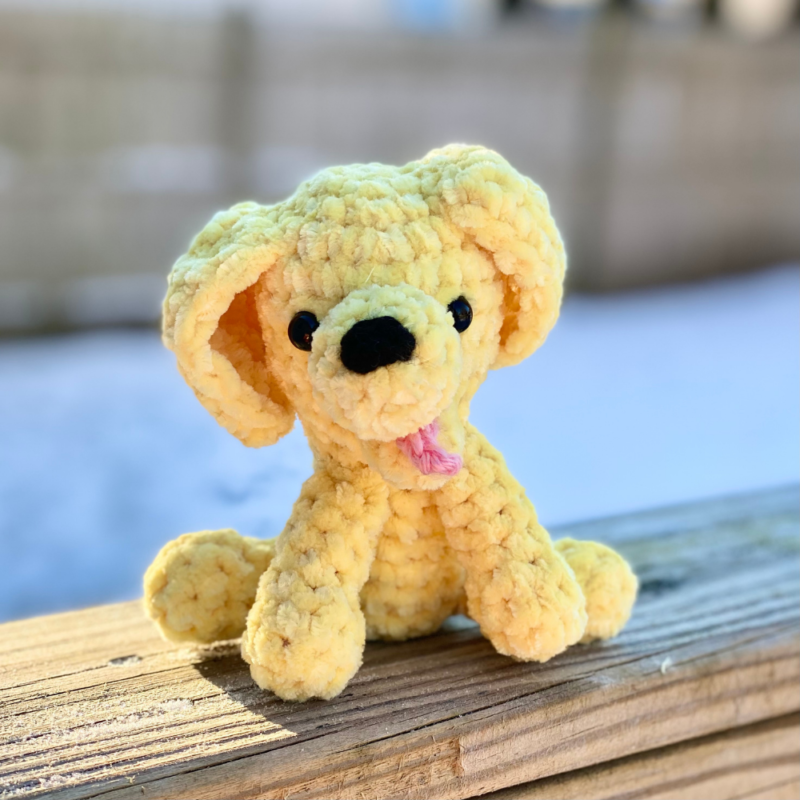
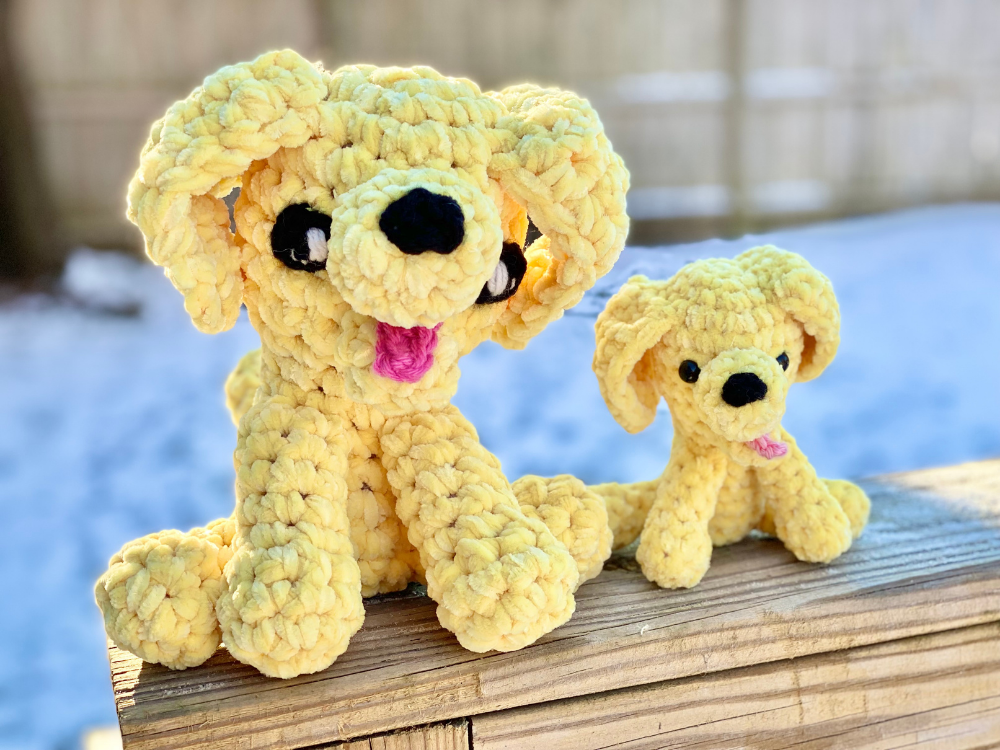
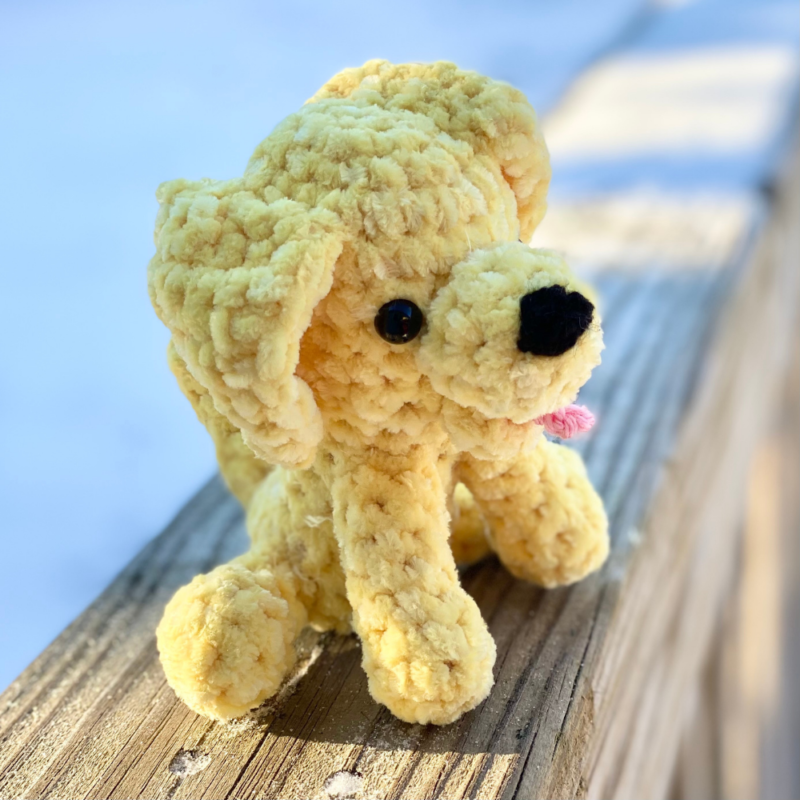
Regular Size: about 5 inches length
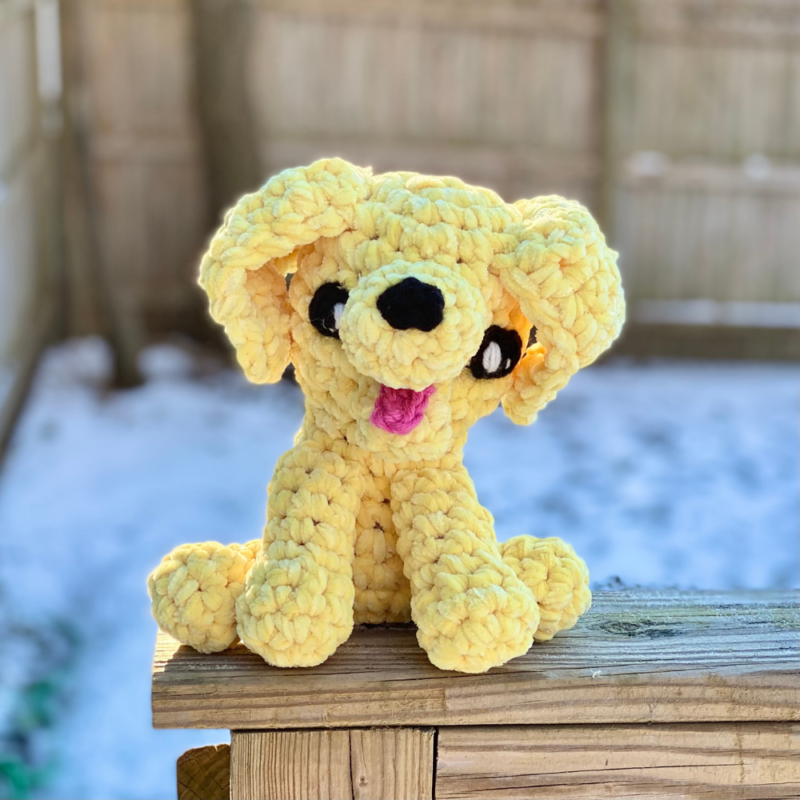
Large Size: about 8 inches length
Notes
To make Large Size, follow instructions throughout pattern, but use 8 mm hook and 3 strands of all yarns that are called for in the pattern. Also, follow directions for Eyes for Large Size.
How to Make This
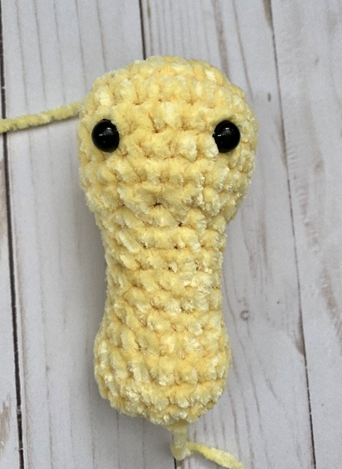
Head/Body
This piece is worked in continuous rnds. You may wish to use a stitch marker and move it up at the beginning of each new rnd.
Rnd 1 – with main color, make a magic ring. 6 sc in ring (6 sc)
Rnd 2 – 2 sc in each st (12 sc)
Rnd 3 – *2 sc in next st, sc in next.* Rep from * to * around (18 sc)
Rnd 4 – *2 sc in next st, sc in next 2 sts.* Rep from * to * around (24 sc)
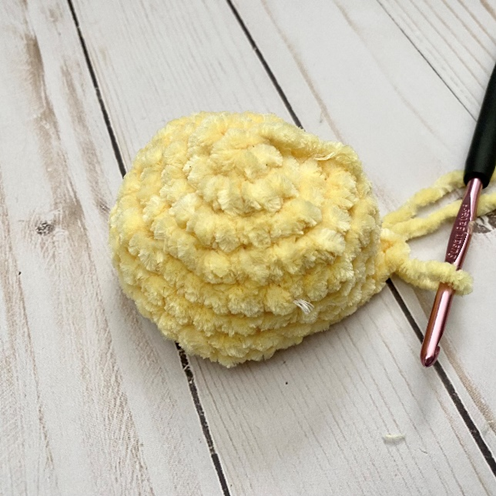
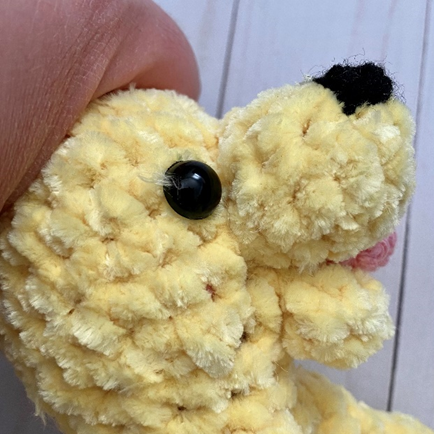
Rnds 5 – 8 – sc in each st around. Begin stuffing. If using safety eyes, attach them around Rnds 6 and 7, about 4 – 5 sts apart. (First photo below shows piece at this stage.) (24 sc)
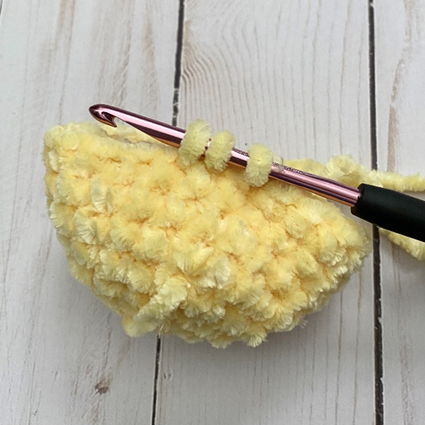
Rnd 9 – *sc2tog (second photo) over next 2 sts.* Rep from * to * around (third photo). (12 sc)
Rnds 10 – 14 – sc in each st around (fourth photo). (12 sc)
Rnd 15 – *2 sc in next st, sc in next st.* Rep from * to * around. (18 sc)
Rnds 16 – 17 – sc in each st around. Continue stuffing. (18 sc)
Rnd 18 – *sc2tog over next 2 sts.* Rep from * to * around. Finish stuffing. (9 sc)
Rnd 19 – *sc2tog over next 2 sts.* Rep from * to * 3 more times. Sc in last st. (5 sc)
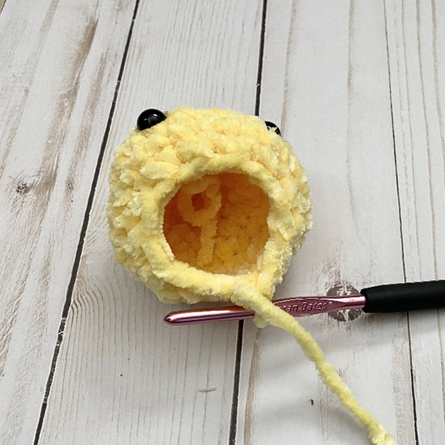
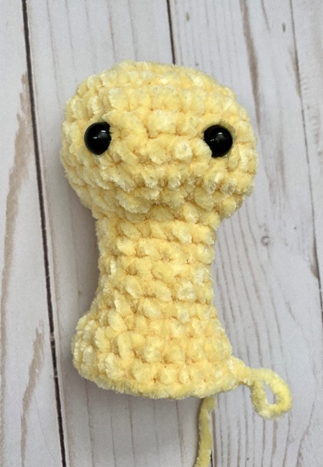
Fasten off, leaving long tail for sewing rem gap from Rnd 19. Fifth photo shows piece.
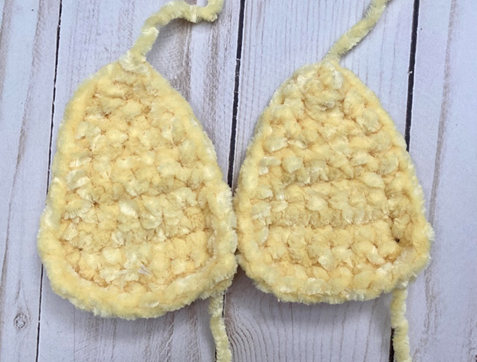
Ear (make 2)
With main color, ch 8.
Row 1 – sc in 2nd ch from hook, and in each st across. Ch 1, turn (7 sc)
Rows 2 – 3 – sc in each st across. Ch 1, turn (7 sc)
Row 4 – sc2tog over first 2 sts. Sc in next 3 sts. Sc2tog over last 2 sts. Ch 1, turn (5 sc)
Rows 5 – 6 – sc in each st across. Ch 1, turn (5 sc)
Row 7 – sc2tog over first 2 sts. Sc in next sts Sc2tog over last 2 sts. Ch 1, turn (3 sc)
Row 8 – Sc in each st across. Ch 1, turn (3 sc)
Row 9 – sc3tog over all 3 sts. Ch 1, turn (1 sc)
Row 10 – sc in next st. Ch 1 (1 sc)
Edging
Working up side of piece, evenly make 8 sc across side. Sc across bottom of piece, over sts of Row 1. Working down other side of piece, evenly make 8 sc across other side. Join with sl st to sc of Row 10. (23 sc)
Fasten off, leaving long tail for sewing. (Photo below shows finished pieces.)
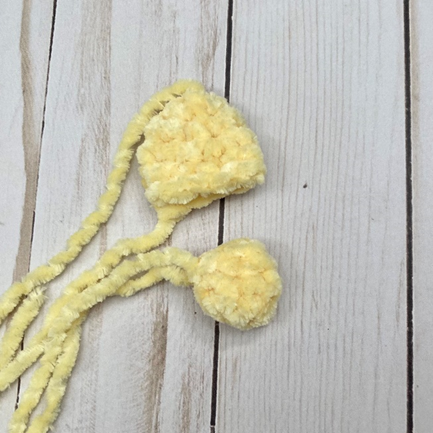
Top of Snout
This piece is worked in continuous rnds. You may wish to use a stitch marker and move it up at the beginning of each new rnd.
Rnd 1 – with main color, make a magic ring. 6 sc in ring (6 sc)
Rnd 2 – *2 sc in next st, sc in next st.* Rep from * to * around. (9 sc)
Rnds 3 – 5 – sc in each st around. (9 sc)
Fasten off, leaving long tail for sewing.
Bottom of Snout
This piece is worked in continuous rnds. You may wish to use a stitch marker and move it up at the beginning of each new rnd.
Rnd 1 – with main color, make a magic ring. 6 sc in ring (6 sc)
Rnds 2 – 3 – sc in each st around. (6 sc)
Fasten off, leaving long tail for sewing. (Photo below shows finished Top and Bottom.)
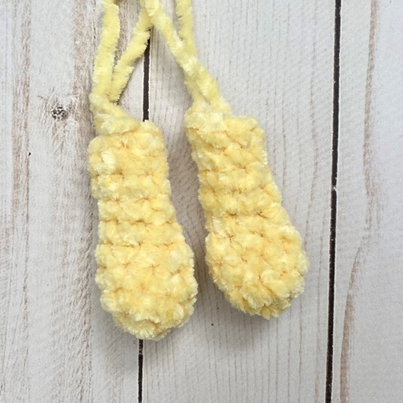
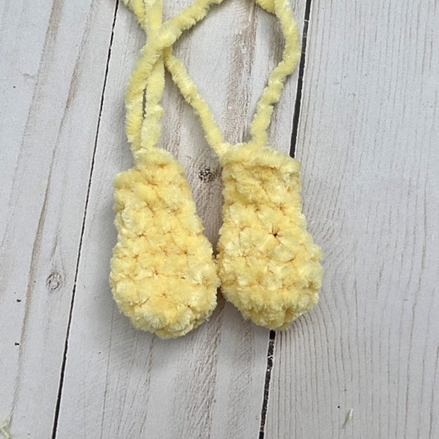
Front Leg (make 2)
This piece is worked in continuous rnds. You may wish to use a stitch marker and move it up at the beginning of each new rnd.
Rnd 1 – with main color, make a magic ring. 6 sc in ring (6 sc)
Rnd 2 – *2 sc in next st, sc in next st.* Rep from * to * around. (9 sc)
Rnd 3 – sc in each st around. (9 sc)
Rnd 4 – *sc2tog over next 2 sts.* Rep from * to * two more times. Sc in rem sts. (6 sc)
Rnds 5 – 9 – sc in each st around. (6 sc)
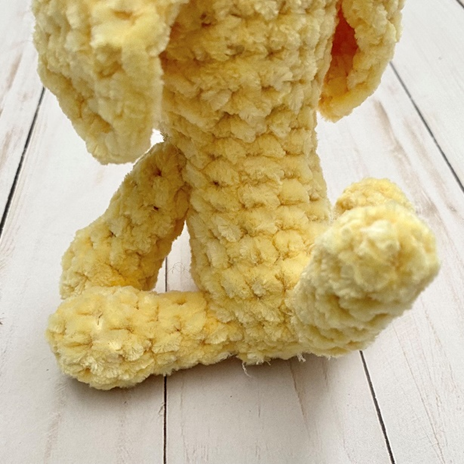
Fasten off, leaving long tail for sewing. (First photo below shows finished pieces.)
Back Leg (make 2)
Rep Rnds 1 – 7 of Front Leg.
Fasten off, leaving long tail for sewing. (Second photo below shows finished pieces.)
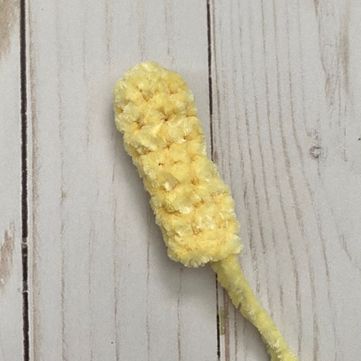
Tail
This piece is worked in continuous rnds. You may wish to use a stitch marker and move it up at the beginning of each new rnd.
Rnd 1 – with main color, make a magic ring. 6 sc in ring (6 sc)
Rnds 2 – 6 – sc in each st around. (6 sc)
Fasten off, leaving long tail for sewing. (Photo below shows finished piece.)
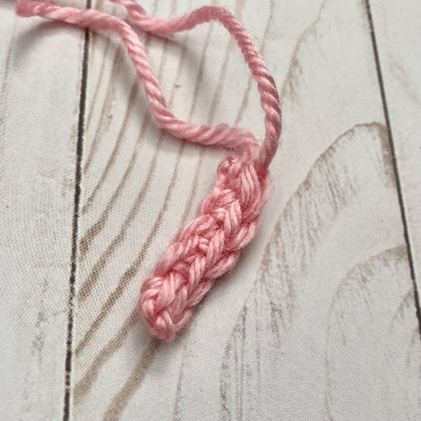
Tongue
With pink yarn, ch 5.
Row 1 – sc in each st across. (4 sc)
Fasten off, leaving long tail for sewing. (Photo below shows finished piece.)
Nose
With black yarn, ch 4. Join with sl st to first ch. (4 chs)
Fasten off, leaving long tail for sewing.
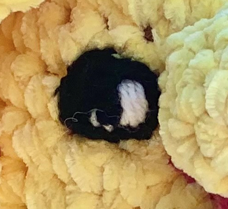
Eyes for Large Size Only
With 3 strands of black yarn and 8 mm hook, make a magic ring. 5 sc in ring. (5 sc)
Fasten off, leaving long tail for sewing.
Sparkles
With one strand of white yarn on needle, make several vertical lines near edge of each Eye. Make several small lines on opposite side of these lines. Carry ends to back of piece and tie off ends, leaving only the long tail for sewing from end of making Eyes. Photo shows finished Eye.
Finishing
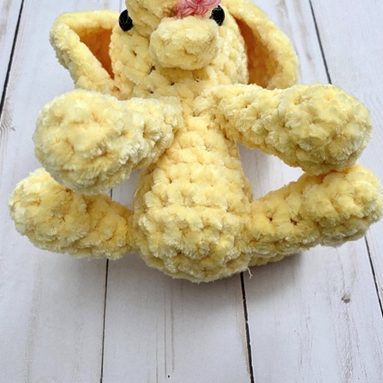
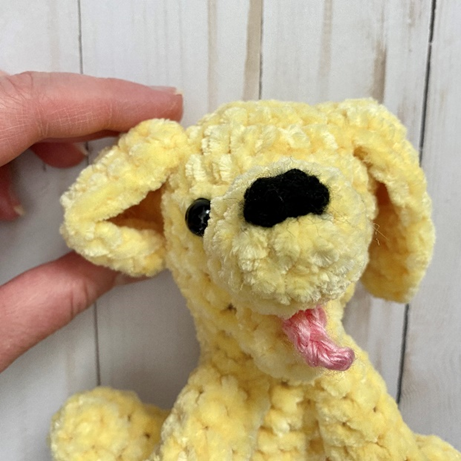
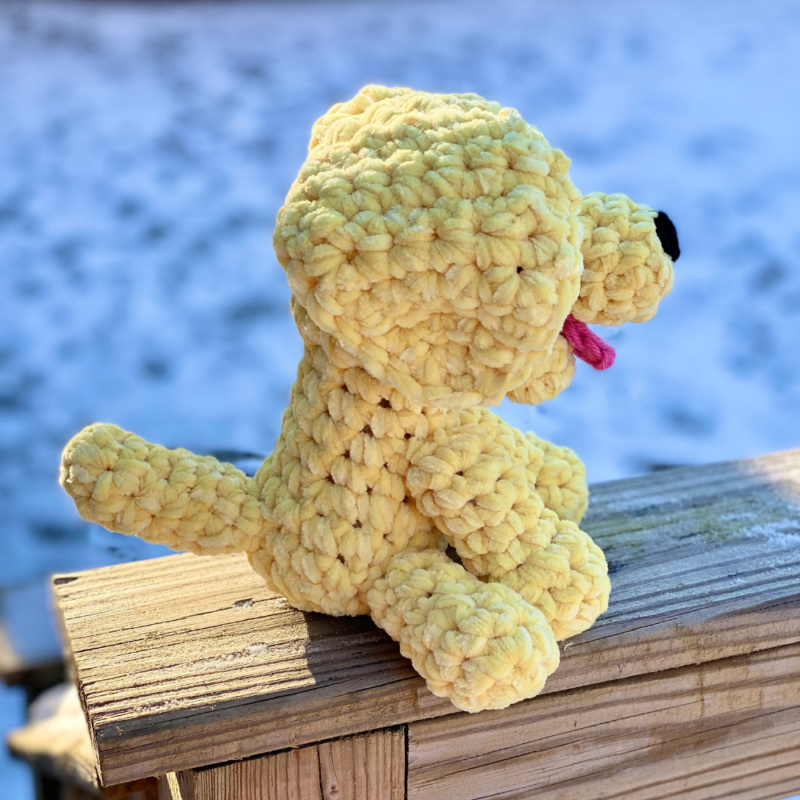
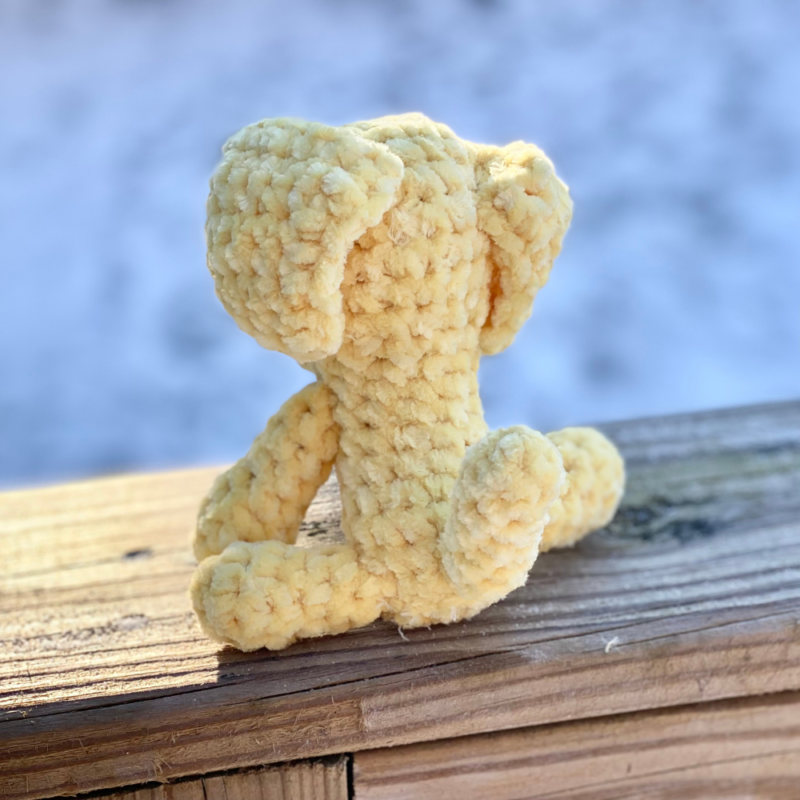
If making Large Size, sew Eyes to center of Head, about 4 – 5 sts apart. Sew Nose to center of Top of Snout. Lightly stuff Top of Snout, and sew between eyes onto Head. Press Bottom of Snout flat and sew Tongue to Bottom of Snout. Sew Bottom of Snout directly below Top of Snout onto Head. Align Ears with Eyes on top of Head and sew in place. Press Ears together at centers to shape (third photo). Lightly stuff Front Legs and sew to front of Body, below Head. Lightly stuff Lower Back Legs and sew to sides of bottom of Body. Lightly stuff Tail and sew to back of Body. See photos below for placement.
Weave in all ends and/or tie off knots and hide inside sts.

Here are the finished puppies!

I hope you enjoyed crocheting this puppy along with me today. If you love fun, free patterns like this one, then please be sure to sign up for my email list to keep up to date with all my latest designs:
Also, please be sure to follow me on social media, and tag me in photos of your finished projects made from my patterns, so I can see your lovely work!
Don’t forget to pin it for later HERE!
And you can find that ad-free PDF pattern HERE!
Happy Crocheting!
COPYRIGHT:
This pattern is owned by Crafty Kitty Crochet (Melissa Moore). Any reselling or distribution of this pattern is prohibited. Sale of items made using this pattern is welcomed, but I do ask that credit/a link be provided back to my site, craftykittycrochet.com.

Comments (2)
Amigurumi Jelly Bees ~ Crafty Kitty Crochet
July 14, 2022 at 9:59 pm
[…] I’ve become a little obsessed with chenille yarn! My Hearty Mushrooms, Sweet Spring Birds, and Golden Puppy are great examples of this! And I have so many more fun, velvety soft projects in the works too. So […]
21 Free Crochet Puppy Patterns For Kids – Craftsy
September 18, 2023 at 7:34 am
[…] Click Here […]