
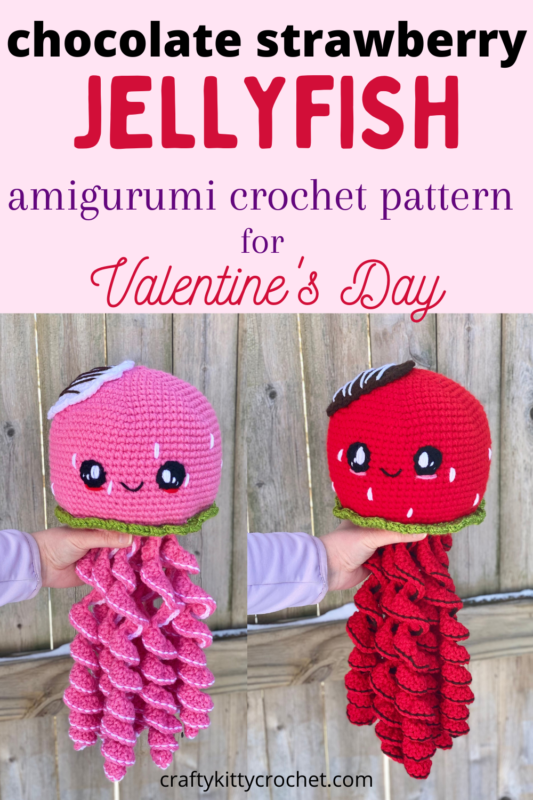
Chocolate Covered Strawberry Jellyfish – Amigurumi Crochet Pattern
Pin it for later!
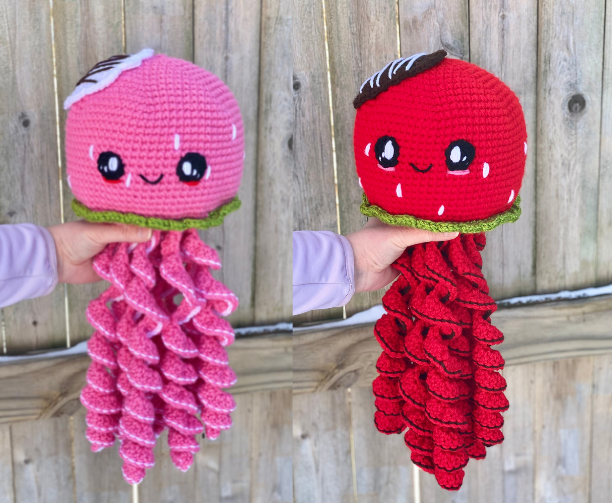
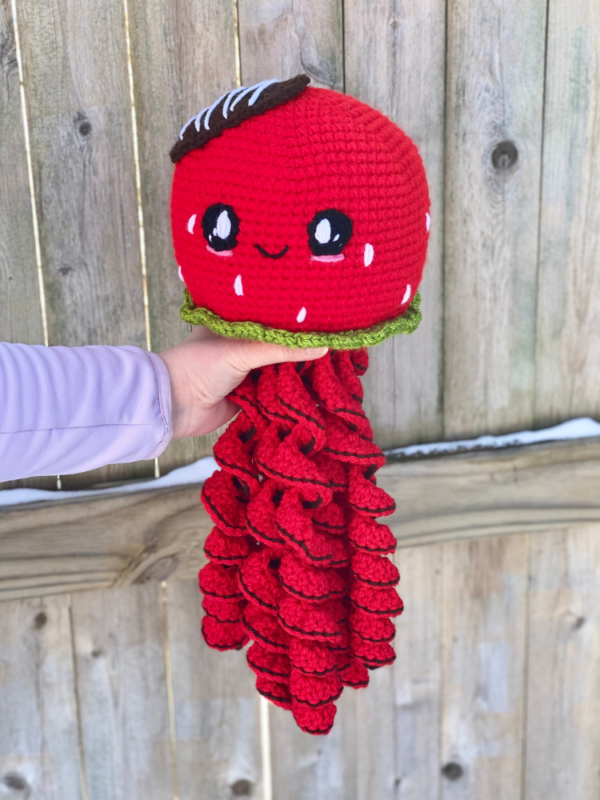
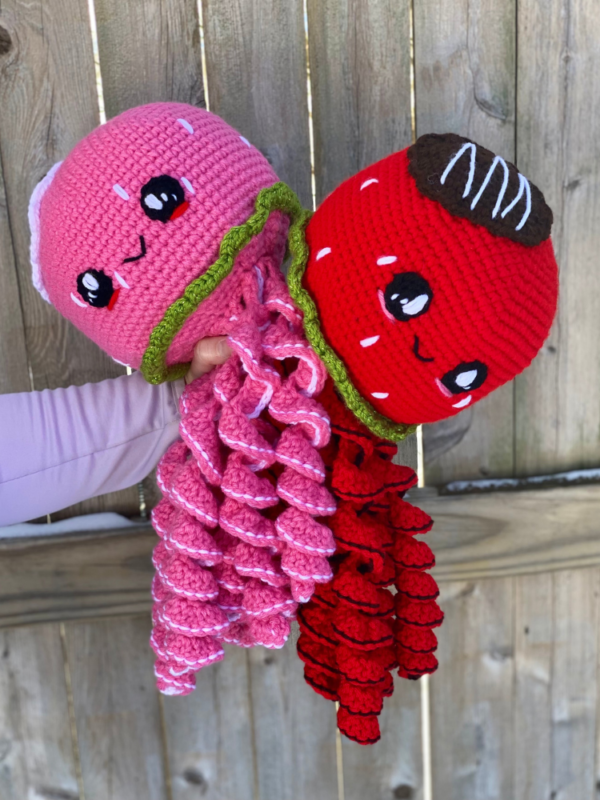
These Valentine’s themed jellyfish are sweet as can be! If you’re looking for the perfect kawaii DIY for the one you love this season, then look no further than these chocolate covered strawberry jellyfish! Inspired by the classic dessert, these squishy, snuggly cuties make great gifts, decor, or toys. What a perfect combo of amigurumi food and stuffed animals! Crochet a bunch in bright, custom colors with this easy pattern!
Chocolate Covered Strawberry Jellyfish
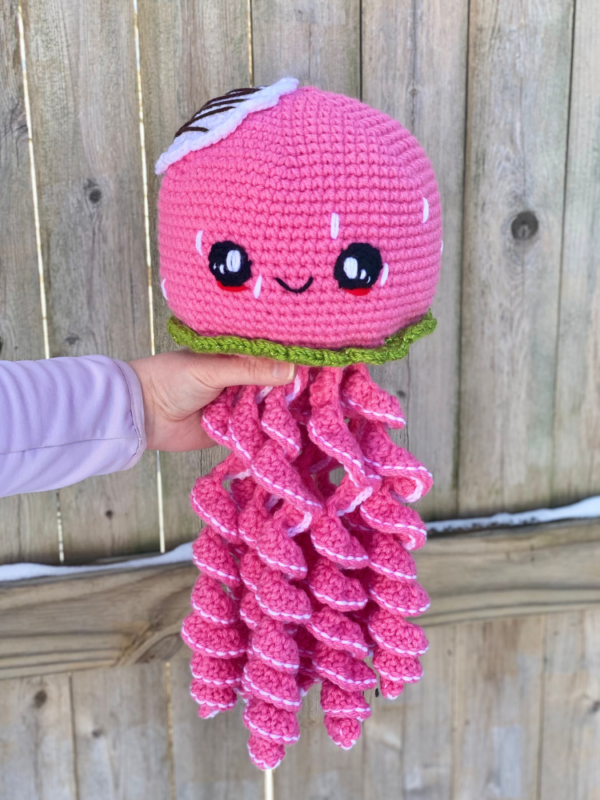
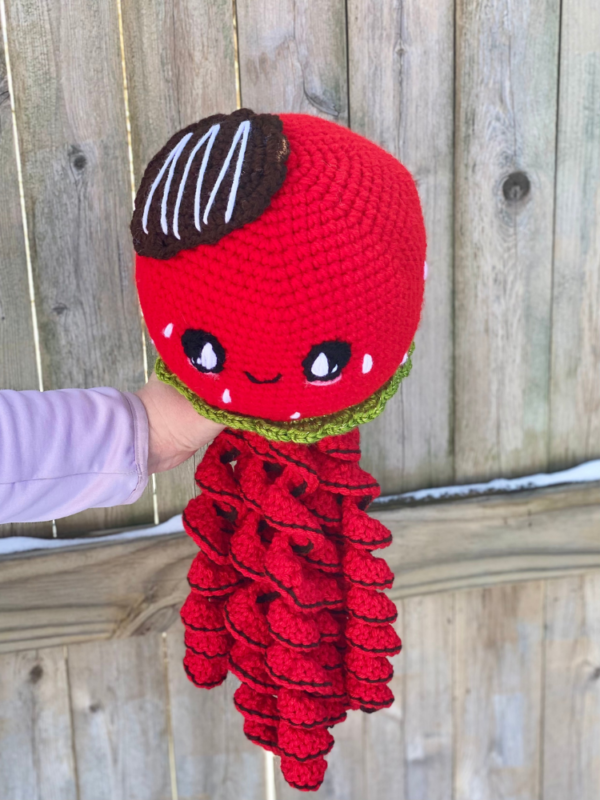
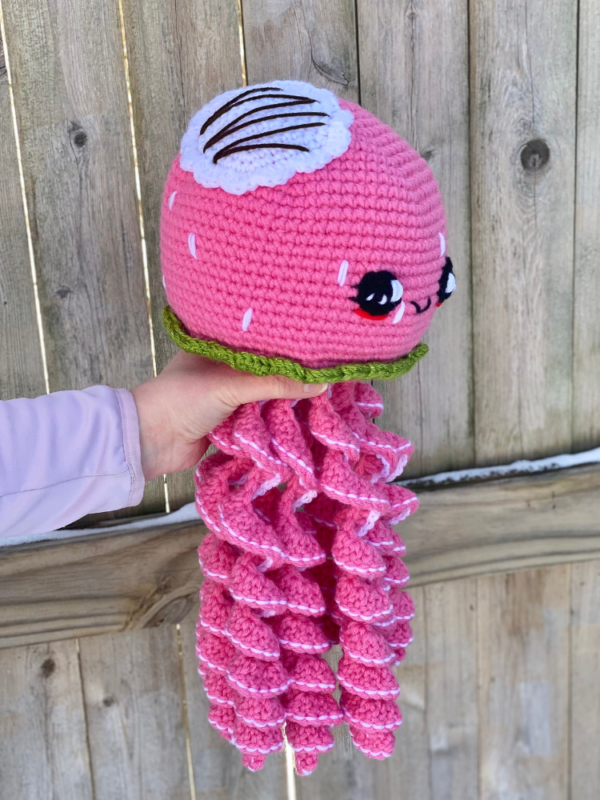
I’ve been having way too much fun lately with crocheted jellyfish! I started with my classic Rainbow Jellyfish last summer, made some fun Halloween Jellyfish in the fall, and was thrilled with how much folks loved my Gingerbread Jellyfish this past holiday season! So why not combine these aquatic critters with a classic seasonal dessert to make an irresistible combo? I made one in classic red and another in sugar pink to capture a few different styles for my jellyfish. I love how they came out! The red/chocolate combo is bright and sweet, and the pink/white chocolate gives off strawberries-and-cream vibes! Both are perfect for Valentine’s Day! And the best part? This pattern is so EASY! It’s perfect for cozying up and crocheting on a late winter night.
The yarn I used for the pink style is somewhat hard to find in stores, but is so incredibly perfect! In fact, it’s called Perfect Pink (a color way of Red Heart Super Saver). It’s the exact right shade for “sugar pink” – not too light, not too dark, not too neutral or rosy, etc. Find some on Amazon!
Looking for the ad-free PDF version of this pattern? You can find it in my shop HERE!

Supplies
Size H/8 5.0 mm crochet hook
2 skeins of Red Heart Super Saver in Cherry Red (for red jellyfish) or Perfect Pink (for pink jellyfish); (medium weight) – about 650 yds
1 skein of Red Heart Super Saver in White (medium weight) – about 50 yds for red jellyfish; about 100 yds for pink jellyfish
1 skein of Caron Simply Soft Party in Spring Sparkle (medium weight) – about 50 yds
Red Heart Super Saver in Coffee (medium weight) – about 90 yds for red jellyfish; about 50 yds for pink jellyfish
Red Heart Super Saver in Black (medium weight) – less than 5 yds
Fiberfill stuffing
Scissors
Abbreviations
*= indicates the beginning/end of a section to be repeated
BLO = back loop only
Ch = chain
Dc = double crochet
FLO = front loop only
Hdc = half double crochet
Rem = remaining
Rep = repeat
Rnd(s) = round(s)
Sc = single crochet
Sc2tog = single crochet 2 together
Sl St = slip stitch
St(s) = stitch(es)
Gauge
Exact gauge is not essential to this project.
Size
About 23 inches long including tentacles
Notes
To make red Jellyfish, use Cherry Red as main color. To make pink Jellyfish, use Pretty in Pink as main color. Use a few yards of whichever one is not used as main color (red or pink) as Blush during Finishing stage.
How to Make This
Instructions
Head
This piece is worked in continuous rnds; you may wish to use a stitch marker and move it up at the beg of each new rnd.
Rnd 1 – with 2 strands of Cherry Red or Perfect Pink, make a magic ring. 6 sc in ring (6 sc)
Rnd 2 – 2 sc in each st (12 sc)
Rnd 3 – *2 sc in next st, sc in next.* Rep from * to * around (18 sc)
Rnd 4 – *2 sc in next st, sc in next 2 sts.* Rep from * to * around (24 sc)
Rnd 5 – *2 sc in next st, sc in next 3 sts.* Rep from * to * around. (30 sc)
Rnd 6 – *2 sc in next st, sc in next 4 sts.* Rep from * to * around (36 sc)
Rnd 7 – *2 sc in next st, sc in next 5 sts.* Rep from * to * around (42 sc)
Rnd 8 – *2 sc in next st, sc in next 6 sts.* Rep from * to * around (48 sc)
Rnd 9 – *2 sc in next st, sc in next 7 sts.* Rep from * to * around (54 sc)
Rnd 10 – *2 sc in next st, sc in next 8 sts.* Rep from * to * around (60 sc)
Rnd 11 – *2 sc in next st, sc in next 9 sts.* Rep from * to * around (66 sc)
Rnd 12 – *2 sc in next st, sc in next 10 sts.* Rep from * to * around (72 sc)
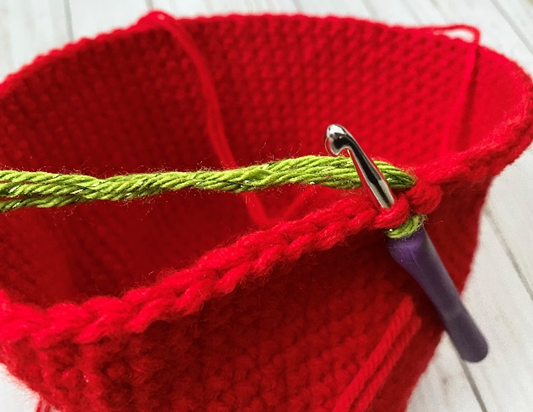
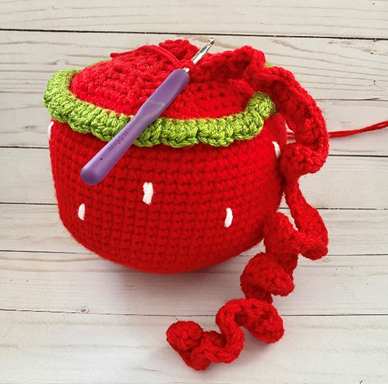
Rnds 13 – 27 – sc in each st around. Attach Spring Sparkle in last st of Rnd 27. (72 sc per rnd)
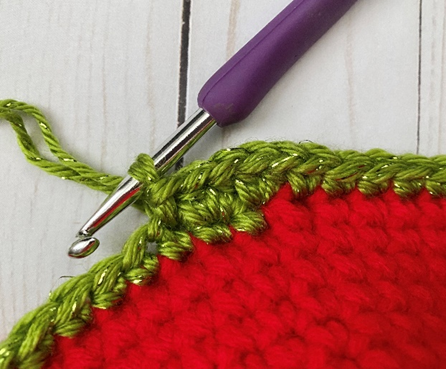
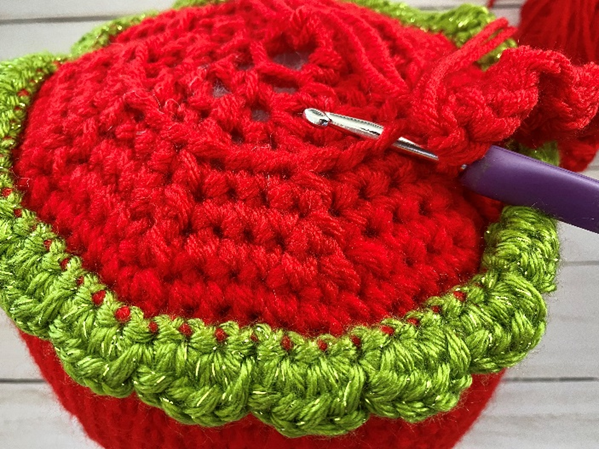
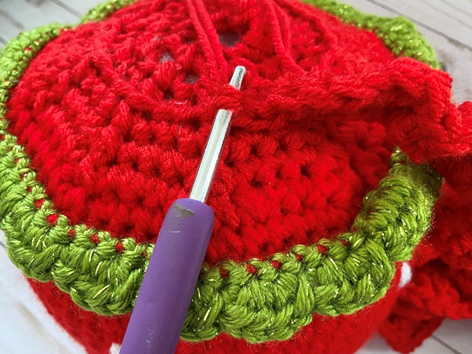
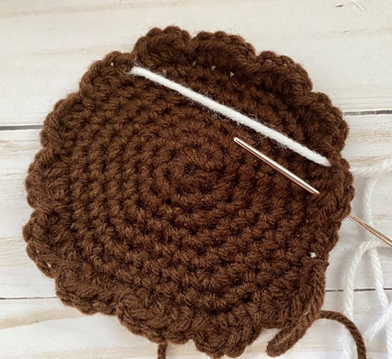
Rnd 28 – working in FLO (first photo below), sc in each st around. (72 sc)
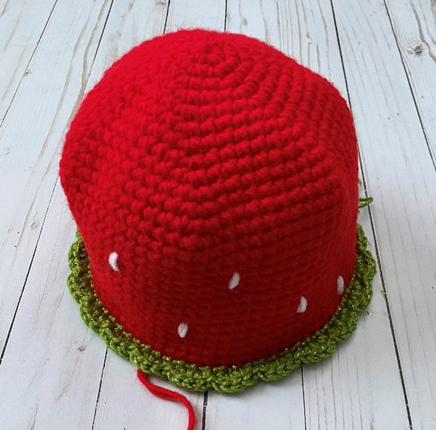
Rnd 29 – *2 hdc in next 2 sts. Sl st in next st (scallop made – second photo below).* Rep from * to * 23 more times. Begin stuffing. (24 scallops)
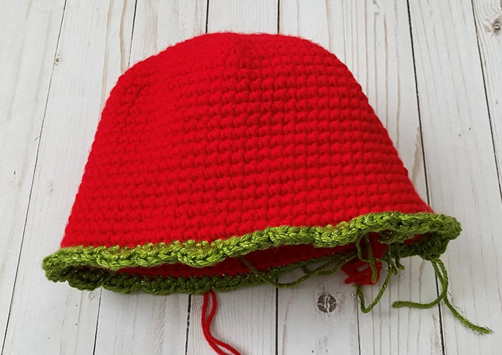
Fasten off. (Third photo shows finished piece.)
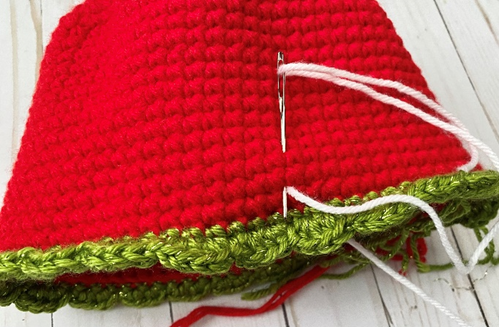
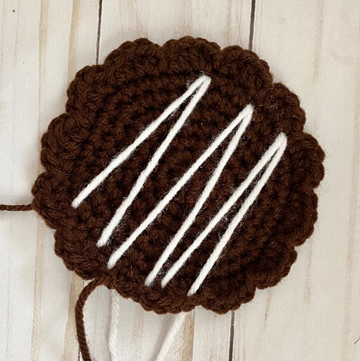
Strawberry Seeds
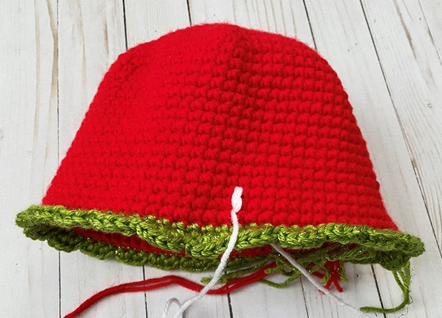
Before moving on to closing the Head, use White to sew several small vertical lines throughout Head to make Seeds. (Seeds shown here are made up of multiple vertical lines – see first and second photos below.) Tie off or weave in ends before moving on to next step. (Third photo shows finished process.)
Closing the Head
This piece is worked in continuous rnds; you may wish to use a stitch marker and move it up at the beg of each new rnd.
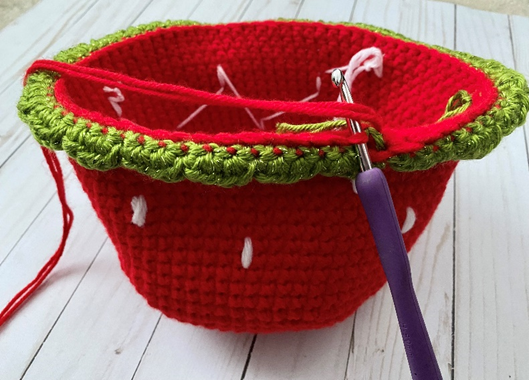
Attach 2 strands of Cherry Red or Perfect Pink in first rem loop from Rnd 28 (first photo below), ch 1.
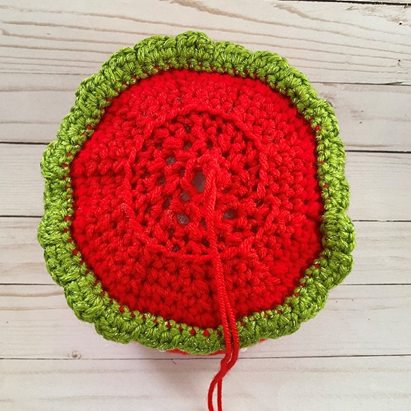
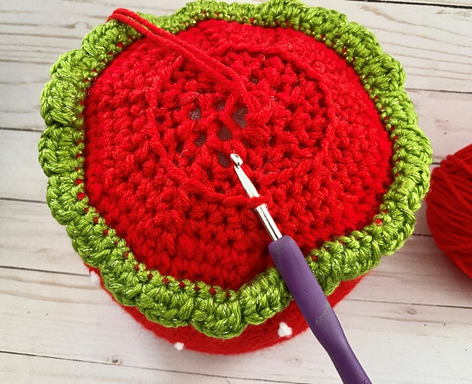
Rnd 1 – *sc2tog over next 2 sts, sc in next 5 sts.* Rep from * to * 9 more times. Sc2tog over last 2 sts. (61 sc)
Rnd 2 – *sc2tog over next 2 sts, sc in next 4 sts.* Rep from * to * 9 more times. Sc in last st. (51 sc)
Rnd 3 – *sc2tog over next 2 sts, sc in next 3 sts.* Rep from * to * 9 more times. Sc in last st. (41 sc)
Rnd 4 – *sc2tog over next 2 sts, sc in next 2 sts.* Rep from * to * 9 more times. Sc in last st. (31 sc)
Rnd 5 – working in BLO, *sc2tog over next 2 sts, sc in next st.* Rep from * to * 9 more times. Sc in last st. (21 sc)
Rnd 6 – *sc2tog over next 2 sts.* Rep from * to * around. Sc in last st. Finish stuffing. (11 sc)
Rnd 7 – *sc2tog over next 2 sts.* Keep decrease sts tight by pressing together edges of rnd. Rep from * to * around. Sc in last st. (6 sc)
Rnd 8 – sc2tog over next 2 sts. Leave rem sts unworked. (5 sc)
Fasten off. Second photo below shows piece at this stage.
Tentacles
Attach 2 strands of Cherry Red or Perfect Pink in first rem loop of Rnd 5 of Closing the Head (first photo below).
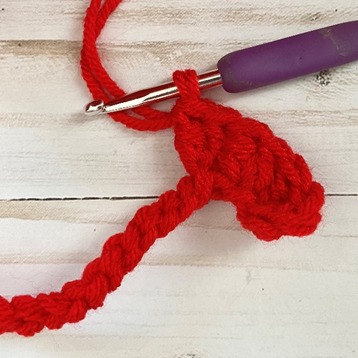
Row 1 – Ch 52. Make 2 dc in 3rd ch from hook, and in each st across (second photo shows sts with 2 dc made into them). Sl st to next rem loop from Rnd 6 (third photo); sl st in next two rem loops (fourth photo). (Fifth photo shows tentacle at this stage.) (100 dc)
Rows 2 – 10 – rep Row 1 for a total of 10 tentacles.
Fasten off.
Tentacle Chocolate Drizzle
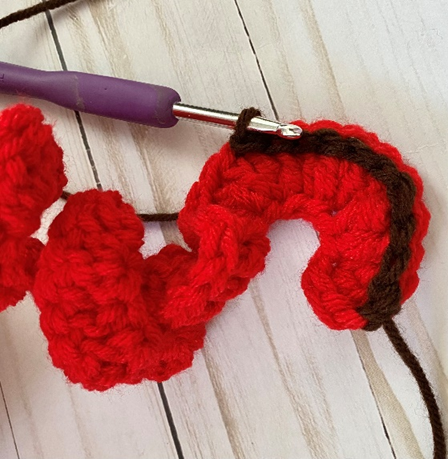
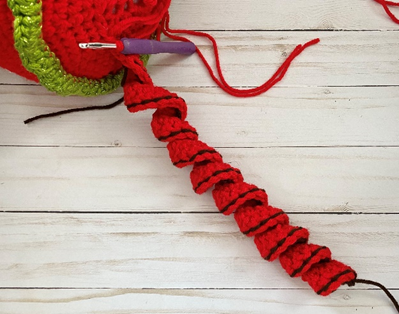
Attach 1 strand of Coffee or White at outer edge of Tentacle, ch 1. Sk first st, loosely sl st in each st across (first photo below shows example). Fasten off. Repeat for all 10 Tentacles. Twist tentacle inward (from left to right) to shape curl (second photo below shows piece before twisting; second photo shows piece after).
Chocolate
This piece is worked in continuous rnds; you may wish to use a stitch marker and move it up at the beg of each new rnd.
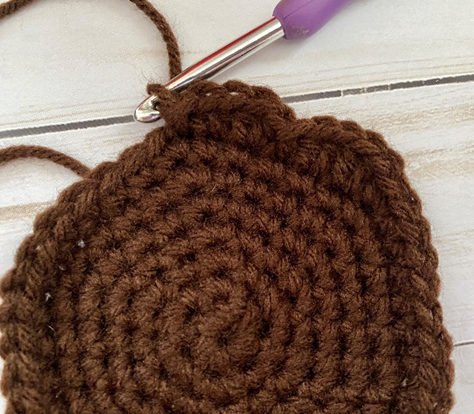
Rnd 1 – with Coffee or White, make a magic ring. 6 sc in ring (6 sc)
Rnd 2 – 2 sc in each st (12 sc)
Rnd 3 – *2 sc in next st, sc in next.* Rep from * to * around (18 sc)
Rnd 4 – *2 sc in next st, sc in next 2 sts.* Rep from * to * around (24 sc)
Rnd 5 – *2 sc in next st, sc in next 3 sts.* Rep from * to * around. (30 sc)
Rnd 6 – *2 sc in next st, sc in next 4 sts.* Rep from * to * around (36 sc)
Rnd 7 – *2 sc in next st, sc in next 5 sts.* Rep from * to * around (42 sc)
Rnd 8 – *2 hdc in next 2 sts. Sl st in next st (scallop made – first photo below).* Rep from * to * 12 more times. Sl st in next st. Leave rem sts unworked. (13 scallops)
Fasten off, leaving long tail for sewing.
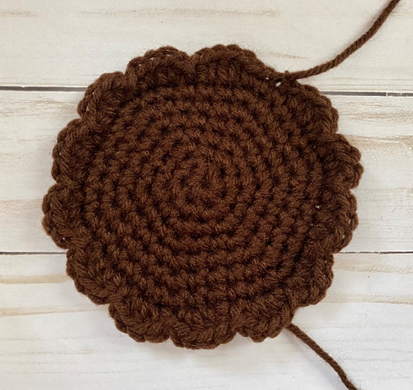
Drizzle
Make about 3 large “v” shapes across Chocolate piece with White or Coffee. (Second photo below shows finished piece.)
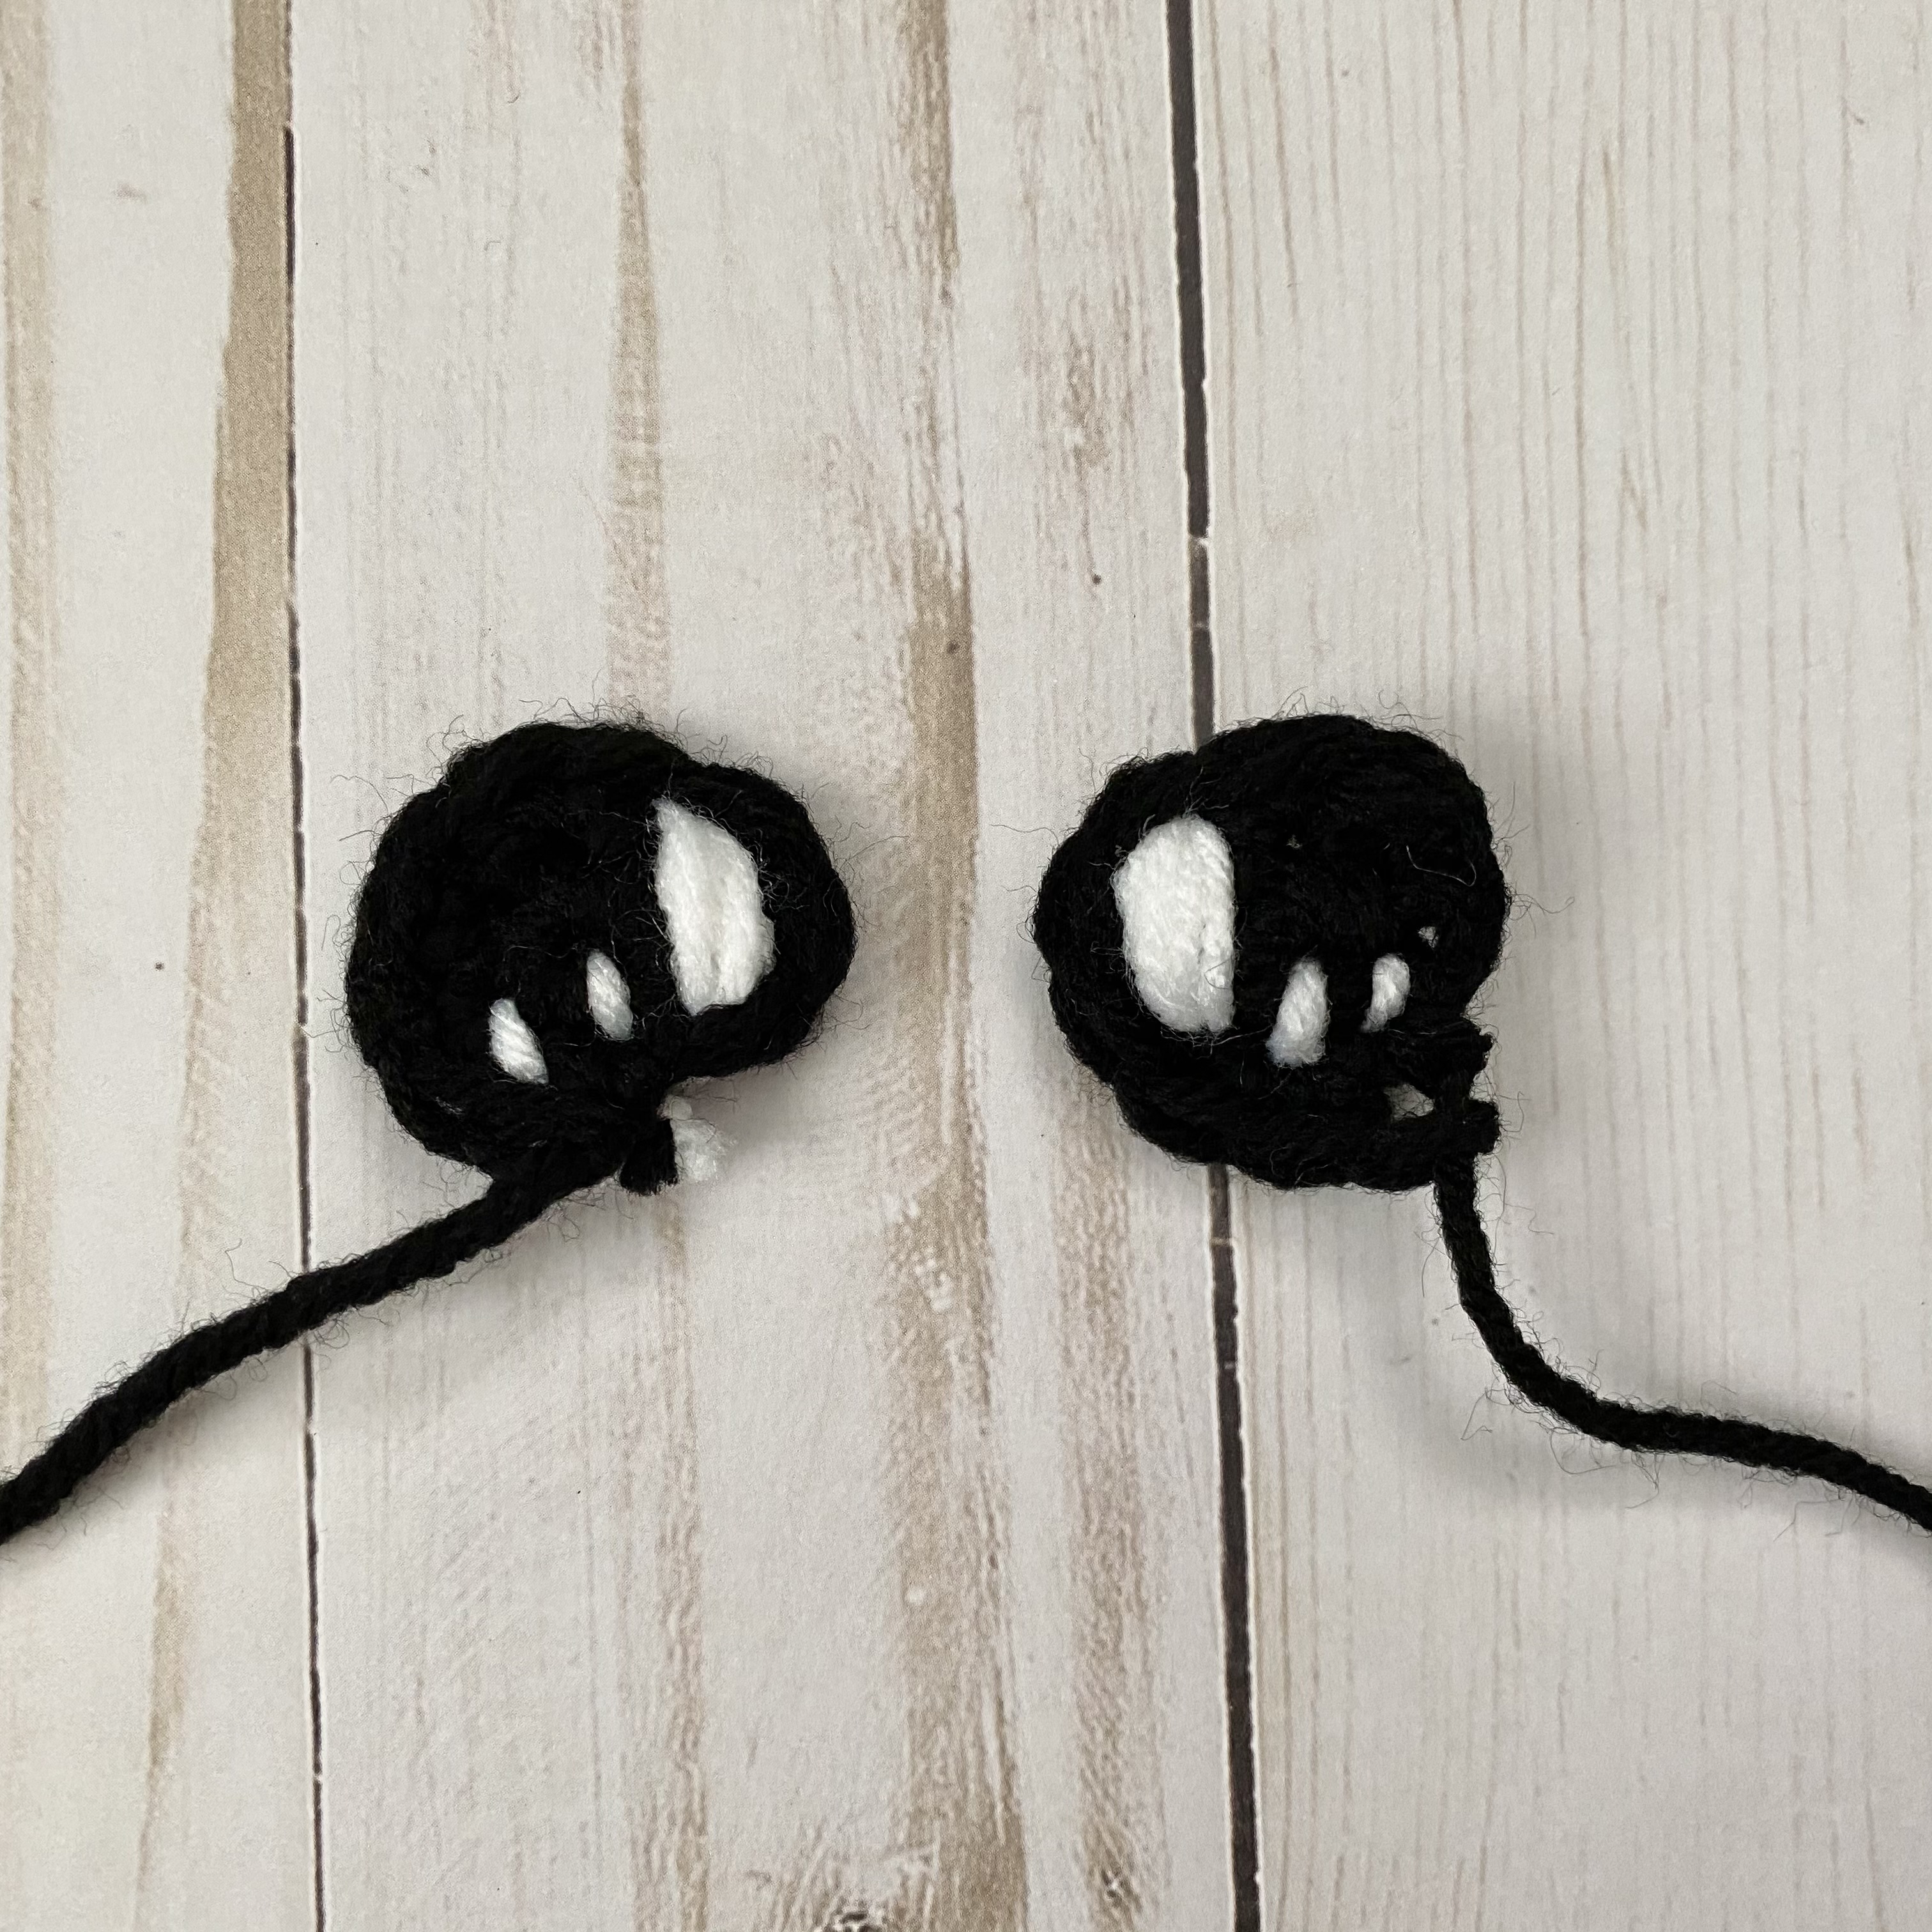
Eye (make 2)
This piece is worked in continuous rnds; do not join. You may wish to use a stitch marker and move it up and the beginning of each new rnd.
Rnd 1 – With Black, make a magic ring. 5 sc in ring. (5 sc)
Rnd 2 – 2 sc in next st, sc in next st; rep around. (10 sc)
Fasten off, leaving long tail for sewing.
Eye Sparkle
With White, make several vertical lines near edge of Eye. Make several smaller lines to the side for smaller sparkles. Tie off White ends on back of Eye.
Finishing
(See photo below for placement.) Sew Chocolate on side of Head. Sew Eyes onto Head. With rem Black yarn ends, make small “v” below for Smile. With Pretty in Pink or Cherry Red, make several horizontal lines below each eye.
Weave in ends and/or tie off and hide knots in sts.
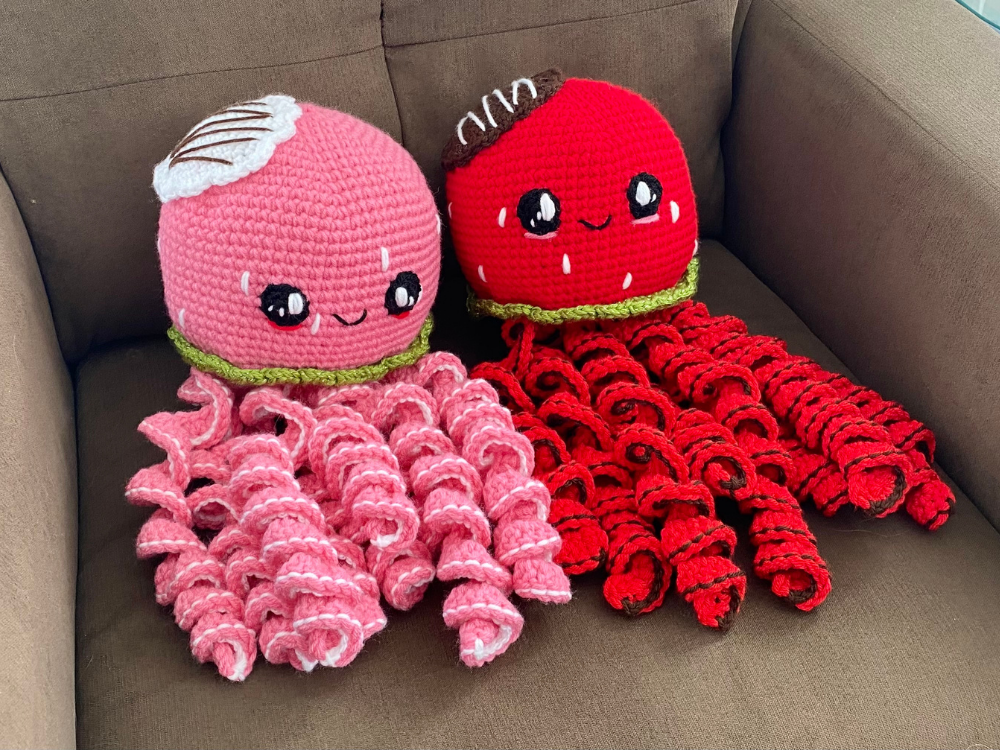
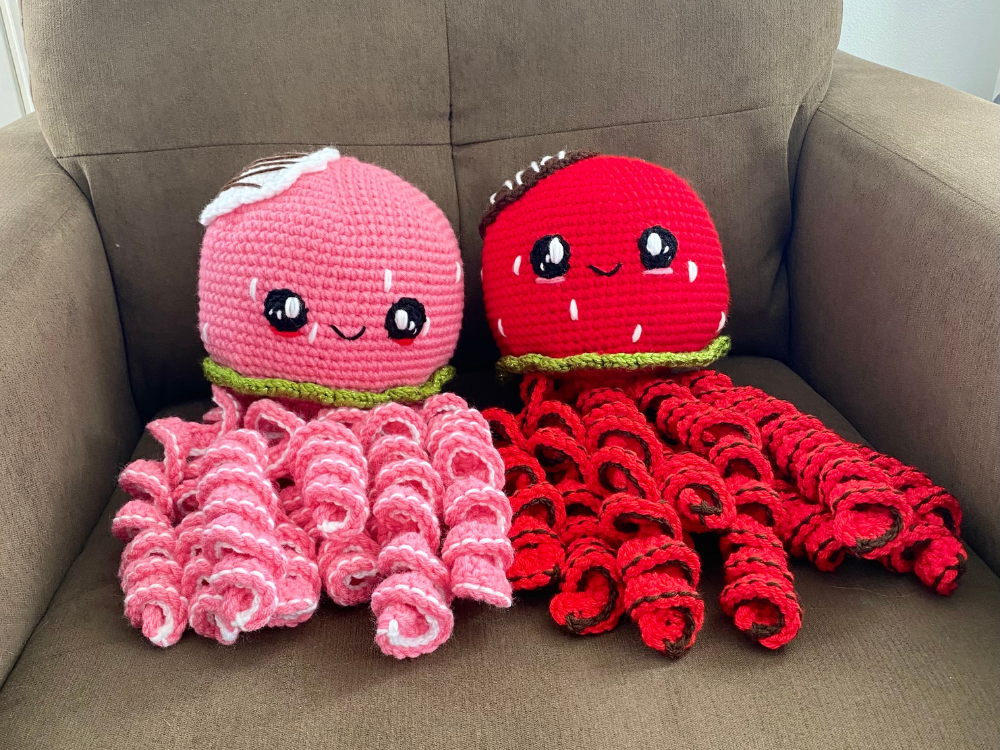
Here are the finished jellyfish!
I hope you enjoyed crocheting this jellyfish along with me today. If you love fun, free patterns like this one, then please be sure to sign up for my email list to keep up to date with all my latest designs:
Also, please be sure to follow me on social media, and tag me in photos of your finished projects made from my patterns, so I can see your lovely work!
Don’t forget to pin it for later HERE!
And you can find that ad-free PDF pattern HERE!
Happy Crocheting!
COPYRIGHT:
This pattern is owned by Crafty Kitty Crochet (Melissa Moore). Any reselling or distribution of this pattern is prohibited. Sale of items made using this pattern is welcomed, but I do ask that credit/a link be provided back to my site, craftykittycrochet.com.
Comments (2)
Amigurumi Rosy Turtle – Crochet Pattern ~ Crafty Kitty Crochet
February 7, 2022 at 9:44 pm
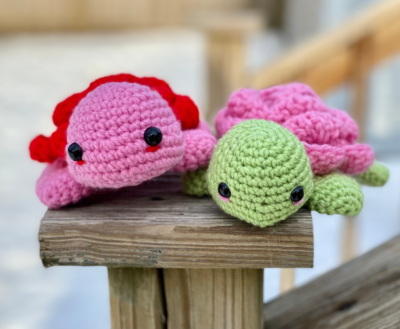
[…] You might already be familiar with my other unique takes on turtles: the Birthday Cupcake Turtle and Pumpkin Pie Turtle patterns I released last year! Well, why not keep the party going with a Valentine’s edition? The rose fits so well as the “shell” of this little guy, and it makes it such a fun new twist on giving roses for Valentine’s Day! And if you’re making these as gifts-to-self, then this rose edition is a must-have for your ongoing turtle collection! I hope to release even more turtle patterns throughout the year, as well as other cute interpretations of critters (i.e. my Chocolate Covered Strawberry Jellyfish)! […]
12 Crochet Jellyfish Patterns For Free
August 15, 2023 at 6:28 am
[…] Click Here […]