Christmas Tree Beanie – Crochet Pattern
Pin it for later!
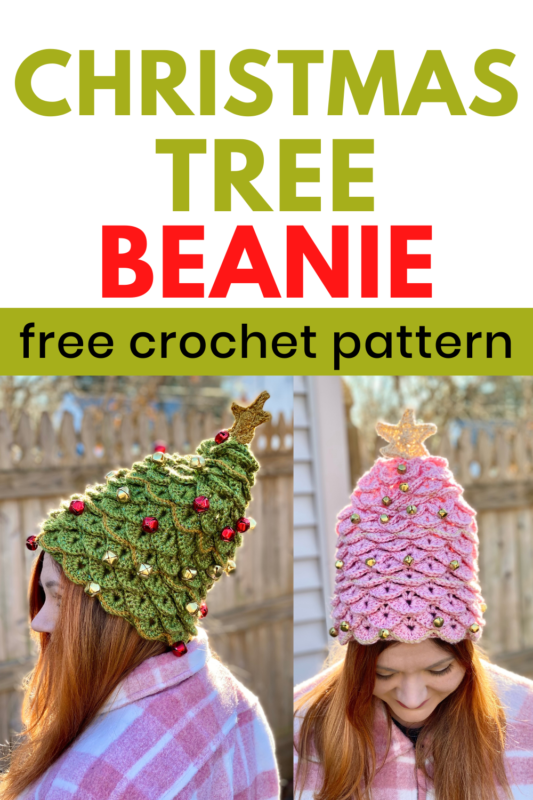
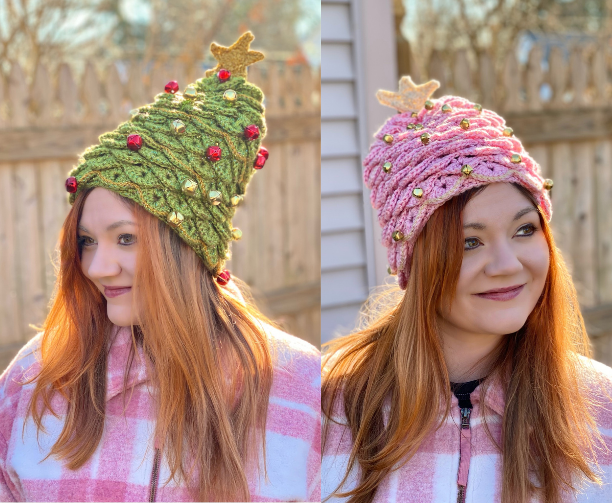
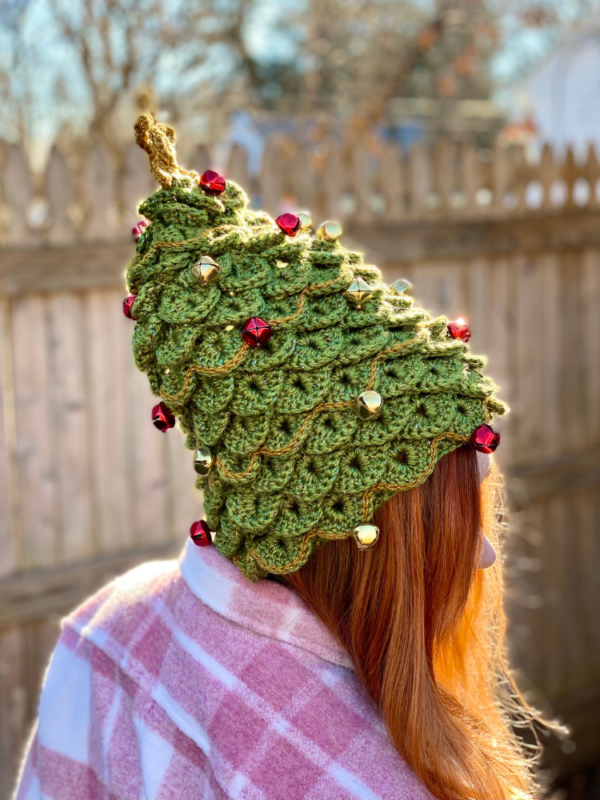
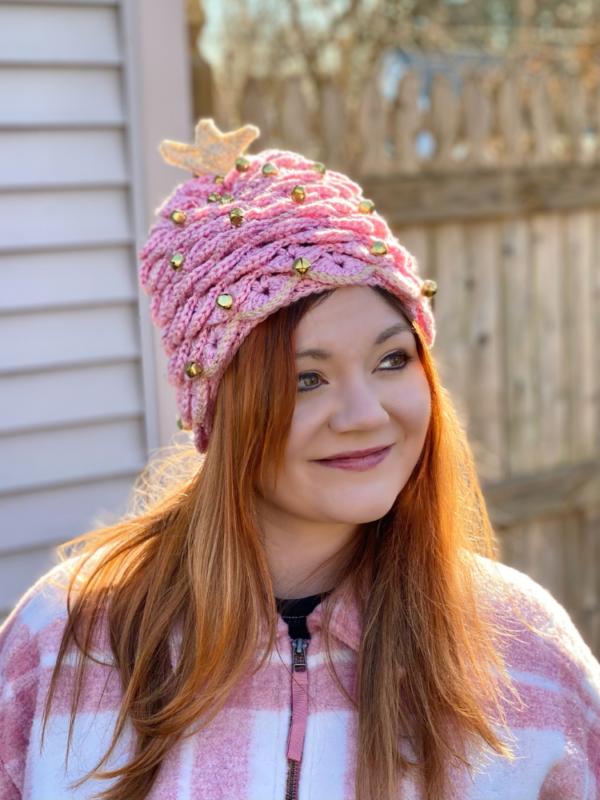
Oh Christmas Tree, oh Christmas Tree…..I wear you as a beanie! It’s one of the most iconic images of the holiday season, and now you can wear it as a hat! My Christmas Tree beanie is the perfect gift for just about anyone on your gift list. It’s easy to make, can be made in all kinds of colors, and features festive jingle bells as the ornaments! You can even add sparkly garland to your beanie! The hat doesn’t take much yarn, and the pattern works up fast – so it’s a great last-minute make to use as a stocking stuffer!
Christmas Tree Beanie
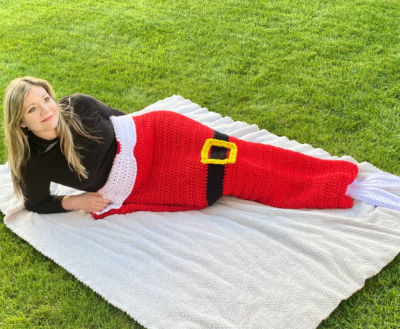
Tree beanies seem to be an up and coming trend this holiday season, and as soon as I saw them on the rise of popularity this year, I instantly thought of my Mermaid Slouchy Beanie and how fun and easy it would be to mod it into a Christmas Tree! And so, this festive delight of a hat is a modified combo of that and my Mermaid Messy Bun Hat. Once you deck it out with garland, ornaments and a star topper, it’s hard to believe this was ever a mermaid design! But total extra credit to anyone who decides to combine the two and make a Mermaid Christmas Tree hat!!!
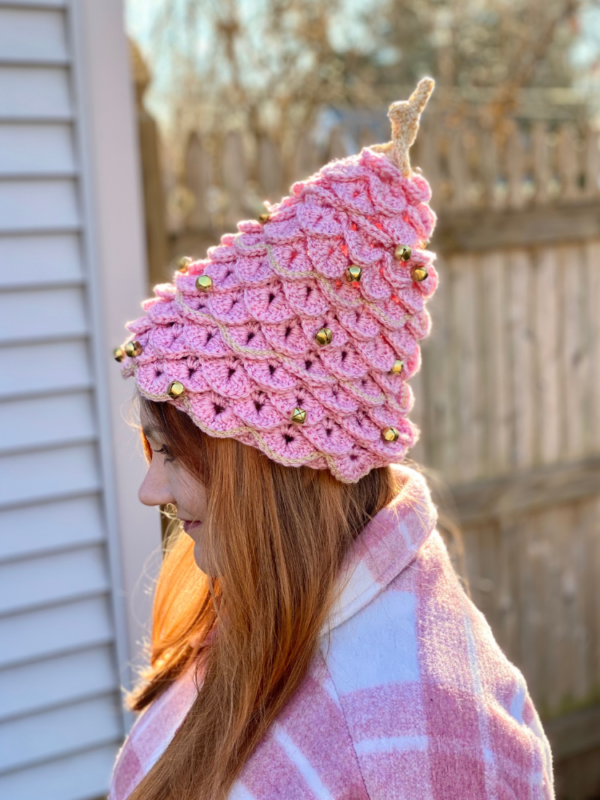
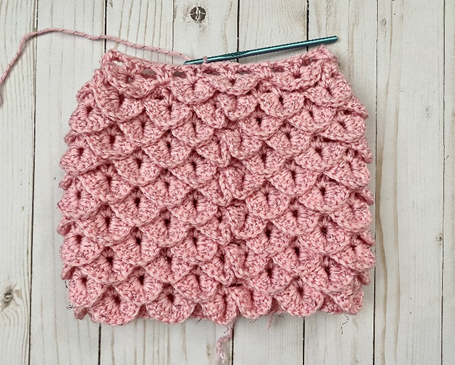
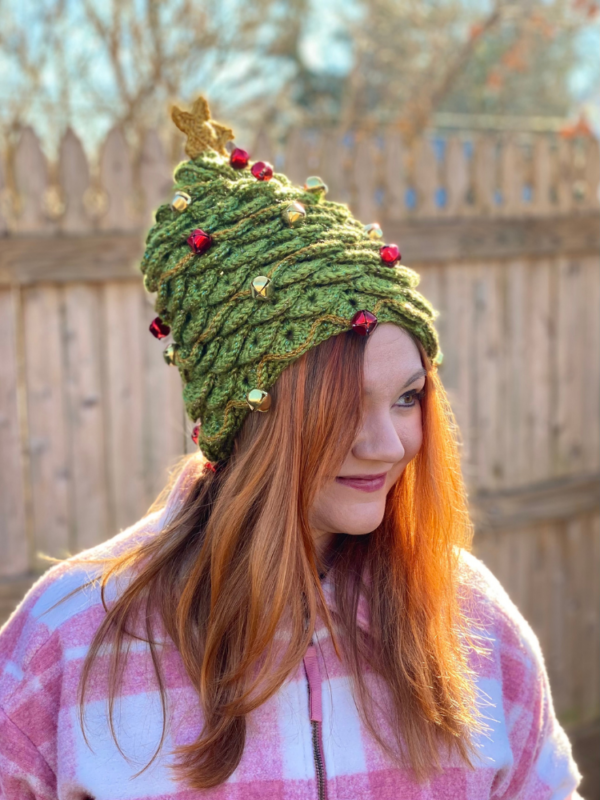
It’s hard to go wrong with a sparkly yarn for your Christmas Tree hat!!! I used Caron Simply Soft Party for the pink hat, and a discontinued yarn for the green one – I’d suggest Caron Simply Soft Party as an alternative. You can find it on Amazon!
Looking for the ad-free PDF version of this pattern? You can find it in my shop HERE!!
Supplies
Size H-8 / 5 mm crochet hook
About 320 yds of medium weight yarn for hat; 2 skeins of Caron Simply Soft Party in Soft Pink, Purple, and Spring Sparkle used in photos
About 50 yds of medium weight yarn for star and garland; 1 skein of Lion Brand Vanna’s Glamour in Topaz used in photos
½ inch or 1 inch craft jingle bells
Yarn Needle
Scissors
Abbreviations
*= indicates the beginning/end of a section to be repeated
BLO = back loop only
Ch = chain
Croc St = crocodile stitch
Dc = double crochet
Rem = remaining
Rep = repeat
Rnd(s) = round(s)
Sc = single crochet
Sc2tog = single crochet 2 together
Sk = skip
Sl St = slip stitch
St(s) = stitch(es)
Gauge
2 croc sts and 4 rows of croc sts = approx. 3.5 inches
Size
About 10.5 inches wide and 10.5 inches length laying flat
How to Make This
Instructions
Hat
Ch 70.
Rnd 1 – sc in each st across. Join with sl st to first sc of rnd. Ch 3 (69 sc)
Rnd 2 – Dc back into same st, ch 1. *Sk 2 sts, [dc, ch 1, dc, ch 1 (2-dc cluster made)] in next st.* Rep from * to * 21 more times. Join with sl st to 2nd ch in beg ch 3. Ch 1 (23 2-dc clusters)
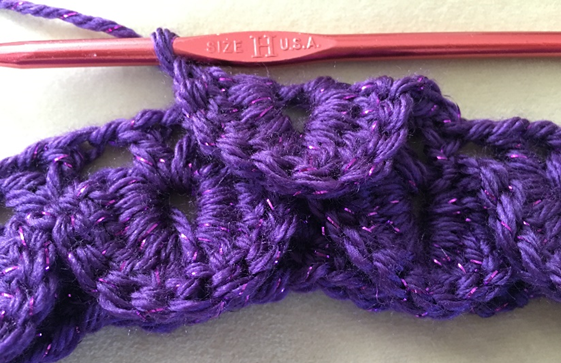
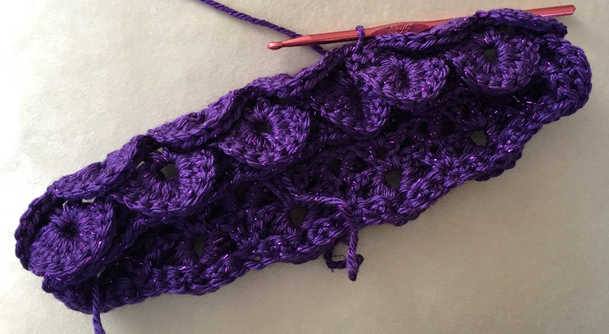
Rnd 3 – *Croc st around next 2-dc cluster, sc in next 2-dc cluster.* Rep from * to * ten more times. Croc st around last 2-dc cluster. Join with sl st to center of first croc st made. (12 croc sts, 11 sc)
Rnd 4 – Ch 3, dc back into same st, ch 1. *In next sc, [dc, ch 1, dc, ch 1]. In center of next croc, [dc, ch 1, dc, ch 1].* Rep from * to * ten more times. Ch 1 (23 2-dc clusters)
Rnd 5 – *Sc in next 2-dc cluster, croc st around next 2-dc cluster.* Rep from * to * ten more times. Sc in last 2-dc cluster. Join with sl st to first sc made. (11 croc sts, 12 sc)
Rnd 6 – Ch 3, dc back into same st, ch 1. *In center of next croc, [dc, ch 1, dc, ch 1]. In next sc, [dc, ch 1, dc, ch 1].* Rep from * to * ten more times. Join with sl st to 2nd ch in beg ch 3. Ch 1 (23 2-dc clusters)
Rnds 7 – 22 – Rep Rnds 3 – 6 four more times.
Rnds 23 – 24 – Rep Rnds 3 – 4 once more.
Rnd 25 – sk first 2-dc cluster, *croc st in next cluster, sc2tog over next 2 clusters.* Rep from * to * six more times. Croc once more. Join with sl st to center of first croc. (7 sc, 8 croc sts)
Rnd 26 – Ch 3, dc back into same st. *In next sc, [dc, ch 1, dc, ch 1]. In center of next croc st, [dc, ch 1, dc, ch 1].* Rep from * to * six more times. Join with sl st to 2nd ch in beg ch 3. Ch 1 (15 2-dc clusters)
Rnd 27 – *Sc in next 2-dc cluster, croc st around next 2-dc cluster.* Rep from * to * 6 more times. Sc in last 2-dc cluster. Join with sl st to first sc made. (7 croc sts, 8 sc)
Rnd 28 – Ch 3, dc back into same st. *In center of next croc, [dc, ch 1, dc, ch 1]. In next sc, [dc, ch 1, dc, ch 1].* Rep from * to * six more times. Join with sl st to 2nd ch in beg ch 3. Ch 1 (15 2-dc clusters)
Rnd 29 – *Croc st around next 2-dc cluster, sc in next 2-dc cluster.* Rep from * to * 6 more times. Croc st around last 2-dc cluster. Join with sl st to center of first croc st made. (8 croc sts, 7 sc)
Rnd 30 – Ch 3, dc back into same st. *In next sc, [dc, ch 1, dc, ch 1]. In center of next croc st, [dc, ch 1, dc, ch 1].* Rep from * to * six more times. Join with sl st to 2nd ch in beg ch 3. Ch 1 (15 2-dc clusters)
Rnd 31 – *Croc st around next 2-dc cluster, sc2tog over next 2 clusters.* Rep from * to * 4 more times. Join with sl st to center of first croc st made. (5 croc sts, 5 sc)
Rnd 32 – Ch 3, dc back into same st. *In next sc, [dc, ch 1, dc, ch 1]. In center of next croc st, [dc, ch 1, dc, ch 1].* Rep from * to * three more times. In next sc, [dc, ch 1, dc, ch 1]. Join with sl st to 2nd ch in beg ch 3. Ch 1 (10 2-dc clusters)
Rnd 33 – *Sc2tog over next 2 clusters.* Rep from * to * around. (5 sc)
Fasten off.
Garland
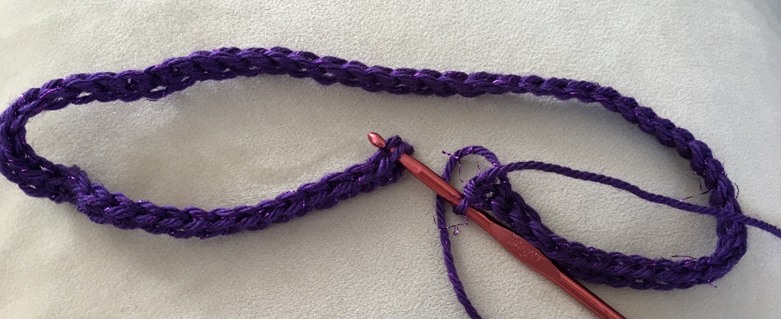
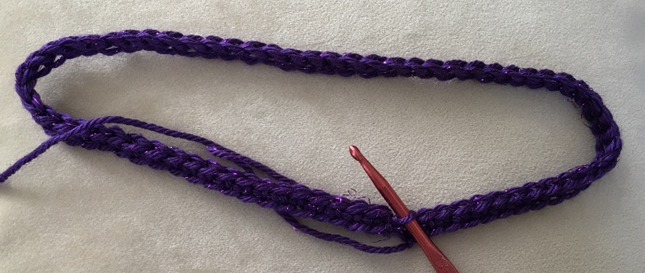
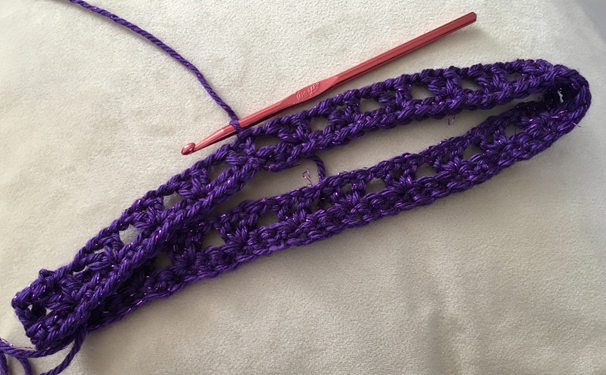
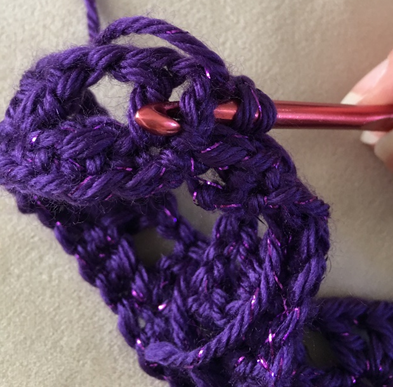
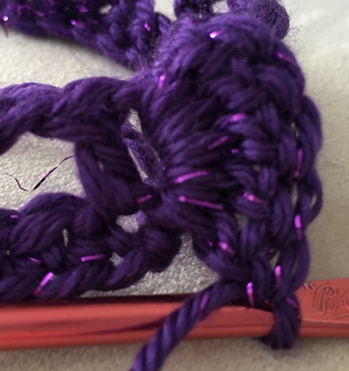
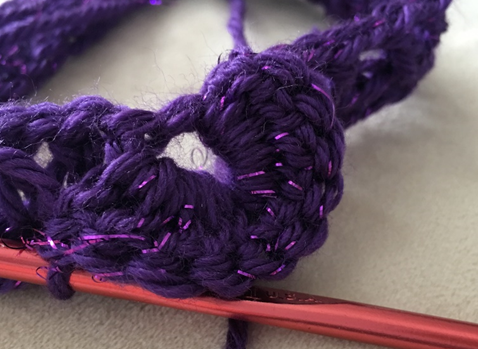
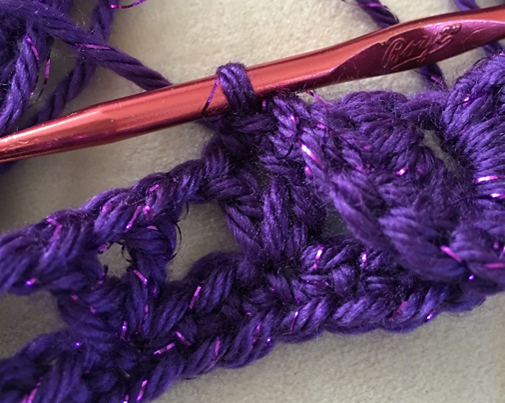
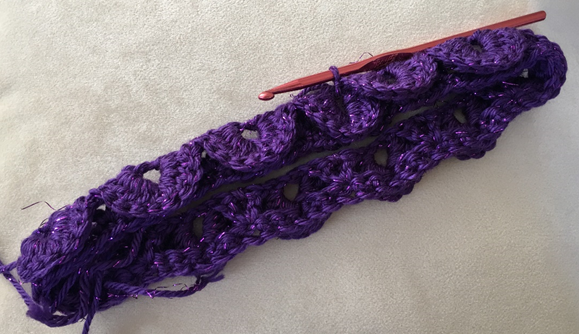
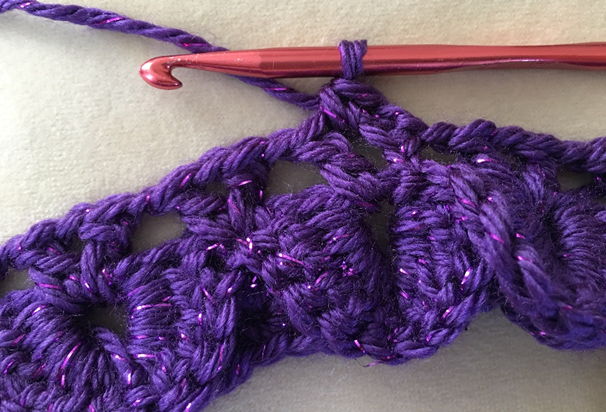
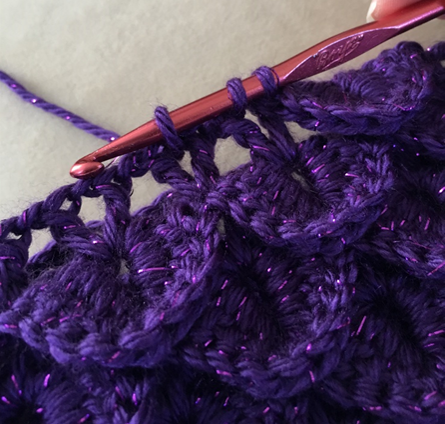
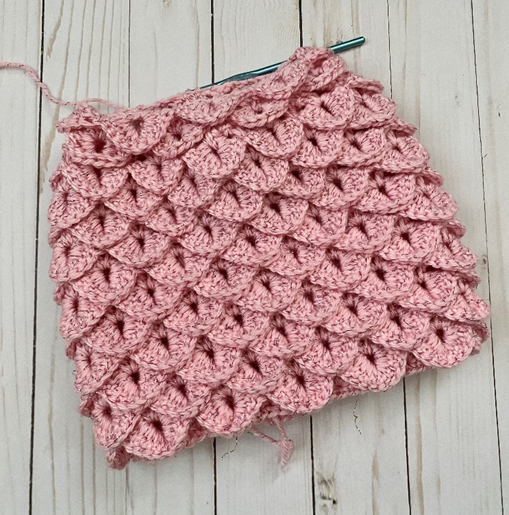
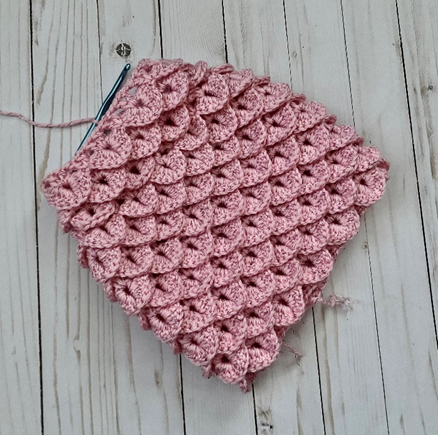
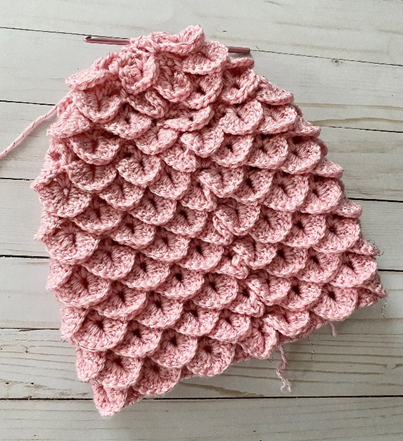
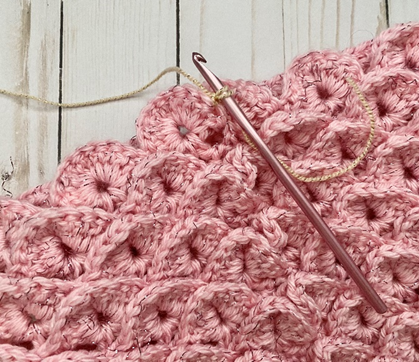
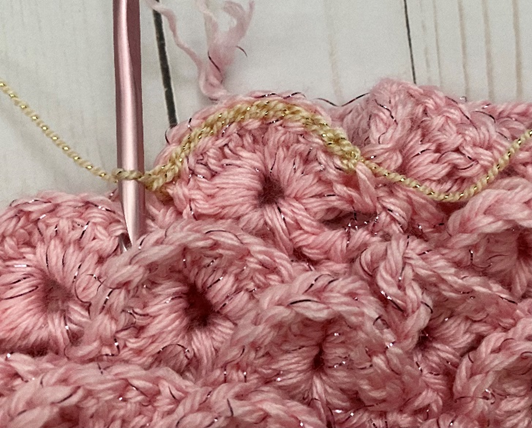
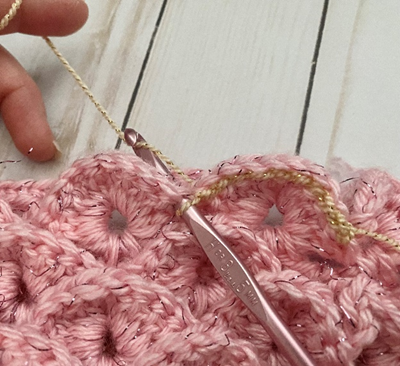
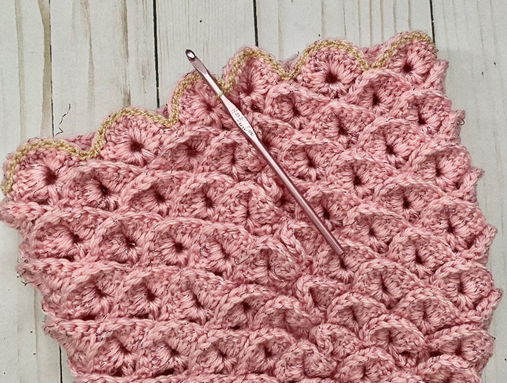
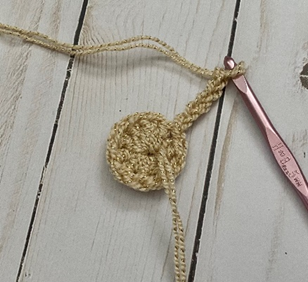
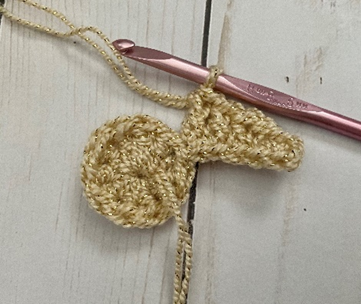
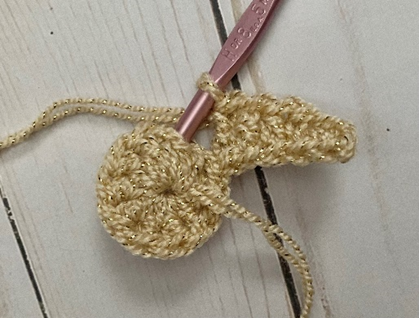
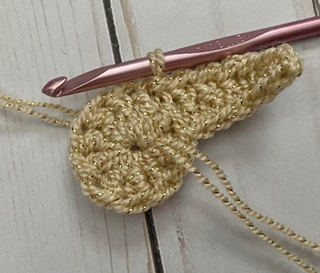
Place hat so that point/top of hat is facing you, and croc sts are “upside down”. Join contrast color in last dc of croc st in first rnd, ch 1 (first photo below). Sk next dc of croc st. Loosely sl st over rem dc sts of croc sts (second photo). Skipping sc sts in between croc sts (third photo), continue to loosely sl st over each dc of each croc st of rnd. Join with sl st to first sl st of rnd (fourth photo). (119 sl sts)
Rep process above about every 3 croc st rnds on hat, or as many times as desired. (St count for some rnds will be 109 instead of 119 due to 11 croc sts instead of 12 croc sts.)
Star
Rnd 1 – With contrast color (2 strands held together if using Vanna’s Glamour or other fine-weight yarn), make a magic ring. Make 10 dc in ring. Join with sl st to first dc of rnd. (10 dc)
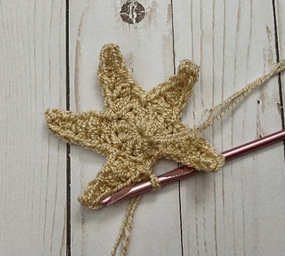
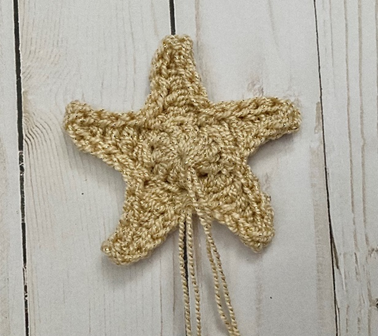
Rnd 2 – *Ch 6 (first photo below). Sc in 2nd ch from hook, and in next ch. Hdc in next ch. Dc in next 2 chs. (Second photo shows piece at this stage.) Sk next st on Rnd 1 (third photo), and join with sl st to next dc on Rnd 1 (fourth photo). (Star Point made)* Rep from * to * 4 more times. (Fifth photo below shows piece at this stage.) (5 star points)
Rnd 3 – ch 1. Loosely sl st in each st of each Star Point around. (50 sl sts)
Fasten off, leaving long tail for sewing.
Finishing
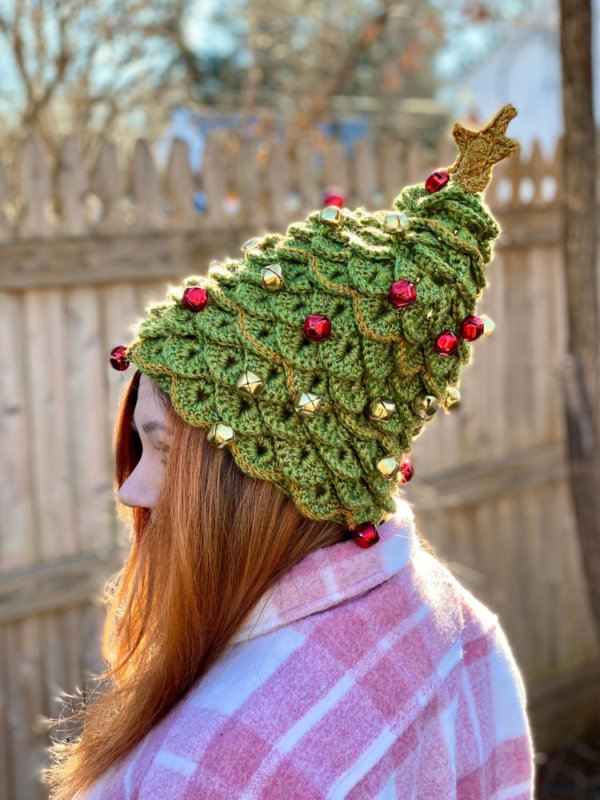
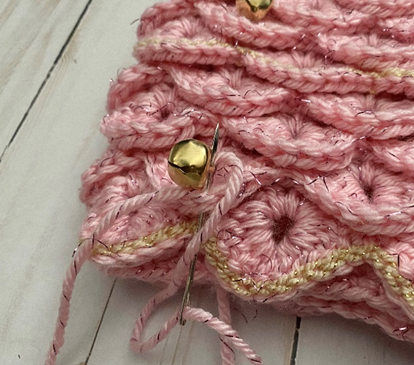
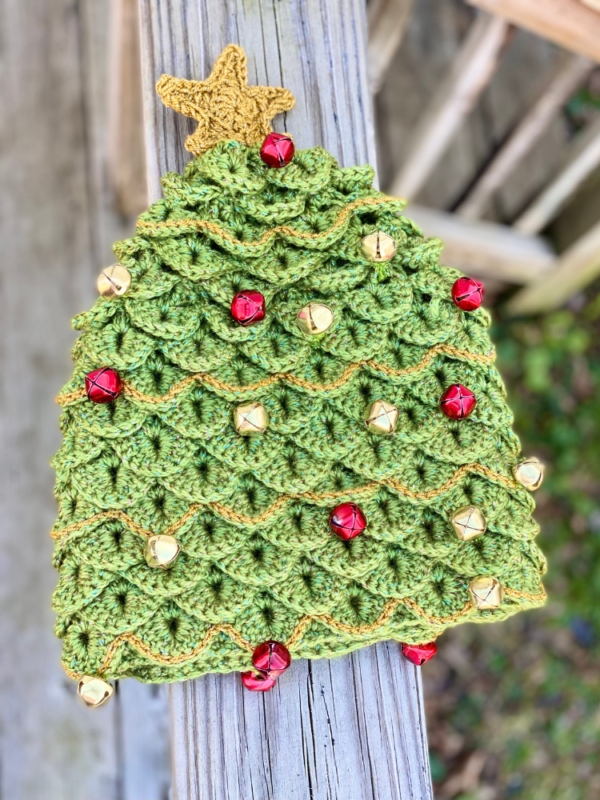
Thread needle with main color and sew jingle bells to croc sts throughout hats to make Ornaments (first photo below). (Second photo of finished piece shows 4 bells sewn every few rnds, 2 bells sewn a few rnds above, and 1 bell sewn on last rnd of Hat; or, sew as many as desired).
Sew Star to top of Hat.
Carry ends from Garland (and any other ends) to inside of hat; weave in all ends.
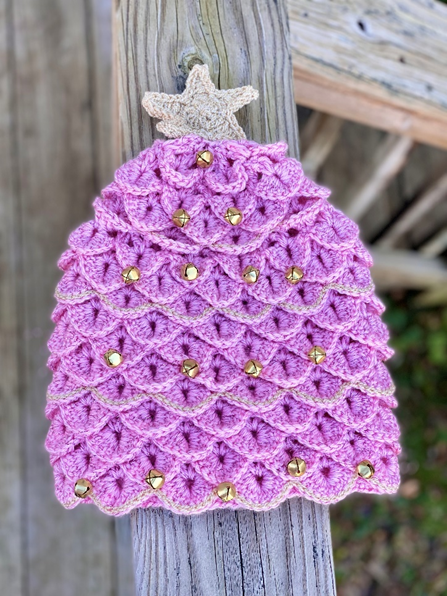
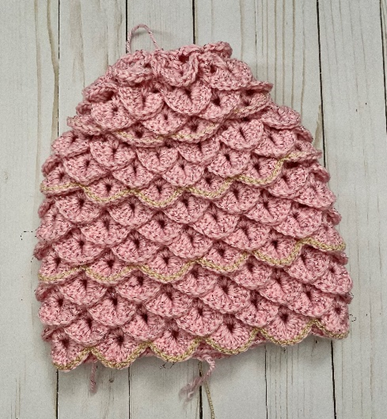
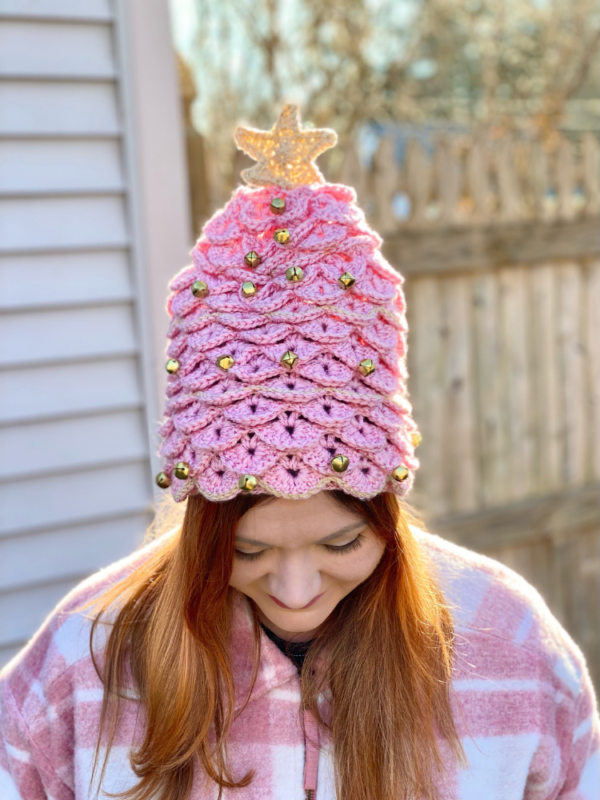
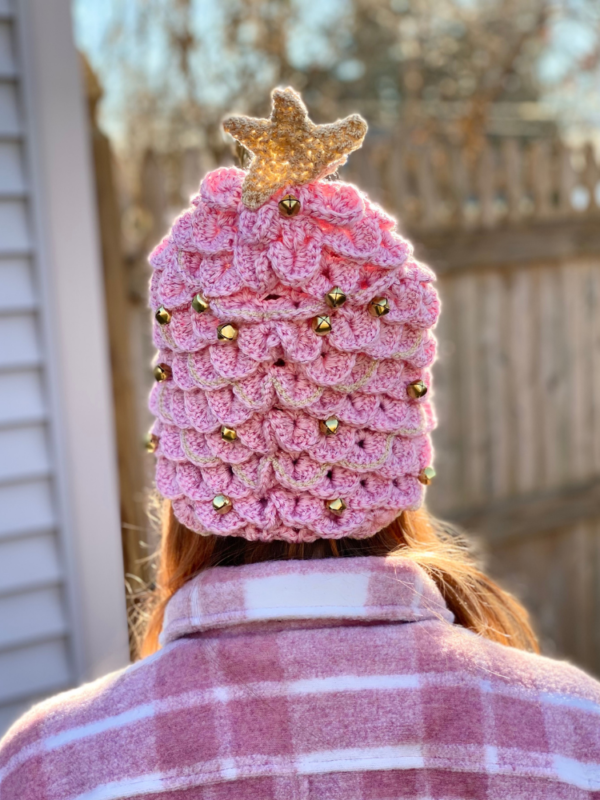
Here is the finished hat!

I hope you enjoyed crocheting this beanie along with me today. If you love fun, free patterns like this one, then please be sure to sign up for my email list to keep up to date with all my latest designs:
Also, please be sure to follow me on social media, and tag me in photos of your finished projects made from my patterns, so I can see your lovely work!
Don’t forget to pin it for later HERE!
And you can find that ad-free PDF pattern HERE!
Happy Crocheting!
COPYRIGHT:
This pattern is owned by Crafty Kitty Crochet (Melissa Moore). Any reselling or distribution of this pattern is prohibited. Sale of items made using this pattern is welcomed, but I do ask that credit/a link be provided back to my site, craftykittycrochet.com.