
Santa Mermaid Tail Blanket – Crochet Pattern
(Note, this post contains affiliate links, meaning, at no additional cost to you, I will make a small commission if you click through and make a purchase.)
Pin it for later!
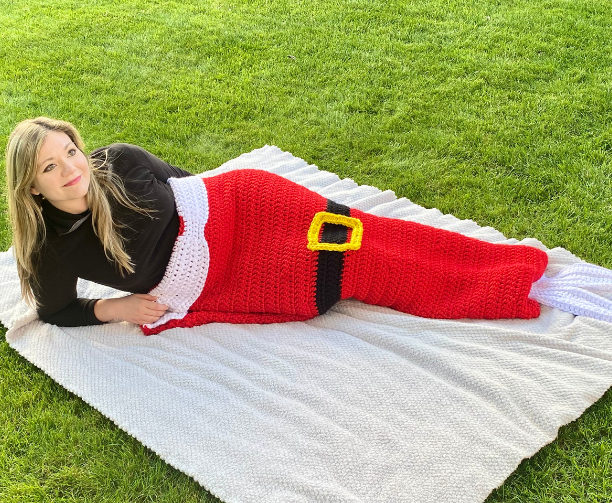
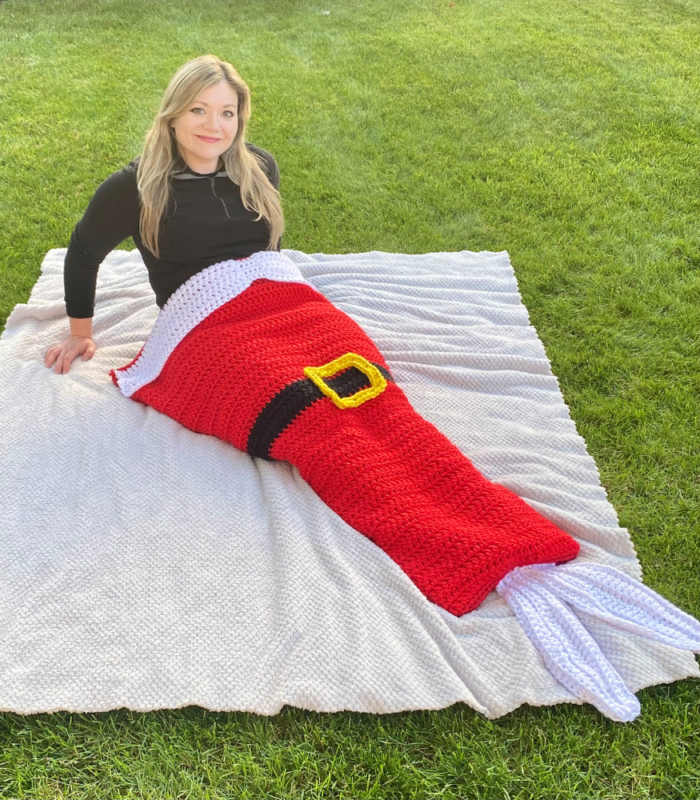
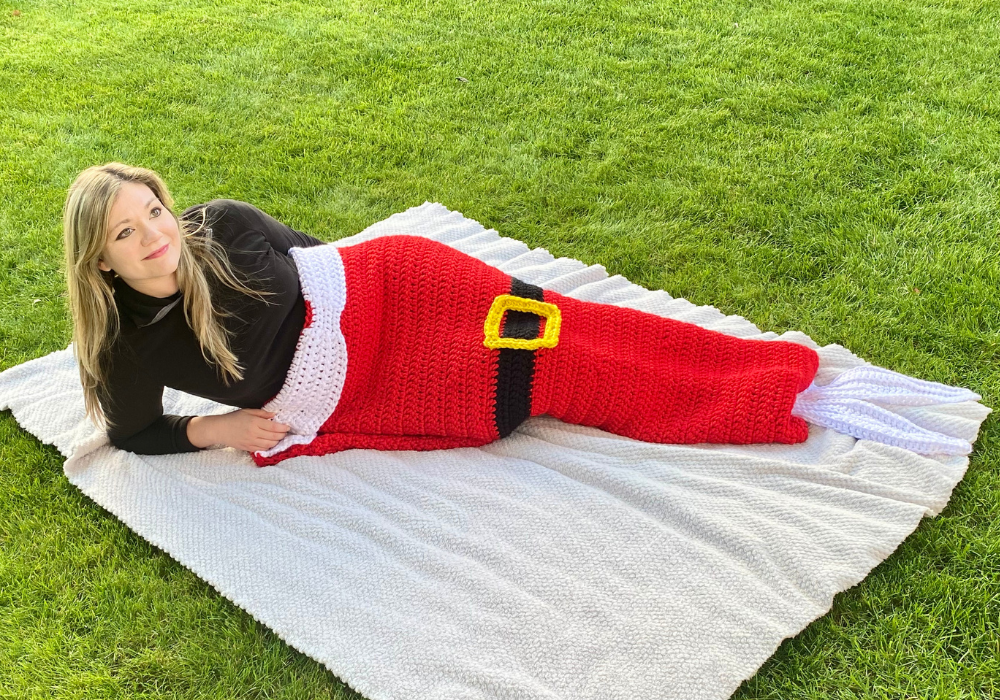
We’ve all heard of mermaid fin blankets, and know how much fun they are to crochet – but have you ever made your own SANTA MERMAID TAIL BLANKET?! Bring all the magic of the holidays and mermaids together in this cozy, easy, beautiful blanket! It features the classic mermaid fin blanket shape, but with a “Santa belt” and winter white fins. The best part is that the bulky / chunky yarn used to make this cocoon style blanket makes it a fast project considering the size! Gift one to everyone on your list this season!
Santa Mermaid Blanket
It’s probably no surprise that I had something mer-magical up my sleeve this holiday season! I’m pretty obsessed with mermaids, as you might know from my Mermaid Slouchy Hat, Mermaid Messy Bun Hat, Mermaid Christmas Stocking, and even my Sunflower Mermaid Blanket! So combining the holidays and mermaids just seemed natural to me. I’m a big fan of the “Santa belt” motif that’s become popular for Christmas, because it’s very simple but also instantly recognizable. So what better way to add some Christmas cheer to a standard mermaid blanket than to put the two ideas together? And so the Santa Mermaid Blanket pattern was born!!
Looking for the ad-free PDF pattern? You can find it in my shop HERE!
And guess what? As of December 7, 2021, I was featured in the Winter Wonders Blog Hop! If you missed this pattern or others in the hop, no worries – there’s a bundle for that!
Grab your bundle HERE!!!

Special thanks to WeCrochet for providing the yarn for this pattern! Their yarn is a dream to work with and makes this pattern work up nice and quickly!
Don’t miss out on the awesome giveaway, too:
Supplies
Size N/P-15 10 mm crochet hook
Super Bulky weight yarn in the following amounts:
- 650 yds of Serrano (15 skeins of Knit Picks Mighty Stitch Super Bulky in Serrano used in photos)
- 200 yds of White (5 skeins of Knit Picks Mighty Stitch Super Bulky in White used in photos)
- 40 yds of Black (1 skein of Knit Picks Mighty Stitch Super Bulky in Black used in photos)
- 30 yds of Yellow (1 skein of Knit Picks Mighty Stitch Super Bulky in Canary used in photos)
Yarn Needle with large eye
Scissors
Abbreviations
*= indicates beginning/end of a section to be repeated
BLO = back loop only
Ch = chain
Dc = double crochet
Hdc = half double crochet
Rep = repeat
Sc = single crochet
Sl st = slip stitch
St(s) = stitch(es)
Gauge
2 dc and 1 row = about 1 inch
Size (fits Women’s S – XL)
Width: 29 inches circumference at bottom of blanket (near fin), 32.5 inches flat across at very top of blanket
Length: about 49 inches (before fin)
How to Make This
Instructions
Body
With Serrano, ch 52.
Row 1 – dc in 3rd ch from hook, and in each st across. Ch 2, turn (50 dc)
Row 2 – dc in each st across. Ch 2, turn (50 dc)
Rows 3 – 8 – rep Row 2. (50 dc)
Row 9 – make 2 dc in first st, dc in next 48 sts, 2 dc in last st. Ch 2, turn (52 dc)
Row 10 – dc in each st across. Ch 2, turn (52 dc)
Rows 11 – 17 – rep Row 10. (52 dc)
Row 18 – make 2 dc in first st, dc in next 50 sts, 2 dc in last st. Ch 2, turn (54 dc)
Row 19 – dc in each st across. Ch 2, turn (54 dc)
Rows 20 – 26 – rep Row 19. (54 dc)
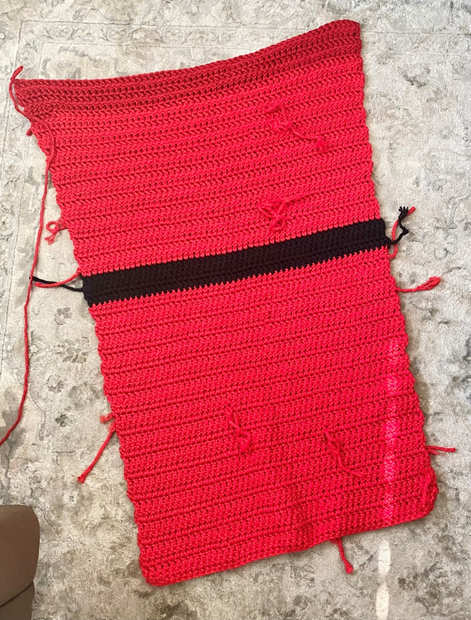
Row 27 – make 2 dc in first st, dc in next 52 sts, 2 dc in last st. Attach Black in last st. Ch 2, turn (56 dc)
Row 28 – 30 – dc in each st across. Attach Serrano in last st of Row 30. Ch 2, turn (56 dc)
Row 31 – 35 – dc in each st across. Ch 2, turn (56 dc)
Rows 36 – make 2 dc in first st, dc in next 54 sts, 2 dc in last st. Ch 2, turn (58 dc)
Row 37 – dc in each st across. Ch 2, turn (58 dc)
Rows 38 – 44 – rep Row 28. (58 dc)
Row 45 – make 2 dc in first st, dc in next 56 sts, 2 dc in last st. Ch 2, turn (60 dc)
Row 46 – dc in each st across. Ch 2, turn (60 dc)
Rows 47 – 53 – rep Row 28. (60 dc)
Edging
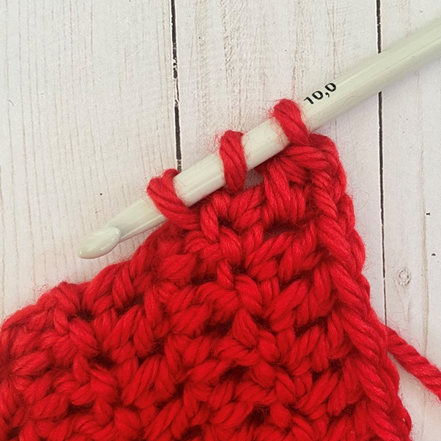
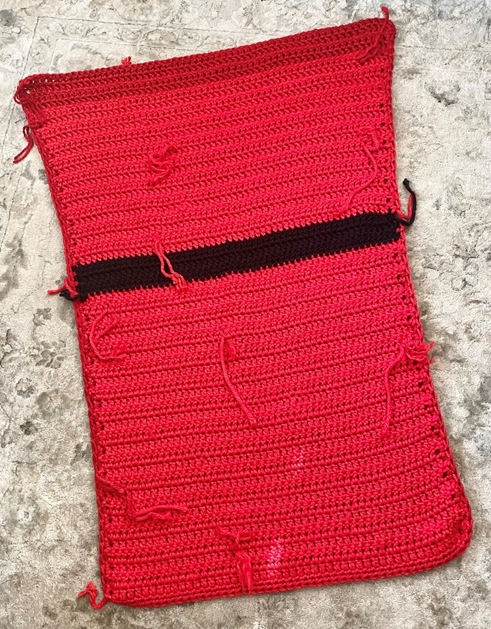
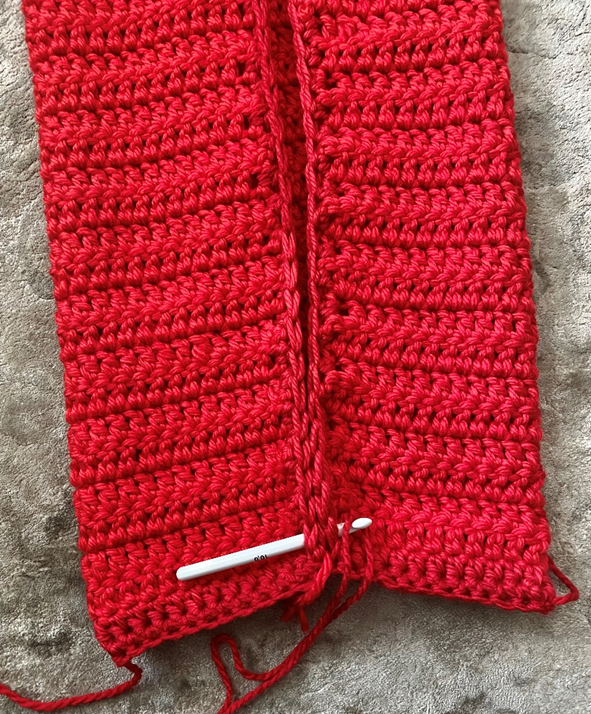
Ch 1. Working on side of piece, evenly make about 1 hdc per every row of piece (50 hdc) down side (first photo below shows hook inserted in side sts). Hdc across bottom edge, and back up other side of piece, again making about 1 hdc per every row. Join with sl st to first st of Row 53. (Second photo below shows finished piece at this stage.) (150 hdc)
Fasten off.
Body Assembly
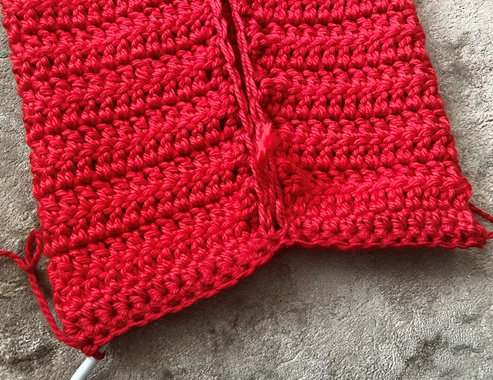
Fold Body so that right sides are facing each other, and edges are lined up in center of piece (first photo below). Attach Serrano at bottom edges, through both sides of sts (second photo); ch 1. Sc across, attaching bottom edges together (about 24 sc – third photo). Fasten off.

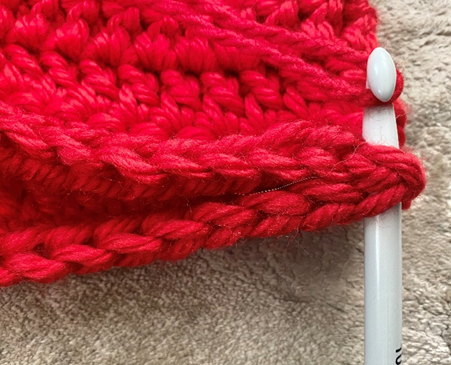
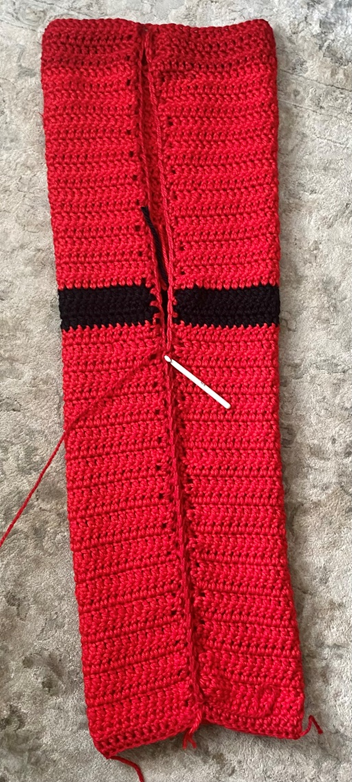
With piece still turned inside out, attach Serrano at bottom of piece through side edges (first photo below); ch 1. Sc up 26 sts, attaching sides together.
Fasten off. (Second photo shows piece after attachment.) Turn piece right side out.
Top
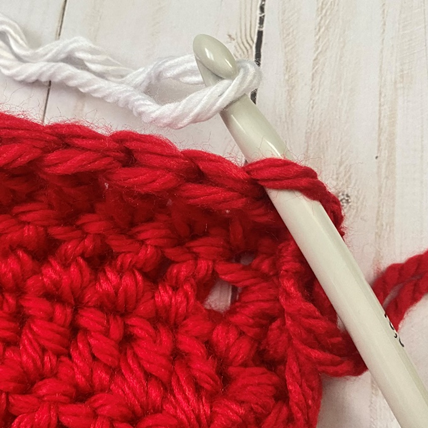
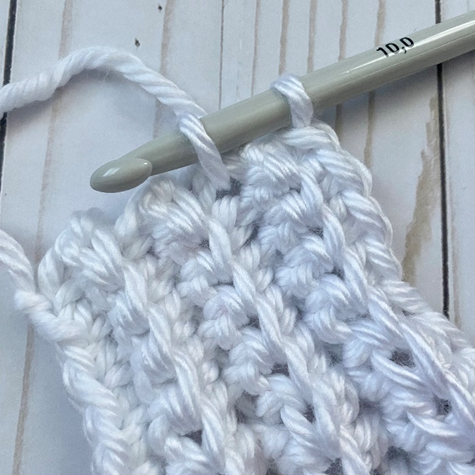
Row 1 – Attach White in BLO (first photo below) of top of Body, ch 2. Dc in BLO of next 28 sts. Sc in BLO of next 4 sts. Dc in BLO of last 28 sts. Ch 2, turn (56 dc, 4 sc)
Row 2 – Dc in next 28 sts, sc in next 4 sts, dc in last 28 sts. Ch 2, turn (56 dc, 4 sc)
Rows 3 – 6 – rep Row 2. Do not ch 2 at the end of Row 6.
Fasten off. (Second photo shows finished Top as part of piece.)
Buckle
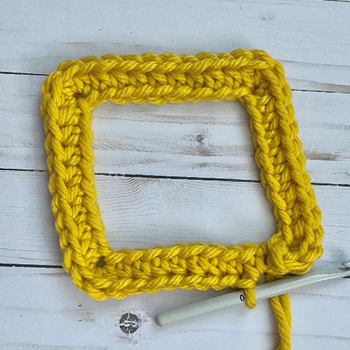
With Canary, ch 37.
Row 1 – 3 hdc in 2nd ch from hook, and in next 8 sts. *3 hdc in next st, hdc in next 8 sts.* Rep from * to * two more times. Fasten off, leaving long tail (first photo below). Use yarn needle and long tail to sew edges of Buckle closed; leave remaining tail for sewing. (44 hdc)
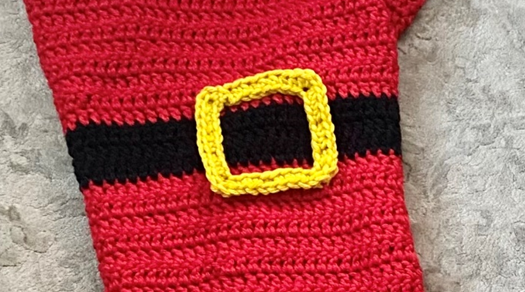
Place Buckle on center of Black portion of Body and sew in place (second photo below).
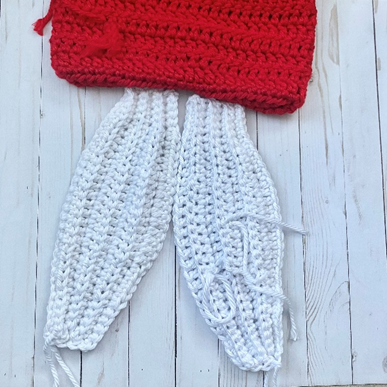
Fin (make 2)
(Note: all rows after Row 1 are worked in BLO.)
With White, ch 31.
Row 1 – sc in 2nd ch from hook, and in next 4 sts. Hdc in next 5 sts. Dc in next 10 sts. Hdc in next 5 sts. Sc in last 5 sts. Ch 1, turn (10 sc, 10 hdc, 10 dc)
Row 2 – sc in next 5 sts. Hdc in next 5 sts. Dc in next 10 sts. Hdc in next 5 sts. Sc in last 5 sts. Ch 1, turn (10 sc, 10 hdc, 10 dc)
Rows 3 – 7 – rep Row 2. Do not fasten off. (10 sc, 10 hdc, 10 dc)
Side Edging
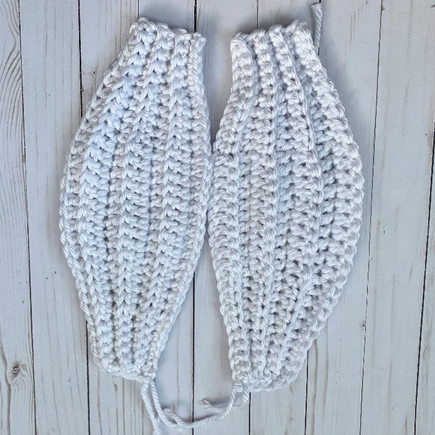
To make a curved side edge, evenly make 3 sc down side of piece (two photos below). Join with sl st to last st of Row 1.
Fasten off, leaving long tail for sewing.
Attaching Fins
Arrange Fins in center at bottom of Body (photo below); sew to bottom of Body to attach. Weave in all ends on blanket.
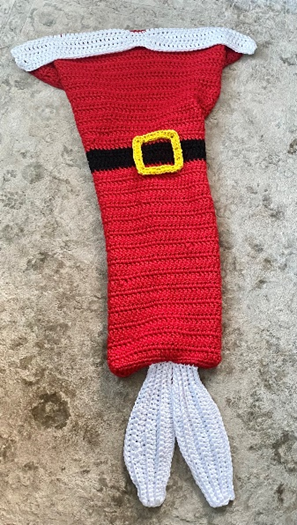
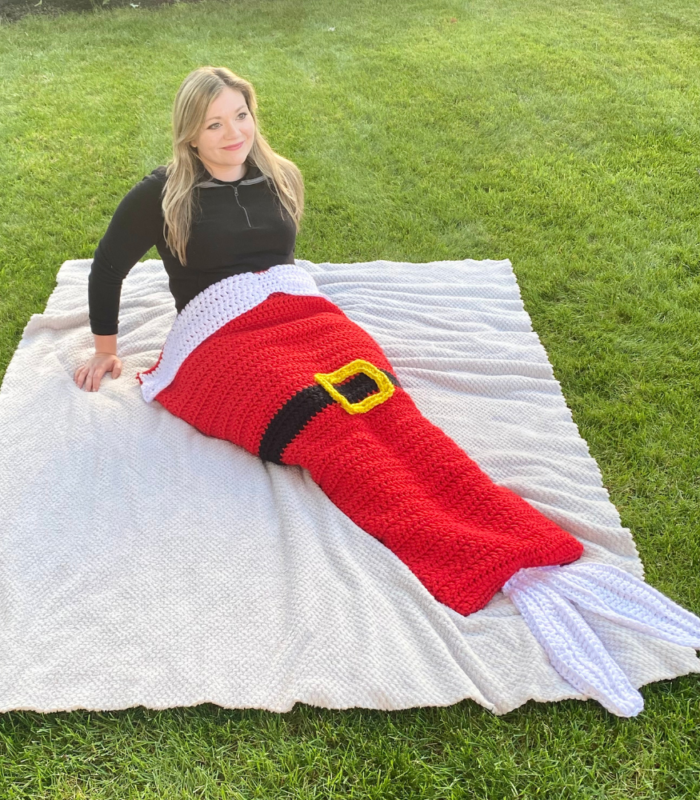
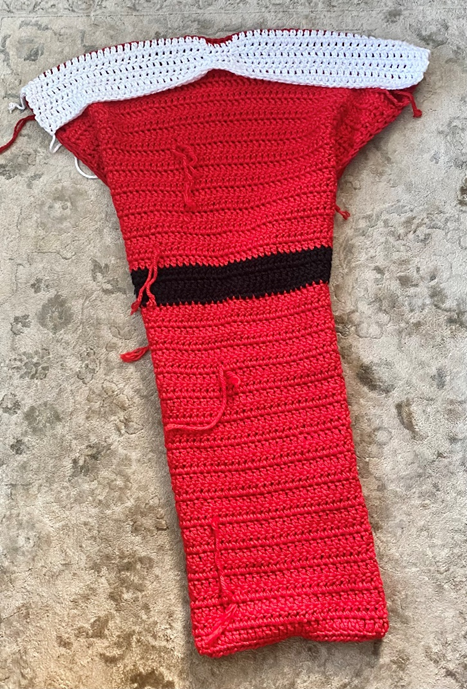
Here is the finished Santa Mermaid Blanket!
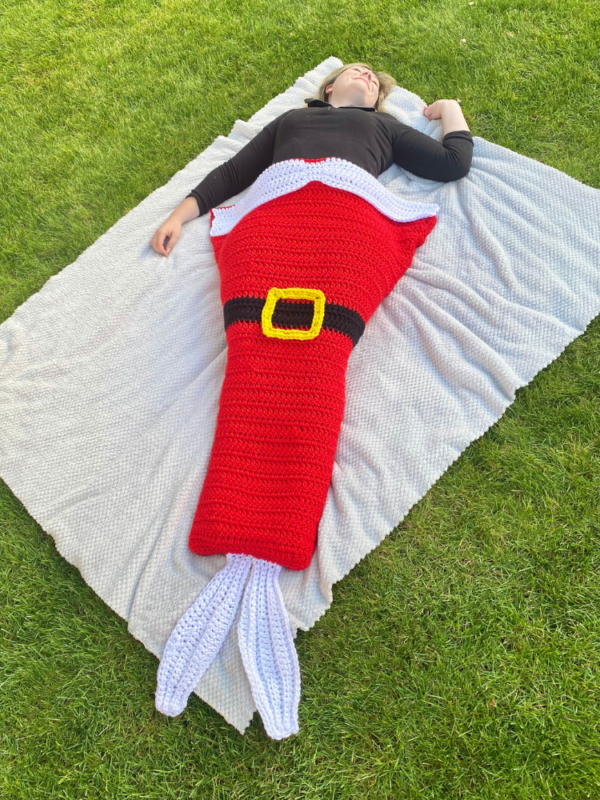
I hope you enjoyed crocheting this blanket along with me today. If you love fun, free patterns like this one, then please be sure to sign up for my email list to keep up to date with all my latest designs:
Also, please be sure to follow me on social media, and tag me in photos of your finished projects made from my patterns, so I can see your lovely work!
Don’t forget to pin it for later HERE!
And you can find that ad-free PDF pattern HERE!
Happy Crocheting!
COPYRIGHT:
This pattern is owned by Crafty Kitty Crochet (Melissa Moore). Any reselling or distribution of this pattern is prohibited. Sale of items made using this pattern is welcomed, but I do ask that credit/a link be provided back to my site, craftykittycrochet.com.
Comments (1)
Winter Wonders Blog Hop – 42 Free Crochet Patterns | Ned & Mimi
December 7, 2021 at 11:10 pm
[…] Santa Mermaid Tail Blanket by Crafty Kitty Crochet […]