
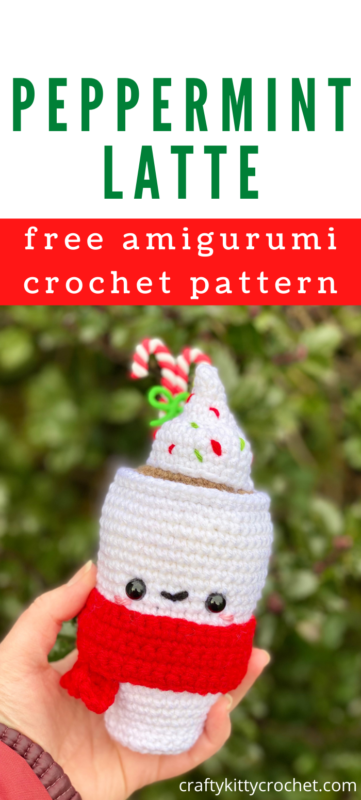
Amigurumi Peppermint Latte – Crochet Pattern
Pin it for later!
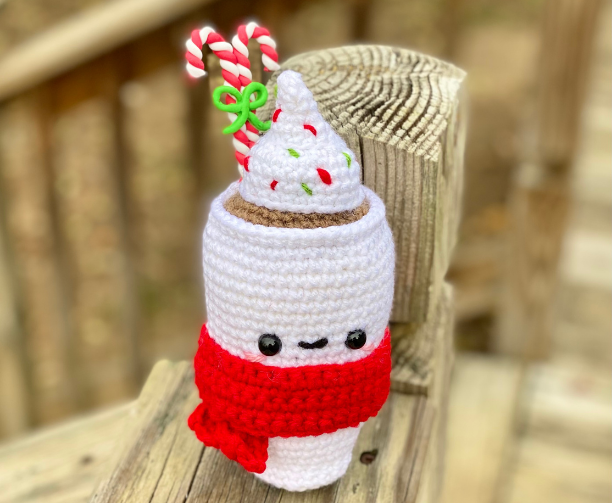
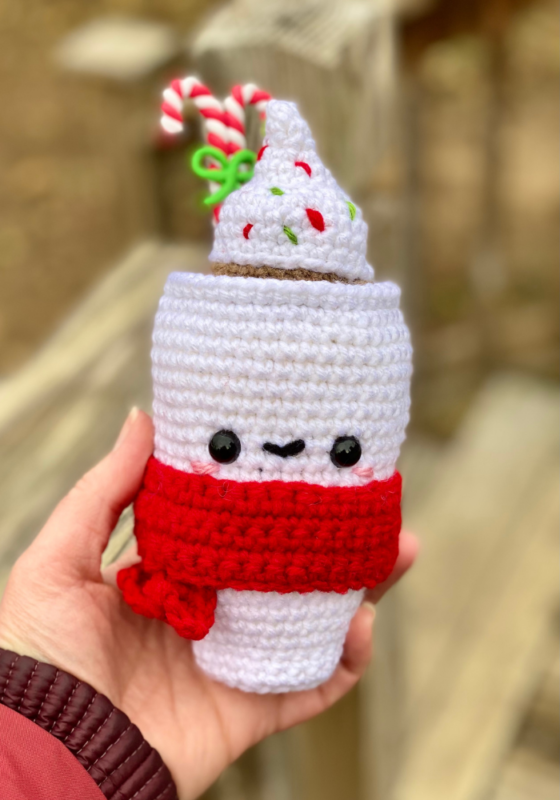
Introducing the sweetest treat this holiday season, the Amigurumi Peppermint Latte! This cutie features all the things you love about a Christmas-themed coffee treat, including candy canes, whipped cream, and sprinkles – but it also is wrapped up in its own adorable holiday scarf! What a great gift idea this would make for everyone on your list! It’s quick, easy, and a great stash buster, so you can make a whole bunch to give as presents, use as decor, etc.! The possibilities are endless!
Amigurumi Peppermint Latte
In recent years, I’ve been delighted to see how much folks have been loving my Amigurumi Pumpkin Spice Latte! It’s a fall staple, and almost as fun to crochet as it is to drink! So I’ve been planning a holiday edition for a while. What better motif to use than a classic peppermint / candy cane flavor? This little latte really comes to life thanks to the addition of candy canes – I used a resin ornament, but you could easily make some using pipe cleaners. Or how about finding a way to temporarily attach wrapped, real candy canes so that this is a two-in-one gift?! It’s highly customizable, so go ahead and get creative when making your coffee cutie!
I got my resin ornament in a two-pack at Dollar Tree, but here’s something similar from Amazon that could also work well!
Looking for the ad-free PDF version of this pattern? Find it in my shop HERE!
Supplies
Size D-3 / 3.25 mm crochet hook
1 skein Red Heart Super Saver in White (about 120 yds)
1 skein Red Heart Super Saver in Café Latte (about 50 yds)
1 skein Red Heart Super Saver in Cherry Red (about 50 yds)
Small amounts of Red Heart Super Saver in Black, Pink, and Kelly Green for Smile, Blush, and Sprinkles (less than a yard each)
1 pair of 10 or 12 mm safety eyes
Pipe cleaners – 2 red, 2 white for candy canes; or small resin candy cane ornament
Craft Glue or Hot Glue (optional)
Fiberfill stuffing
Yarn Needle
Scissors
Abbreviations
*= indicates beginning/end of a section to be repeated
Beg = beginning
BLO = back loop only
Ch = chain
FLO = front loop only
Rem = remaining
Rep = repeat
Rnd(s) = round(s)
Sc = single crochet
Sc2tog = single crochet 2 together
Sl St = slip stitch
St(s) – stitch(es)
Gauge
Exact gauge is not essential to this project.
Size
About 7.5 inches length
How to Make This
Instructions
Cup
This pattern is worked in continuous rnds; do not join. You may wish to use a stitch marker and move it up at the beginning of each new rnd.
Rnd 1 – with White, make a magic ring. 6 sc in ring. (6 sc)
Rnd 2 – 2 sc in each st around. (12 sc)
Rnd 3 – 2 sc in next st, sc in next st*; rep around. (18 sc)
Rnd 4 – *2 sc in next st, sc in next 2 sts*; rep from * to * around (24 sc)
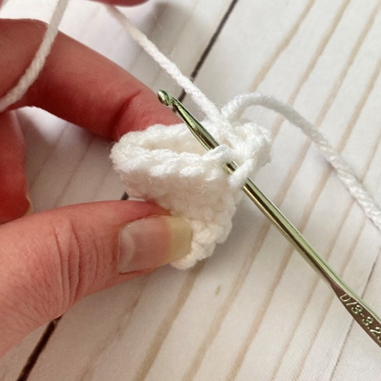
Rnd 5 – working in BLO (see first photo under Whipped Cream to see how this is made), sc in each st around. (24 sc)
Rnds 6 – 7 – sc in each st around. (24 sc)
Rnd 8 – *2 sc in next st, sc in next 3 sts*; rep from * to * around. (30 sc)
Rnds 9 – 12 – sc in each st around. (30 sc)
Rnd 13 – *2 sc in next st, sc in next 4 sts*; rep from * to * around. (36 sc)
Rnds 14 – 19 – sc in each st around. (36 sc)
Rnd 20 – *2 sc in next st, sc in next 5 sts;* rep from * to * around. (42 sc)
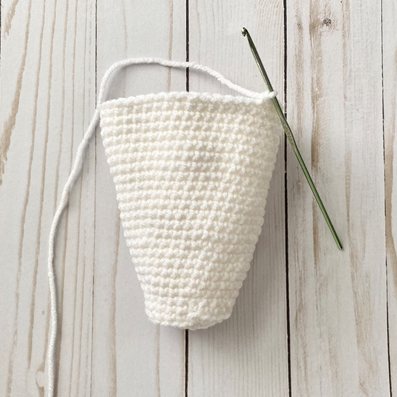
Rnds 21 – 27 – sc in each st around. (First photo below shows piece after this rnd.) (42 sc)
Rnd 28 – working in FLO (see second photo below), sc in each st around. (42 sc)
Fasten off White. Attach safety eyes between rnds 20 and 21, about 7 sts apart.
Coffee
This pattern is worked in continuous rnds; do not join. You may wish to use a stitch marker and move it up at the beginning of each new rnd.
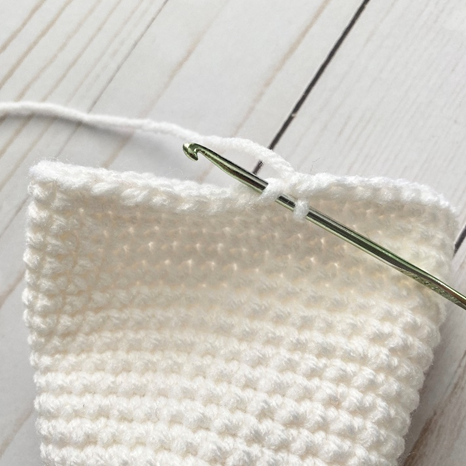
Working in back loops from Rnd 28 of Cup (see first photo below), attach Café Latte and ch 1.
Rnd 1 – *sc2tog over next 2 sts, sc in next 5 sts*; rep from * to * around. (36 sc)
Rnd 2 – *sc2tog over next 2 sts, sc in next 4 sts*; rep from * to * around. (30 sc)
Rnd 3 – *sc2tog over next 2 sts, sc in next 3 sts*; rep from * to * around. (24 sc)
Rnd 4 – *sc2tog over next 2 sts, sc in next 2 sts*; rep from * to * around. Stuff Cup (do not overstuff). (18 sc)
Rnd 5 – *sc2tog over next 2 sts, sc in next st*; rep from * to * around. (12 sc)
Rnd 6 – sc2tog in each st around. (6 sc)
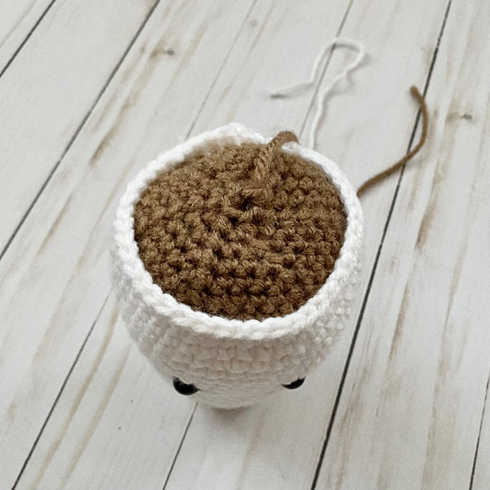
Rnd 7 – sc2tog over next 2 sts, leave rem sts unworked. (Second photo below shows piece after this rnd.) (5 sc)
Fasten off, leaving tail to sew rem gap from Rnd 7.

Body of Scarf
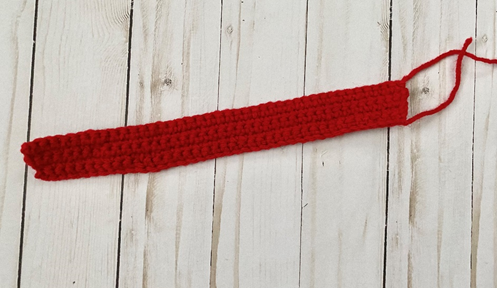
With Cherry Red, ch 40.
Row 1 – sc in 2nd ch from hook and in each ch across. Ch 1, turn (39 sc)
Row 2 – rep Row 1. (39 sc)
Row 3 – 2 sc in next st. Sc in next 37 sts. 2 sc in last st. Ch 1, turn (41 sc)
Rows 4 – 6 – sc in each st across. (41 sc)
Fasten off, leaving long tail for sewing.
Scarf End (make 2)
With Cherry Red, ch 8.
Row 1 – sc in 2nd ch from hook and in each ch across. Ch 1, turn. (7 sc)
Rows 2 – 3 – rep Row 1. Do not ch 1 at the end of Row 3. (7 sc)
Fasten off, leaving long tail for sewing.
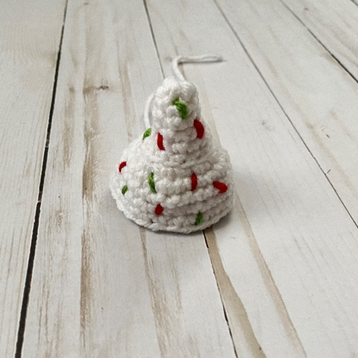
Whipped Cream
This piece is worked in continuous rnds. You may wish to use a stitch marker and move it up at the beginning of each new rnd.
Rnd 1 – With White, make a magic ring. 6 sc in ring (6 sc)
Rnds 2 – 3 – sc in each st around. (6 sc)
Rnd 4 – 2 sc in each st around. (12 sc)
Rnds 5 – 6 – sc in each st around. (12 sc)
Rnd 7 – working in BLO (first photo below), 2 sc in each st around. (24 sc)
Rnds 8 – 11 – sc in each st around. (24 sc per rnd)
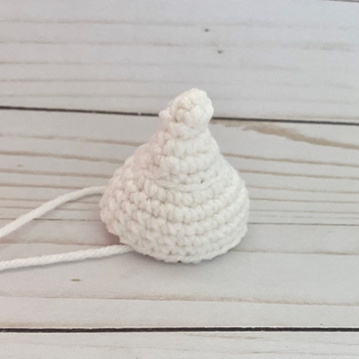
Fasten off, leaving long tail for sewing. Pull beg tail tightly to make tip of Whipped Cream “curl”. (Second photo below shows finished piece.)
Finishing
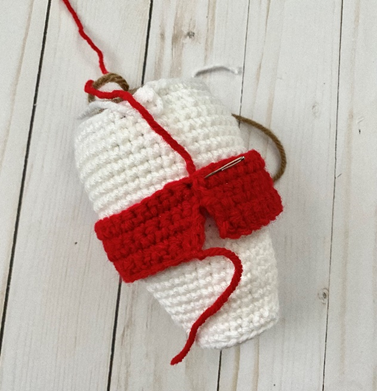
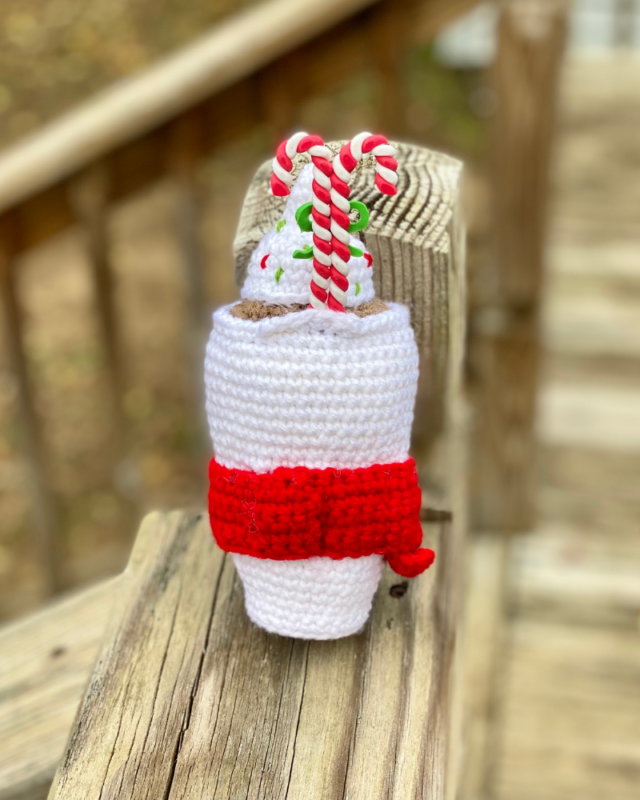
Wrap Body of Scarf around Cup, underneath eyes (first photo below). Tuck tops of Scarf Ends underneath Scarf, off to one side, on front of piece (second photo below). Sew Scarf in place along top and bottom edges, connecting both sides of Scarf and securing tops Scarf Ends in process (leave bottom edges of Scarf Ends unsewn). With Cherry Red and Kelly Green, make several small lines on Whipped Cream for Sprinkles (third photo below). Stuff Whipped Cream (do not overstuff) and sew to center of Coffee.
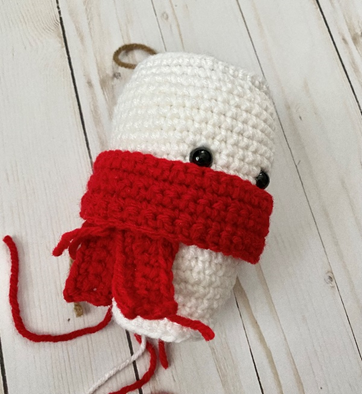
Glue ornament to back side edge of piece; or twist Red and White Pipe Cleaners to make Candy Cane shape. Glue in place, or insert into sts of Coffee. With Black, make a small “v” between eyes for Smile. With Pink, make small horizontal lines under each eye for Blush.
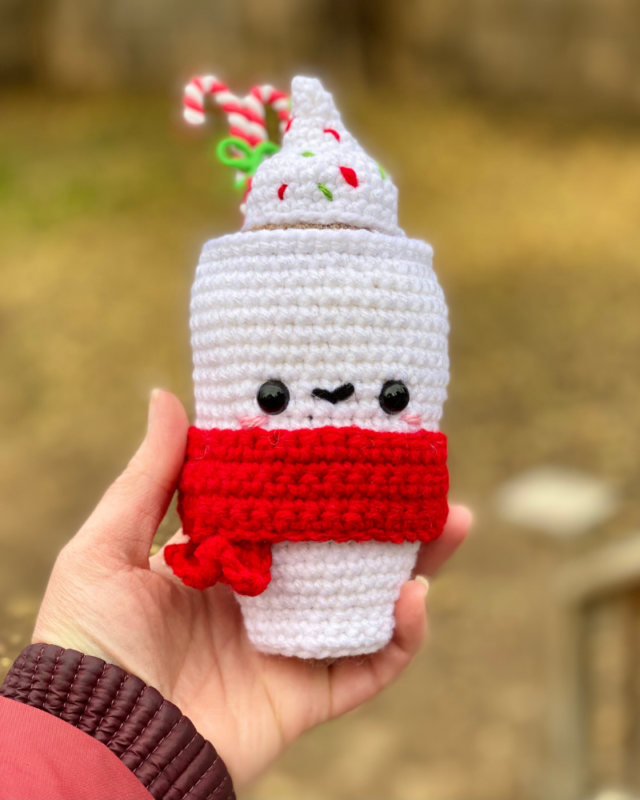
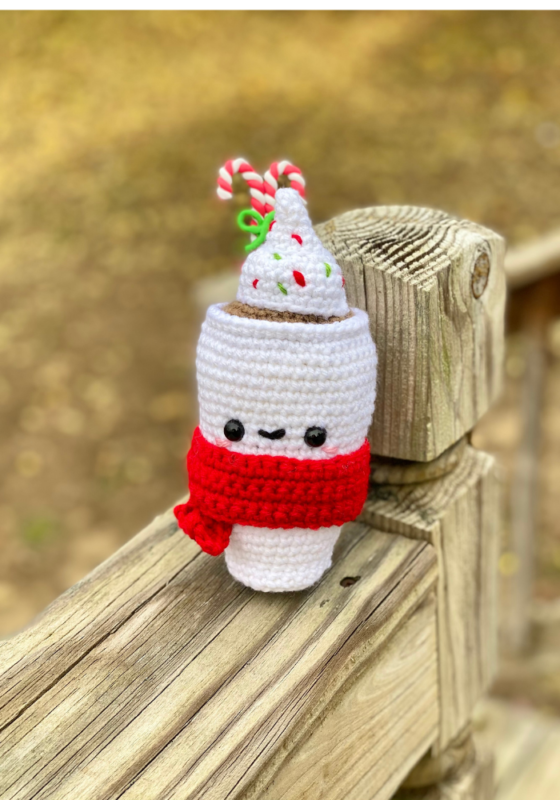
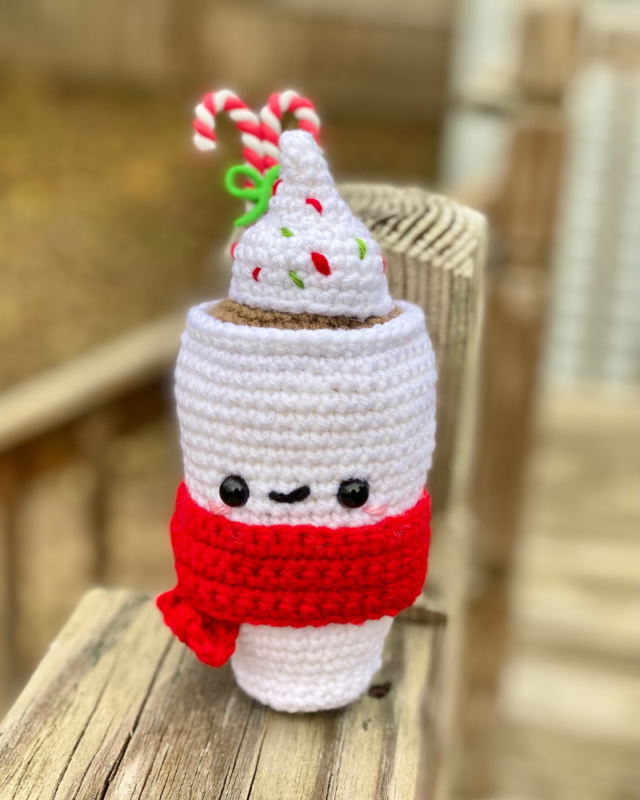
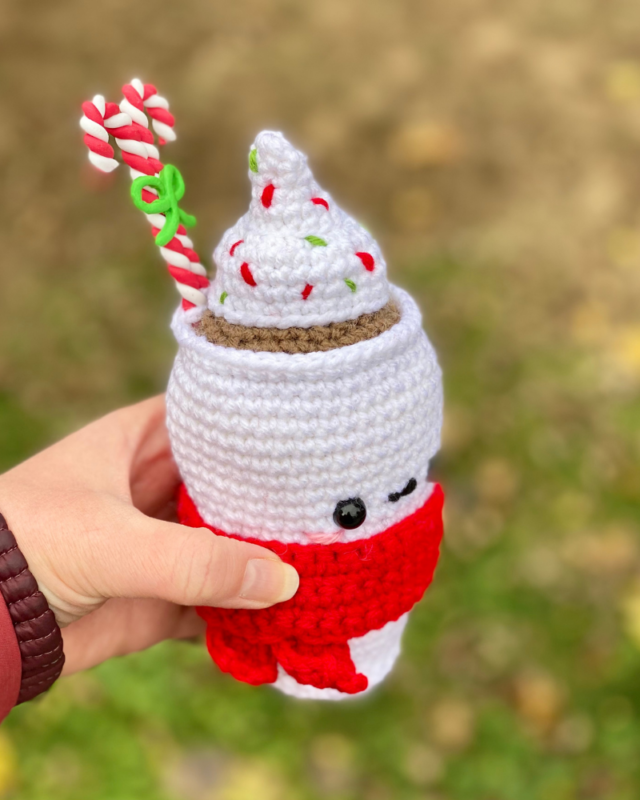
Weave in all ends and/or tie off and hide knots in sts. Photo below shows finished piece.
Here is the finished latte!
I hope you enjoyed crocheting this Peppermint Latte along with me today. If you love fun, free patterns like this one, then please be sure to sign up for my email list to keep up to date with all my latest designs:
Also, please be sure to follow me on social media, and tag me in photos of your finished projects made from my patterns, so I can see your lovely work!
Don’t forget to pin it for later HERE!
And you can find that ad-free PDF pattern HERE!
Happy Crocheting!
COPYRIGHT:
This pattern is owned by Crafty Kitty Crochet (Melissa Moore). Any reselling or distribution of this pattern is prohibited. Sale of items made using this pattern is welcomed, but I do ask that credit/a link be provided back to my site, craftykittycrochet.com.

Comments (1)
Announcing the 2021 Holiday Stashdown Crochet Along! – Underground Crafter
October 22, 2023 at 1:26 pm
[…] the Amigurumi Peppermint Latte […]