

Amigurumi Pumpkin Spice Latte – Crochet Pattern
Pin it for later!

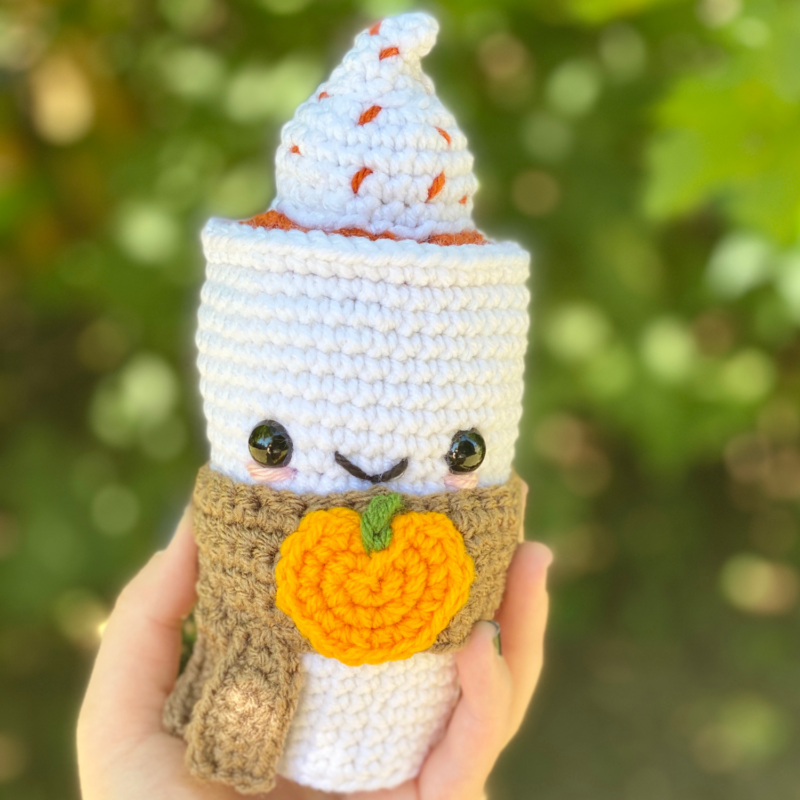
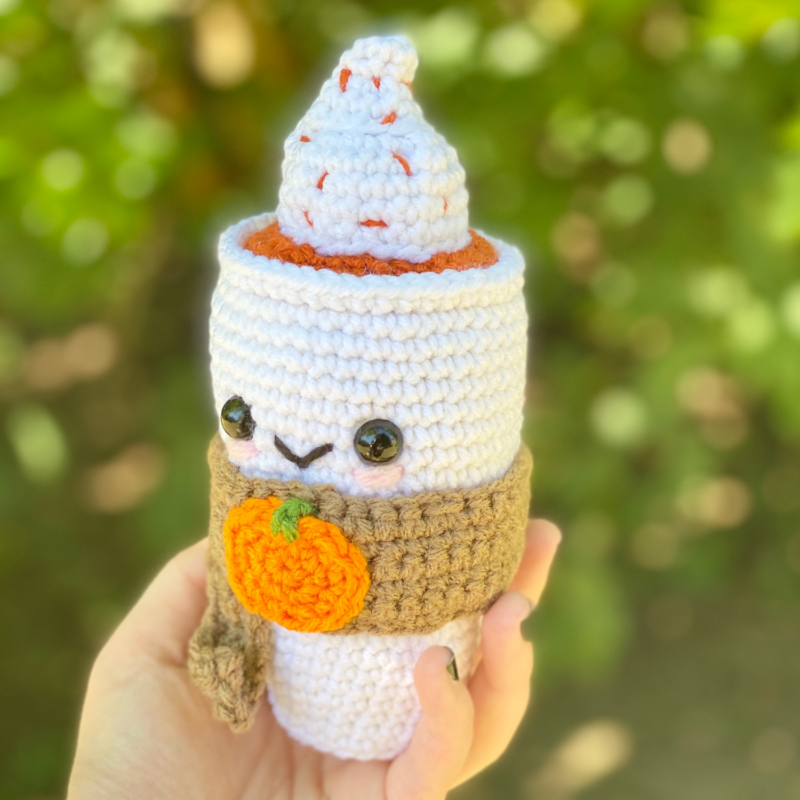
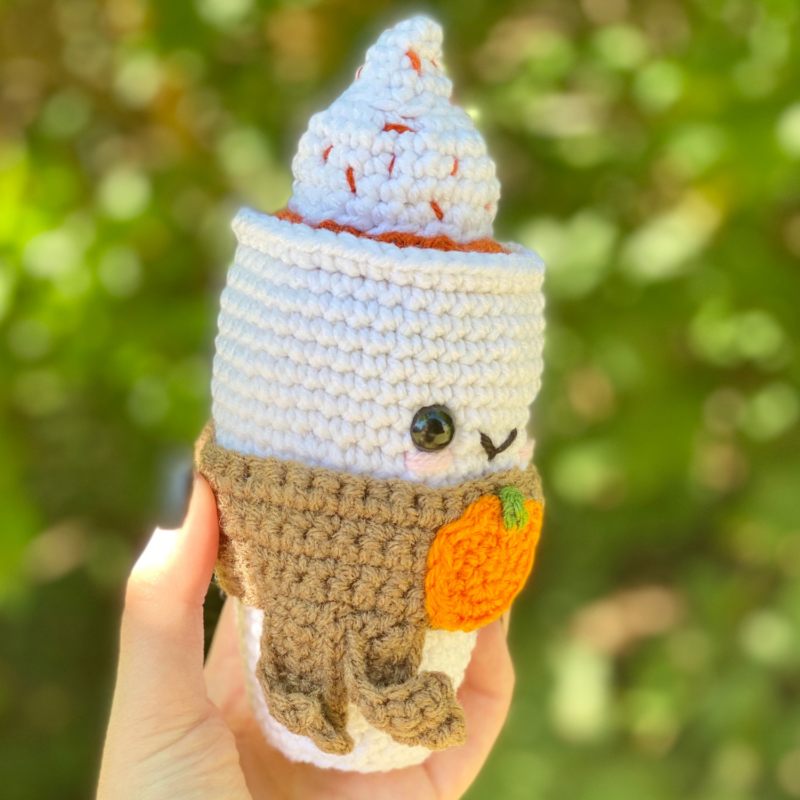
It’s Pumpkin Spice season, and nothing quite represents the pumpkin craze like pumpkin spice lattes! These signature fall drinks are one of the early signs that fall is on its way again. I know not everyone cares for the taste, but even if you’re not a pumpkin spice fall-natic like me, you can appreciate the cuteness and relevance of this sweet little amigurumi Pumpkin Spice Latte! As if his tall whipped cream “hat” wasn’t enough to send you into cuteness overload, his cup cozy even doubles as a comfy fall scarf with a pumpkin applique on it! It doesn’t get much cuter than this!
Amigurumi Pumpkin Spice Latte
As you may know from many of my crochet patterns (like my Pumpkin Poncho and my Pumpkin Messy Bun Hat), I’m a pumpkin maniac! Whether it’s the sight of pumpkins, the taste and smell of pumpkin spice, or even pumpkin seeds – I just love everything about these fall symbols (and fall in general). When creating my amigurumi pumpkin spice latte, I knew I wanted to do something to make him stand out. That’s when I thought of making the cup “holder” or cozy around the middle of the cup into a scarf! It just screams fall coziness! How cute would this little latte be as a gift to the pumpkin spice lover in your life? It also makes a great play food toy for kids! The possibilities are endless!
The great thing about this pattern is that it doesn’t require a ton of yarn, the colors are generally fairly easy to find in one’s stash – white, brown, etc. There is one color that I swear by for this pattern, though, and that’s Lion Brand Vanna’s Choice in Terracotta! It’s just the perfect color for the “coffee” and “spice” and really brings this little cutie to life! You can find some on Amazon HERE!
Looking for the ad-free PDF version of this pattern? You can purchase it HERE!
I’m also really pleased to announce that on September 30, 2021, this pattern was featured in the Pumpkin Palooza Blog Hop by Pineapple & Pine! The blog hop is over, but you can still head over to the page to see what kinds of patterns were included and show some love to the host and other designers!!! Just head to A Plush Pineapple’s blog hop page !
Supplies
Size D-3 / 3.25 mm crochet hook
Red Heart Super Saver in White (about 120 yds)
Lion Brand Vanna’s Choice in Terracotta (about 50 yds)
Red Heart Super Saver in Café Latte (about 50 yds)
Red Heart Super Saver in Pumpkin (about 10 yds)
Small amounts of Lion Brand Vanna’s Choice in Black, Pink, and Kelly Green for Smile, Blush, and Pumpkin Stem
1 pair of 12 mm safety eyes
Fiberfill stuffing
Yarn Needle
Scissors
Abbreviations
BLO = back loop only
Ch = chain
FLO = front loop only
Rem = remaining
Rep = repeat
Rnd(s) = round(s)
Sc = single crochet
Sc2tog = single crochet 2 together
Sl St = slip stitch
St(s) – stitch(es)
Gauge
Exact gauge is not essential to this project.
Size
About 7.5 inches length
How to Make This
Instructions
Cup
This pattern is worked in continuous rnds; do not join. You may wish to use a stitch marker and move it up at the beginning of each new rnd.
Rnd 1 – with White, make a magic ring. 6 sc in ring. (6 sc)
Rnd 2 – 2 sc in each st around. (12 sc)
Rnd 3 – 2 sc in next st, sc in next st; rep around. (18 sc)
Rnd 4 – 2 sc in next st, sc in next 2 sts; rep around (24 sc)
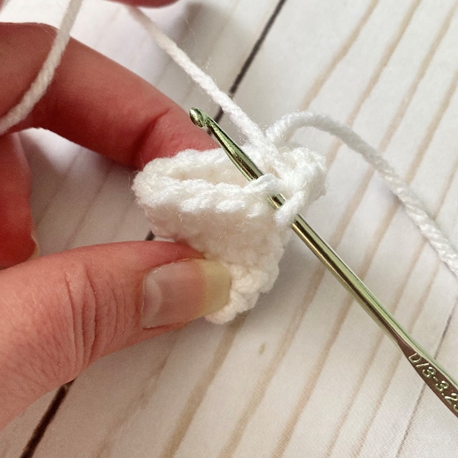
Rnd 5 – working in BLO (see first photo under Whipped Cream to see how this is made), sc in each st around. (24 sc)
Rnds 6 – 7 – sc in each st around. (24 sc)
Rnd 8 – 2 sc in next st, sc in next 3 sts; rep around. (30 sc)
Rnds 9 – 12 – sc in each st around. (30 sc)
Rnd 13 – 2 sc in next st, sc in next 4 sts; rep around. (36 sc)
Rnds 14 – 19 – sc in each st around. (36 sc)
Rnd 20 – 2 sc in next st, sc in next 5 sts; rep around. (42 sc)
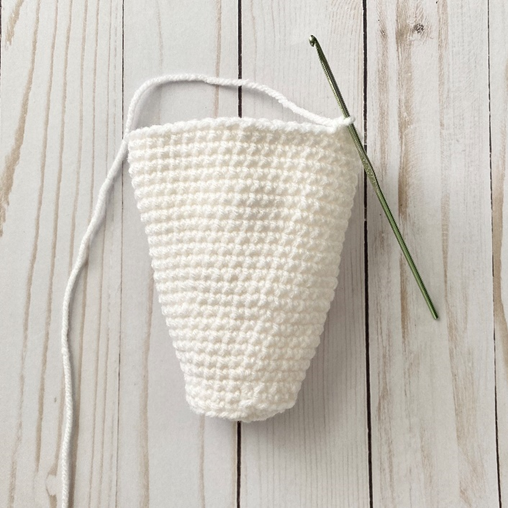
Rnds 21 – 27 – sc in each st around. (First photo below shows piece after this rnd.) (42 sc)
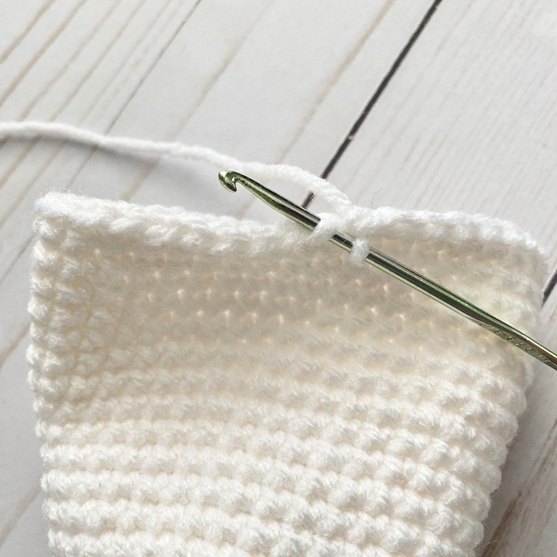
Rnd 28 – working in FLO (see second photo below), sc in each st around. (42 sc)
Fasten off White. Attach safety eyes between rnds 20 and 21. Stuff Cup (do not overstuff).
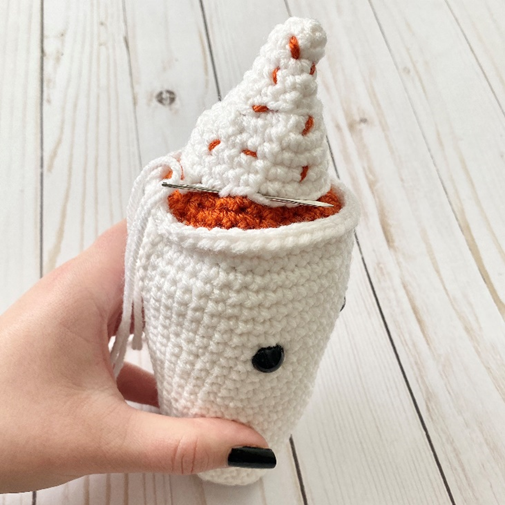
Coffee
This pattern is worked in continuous rnds; do not join. You may wish to use a stitch marker and move it up at the beginning of each new rnd.
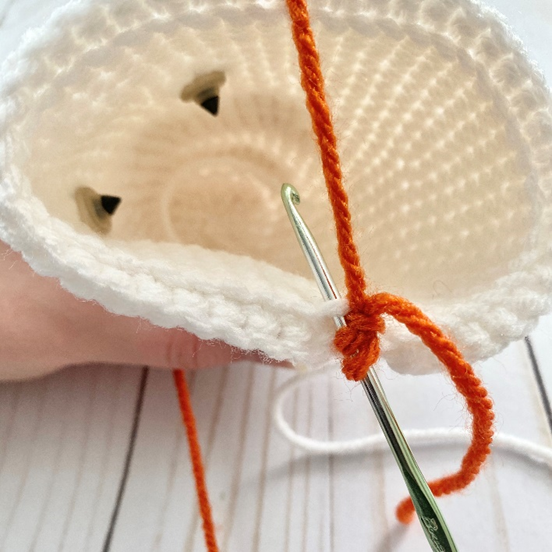
Working in rem loops from Rnd 28 of Cup (see first photo below), attach Terracotta and ch 1.
Rnd 1 – sc2tog over next 2 sts, sc in next 5 sts; rep around. (36 sc)
Rnd 2 – sc2tog over next 2 sts, sc in next 4 sts; rep around. (30 sc)
Rnd 3 – sc2tog over next 2 sts, sc in next 3 sts; rep around. (24 sc)
Rnd 4 – sc2tog over next 2 sts, sc in next 2 sts; rep around. (18 sc)
Rnd 5 – sc2tog over next 2 sts, sc in next st; rep around. (12 sc)
Rnd 6 – sc2tog in each st around. (6 sc)
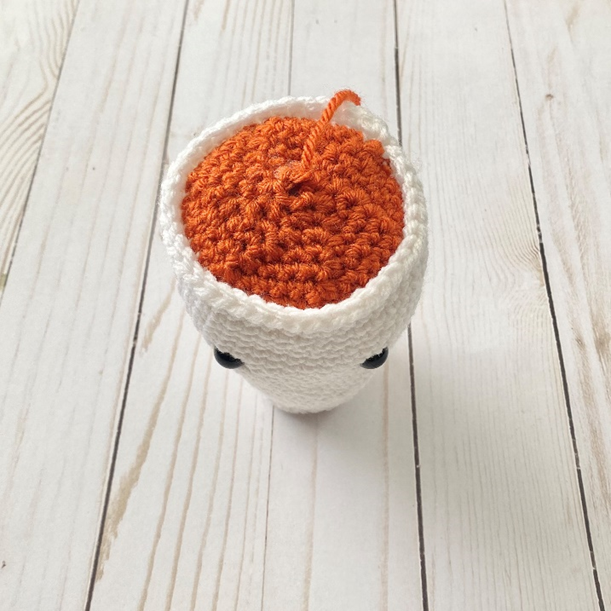
Rnd 7 – sc2tog over next 2 sts, leave rem sts unworked. (Second photo below shows piece after this rnd.) (5 sc)
Fasten off, leaving tail to sew rem gap from Rnd 7.
Body of Scarf
With Café Latte, ch 40.
Row 1 – sc in each st across. Ch 1, turn (39 sc)
Row 2 – rep Row 1. (39 sc)
Row 3 – 2 sc in next st. Sc in next 37 sts. 2 sc in last st. Ch 1, turn (41 sc)
Rows 4 – 6 – sc in each st across. (41 sc)
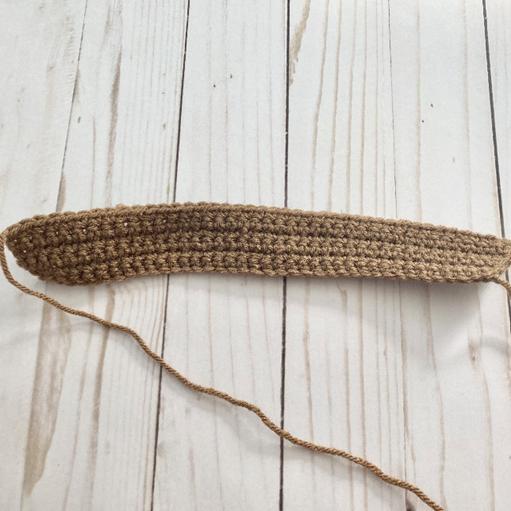
Fasten off, leaving long tail for sewing.
Scarf End (make 2)
With Café Latte, ch 8.
Row 1 – sc in each st across. Ch 1, turn. (7 sc)
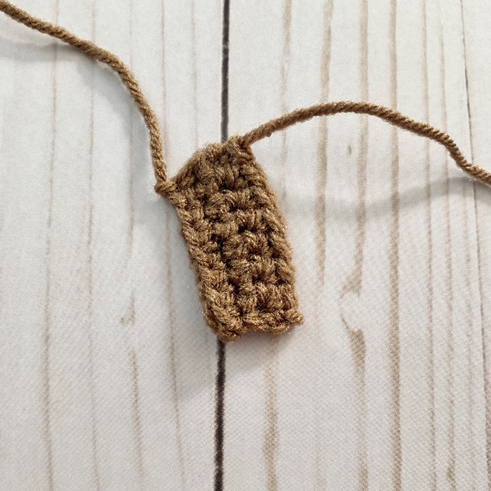
Rows 2 – 3 – rep Row 1. Do not ch 1 at the end of Row 3. (7 sc)
Fasten off, leaving long tail for sewing.
Pumpkin Applique
This pattern is worked in continuous rnds; do not join. You may wish to use a stitch marker and move it up at the beginning of each new rnd.
Rnd 1 – With Pumpkin, make a magic ring. 6 sc in ring. (6 sc)
Rnd 2 – 2 sc in each st around. (12 sc)
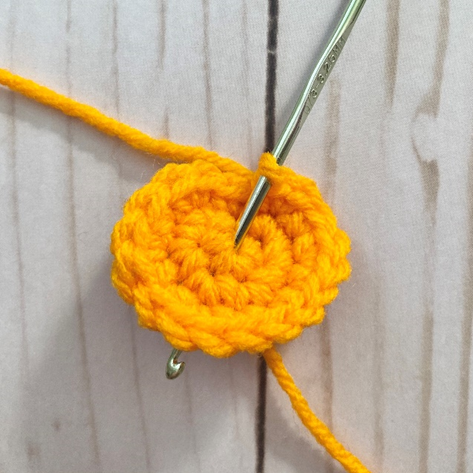
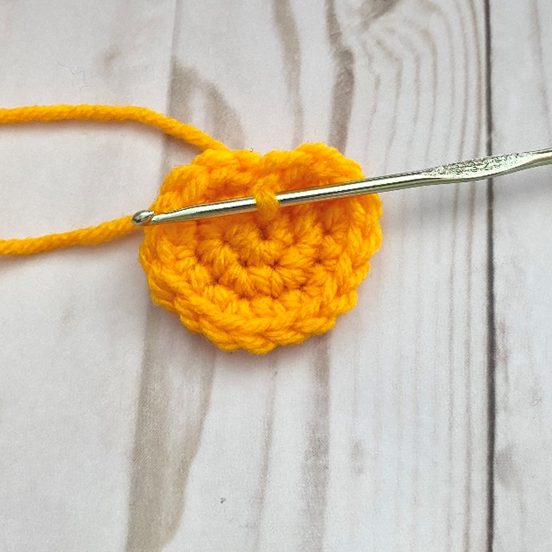
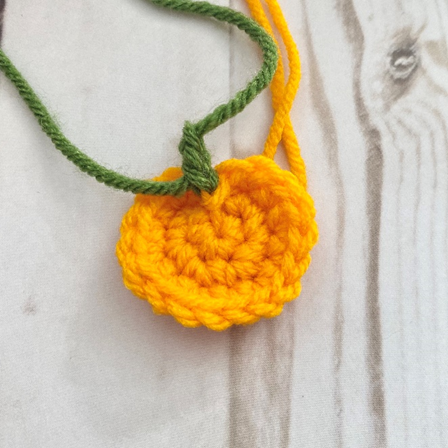
Rnd 3 – 2 sc in next st, sc in next st; rep around. Sl st to a st below on Rnd 1 (first and second photos below). Attach Kelly Green, ch 3 for Stem. (Third photo below shows finished piece.) (18 sc)
Fasten off, leave long tails for sewing.
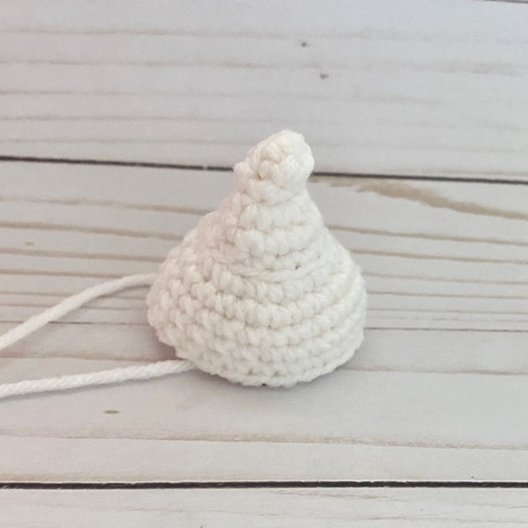
Whipped Cream
This piece is worked in continuous rnds. You may wish to use a stitch marker and move it up at the beginning of each new rnd.
Rnd 1 – With White, make a magic ring. 6 sc in ring (6 sc)
Rnds 2 – 3 – sc in each st around. (6 sc)
Rnd 4 – 2 sc in each st around. (12 sc)
Rnds 5 – 6 – sc in each st around. (12 sc)
Rnd 7 – working in BLO (first photo below), 2 sc in each st around. (24 sc)
Rnds 8 – 11 – sc in each st around. (24 sc per rnd)
Fasten off, leaving long tail for sewing. Pull beg tail tightly to make tip of Whipped Cream “curl”. (Second photo below shows finished piece.)
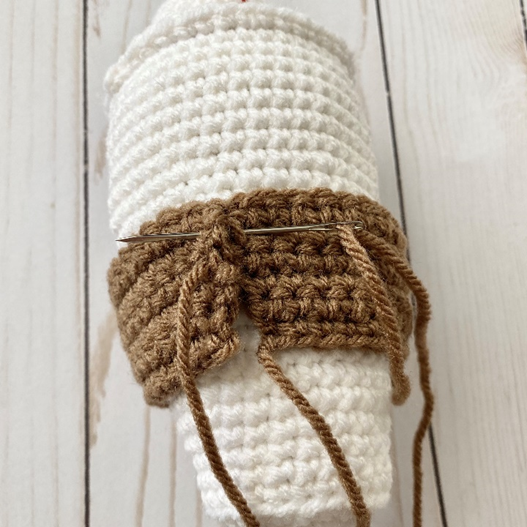
Finishing
With Terracotta, make several small lines on Whipped Cream for Spice. Stuff Whipped Cream (do not overstuff) and sew to center of Coffee.
Sew Pumpkin Applique to center of Body of Scarf.
Wrap Body of Scarf around Cup, underneath eyes. Sew together ends of Body of Scarf on back of Cup, and sew down top and bottom edges of Body of Scarf to Cup (first photo below). Place Scarf Ends at bottom edge of Body of Scarf off to one side; sew in place, leaving bottom edges free to curl (see second photo below).
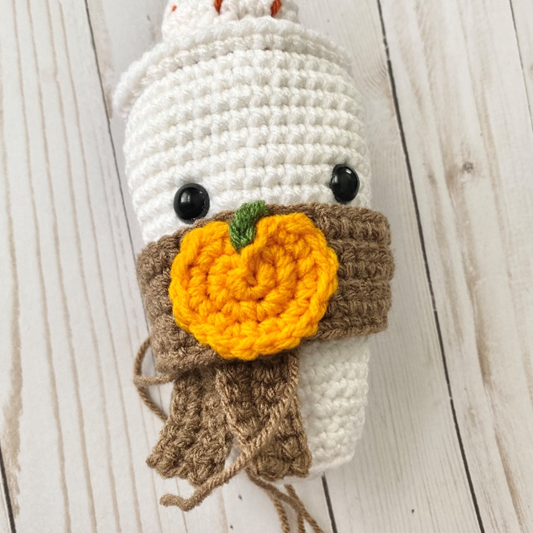
With Black, make a small “v” between eyes for Smile. With Pink, make small horizontal lines under each eye for Blush.

Weave in all ends and/or tie off and hide knots in sts.
Here is the finished Latte!

I hope you enjoyed crocheting this sweet little latte along with me today! If you love fun, free patterns like this one, please be sure to subscribe to my email list to stay up to date with all my latest designs:
And please be sure to follow me on social media, and tag me in photos of your finished items made from my patterns, so I can see your lovely work!
Don’t forget to pin it for later HERE!
And you can purchase that PDF pattern HERE!
Happy Crocheting!
COPYRIGHT: This pattern is owned by Crafty Kitty Crochet (Melissa Moore). Any reselling or distribution of this pattern is prohibited. Sale of items made using this pattern is welcomed, but I do ask that credit/a link be provided back to my site, craftykittycrochet.com.
Comments (11)
Amigurumi Wee Little Ghostie – Crochet Pattern ~ Crafty Kitty Crochet
September 4, 2020 at 5:51 pm
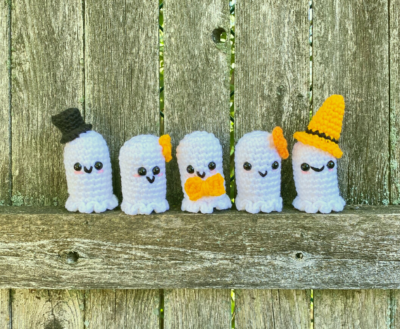
[…] so naturally I wanted to make some cute Halloween ones this year! (Have you met my Amigurumi Pumpkin Spice Latte yet?) Ghosts are an easy and immediately recognizable symbol to design, so I started playing around […]
Fox & Cat Ear Headbands – Crochet Pattern ~ Crafty Kitty Crochet
September 18, 2020 at 7:04 pm
[…] probably evident in the patterns I’ve been publishing, like my Pumpkin Messy Bun Beanie and Pumpkin Spice Latte Amigurumi!). Even though Halloween will look a little different this year, there’s no reason we […]
Fall & Halloween Face Masks – Crochet Pattern ~ Crafty Kitty Crochet
September 18, 2020 at 7:48 pm
[…] Find the pattern for the Pumpkin Applique featured on the Striped Mask HERE! […]
Candy Corn Bow – Crochet Pattern ~ Crafty Kitty Crochet
September 25, 2020 at 6:57 pm
[…] whole bunch of fun and cute pumpkin and candy corn related patterns, like my Pumpkin Messy Bun Hat, Pumpkin Spice Latte Amigurumi, and Candy Corn Witch Hat for Kids & Toddlers. I love making costume accessories, and also […]
Pumpkin Placemats – Crochet Pattern ~ Crafty Kitty Crochet
October 10, 2020 at 5:08 pm
[…] pumpkins by some of the other patterns I’ve released, such as my Pumpkin Messy Bun Beanie, Pumpkin Spice Latte Amigurumi, and Easy Peasy Pumpkins! But what if you want to incorporate pumpkins into your dining decor, as […]
Twelve Crochet Pumpkin Patterns to Make for Fall • A Plush Pineapple
September 30, 2021 at 2:33 am
[…] GET THE PATTERN! Tags: crochetcrochet fall patterncrochet patterncrochet patternscrochet pumpkincrochet pumpkin patternfree crochet patternpumpkin pattern […]
Peter
September 30, 2021 at 1:53 pm
OMG – you are hands down the winner of this Bloghop – this is FANTASTIC and sooooo worthy to be the last pattern!
Melissa
October 3, 2021 at 12:39 pm
Oh my gosh thank you Peter!!!! You’re so kind!!! I’m thrilled to hear that you like my ami PSL 😀 Enjoy!!!
Linda
September 30, 2021 at 2:13 pm
the code is not working I am using AmiPSLyll
Pumpkin Palooza: 26 Awesome Pumpkin Patterns –
September 30, 2021 at 3:07 pm
[…] Amigurumi Pumpkin Spice Latte […]
Amigurumi Peppermint Latte – Crochet Pattern ~ Crafty Kitty Crochet
November 24, 2021 at 10:17 pm
[…] recent years, I’ve been delighted to see how much folks have been loving my Amigurumi Pumpkin Spice Latte! It’s a fall staple, and almost as fun to crochet as it is to drink! So I’ve been planning a […]