
Happy Hearts Pocket Shawl – Crochet Pattern
Pin it for later!
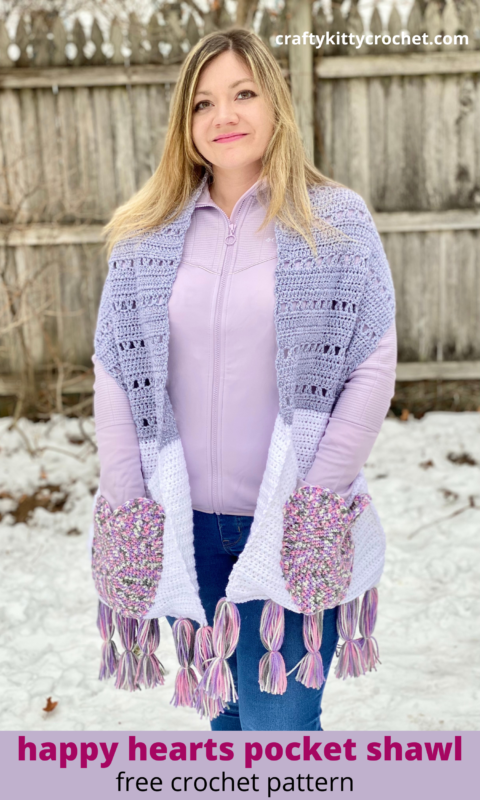
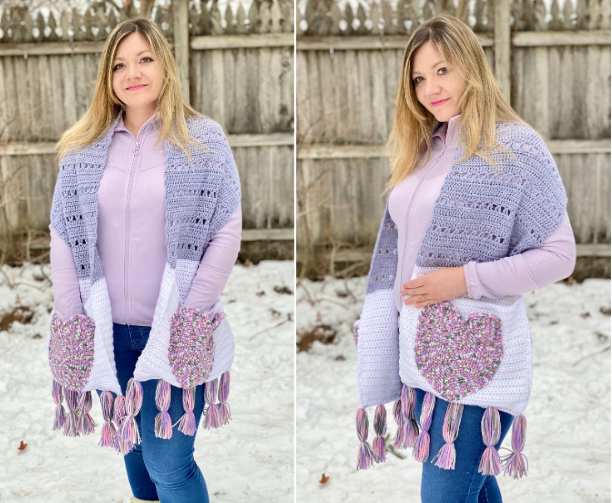
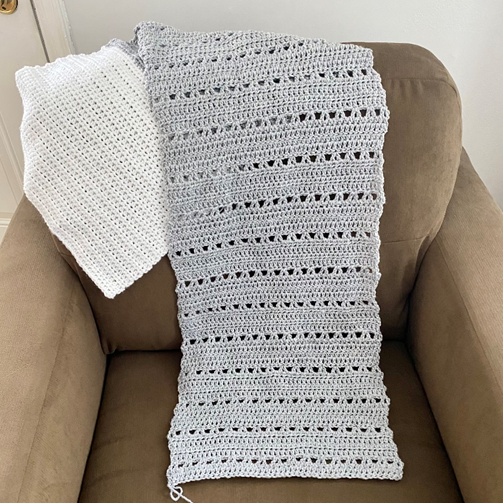
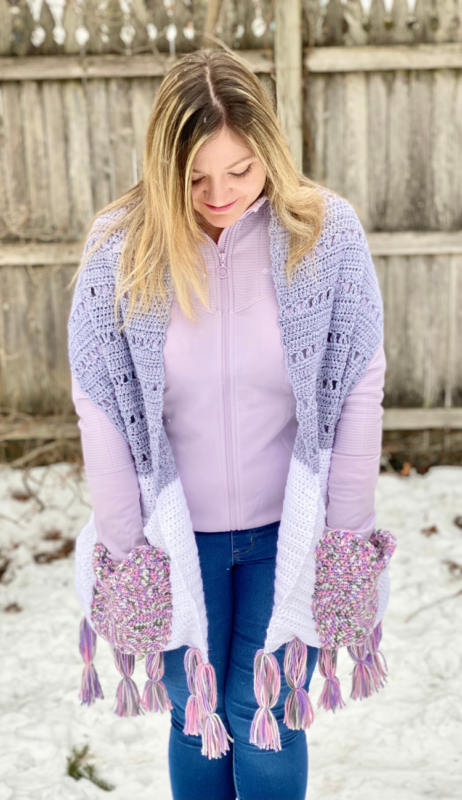
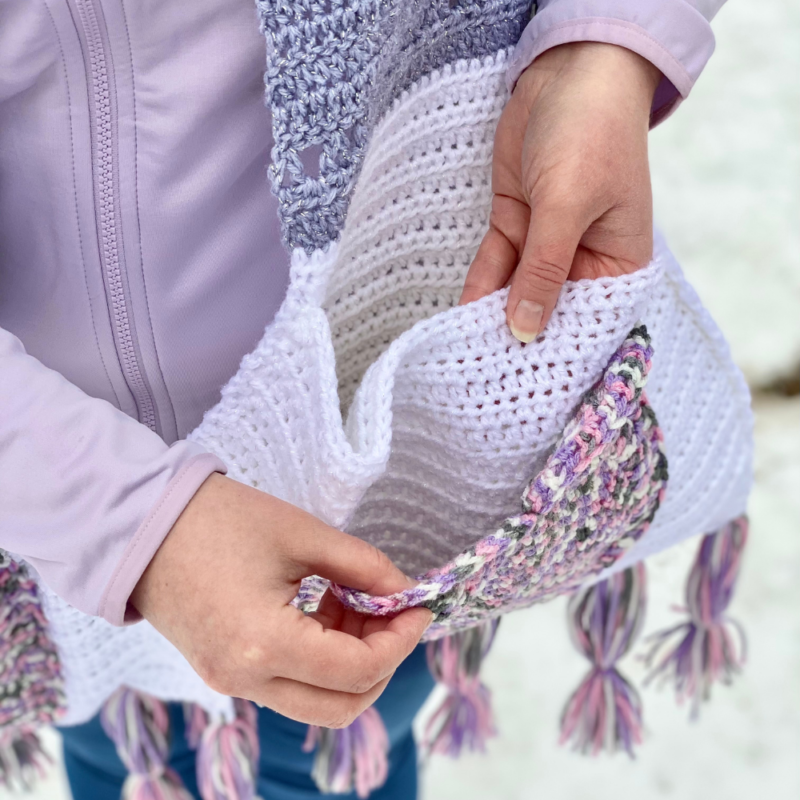
Make your heart happy with this Happy Hearts Pocket Shawl! It’s bigger than a scarf and serves as more of a shawl/stole – perfect for late winter days! What a great gift this would make for your loved ones – kids and adults alike will love the cozy warmth and cute design! It features dual pockets (yes, those hearts are pockets too)! So you can carry around all your essentials as well as having a sleeve for smaller items like a smartphone. It’s the perfect accessory for Valentine’s Day (and so many other occasions)!
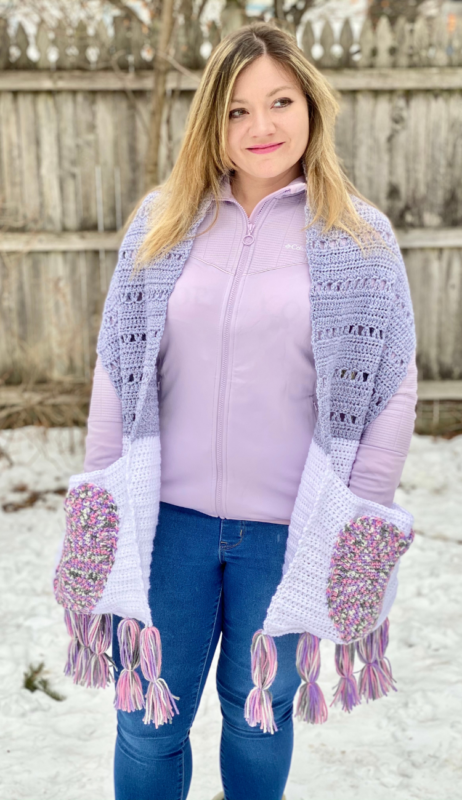
Happy Hearts Pocket Shawl
I became familiar with the concept of pocket shawls recently, as their popularity has been exploding these past fall and winter seasons! Needless to say, I’m now hooked (pun intended). Talk about more bang for your buck-these shawls are a “scarf plus”, keeping more than just your neck warm by also covering shoulders and arms. But at the same time, they’re not too bulky and are sleek enough to wear with nearly any outfit. I knew once I started designing this one that there were so many possibilities I’d explore in the future-mermaid pocket shawls, rainbow pocket shawls, etc! (See my Mermaid Scarf here if you’re interested in more of my mer-mania!) Stay tuned and hope you enjoy this first venture in the world of these comfy, practical accessories!
The yarn I used for this shawl has a shimmery thread throughout that really helps it bridge that time from winter to spring – as Valentine’s itself sort of does! It’s a JoAnn Fabrics house brand, Big Twist Twinkle. But if you’re having trouble finding this yarn now that the holidays are over, I highly recommend an excellent substitute that has a similar sparkle and thickness – Red Heart With Love Metallic! You can find some on Amazon:
Looking for the ad-free PDF? You can purchase one in my shop HERE!
Supplies
H/8 5.0 mm crochet hook
1 skein of Big Twist Twinkle in Slate for Main Color (medium weight yarn; approx..375 yds used)
2 skeins of Big Twist Twinkle in White for Contrast/Pocket Color (medium weight yarn; approx. 450 yds used)
1 skein of Caron Jumbo in Easter Basket for Heart Color (medium weight yarn; 300 yds used)
Yarn Needle
Scissors
Abbreviations
*= indicates beginning/end of a section to be repeated
Ch = chain
Dc = double crochet
Hdc = half double crochet
Rep = repeat
Rnd(s) = round(s)
Sc = single crochet
Sc2tog = single crochet 2 together
Sk = skip
Sl st = slip stitch
Sp = space
St(s) = stitch(es)
Tr = triple crochet
V st(s) = v stitch(es)
Gauge
3 hdc and 2 rows = approx. 1 inch
Size
About 60 inches in length before fringe
How to Make This
Instructions
Shawl
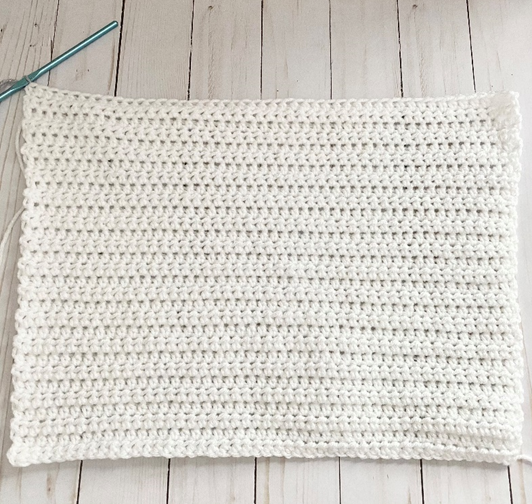
With Contrast Color, ch 48.
Row 1 – Hdc in 3rd ch from hook, and in each st across. Ch 2, turn (46 hdc)
Row 2 – Hdc in each st across. Ch 2, turn (46 hdc)
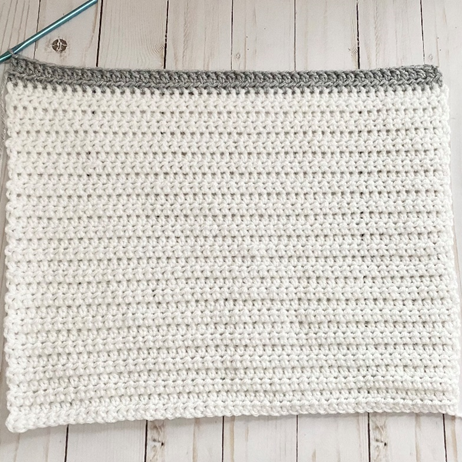
Rows 3 – 30 – Rep Row 2. In last st of Row 30, change to Main Color before ch 2 and turn. (46 hdc)
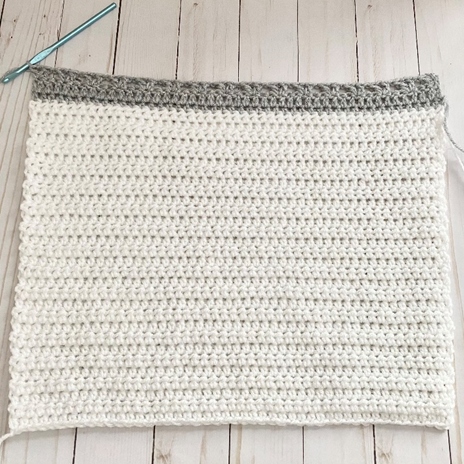
Row 31 – Rep Row 2. (46 hdc)
Row 32 – Dc in each st across. Ch 2, turn (46 dc)
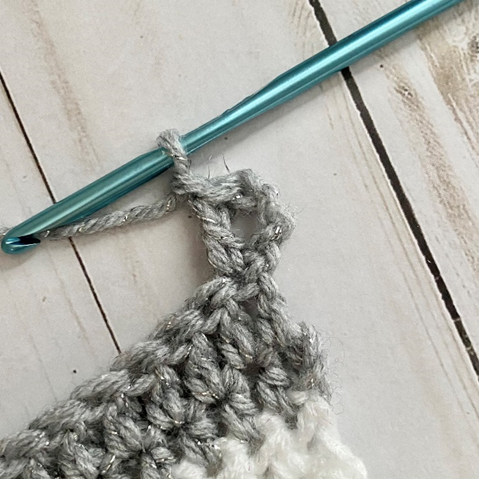
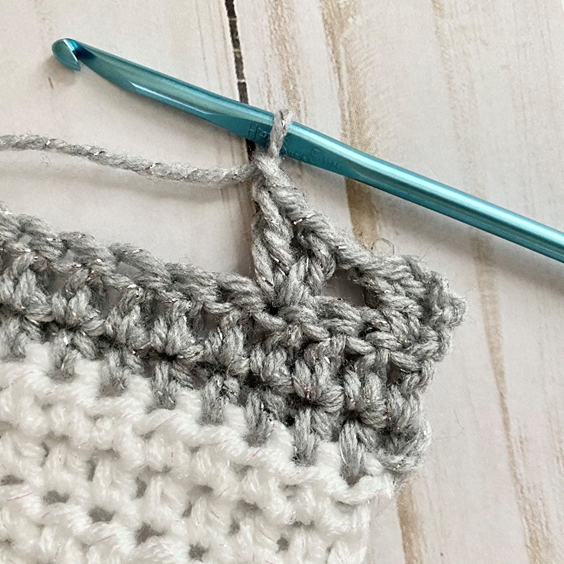
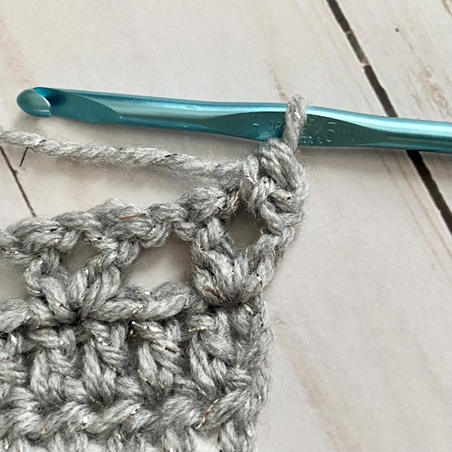
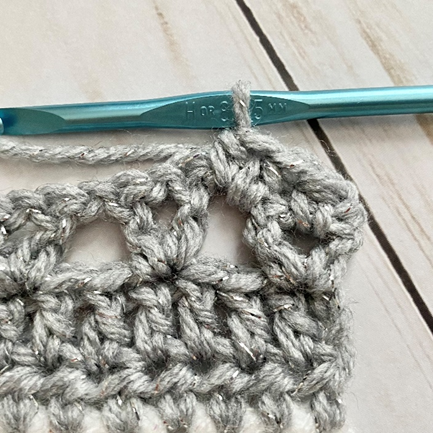
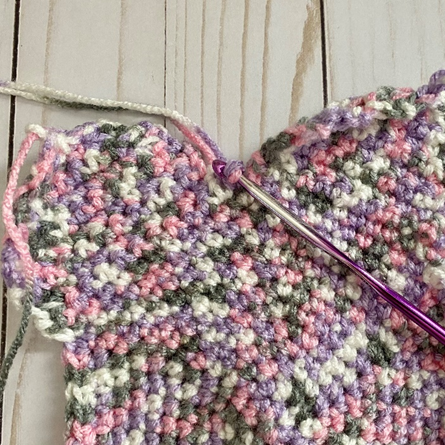
Row 33 – Ch 3, dc back in same st, ch 1 (first v st made – first photo below). *Sk 2 sts, [dc, ch 1, dc, ch 1] in next st (second photo below)* Rep from * to * 14 more times; do not ch 1 on last v st. Ch 2, turn (third photo below shows finished row). (16 v sts)
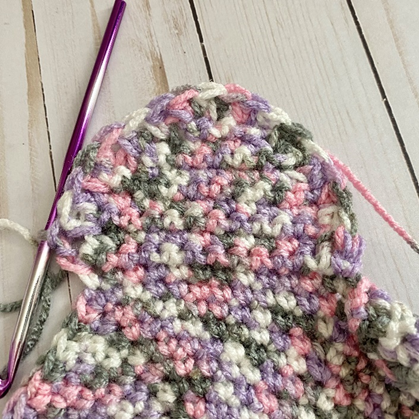
Row 34 – *Hdc in next v st (first photo below), 2 hdc in next sp between v sts (second photo below).* Rep from * to * 14 more times. Hdc in last v st. Ch 2, turn (third photo shows finished row). (46 hdc)
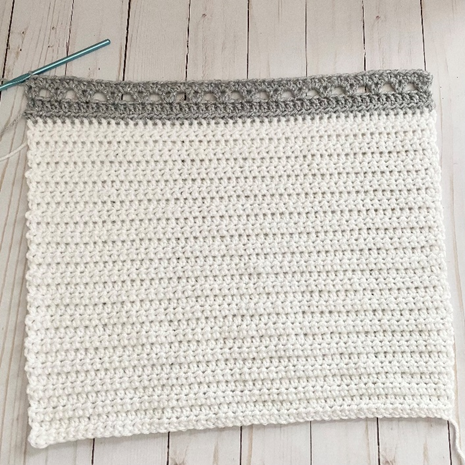
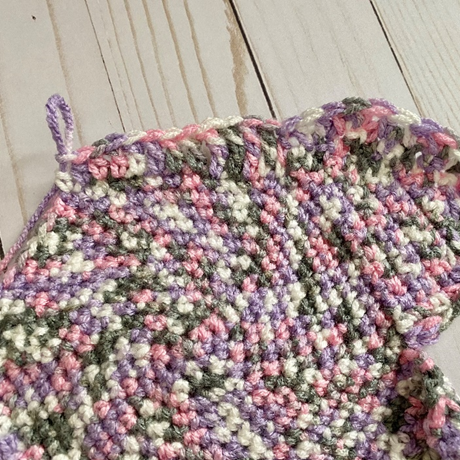
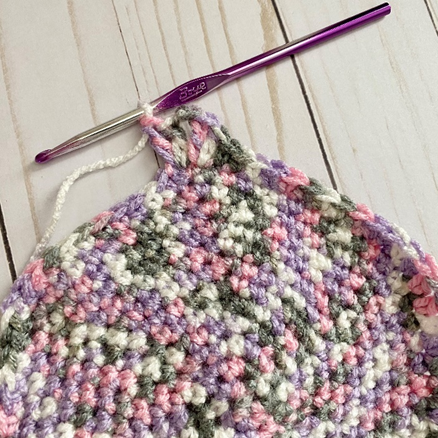
Row 35 – Dc in each st across. Ch 2, turn (photo below shows finished row). (46 dc)

Rows 36 – 115 – Rep Rows 31 – 35 sixteen more times. In last st of Row 115, change to Contrast Color.
Rows 116 – 145 – Rep Row 2. Do not ch 2 at end of Row 145. (46 hdc)
Fasten off.
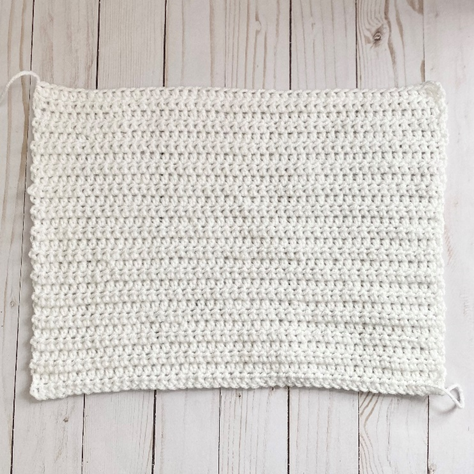
Pocket (Make 2)
With Contrast Color, ch 46.
Row 1 – Hdc in 3rd ch from hook, and in each st across. Ch 2, turn (44 hdc)
Row 2 – Hdc in each st across. Ch 2, turn (44 hdc)
Rows 3 – 28 – Rep Row 2. (46 hdc)
Fasten off, leaving long tail for sewing.
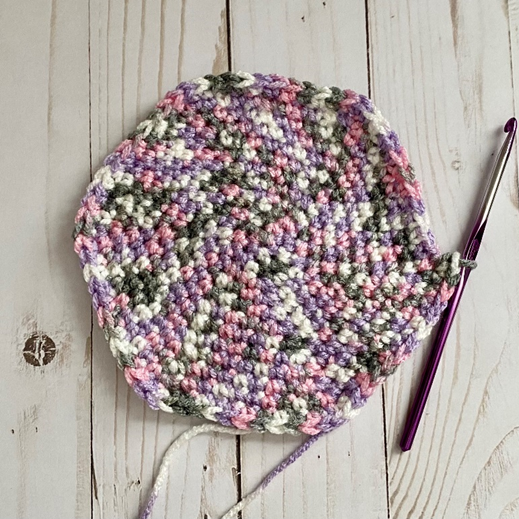
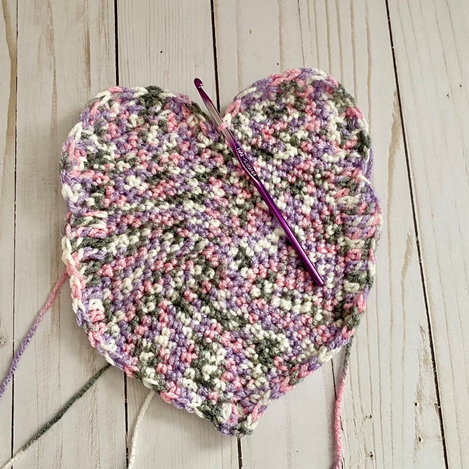
Base of Heart
(This piece is worked in continuous rnds ; do not join. You may wish to use a stitch marker and move it up at the start of each new rnd.)
Rnd 1 – With Heart Color, make a magic ring. 6 sc in ring (6 sc)
Rnd 2 – 2 sc in each st around. (12 sc)
Rnd 3 – 2 sc in next st, sc in next st; rep around. (18 sc)
Rnd 4 – 2 sc in next st, sc in next 2 sts; rep around. (24 sc)
Rnd 5 – 2 sc in next st, sc in next 3 sts; rep around. (30 sc)
Rnd 6 – 2 sc in next st, sc in next 4 sts; rep around. (36 sc)
Rnd 7 – 2 sc in next st, sc in next 5 sts; rep around. (42 sc)
Rnd 8 – 2 sc in next st, sc in next 6 sts; rep around. (48 sc)
Rnd 9 – 2 sc in next st, sc in next 7 sts; rep around. (54 sc)
Rnd 10 – 2 sc in next st, sc in next 8 sts; rep around. (60 sc)
Rnd 11 – 2 sc in next st, sc in next 9 sts; rep around. (68 sc)
Rnd 12 – 2 sc in next st, sc in next 10 sts; rep around. (72 sc)
Do not fasten off.
Heart Peaks
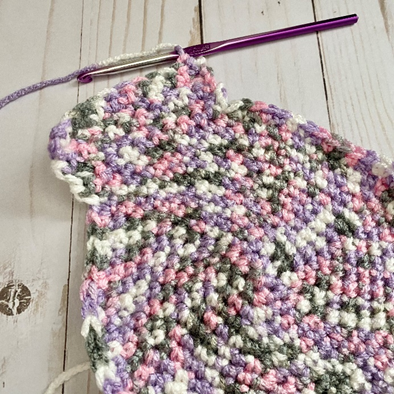
Row 1 – Sc in next 11 sts. Ch 1, turn (11 sc)
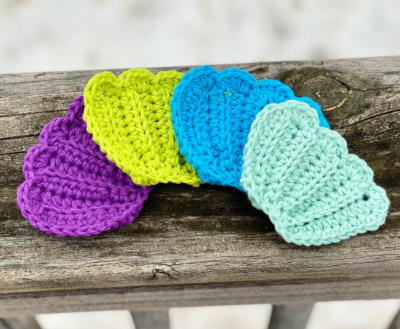
Rows 2 – 6 – rep Row 1 (first photo below). (11 sc)
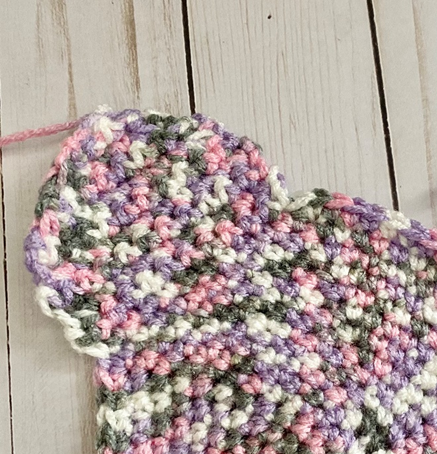
Row 7 – sc2tog over first two sts, sc in next 7 sts, sc2tog over last 2 sts. Ch 1, turn (9 sc)
Row 8 – sc2tog over first two sts, sc in next 5 sts, sc2tog over last 2 sts. Ch 1, turn (7 sc)
Row 9 – sc2tog over first two sts, sc in next 3 sts, sc2tog over last 2 sts. Ch 1, turn (5 sc)
Row 10 – sc2tog over first two sts, sc in next st, sc2tog over last 2 sts. (Second photo below shows finished Peak.) (3 sc)
Fasten off.
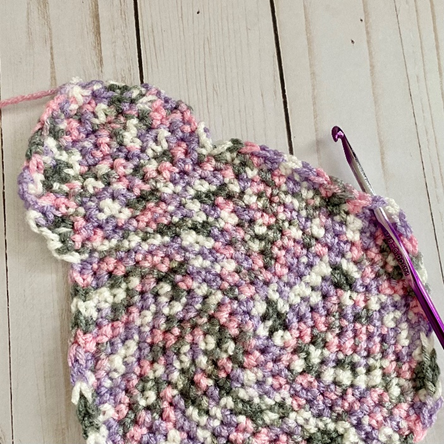
To make second Peak, count 12 sts to the right of current Peak (first photo below); attach Heart Color and rep Rows 1 – 10. (Second photo below shows finished second Peak.)
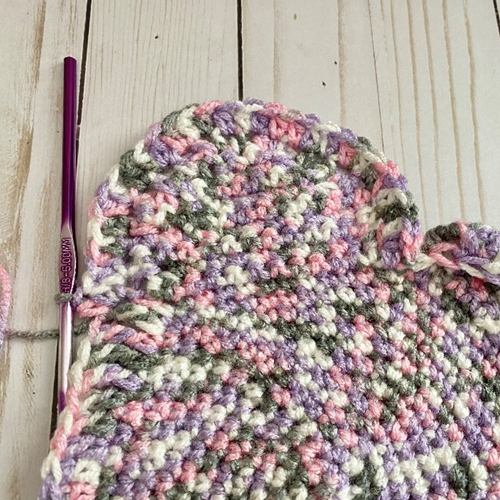
Edging/Shaping
Rnd 1 – Attach yarn in center between heart peaks (first photo below). Ch 1, hdc 6 evenly up first side of first Heart Peak. 2 hdc in next st (last st of Row 10 of Heart Peak), hdc in next, 2 hdc in next (first st of Row 10), evenly make hdc 7 down other side of Heart Peak. (Second photo below shows piece at this stage.)
Tr in next 5 sts, dc in next 5 sts, hdc in next 3 sts (first photo below). Sc in next 11 sts. 2 Dc in next st, ch 2, 2 dc in next st (tip made – second photo below).
Working up other side towards second Peak, sc in next 11 sts, hdc in next 3 sts, dc in next 5 sts, tr in next 5 sts. Working into sts of second Peak, evenly make 7 hdc up first side, 2 hdc in next st (last st of Row 10 of Heart Peak), hdc in next, 2 hdc in next (first st of Row 10), evenly make 6 hdc down other side of Peak. Join with sl st to first st, at center of Heart between Peaks (see photo below). Ch 1. (42 hdc, 10 tr, 14 dc, 22 sc)
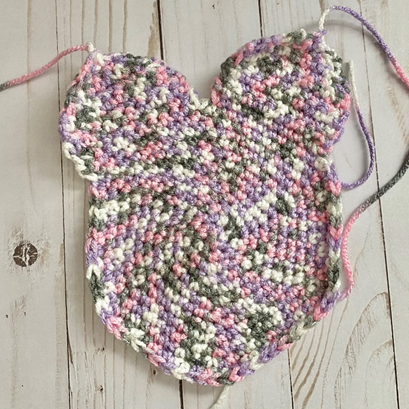
Rnd 2 – Working around first Peak, [2 hdc in next st, hdc in next st] nine times. 2 hdc in next st (first photo below). Hdc in next 24 sts. 2 hdc in tip of heart. Hdc in next 26 sts. Working around second Peak, [2 hdc in next st, hdc in next st] nine times. Join with sl st to first st, at center of Heart between Peaks. (108 hdc)
Fasten off, leaving long tail for sewing. Heart will need to be thoroughly stretched, width-wise, to reduce curling. (Second photo below shows finished piece.)

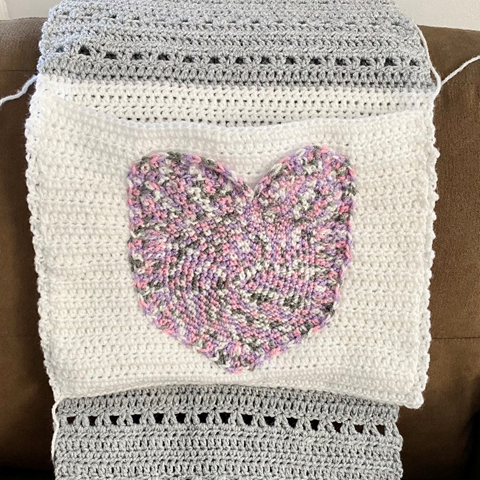
Finishing
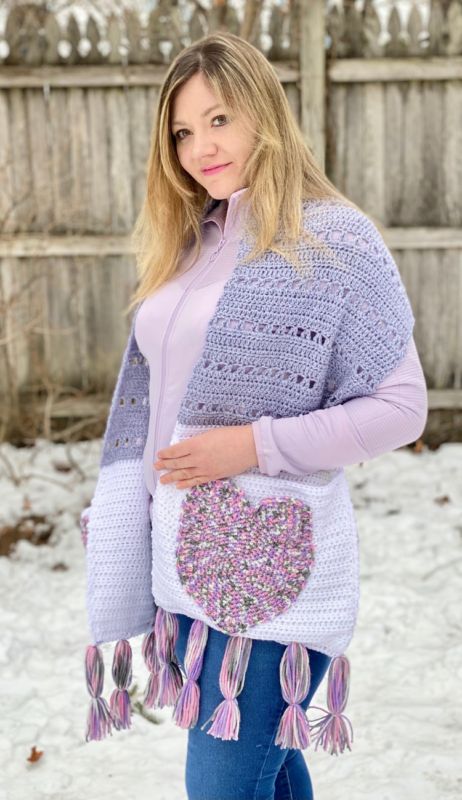
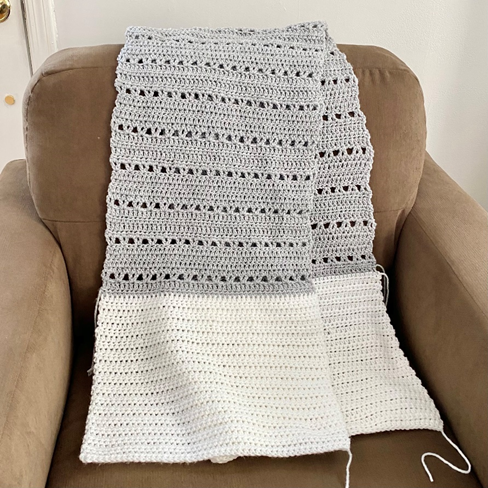
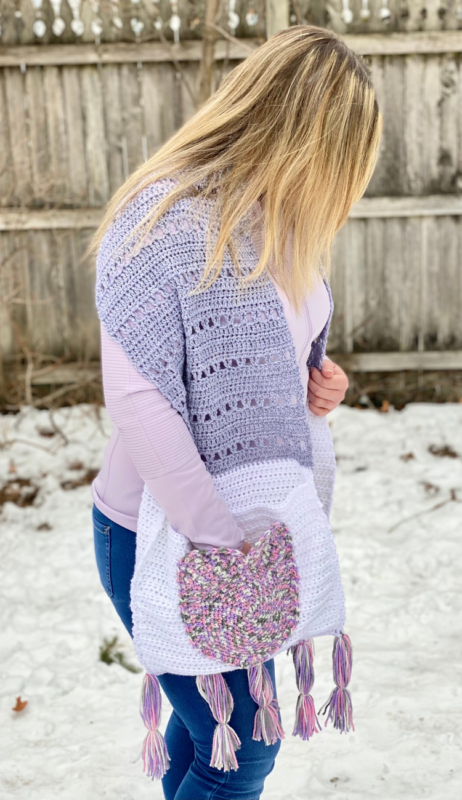
Sew Hearts to Pockets, leaving sides of Peaks closes to the center of the Heart unsewn to provide extra pocket. Sew Pockets to ends of Shawl, centering them on portions made in Contrast Color. (See photo below.)
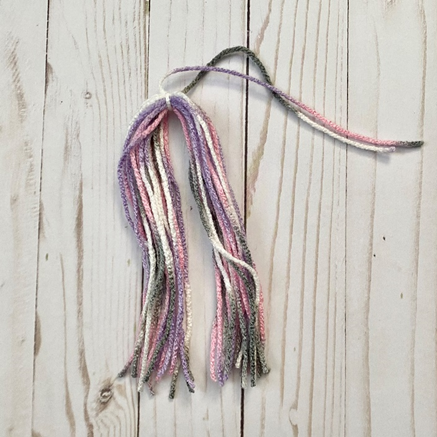
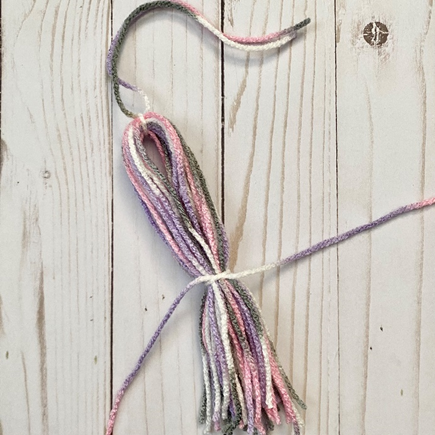
Fringe (make 10 [5 per edge])
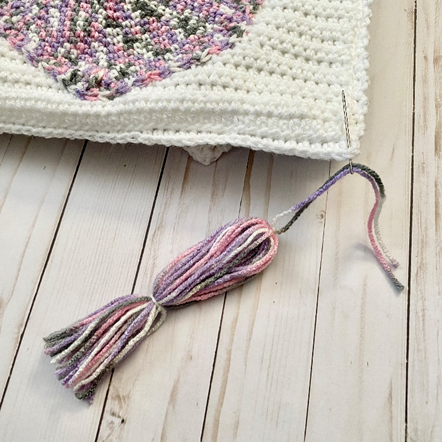
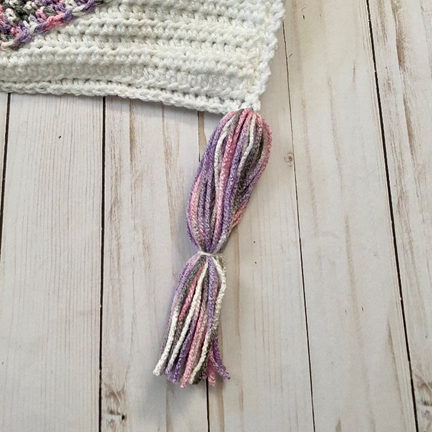
Cut twenty-two 10 inch pieces of Heart Color. Use one strand to tie 20 strands in center (first photo below). Use last strand to tie around piece, slightly below half-way point (second photo). Trim ends and use first strand to sew to a st at bottom of one edge of shawl (third and fourth photos). Repeat for the rest of Fringe pieces.
Weave in all ends.
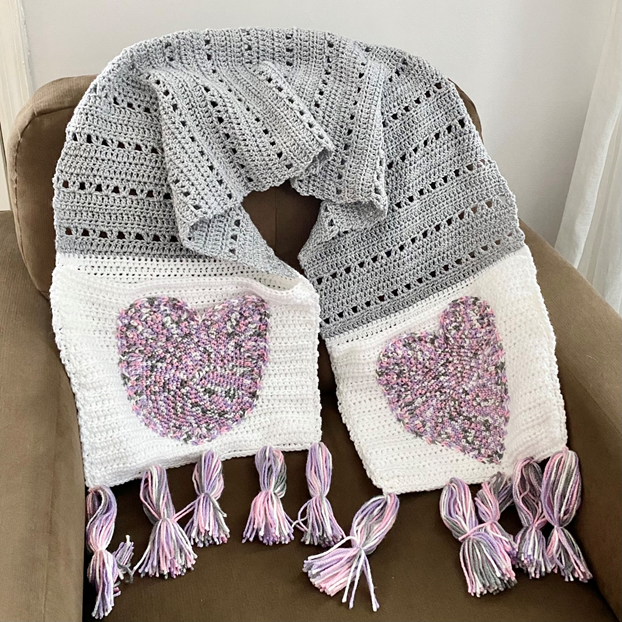
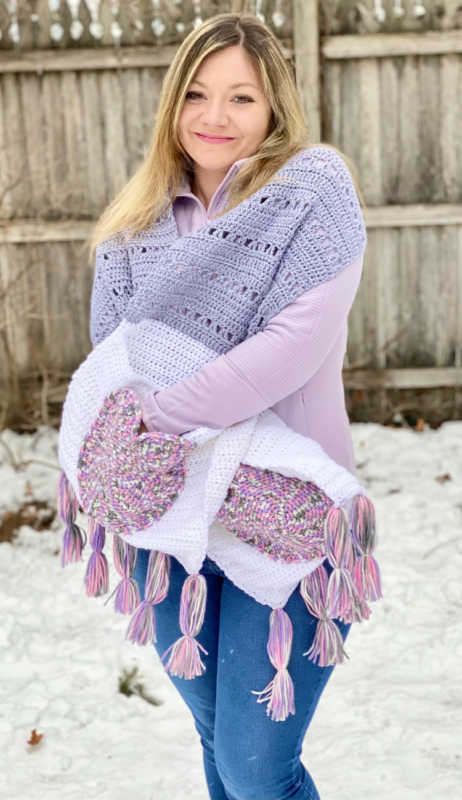
Here is the finished shawl!
I hope you enjoyed crocheting this shawl along with me today! If you love fun, free patterns like this one, then be sure to subscribe to my email list to keep up to date with all my latest patterns:
Also, please be sure to follow me on social media, and tag me in photos of your finished projects made using my patterns, so I can see your lovely work!
Don’t forget to pin it for later!
And you can find that ad-free PDF HERE!
COPYRIGHT: This pattern is owned by Crafty Kitty Crochet (Melissa Moore). Any reselling or distribution of this pattern is prohibited. Sale of items made using this pattern is welcomed, but I do ask that credit/a link be provided back to my site, craftykittycrochet.com.
Comments (2)
Patricia
February 8, 2023 at 7:36 pm
This is really pretty and different from other patterns that I have seen. I would like to make it but I do have a question. Does the chain 2 count as a stitch? Thank you for this pattern.
Patricia
Melissa
February 9, 2023 at 2:54 pm
Thank you so much Patricia, I’m happy to hear it! The chain 2 does not count as a stitch! You are so welcome and thank you! Happy Crocheting ~ Melissa