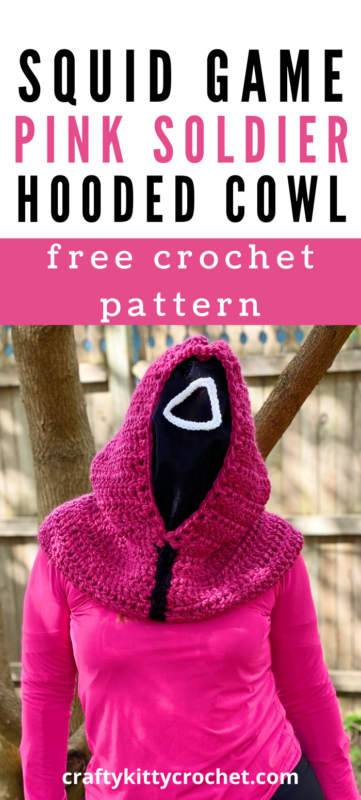
Pink Soldier Hooded Cowl – Crochet Pattern
Pin it for later!
Halloween is just around the corner – looking for a fast, easy, fun DIY costume that’s perfect for 2021? You’ve found it! With this Pink Soldier Hooded Cowl FREE pattern, you can throw together a great costume based on one of the biggest shows of the year: Squid Game! It’s been a top-rated show on Netflix recently, so you can be sure that lots of folks on your holiday gift list have seen it as well. So this would also make a perfect Christmas gift for fans of the show!!! It’s a functional fall and winter accessory that also hits the iconic look spot on!
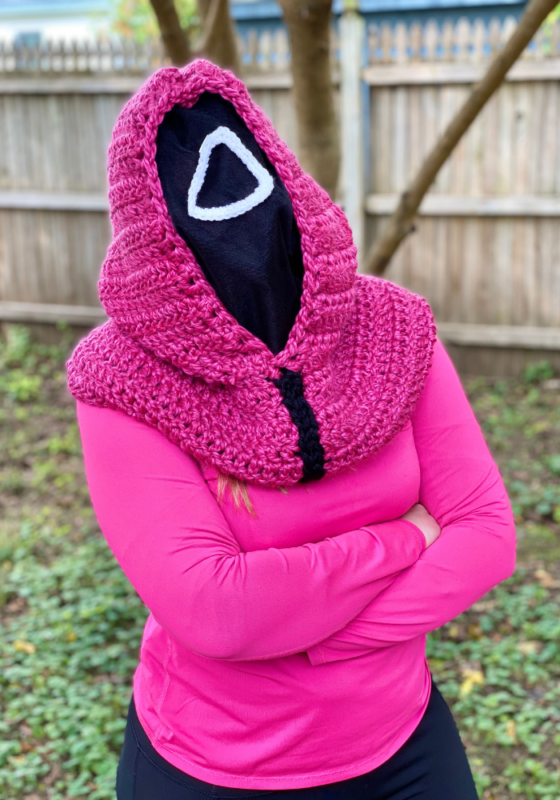
Pink Soldier Hooded Cowl
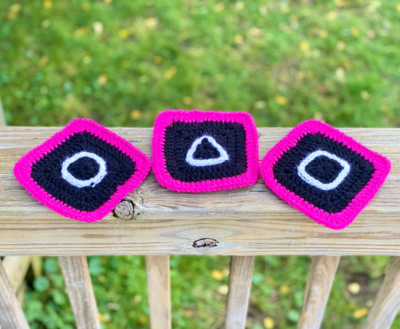
If you’ve seen my granny square pattern inspired by Squid Game, then you’ve probably figured it out that I’m a big fan of the show! The fact that it was less than 10 episodes, combined with the fact that it was impossible to stop watching, allowed me to binge watch the series in a matter of days. And based on what I’m seeing on social media, I’m guessing a lot of you crocheters out there enjoyed it, too – I feel like amigurumi Pink Soldiers are ALL over the place right now! So that’s why I wanted to come up with a quirky yet functional fashion accessory that’s great for Halloween, to give as a holiday gift, and more. And so this hooded cowl pattern was born!
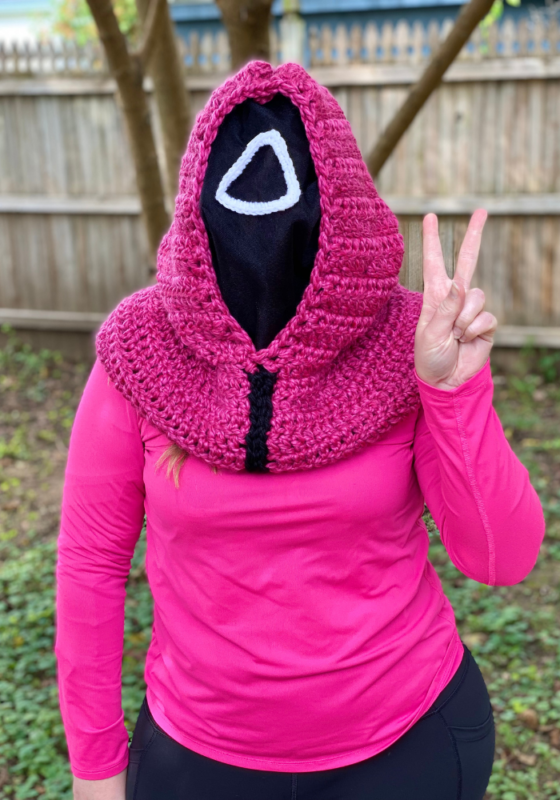
This was somewhat of an experimental piece for me, as I really wanted to feature the “mask” portion of the hood, yet wanted the mask to be actually wearable. I incorporated black tulle into the design, since it’s lightweight and somewhat see-through even when doubled up. That’s right – the mask on this hooded cowl is actually functional! And depending on how you make the hooded cowl, you can also remove the tulle so that you can machine/wash dry the hooded cowl, and/or just use it as a regular hooded cowl. Now, I wouldn’t recommend you do anything like drive or operate heavy machinery while wearing it, but you could totally wear it to show off to friends and still be able to have some visibility!
Speaking of not making the mask portion permanent, I’ve also included a way to be able to switch out shapes in case you’d like to switch up your “role” as a Pink Soldier depending on your mood. 🙂 I used Super Glue brand foam mounting tape squares to make the shape placements only semi-permanent. I got mine at my local Dollar Tree, but you can also get them on Amazon:
Supplies
N/P-15 10 mm crochet hook
H/8 5.0 mm crochet hook
About 310 yds of super bulky pink yarn (4 skeins of Loops & Threads Cozy Wool in Sangria used in photos)
About 10 yds of super bulky black yarn (Lion Brand Hometown USA in Oakland Black used in photos)
Less than 10 yds of medium weight white yarn per shape (Red Heart Super Saver in White used in photos)
½ yd of black tulle fabric
Black sewing thread or safety pins for attaching tulle
White sewing thread or Super Glue Foam Mounting Squares for attaching shapes
Yarn needle with large eye
Scissors
Abbreviations
*= indicates beginning/end of a section to be repeated
BLO = back loop only
Ch = chain
Dc = double crochet
FLO = front loop only
Hdc = half double crochet
Rep = repeat
Rnd(s) = round(s)
Sc = single crochet
Sl St = slip stitch
St(s) = stitch(es)
Gauge
2 dc and 1 row = about 1 inch
Size
One Size Fits Most for Teens/Adults:
Total length (top to bottom) – 21.5 inches
Length of Hood (opening to top) – 13 inches
Width – (from one side of outer edge of Hood to other side) – about 26 inches
How to Make This
Instructions
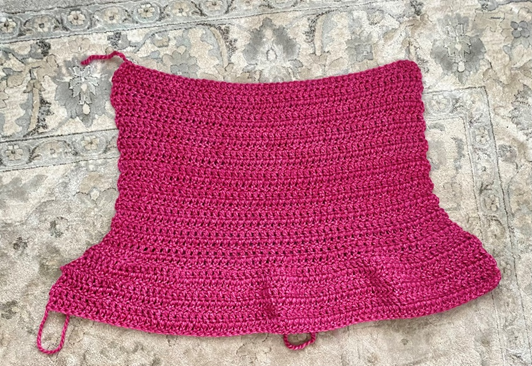
Body
With 10 mm hook and Sangria, ch 50.
Row 1 – dc in 2nd ch from hook and in each st across. Ch 2, turn (48 dc)
Rows 2 – 18 – dc in each st across. Ch 2, turn (48 dc)
Row 19 – *dc in next 5 sts, 2 dc in next st.* Rep from * to * 8 times. Ch 2, turn (56 dc)
Row 20 – *dc in next 6 sts, 2 dc in next st.* Rep from * to * 8 times. Ch 2, turn (64 dc)
Row 21 – *dc in next 7 sts, 2 dc in next st.* Rep from * to * 8 times. Ch 2, turn (72 dc)
Rows 22 – 25 – dc in each st across. Ch 2, turn. Do not ch 2 at end of Row 25. (72 dc)
Fasten off.
Cowl and Hood Shaping
Cowl
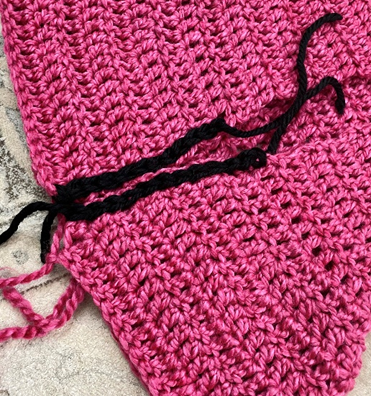
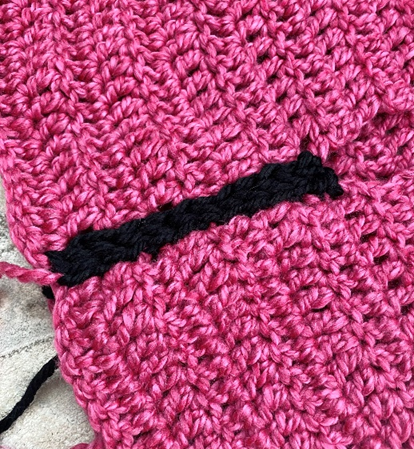
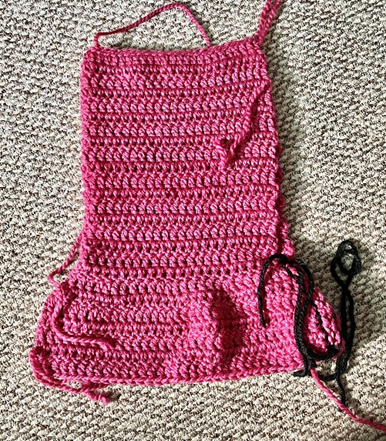
Attach Black at bottom edge of left side of Body with right side facing you (first photo below). Ch 1. Working along side edge, evenly make 11 sl sts from Rows 25 – 18 of Body (second photo). Fasten off. Attach Black at edge of Row 18 on right side of Body; evenly make 11 sl sts downside edge, down to Row 25 (third photo).
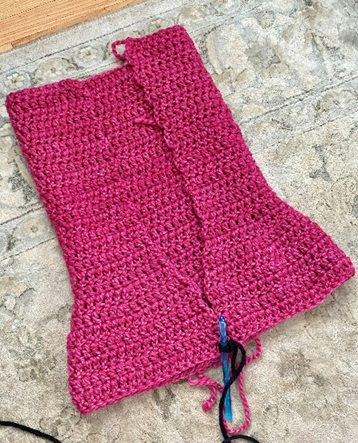

Fasten off, leaving long tail for sewing. Thread long tail on yarn needle and sew through sl sts of left and ride sides to attach Cowl (first photo below; second photo shows finished process).
Hood
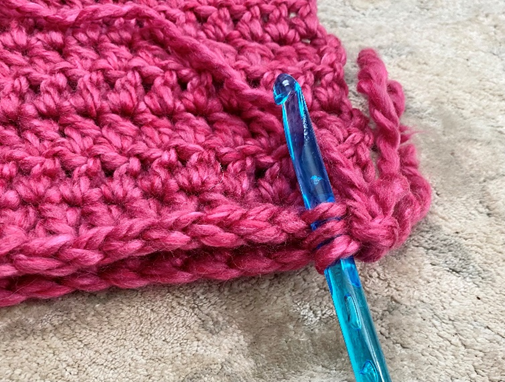
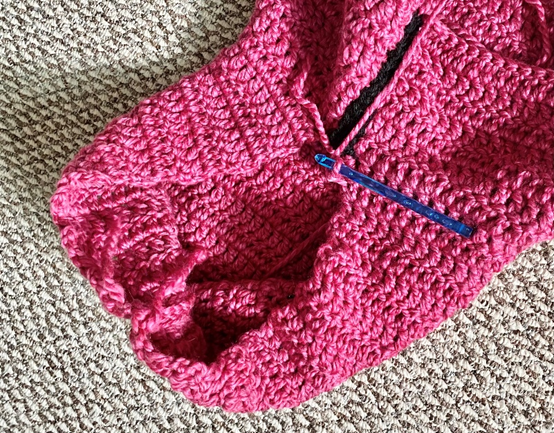
Turn piece inside out and fold piece in half at top (first rows made in Body). At outer edge, insert hook through BLO of st closest to you, and through FLO of st furthest away from you (first photo below). Ch 1, sl st through loops on hook, and working through sts in same way, sl st across edges to attach top of Hood.
Fasten off. (Second photo below shows attached Hood.)
Hood Edging
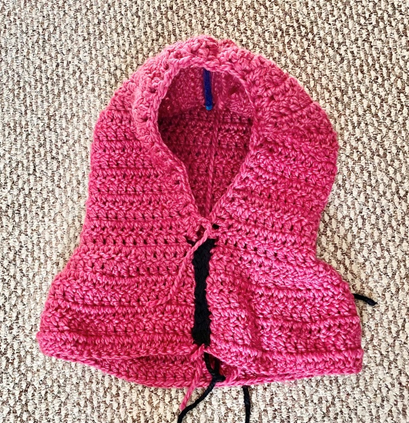
With piece right side out, attach Sangria at bottom of left side of Hood (first photo below). Ch 2; evenly make 19 dc along left side edge of Hood until top-center is reached. Turn piece. Working down right side of Hood, evenly make 19 dc down side edge until bottom-center is reached. Join with sl st to first dc of Hood Edging.
Fasten off. Weave in all ends. (Second photo shows finished piece.)
Shapes
Circle
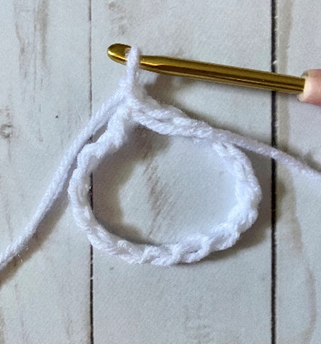
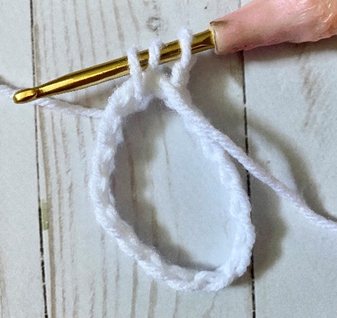
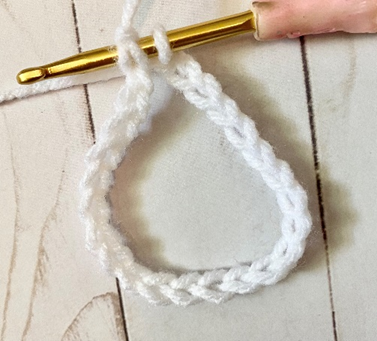
With 5 mm hook and White, ch 18. Join to first ch to make a ring (first photo below). Ch 1.
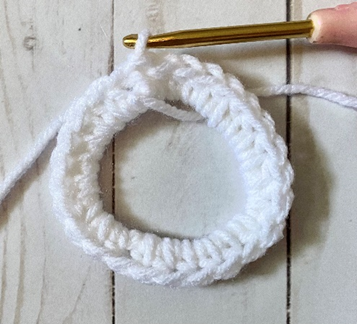
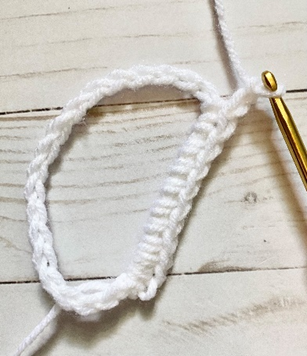
Rnd 1 – 26 hdc inside ring (second photo shows hdc being worked inside ring). Join with sl st to first sc of rnd. (26 hdc)
Fasten off, weave in all ends. (Third photo shows finished Circle.)
Triangle
With 5 mm hook and White, ch 24. Join with sl st to first ch to make a ring (first photo below). Ch 1.
Rnd 1 – *sc 10 inside ring, ch 2 (second photo below).* Rep from * to * once more. Sc 10 inside ring, join with sl st to first sc of rnd. Stretch sts as needed to form triangle shape. (30 sc)
Fasten off, weave in all ends. (Third photo shows finished Triangle.)

Square
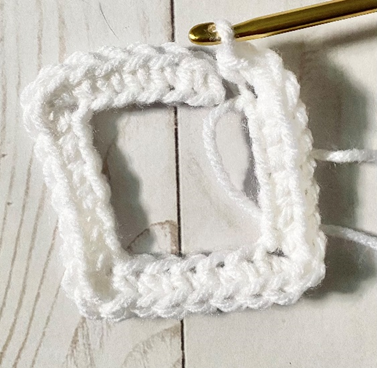
With 5 mm hook and White, ch 29.
Row 1 – sc in 2nd ch from hook, and in next 5 sts. 3 sc in next st. Sc in next 6 sts, 3 sc in next st. Rep from * to * two more times (first photo below). Join with sl st to first sc of row. (36 sc)
Fasten off, weave in all ends. (Second photo shows finished Square.)

Mask
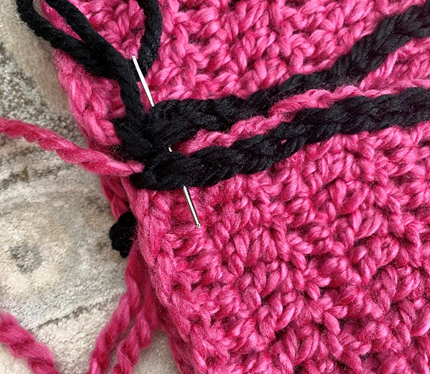
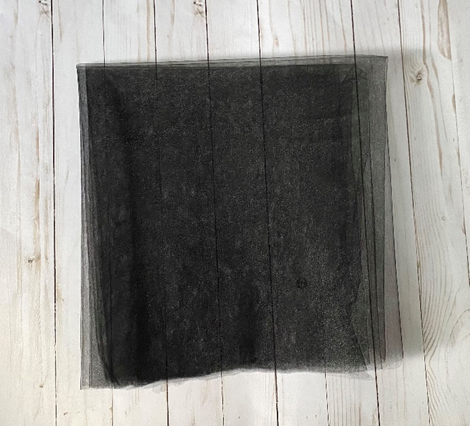
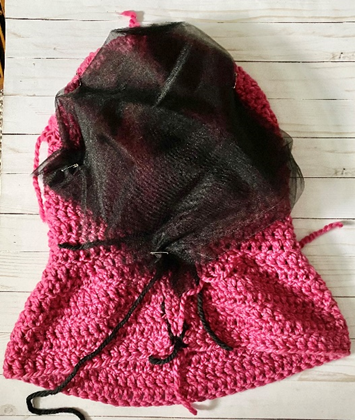
Fold black tulle in half 3 times and shape into a 15 inch square (first photo below). Turn hooded cowl inside out. Arrange tulle in diamond shape on inside of hood, covering opening of Hood. Sew edges to hood using thread, or use safety pins to attach at all four points of diamond shape, and in between points (second photo below).
Finishing
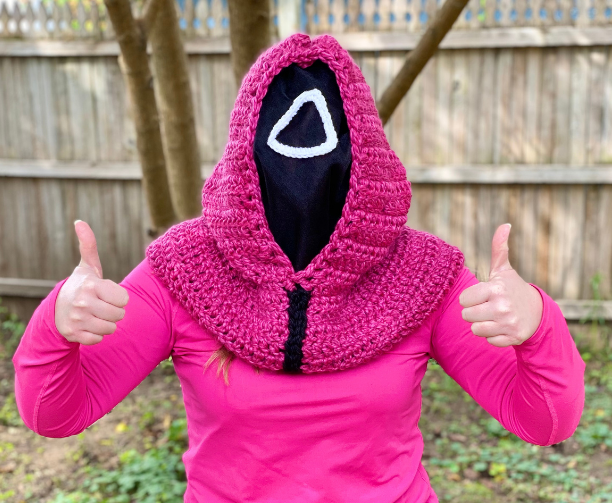
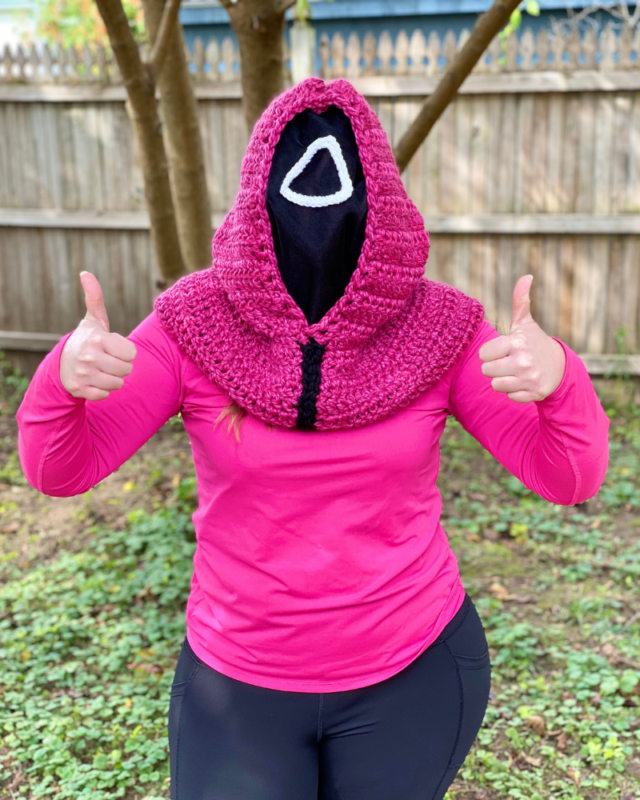
Turn Hooded Cowl right side out (first photo below). Arrange shape of choice on top-center of Mask portion of hood. Sew in place using thread, or use foam mounting squares (cut up to fit shapes) to attach to Mask for a non-permanent attachment (second photo below).
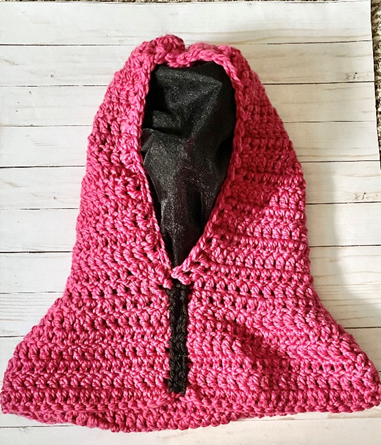
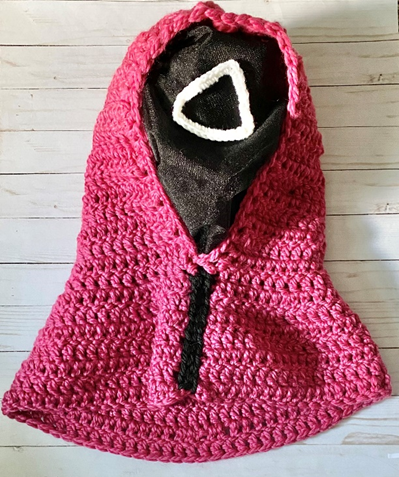
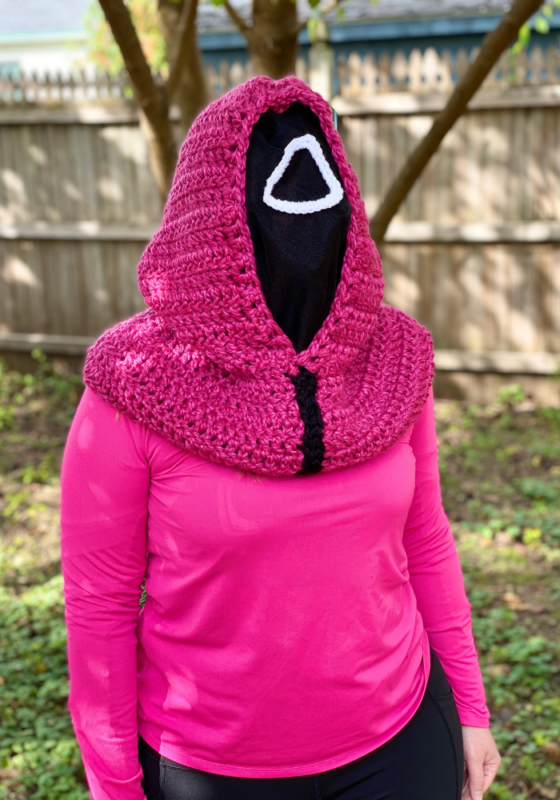
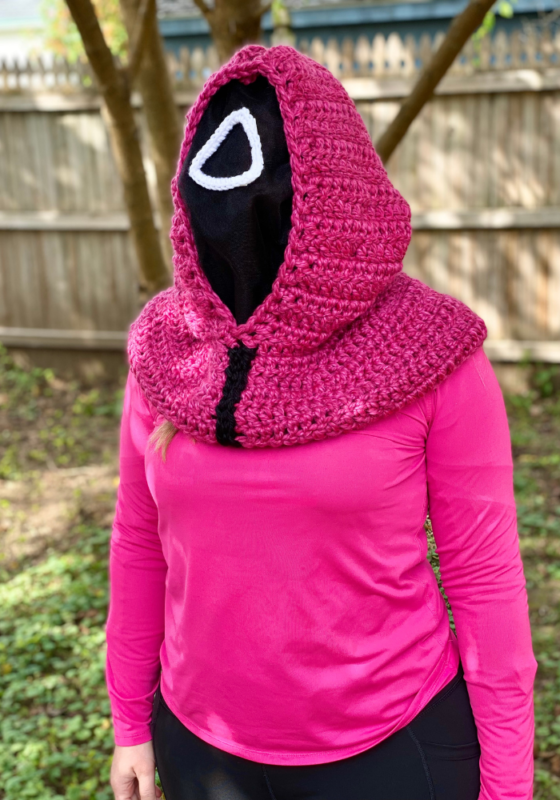
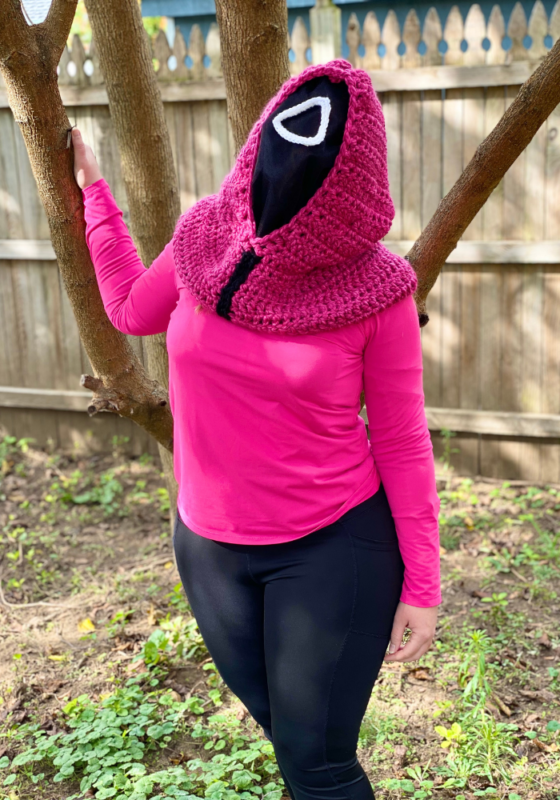
Here is the finished hooded cowl!
I hope you enjoyed crocheting this hooded cowl along with me today. If you love fun, free patterns like this one, then please be sure to sign up for my email list to keep up to date with all my latest designs:
Also, please be sure to follow me on social media, and tag me in photos of your finished projects made from my patterns, so I can see your lovely work!
Don’t forget to pin it for later HERE!
Happy Crocheting!
COPYRIGHT:
This pattern is owned by Crafty Kitty Crochet (Melissa Moore). Any reselling or distribution of this pattern is prohibited. Sale of items made using this pattern is welcomed, but I do ask that credit/a link be provided back to my site, craftykittycrochet.com.