
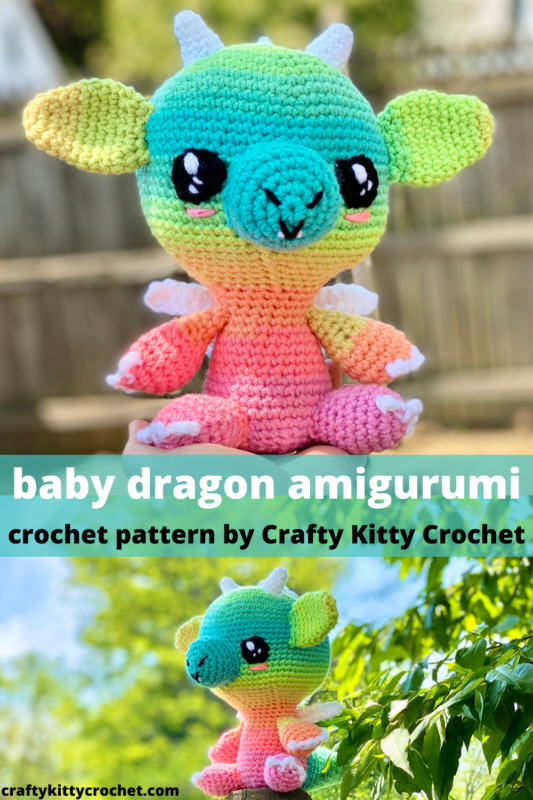
Buffy the Baby Dragon – Crochet Pattern
Pin it for later!
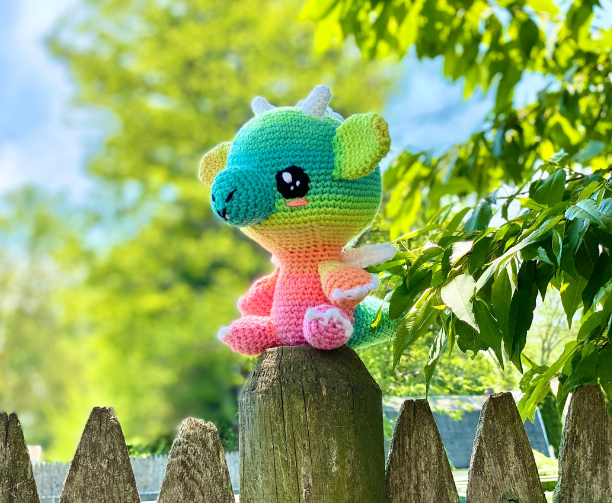
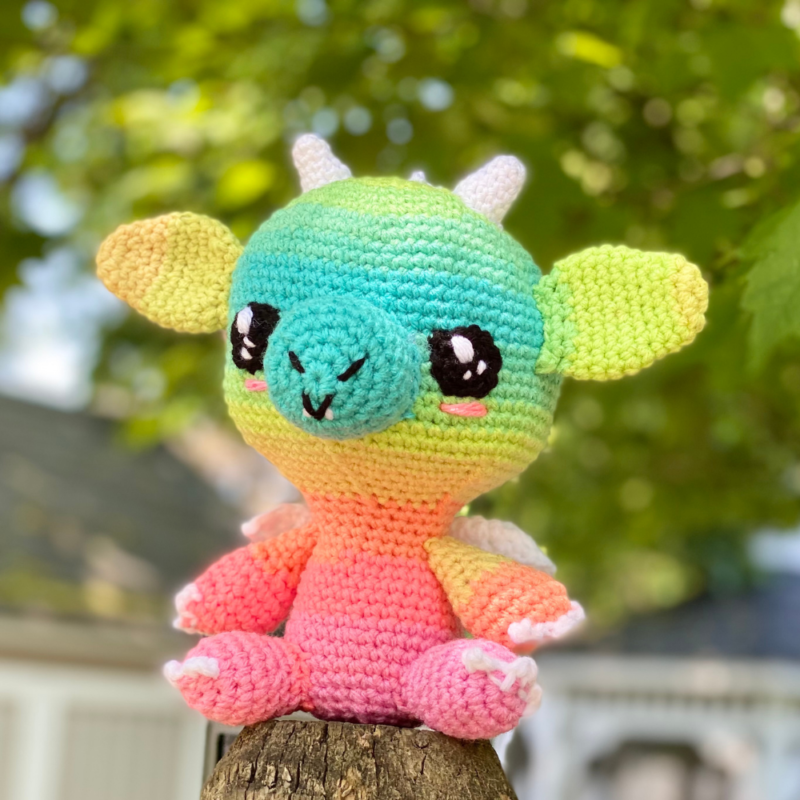
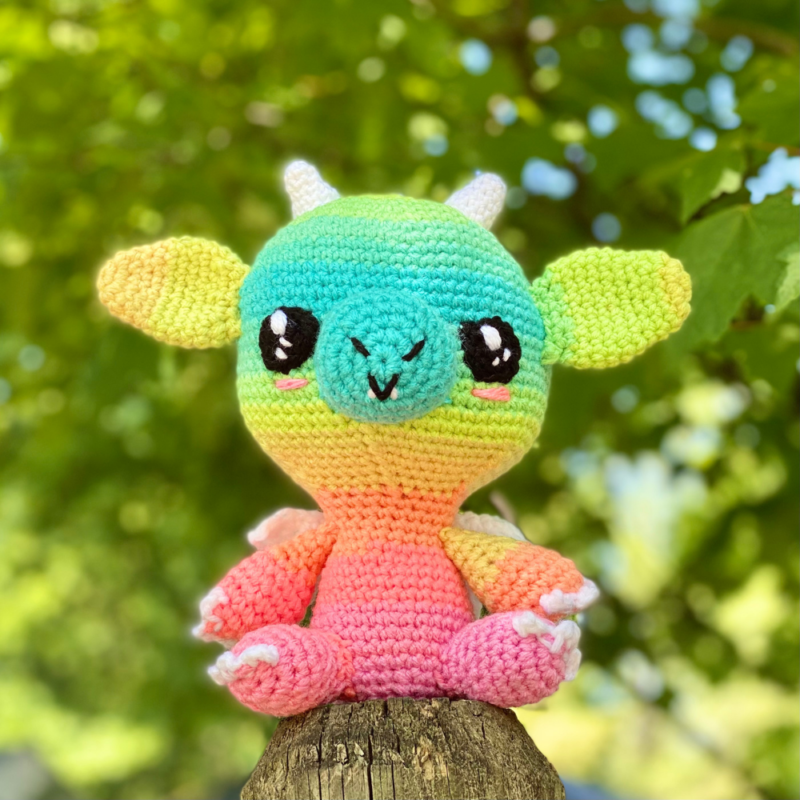
This adorable tiny dragon is sure to be one of your favorite amigurumi makes this year! This free pattern uses a handful of basic stitches, so this is great for advanced beginners and veteran crocheters alike. It also calls for Red Heart Retro Stripes yarn – a color way that has been incredibly trendy this season! This bright, cute baby dragon is colorful, cheery, and great for kids of all ages! Use it as whimsical, summery decor, or gift it as a beloved stuffed toy. Its big eyes and tiny claws are sure to paw their way into your heart!
Buffy the Baby Dragon
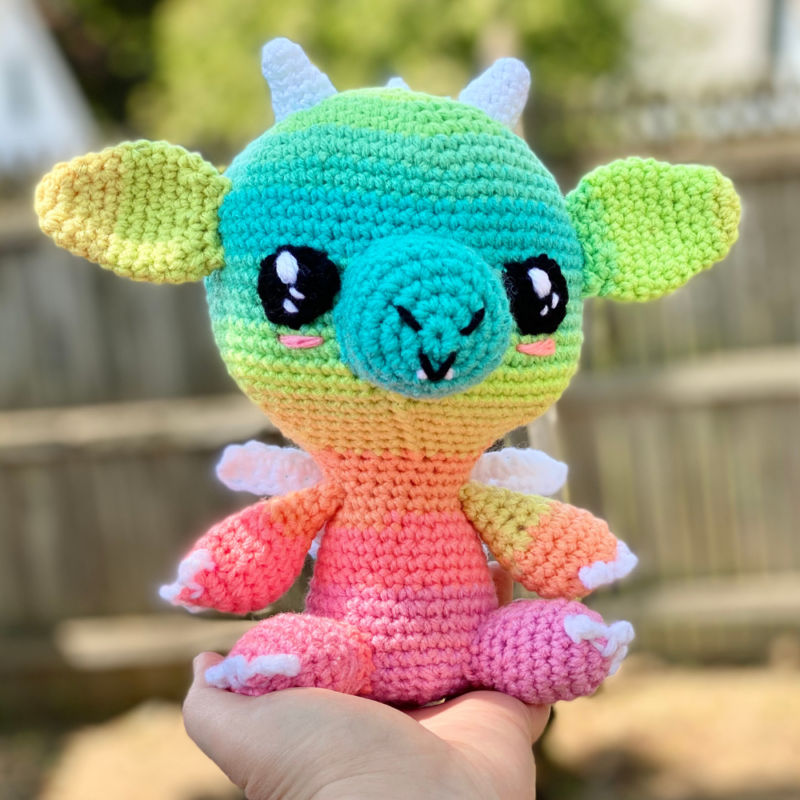
If you enjoy amigurumi patterns with a dash of whimsy and a big helping of cuteness, then you are sure to love this easy baby dragon pattern! (By the way, you can check out more of my amigurumi HERE!) And as many of you may have already guessed, this sweet tiny toy has a very special namesake. That’s right, my very own puppy, Buffy, was the inspiration for the name of this pattern! Buffy often reminds me of a small, cute, and fierce untamed little beastie, so I felt that the name was very fitting! And if you’re looking for fun ways to use the overwhelmingly popular “Retro Stripes” color way of Red Heart Stripes yarn, then this pattern – which uses slightly less than 1 skein – is sure to please!
Looking for the ad-free PDF pattern? Find it in my shop HERE!
Supplies
Size D / 3 – 3.25 mm crochet hook
1 skein of Red Heart Stripes in Retro Stripes (about 200 yds needed)
1 skein of Red Heart Super Saver in White (about 50 yds needed)
1 skein of Red Heart Super Saver in Black (about 10 yds needed)
Fiberfill Stuffing
Yarn Needle
Scissors
Straight pins (optional)
Abbreviations
*= indicates beginning/end of a section to be repeated
Ch = chain
Rem = remaining
Rep = repeat
Rnd(s) = round(s)
Sc = single crochet
Sc2tog = single crochet 2 together
Sl St = slip stitch
St(s) = stitch(es)
Gauge
Exact gauge is not essential to this project.
Size
Finished size is about 9 inches length
How to Make This
Instructions
Head & Body
This piece is worked in continuous rnds; do not join. You may wish to use a stitch marker and move it up and the beginning of each new rnd.
Head
Rnd 1 – with Retro Stripes, make a magic ring. 6 sc in ring. (6 sc)
Rnd 2 – 2 sc in each st around. (12 sc)
Rnd 3 – 2 sc in next st, sc in next st; rep around. (18 sc)
Rnd 4 – 2 sc in next st, sc in next 2 sts; rep around. (24 sc)
Rnd 5 – 2 sc in next st, sc in next 3 sts; rep around. (30 sc)
Rnd 6 – 2 sc in next st, sc in next 4 sts; rep around. (36 sc)
Rnd 7 – 2 sc in next st, sc in next 5 sts; rep around. (42 sc)
Rnd 8 – 2 sc in next st, sc in next 6 sts; rep around. (48 sc)
Rnd 9 – 2 sc in next st, sc in next 7 sts; rep around. (54 sc)
Rnd 10 – 2 sc in next st, sc in next 8 sts; rep around. (60 sc)
Rnd 11 – 2 sc in next st, sc in next 9 sts; rep around. (66 sc)
Rnds 12 – 26 – sc in each st around. Begin stuffing. (66 sc)
Rnd 27 – sc2tog over next 2 sts, sc in next 9 sts; rep around (60 sc)
Rnd 28 – sc2tog over next 2 sts, sc in next 8 sts; rep around (54 sc)
Rnd 29 – sc2tog over next 2 sts, sc in next 7 sts; rep around (48 sc)
Rnd 30 – sc2tog over next 2 sts, sc in next 6 sts; rep around (42 sc)
Rnd 31 – sc2tog over next 2 sts, sc in next 5 sts; rep around (36 sc)
Rnd 32 – sc2tog over next 2 sts, sc in next 4 sts; rep around (30 sc)
Rnd 33 – sc2tog over next 2 sts, sc in next 3 sts; rep around (24 sc)
Do not fasten off.
Body
Rnds 34 – 37 – sc in each st around. (24 sc)
Rnd 38 – 2 sc in next st, sc in next 3 sts; rep around. (30 sc)
Rnds 39 – 42 – sc in each st around. (30 sc)
Rnd 43 – 2 sc in next st, sc in next 4 sts; rep around. (36 sc)
Rnds 44 – 47 – sc in each st around. Continue stuffing. (36 sc)
Rnd 48 – sc2tog over next 2 sts, sc in next 4 sts; rep around. (30 sc)
Rnd 49 – sc2tog over next 2 sts, sc in next 3 sts; rep around. (24 sc)
Rnd 50 – sc2tog over next 2 sts, sc in next 2 sts; rep around. Finish stuffing. (18 sc)
Rnd 51 – sc2tog over next 2 sts, sc in next st; rep around. (12 sc)
Rnd 52 – sc2tog around. (6 sc)
Rnd 53 – sc2tog over next 2 sts, leave rem sts unworked. (5 sc)
Fasten off, leaving end long enough to sew up rem gap left over from Rnd 53.
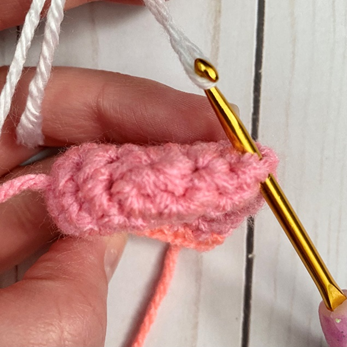
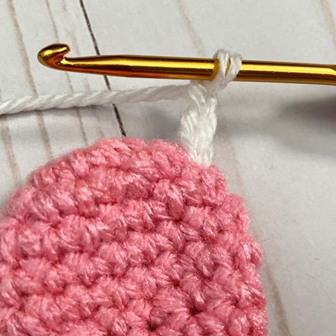
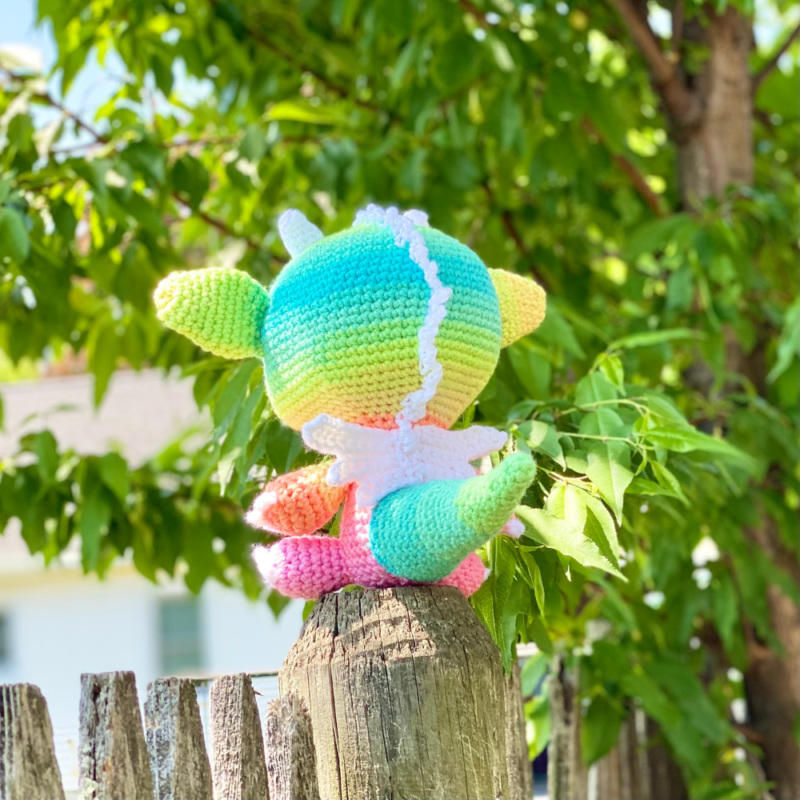
Spikes
You may wish to use straight pins to mark area where Spikes should be made, in order to keep them straight/even.
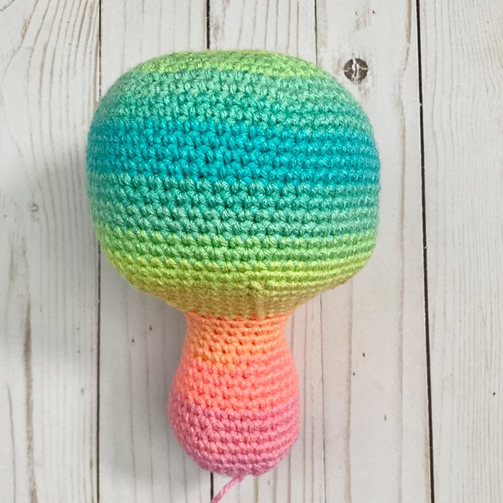
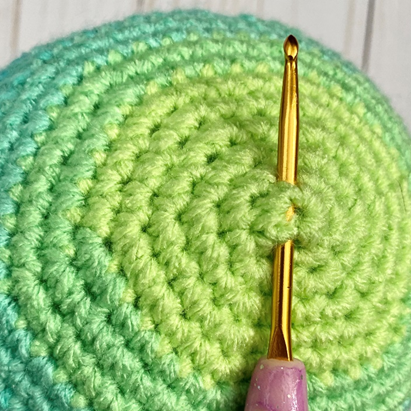
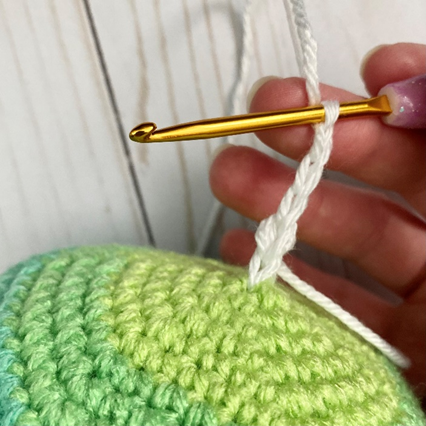
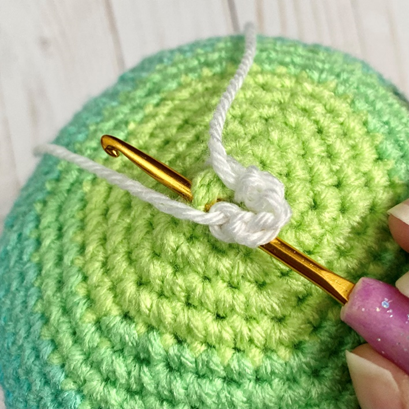
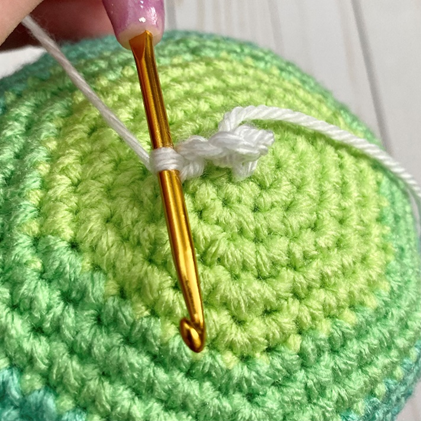
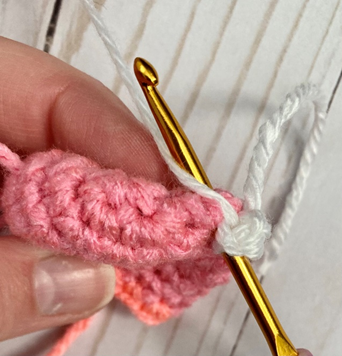
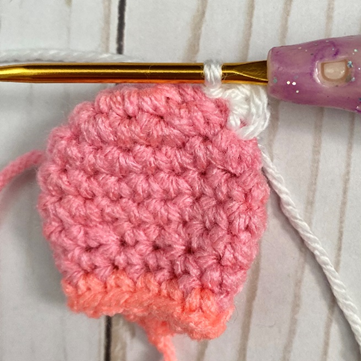
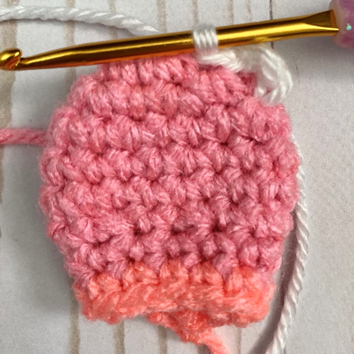
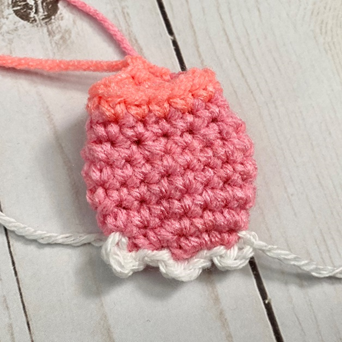
Attach White around sc st near first rnd of head/body (first photo below). *Ch 5 (second photo below), sl st around a sc below (third photo below). Sl st again around a sc st below (fourth photo).* Rep from * to * down Head and 2/3 of Body (leaving room for Tail to be sewn on at bottom of Body). Fasten off.
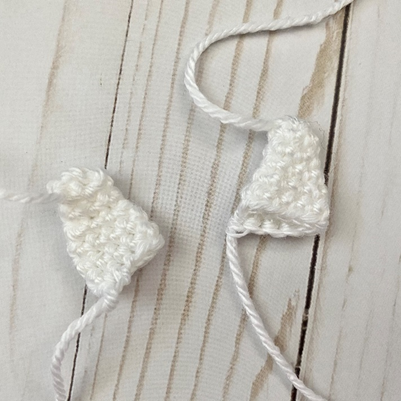
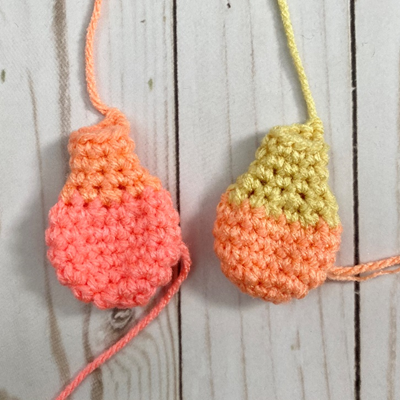
Horn (make 2)
This piece is worked in continuous rnds; do not join. You may wish to use a stitch marker and move it up and the beginning of each new rnd.
Rnd 1 – with White, make a magic ring. 6 sc in ring. (6 sc)
Rnds 2 -3 – sc in each st around. (6 sc)
Rnd 4 – 2 sc in next st, sc in next st; rep around. (9 sc)
Rnds 5 – 6 – sc in each st around. (9 sc)
Fasten off, leaving long tail for sewing.
Ear (make 2)
This piece is worked in continuous rnds; do not join. You may wish to use a stitch marker and move it up and the beginning of each new rnd.
Rnd 1 – with Retro Stripes, make a magic ring. 6 sc in ring. (6 sc)
Rnd 2 – 2 sc in each st around. (12 sc)
Rnds 3 – 5 – sc in each st around. (12 sc)
Rnd 6 – 2 sc in next st, sc in next st; rep around. (18 sc)
Rnds 7 – 10 – sc in each st around. (18 sc)
Rnd 11 – sc2tog over next 2 sts, sc in next st; rep around. (12 sc)
Rnd 12 – sc in each st around. (12 sc)
Fasten off, leaving long tail for sewing.
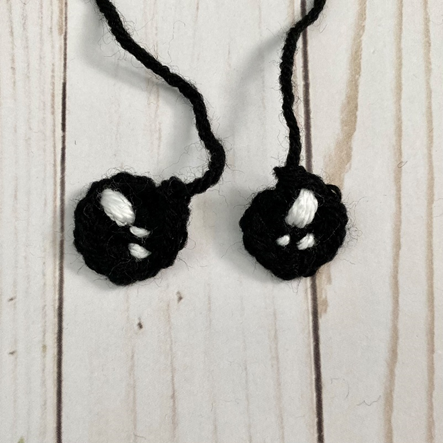
Eye (make 2)
This piece is worked in continuous rnds; do not join. You may wish to use a stitch marker and move it up and the beginning of each new rnd.
Rnd 1 – with Black, make a magic ring. 6 sc in ring. (6 sc)
Rnd 2 – 2 sc in each st around. (12 sc)
Fasten off, leaving long tail for sewing.
Eye Sparkle
With White on needle, make several vertical lines at top of Eye for large sparkle. Make smaller lines at bottom of Eye for small sparkles. Rep on other Eye. Tie off ends on back of Eyes.
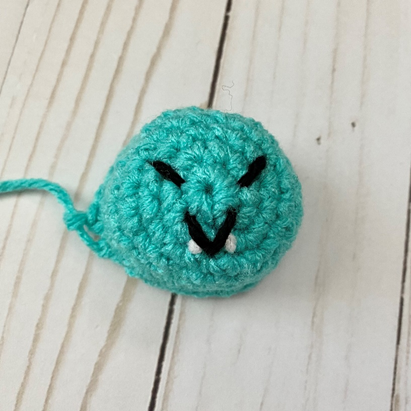
Snout
This piece is worked in continuous rnds; do not join. You may wish to use a stitch marker and move it up and the beginning of each new rnd.
Rnd 1 – with Retro Stripes, make a magic ring. 6 sc in ring. (6 sc)
Rnd 2 – 2 sc in each st around. (12 sc)
Rnd 3 – 2 sc in next st, sc in next st; rep around. (18 sc)
Rnd 4 – 2 sc in next st, sc in next 2 sts; rep around. (24 sc)
Rnds 5 – 8 – sc in each st around. (24 sc)
Fasten off, leaving long tail for sewing.
Nose, Mouth & Fangs
With Black on needle, make two small lines on Snout for Nose. Make a small v beneath for Mouth. With White on needle, make two small lines below Mouth for Fangs. Tie off ends on back of Snout.
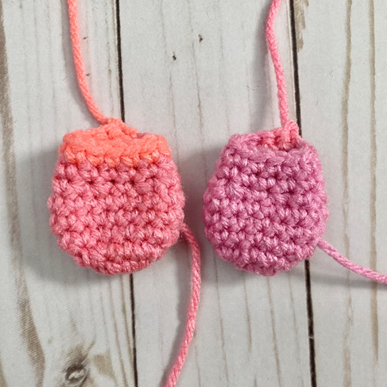
Arm (make 2)
This piece is worked in continuous rnds; do not join. You may wish to use a stitch marker and move it up and the beginning of each new rnd.
Rnd 1 – with Retro Stripes, make a magic ring. 6 sc in ring. (6 sc)
Rnd 2 – 2 sc in each st around. (12 sc)
Rnd 3 – 2 sc in next st, sc in next st; rep around. (18 sc)
Rnds 4 – 6 – sc in each st around. (18 sc)
Rnd 7 – sc2tog over next 2 sts, sc in next st; rep around. (12 sc)
Rnd 8 – sc2tog over next 2 sts, sc in next st; rep around. (8 sc)
Rnds 9 – 11 – sc in each st around. (8 sc)
Fasten off, leaving long tail for sewing.
Leg (make 2)
This piece is worked in continuous rnds; do not join. You may wish to use a stitch marker and move it up and the beginning of each new rnd.
Rnd 1 – with Retro Stripes, make a magic ring. 6 sc in ring. (6 sc)
Rnd 2 – 2 sc in each st around. (12 sc)
Rnd 3 – 2 sc in next st, sc in next st; rep around. (18 sc)
Rnds 4 – 6 – sc in each st around. (18 sc)
Rnd 7 – sc2tog over next 2 sts, sc in next st; rep around. (12 sc)
Rnds 8 – 9 – sc in each st around. (12 sc)
Fasten off, leaving long tail for sewing.
Claw (add to each Arm and Leg)
Attach White around a sc st near bottom of Arm or Leg (first photo below). *Ch 3 (second photo), sl st around next sc st (third and fourth photos). Sl st around next sc st (fifth photo).* Rep from * to * to make 4 claws. (Sixth photo shows finished Claws.)
Fasten off.
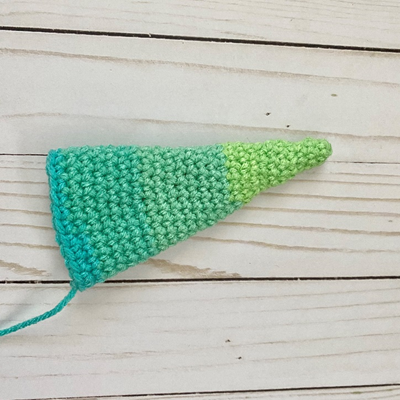
Tail
This piece is worked in continuous rnds; do not join. You may wish to use a stitch marker and move it up and the beginning of each new rnd.
Rnd 1 – with Retro Stripes, make a magic ring. 6 sc in ring. (6 sc)
Rnds 2 – 4 – sc in each st around. (6 sc)
Rnd 5 – 2 sc in next st, sc in next st; rep around. (9 sc)
Rnds 6 – 8 – sc in each st around. (9 sc)
Rnd 9 – 2 sc in next st, sc in next 2 sts; rep around. (12 sc)
Rnds 10 – 12 – sc in each st around. (12 sc)
Rnd 13 – 2 sc in next st, sc in next 3 sts; rep around. (15 sc)
Rnds 14 – 16 – sc in each st around. (15 sc)
Rnd 17 – 2 sc in next st, sc in next 4 sts; rep around. (18 sc)
Rnds 18 – 20 – sc in each st around. (18 sc)
Rnd 21 – 2 sc in next st, sc in next 5 sts; rep around. (21 sc)
Rnds 22 – 24 – sc in each st around. (21 sc)
Rnd 25 – 2 sc in next st, sc in next 6 sts; rep around. (24 sc)
Rnds 26 – 28 – sc in each st around. (24 sc)
Fasten off, leaving long tail for sewing.
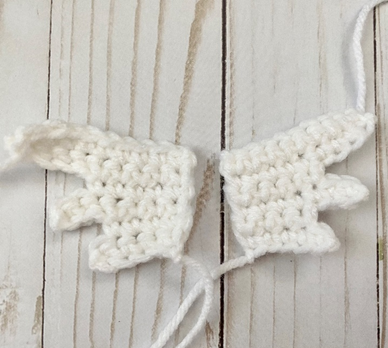
Wing (make 2)
With White, ch 6.
Row 1 – sc in 2nd ch from hook, and in each st across. Ch 1, turn (5 sc)
Row 2 – sc in next 4 sts. Ch 4, turn. (4 sc)
Row 3 – sc in 2nd ch from hook, and in each st across. Ch 1, turn. (7 sc)
Row 4 – sc in next 5 sts. Ch 5, turn. (5 sc)
Row 5 – sc in 2nd ch from hook and in each st across. Ch 1, turn (9 sc)
Row 6 – sc in each st across. (9 sc)
Fasten off, leaving long tail for sewing.
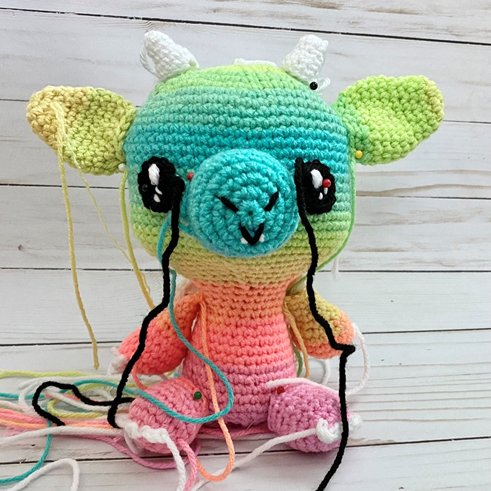
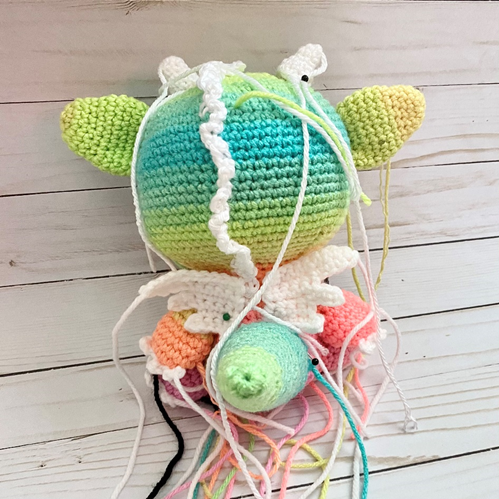
Finishing
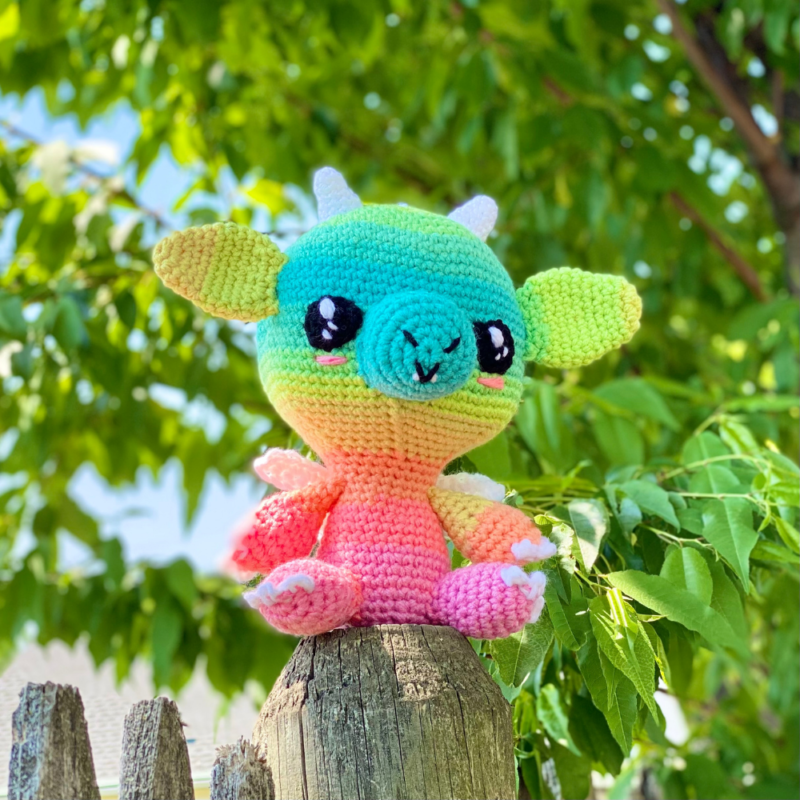
Stuff Horns, Snout, Arms, Legs, and Tail. Press Ears flat. Arrange all pieces as seen in photos below. You may wish to use straight pins to keep pieces in place while sewing. Sew all pieces to Head/Body. With leftover pink or coral colored ends, make small lines under Eyes for Blush. Weave in all ends or tie off knots and hide inside sts.
I hope you enjoyed this Baby Dragon Amigurumi Pattern! Want to stay up to date on my future designs? Then please be sure to sign up for my email list:
Also, please be sure to follow me on social media, and tag me in photos of your finished projects made from my patterns, so I can see your lovely work!
Don’t forget to pin it for later HERE!
And you can find that ad-free PDF pattern HERE!
Happy Crocheting!
COPYRIGHT:
This pattern is owned by Crafty Kitty Crochet (Melissa Moore). Any reselling or distribution of this pattern is prohibited. Sale of items made using this pattern is welcomed, but I do ask that credit/a link be provided back to my site, craftykittycrochet.com.
Comments (9)
10 Free Amigurumi Patterns You'll Love- 2021 – apronbasket .com
May 29, 2021 at 10:21 pm
[…] Click For Free Pattern […]
Amigurumi Golden Puppy – Crochet Pattern ~ Crafty Kitty Crochet
January 9, 2022 at 8:57 pm
[…] for one of my fave Retro Stripes projects to date: an amigurumi dragon that you may know as Buffy the Baby Dragon! We may have just adopted her last year, but Buffy has already quickly taken the center stage of my […]
Archana
February 26, 2022 at 7:27 pm
Sooo cute amigurami .. thanks a ton for the pattern dear ❤️
Melissa
March 1, 2022 at 12:29 pm
Awww you are so welcome and thank YOU! Hope you enjoy it!! ~ Melissa
AMAZING AMI LINK PARTY #4 – Cute and Easy Amigurumi Toys Patterns
April 22, 2022 at 5:52 am
[…] Buffy the Baby Dragon by Crafty Kitty […]
AMAZING AMI LINK PARTY #4 – Cute and Easy Amigurumi Toys Patterns to Crochet – Anvi’s Granny Handicrafts
June 23, 2022 at 7:45 am
[…] Buffy the Baby Dragon by Crafty Kitty […]
17 Free Crochet Dragon Patterns – Crochet Scout
July 12, 2023 at 12:37 am
[…] Get the Pattern […]
Dragon Crochet Patterns – 20+ Free Designs for Fantasy Lovers
January 20, 2026 at 6:21 am
[…] More at: Crafty Kitty CrochetFREE […]
10 Dragon Crochet Pattern Free Ideas – Cloudy Yarn
February 11, 2026 at 3:46 am
[…] Buffy the Baby Dragon is a smaller, super cute project worked in aran-weight Red Heart Super Saver solids and stripes with a 3.25 mm hook. The body, limbs, wings, and tail are all straightforward amigurumi shapes, so this is a great first “full” dragon if you’re comfortable with magic rings and basic increases. The self-striping yarn does a lot of color work for you, giving Buffy a fun, multi-tone body without endless ends to weave. Find the complete written pattern with photos on the Crafty Kitty Crochet blog Tutorial. […]