
Amigurumi Candy Corn Cow – Crochet Pattern
Pin it for later!
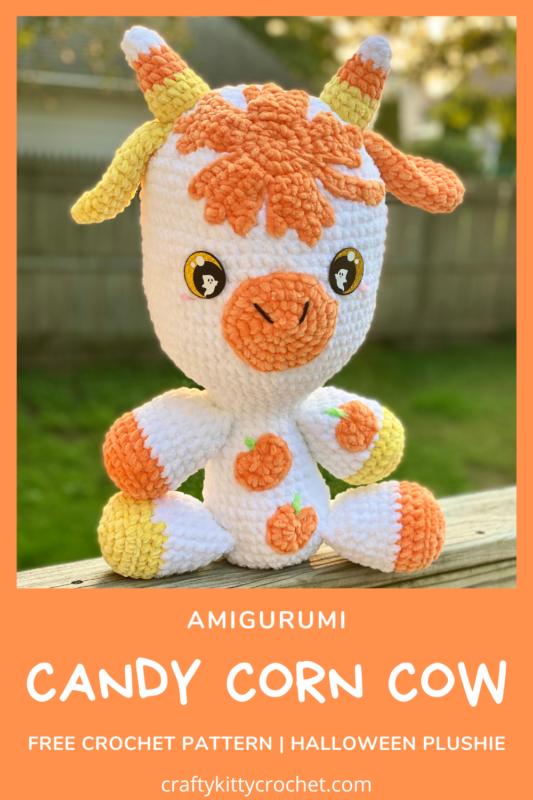
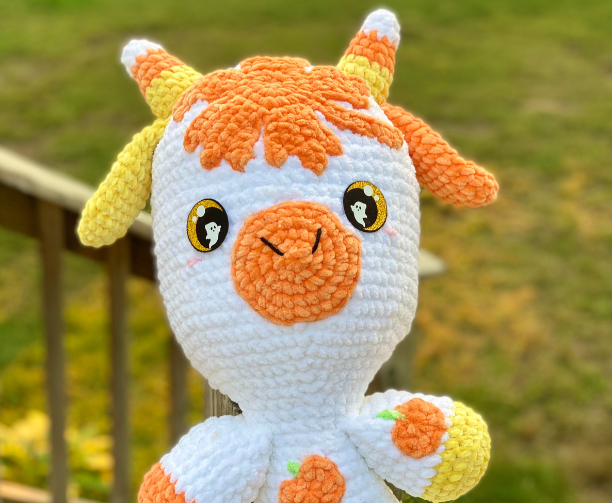
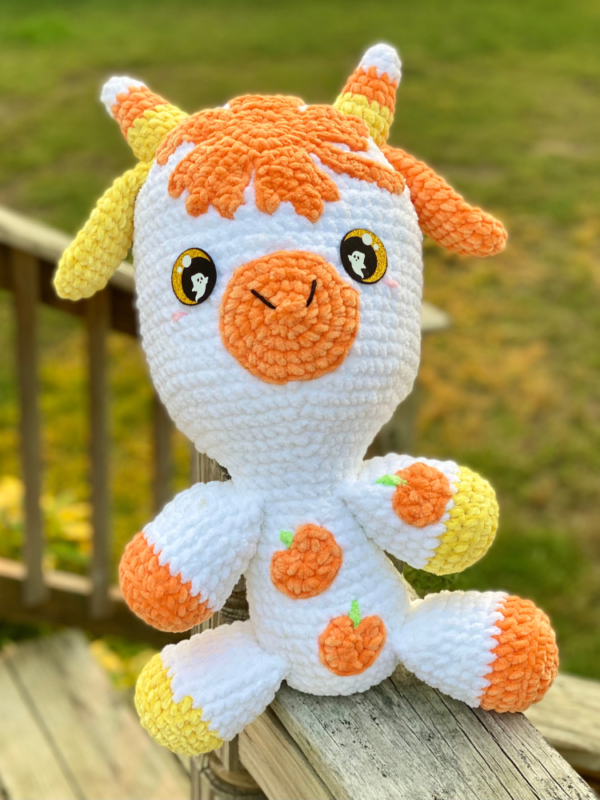
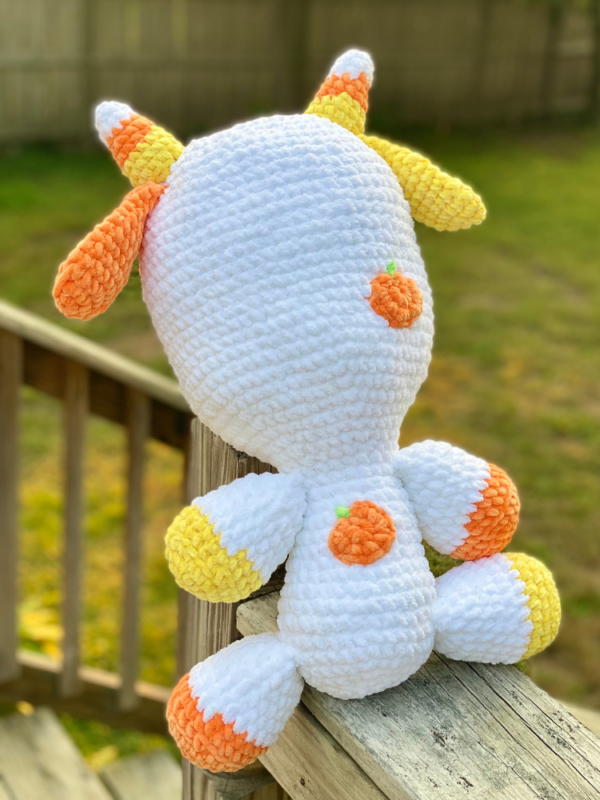
It’s candy corn season, and what better way to celebrate than to crochet this kawaii, easy to make Cow Plushie?! Accent your farm fresh friend with tiny pumpkins, a huge maple leaf, and most importantly – candy corn horns! This is the ultimate stuffed animal for autumn and Halloween season, and is simply perfect to use as cute fall decor, gift as a cherished stuffed animal, or to sell at craft fairs and fall markets! This squishy cow is sure to be the perfect cute critter for spooky season!
Candy Corn Cow
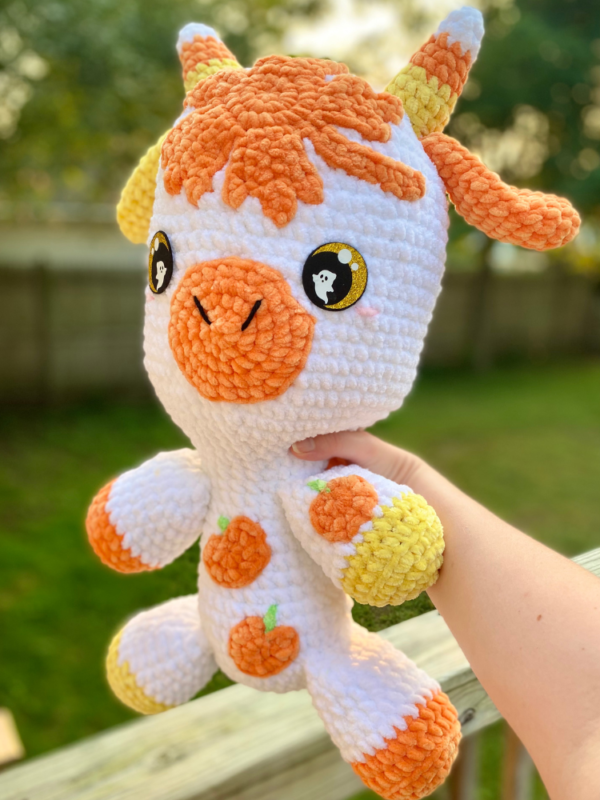
You might be familiar with my Cherry Blossom Cow, who served as the base cow for this Halloween version! Well, I couldn’t just stop at candy corns – I had to add in many other fall icons as well. So this cow is the total package for fall! What an excellent companion it would make to accompany you on hayrides, apple picking, trick or treating, and the like! Candy corn may be a controversial candy, but I think we can all agree that no matter what your stance on it is, this little cow wears it well!
For the jumbo version, I used a mix of Big Twist Cuddle, Premier Just Chenille, and Premier Parfait Chunky for this cutie! As a standard, you can’t go wrong with Premier Parfait Chunky for plushies!! Find some on Amazon HERE!
Guess what? On October 20, 2022 I have been featured in Itchin’ for some Stitchin’s Halloween Blog Hop, go to this page to retrieve the coupon code for the free PDF pattern:
Then use that coupon code to download the free pattern!
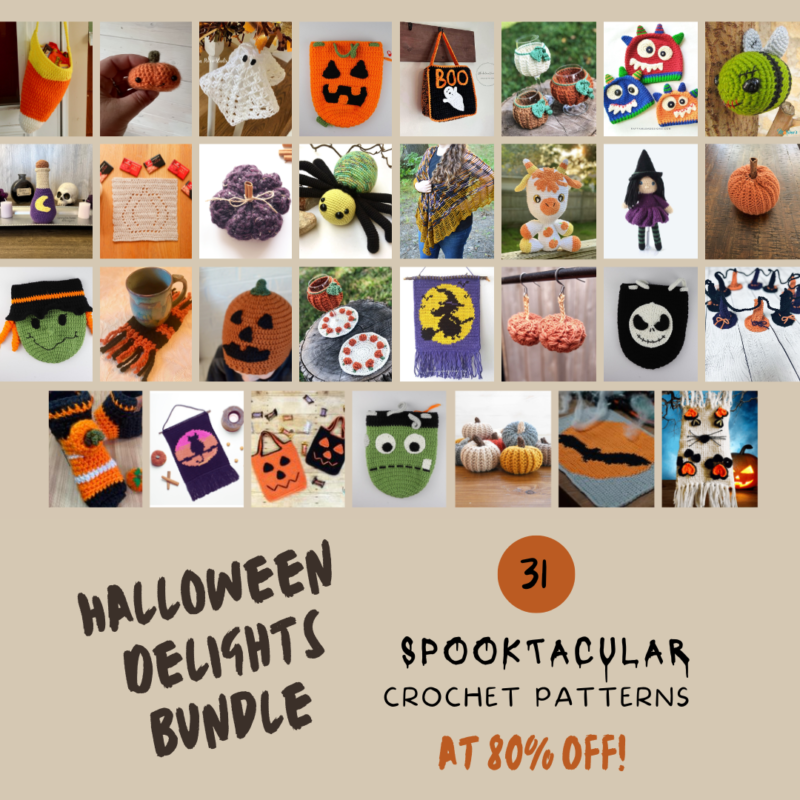
Want all the Halloween Delights patterns at once? There’s a bundle for that! Just grab your copy using my affiliate link:
Supplies
Regular Size:
Size D / 3 – 3.25 mm crochet hook
Medium weight yarn in white (about 200 yds needed)
Medium weight yarn in yellow (about 50 yds needed)
Medium weight yarn in orange (about 100 yds needed)
Medium weight yarn in green (less than 5 yds needed)
1 inch felt eyes
Large Size:
Size 7 – 4.5 mm crochet hook
Super bulky yarn in white (about 300 yds needed – Big Twist Cuddle in White)
Super bulky yarn in yellow (about 100 yds needed – Premier Just Chenille in Lemon)
Super bulky yarn in orange (about 150 yds needed – Premier Parfait Chunky in Tangerine)
Super bulky yarn in green (less than 5 yds needed – Premier Just Chenille in Lime)
1.5 inch felt eyes
Small amount of any weight black and pink yarn for both sizes
Fiberfill Stuffing
Craft glue
Yarn Needle (with large eye if making large size)
Scissors
Straight pins (optional)
Abbreviations
*= indicates beginning/end of a section to be repeated
[ ] = indicates set of instructions to be repeated
Beg = beginning
BLO = back loop only
Ch = chain
Hdc = half double crochet
Rem = remaining
Rep = repeat
Rnd(s) = round(s)
Sc = single crochet
Sc2tog = single crochet 2 together
Sc3tog = single crochet 3 together
Sl St = slip stitch
St(s) = stitch(es)
Gauge
Exact gauge is not essential to this project.
Size
Regular Size: About 9 inches length
Large Size: About 19 inches length
How to Make This
Head & Body
This piece is worked in continuous rnds; do not join. You may wish to use a stitch marker and move it up and the beginning of each new rnd.
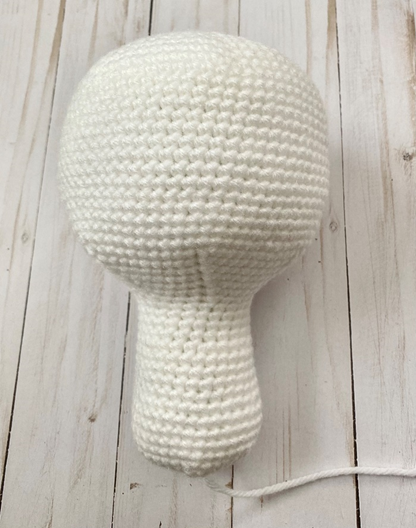
Head
Rnd 1 – with white yarn, make a magic ring. 6 sc in ring. (6 sc)
Rnd 2 – 2 sc in each st around. (12 sc)
Rnd 3 – 2 sc in next st, sc in next st; rep around. (18 sc)
Rnd 4 – 2 sc in next st, sc in next 2 sts; rep around. (24 sc)
Rnd 5 – 2 sc in next st, sc in next 3 sts; rep around. (30 sc)
Rnd 6 – 2 sc in next st, sc in next 4 sts; rep around. (36 sc)
Rnd 7 – 2 sc in next st, sc in next 5 sts; rep around. (42 sc)
Rnd 8 – 2 sc in next st, sc in next 6 sts; rep around. (48 sc)
Rnd 9 – 2 sc in next st, sc in next 7 sts; rep around. (54 sc)
Rnd 10 – 2 sc in next st, sc in next 8 sts; rep around. (60 sc)
Rnd 11 – 2 sc in next st, sc in next 9 sts; rep around. (66 sc)
Rnds 12 – 26 – sc in each st around. Begin stuffing. (66 sc)
Rnd 27 – sc2tog over next 2 sts, sc in next 9 sts; rep around (60 sc)
Rnd 28 – sc2tog over next 2 sts, sc in next 8 sts; rep around (54 sc)
Rnd 29 – sc2tog over next 2 sts, sc in next 7 sts; rep around (48 sc)
Rnd 30 – sc2tog over next 2 sts, sc in next 6 sts; rep around (42 sc)
Rnd 31 – sc2tog over next 2 sts, sc in next 5 sts; rep around (36 sc)
Rnd 32 – sc2tog over next 2 sts, sc in next 4 sts; rep around (30 sc)
Rnd 33 – sc2tog over next 2 sts, sc in next 3 sts; rep around (24 sc)
Do not fasten off.
Body
Rnds 34 – 37 – sc in each st around. (24 sc)
Rnd 38 – 2 sc in next st, sc in next 3 sts; rep around. (30 sc)
Rnds 39 – 42 – sc in each st around. (30 sc)
Rnd 43 – 2 sc in next st, sc in next 4 sts; rep around. (36 sc)
Rnds 44 – 47 – sc in each st around. Continue stuffing. (36 sc)
Rnd 48 – sc2tog over next 2 sts, sc in next 4 sts; rep around. (30 sc)
Rnd 49 – sc2tog over next 2 sts, sc in next 3 sts; rep around. (24 sc)
Rnd 50 – sc2tog over next 2 sts, sc in next 2 sts; rep around. Finish stuffing. (18 sc)
Rnd 51 – sc2tog over next 2 sts, sc in next st; rep around. (12 sc)
Rnd 52 – sc2tog around. (6 sc)
Rnd 53 – sc2tog over next 2 sts, leave rem sts unworked. (5 sc)
Fasten off, leaving end long enough to sew up rem gap left over from Rnd 53.
Ear (make 2)
This piece is worked in continuous rnds; do not join. You may wish to use a stitch marker and move it up and the beginning of each new rnd.
Rnd 1 – with orange or yellow yarn, make a magic ring. 6 sc in ring. (6 sc)
Rnd 2 – 2 sc in each st around. (12 sc)
Rnd 3 – 2 sc in next st, sc in next st; rep around. (18 sc)
Rnds 4 – 9 – sc in each st around. (18 sc)
Rnd 10 – sc2tog over next 2 sts, sc in next st; rep around. (12 sc)
Rnd 11 – 14 – sc in each st around. (12 sc)
Fasten off, leaving long tail for sewing.
Snout
This piece is worked in continuous rnds; do not join. You may wish to use a stitch marker and move it up and the beginning of each new rnd.
Rnd 1 – with orange yarn, make a magic ring. 6 sc in ring. (6 sc)
Rnd 2 – 2 sc in each st around. (12 sc)
Rnd 3 – 2 sc in next st, sc in next st; rep around. (18 sc)
Rnd 4 – 2 sc in next st, sc in next 2 sts; rep around. (24 sc)
Rnd 5 – 2 sc in next st, sc in next 3 sts; rep around. (30 sc)
Fasten off, leaving long tail for sewing. Stretch sideways to create more of an oval shape (first photo below). With black yarn, make two lines in center (second photo below).
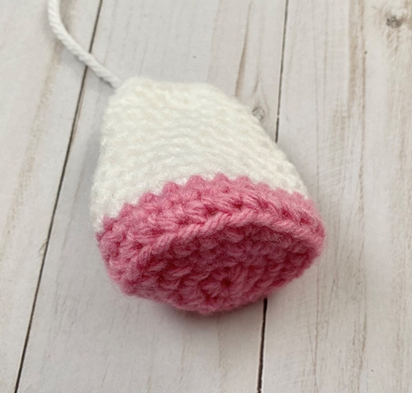
Hoof (make 4)
This piece is worked in continuous rnds; do not join. You may wish to use a stitch marker and move it up and the beginning of each new rnd.
Rnd 1 – with yellow or orange yarn, make a magic ring. 6 sc in ring. (6 sc)
Rnd 2 – 2 sc in each st around. (12 sc)
Rnd 3 – 2 sc in next st, sc in next st; rep around. (18 sc)
Rnd 4 – 2 sc in next st, sc in next 2 sts; rep around. (24 sc)
Rnd 5 – working in BLO, sc in each st around. (24 sc)
Rnd 6 – sc in each st around; change to white yarn in last st. (24 sc)
Rnds 7 – 10 – sc in each st around. (24 sc)
Rnd 11 – sc2tog over next 2 sts, sc in next 2 sts; rep around. (18 sc)
Rnd 12 – sc in each st around. (18 sc)
Fasten off, leaving long tail for sewing.
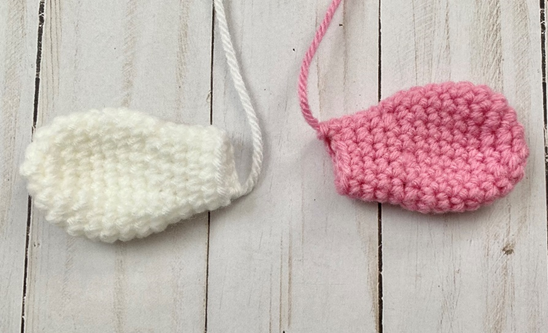
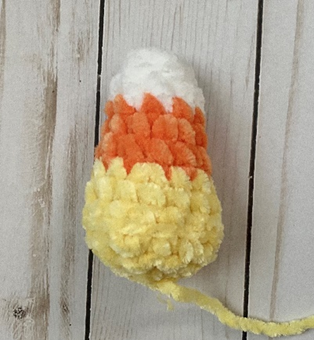
Candy Corn Horn (make 2)
This piece is worked in continuous rnds; do not join. You may wish to use a stitch marker and move it up and the beginning of each new rnd.
Rnd 1 – With white yarn, make a magic ring. 6 sc in ring. (6 sc)
Rnd 2 – Sc in each st around. (6 sc)
Rnd 3 – *Sc in next st, 2 sc in next st.* Rep from * to * around. Change to orange yarn in last st. (9 sc)
Rnd 4 – sc in each st around. (9 sc)
Rnd 5 – *Sc in next 2 sts, 2 sc in next st.* Rep from * to * around. (12 sc)
Rnd 6 – sc in each st around. Change to yellow yarn in last st. (12 sc)
Rnd 7 – *Sc in next 3 st, 2 sc in next st.* Rep from * to * around. (15 sc)
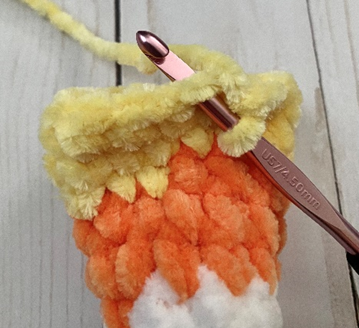
Rnds 8 – 9 – Sc in each st around. Stuff piece. (15 sc)
Rnd 10 – working in BLO (first photo below), *sc2tog over next 2 sts, sc in next 3 sts.* Rep from * to * around. (12 sc)
Rnd 11 – *sc2tog over next 2 sts, sc in next 2 sts.* Rep from * to * around. (9 sc)
Rnd 12 – [Sc3tog over next 3 sts] three times. (3 sc)
Fasten off, leaving long tail for sewing.
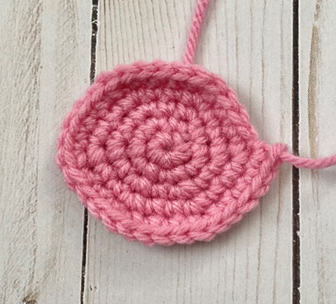
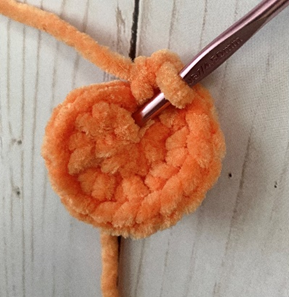
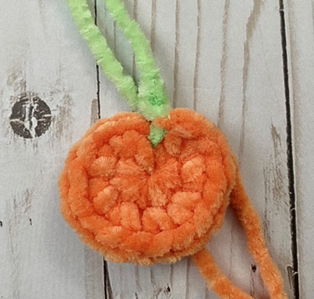
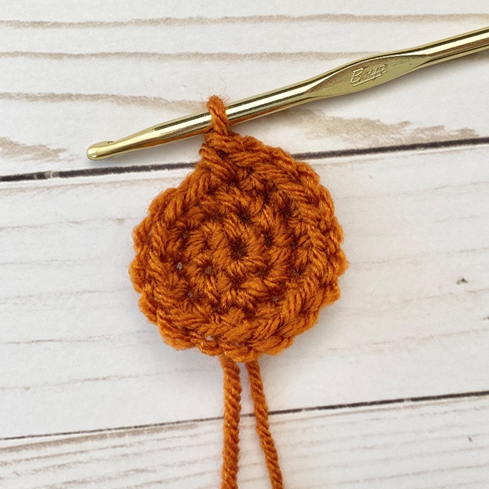
Pumpkin Spot (make 5 or as many as desired)
This piece is worked in continuous rnds; do not join. You may wish to use a stitch marker and move it up and the beginning of each new rnd.
Rnd 1 – With orange yarn, make a magic ring. 8 sc in ring. (8 sc)
Rnd 2 – 2 sc in each st around. Do not fasten off (16 sc)
Shaping
Pulling through green yarn as you finish the st, sl st to center of piece (in center of magic ring). Ch 3. Fasten off green and orange yarns, leaving long tail for sewing from each.

Instructions
Leaf
This section is made up of continuous rnds; do not join. You may wish to use a stitch marker and move it up and the beginning of each new rnd.
Rnd 1 – With orange yarn, make a magic ring, 6 sc in ring. (6 sc)
Rnd 2 – 2 sc in each st around. (12 sc)
Rnd 3 – 2 sc in next st, sc in next st; rep around. (18 sc)
Do not fasten off.
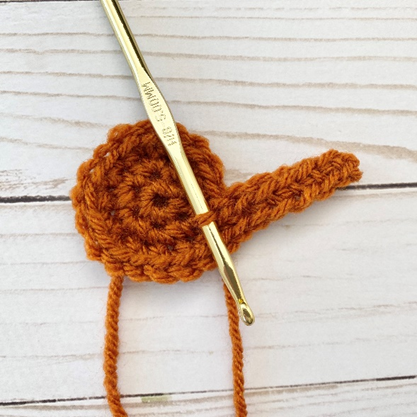
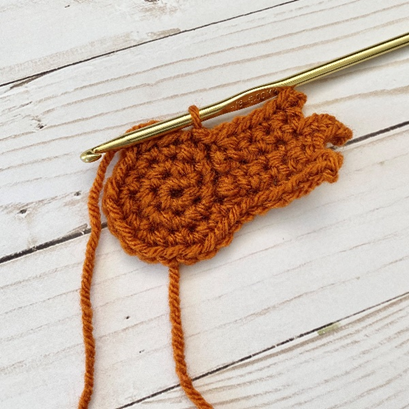
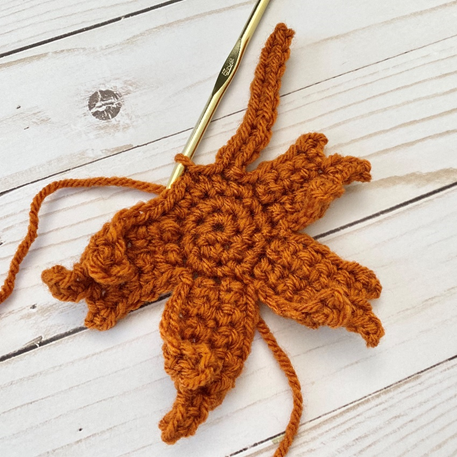
First Point
Row 1 – Ch 6, sc in 2nd ch from hook, and in each ch across. Sl st to same st started in, sl st in next st, Ch 1, turn. (See first photo below.) (5 sc)
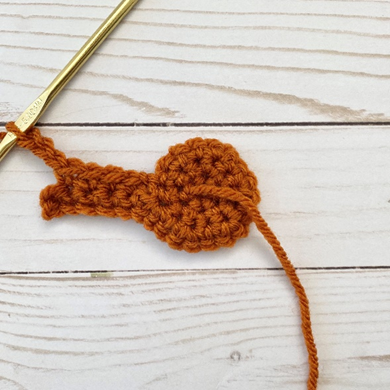
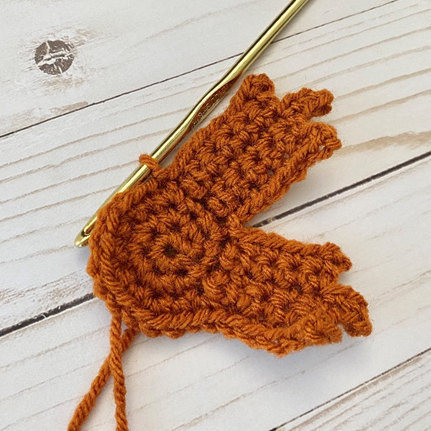
Row 2 – Sc in next 4 sts, ch 3, turn. (See second photo below.) (4 sc)
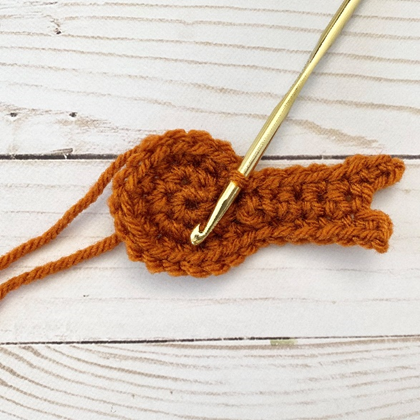
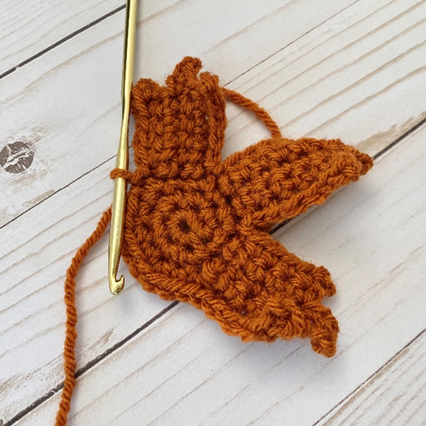
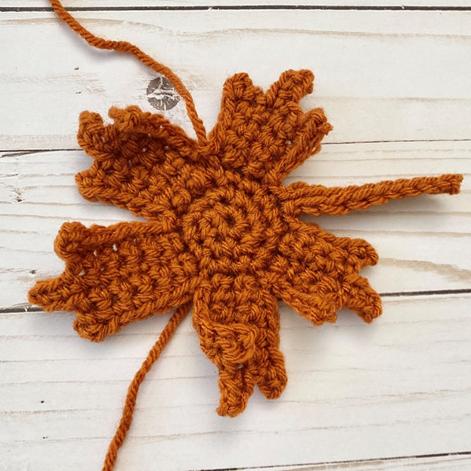
Row 3 – Sc in 2nd ch from hook, and in each st across. Sl st in same started in, sl st in next. Ch 1, turn. (See third photo below.) (6 sc)
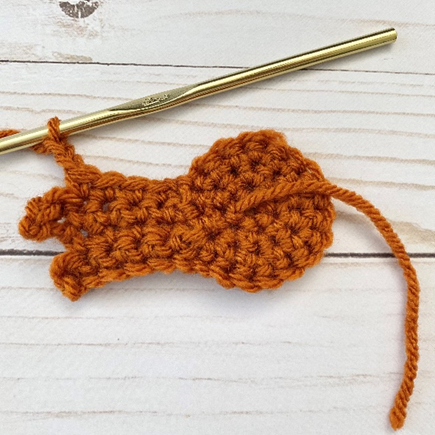
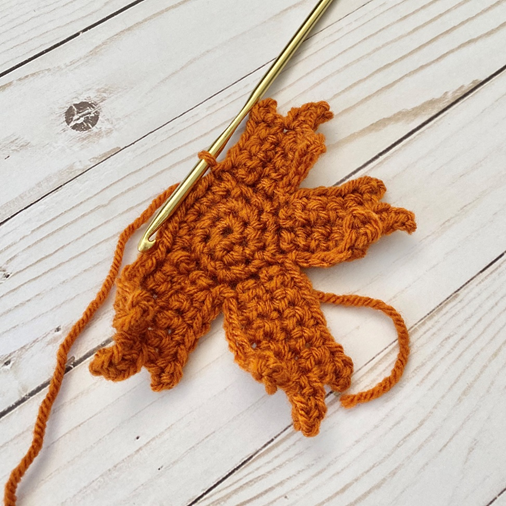
Row 4 – Sc in next 4 sts, ch 2, turn. (See fourth photo below.) (4 sc)
Row 5 – Sc in 2nd ch from hook, and in each st across. Sl st in same started in, sl st in next. (See fifth photo below). (5 sc)
Do not fasten off.
Second Point
Row 1 – Ch 7, sc in 2nd ch from hook, and in each st across. Sl st to same st started in, sl st in next st. Ch 1, turn. (6 sc)
Row 2 – Sc in next 5 sts, ch 3. (5 sc)
Row 3 – Sc in 2nd ch from hook, and in each st across. Sl st in same started in, sl st in next. Ch 1, turn. (7 sc)
Row 4 – Sc in next 5 sts, ch 2. (5 sc)
Row 5 – Sc in 2nd ch from hook, and in each st across. Sl st in same started in, sl st in next. (6 sc)
Do not fasten off.
Third Point
Rep First Point.
Fourth Point
Row 1 – Ch 5, sc in 2nd ch from hook, and in each st across. Sl st to same st started in, sl st in next st, Ch 1, turn. (4 sc)
Row 2 – Sc in next 3 sts, ch 3, turn. (3 sc)
Row 3 – Sc in 2nd ch from hook, and in each st across. Sl st in same started in, sl st in next. Ch 1, turn. (5 sc)
Row 4 – Sc in next 3 sts, ch 2, turn. (3 sc)
Row 5 – Sc in 2nd ch from hook, and in each st across. Sl st in same started in. Sl st in next st, and sl st in st after that. (4 sc)
Do not fasten off.
Stem
Ch 10. Sc in 2nd ch from hook, and in each st across. Sl st to same started in, sl st in next 2 sts. (9 sc)
Do not fasten off.
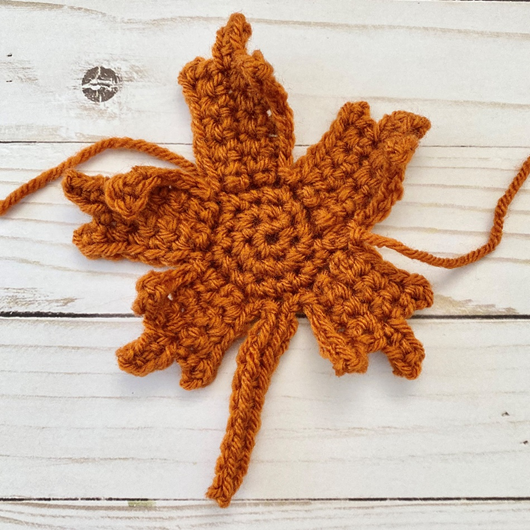
Fifth Point
Rep Fourth Point.
Fasten off; leave a long tail for sewing.
Finishing
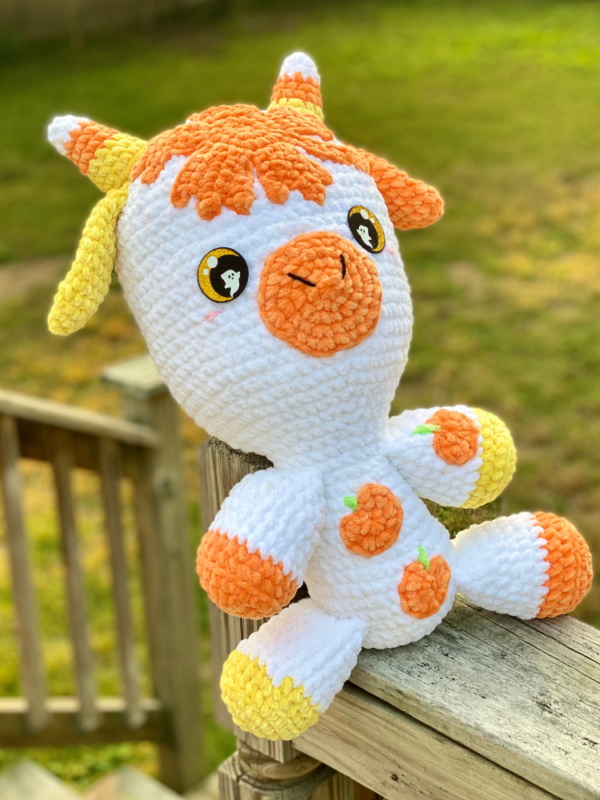
Stuff Arms and Legs. Press Ears flat. Arrange all pieces as seen in photos below. You may wish to use straight pins to keep pieces in place while sewing. Sew all pieces to Head/Body. With pink yarn, make small lines under Eyes for Blush. Weave in all ends or tie off knots and hide inside sts.
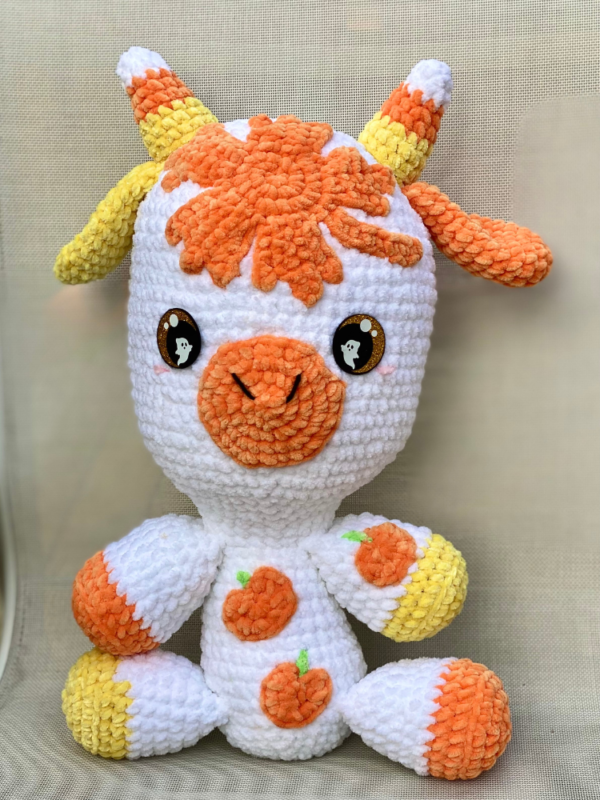
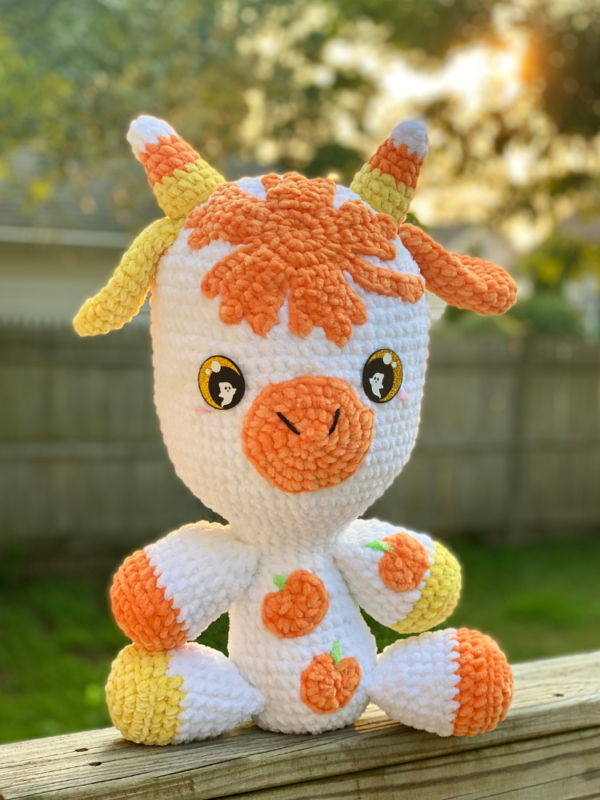
Here is the finished cow!

I hope you enjoyed crocheting this cow along with me today. If you love fun, free patterns like this one, then please be sure to sign up for my email list to keep up to date with all my latest designs:
Also, please be sure to follow me on social media, and tag me in photos of your finished projects made from my patterns, so I can see your lovely work!
Don’t forget to pin it for later HERE!
And you can find that ad-free PDF pattern HERE!
Happy Crocheting!
COPYRIGHT: This pattern is owned by Crafty Kitty Crochet (Melissa Moore). Any reselling or distribution of this pattern is prohibited. Sale of items made using this pattern is welcomed, but I do ask that credit/a link be provided back to my site, craftykittycrochet.com.
Comments (8)
Terri
September 29, 2022 at 4:44 am
Love your pattern! It is a goat. It looks just my beloved goat Molly. I checked the tail. A goat has a short tail. Cows have long tails. No long tail, it is Molly the goat. It is very cute. Thank you for sharing it!
Melissa
October 10, 2022 at 6:04 pm
Thank you! It could totally be a goat too! Molly sounds adorable! You’re so welcome and thank you! ~ Melissa
Sue
October 20, 2022 at 7:02 pm
This is absolutely adorable! Thank you for sharing your amazing talent with us!
Melissa
October 21, 2022 at 12:04 am
You are so welcome and thank YOU!!! Your kind words mean a lot! Hope you love the pattern! ~ Melissa
Evie
October 28, 2022 at 6:38 pm
i just want to thank you for your patterns..im a Great Gramma of two littles who love what i make..seems like every time i look for a fun pattern to try yours pop up..im still pretty new to crochet(if u dont count blankets..lol) and i love how you make them so easy to understand and follow..when my phone quits glitching i will peruse your site for ways to support your endeavors..thanks again
Melissa
October 30, 2022 at 7:44 pm
Hi Evie! Thank you so much for your sweet comment! Your great grandbabies are so lucky to have someone making fun things for them! I’m honored that my patterns pop up in your searches!! And I’m really glad they’re fun patterns that you enjoy using. Thank you so much for your support and for your kindness!!!! Have a great day ^_^ ~ Melissa
Candy Corn Cow Amigurumi Free Crochet Pattern
July 26, 2023 at 2:34 pm
[…] Candy Corn Cow Amigurumi […]
11 Candy Corn Amigumi Crochet Patterns – FREE – iGOODideas.com
September 12, 2023 at 6:41 pm
[…] 8 . Click HERE for this Candy Corn Cow FREE Pattern […]