Amigurumi Snow Critters – Crochet Pattern
Pin it for later!
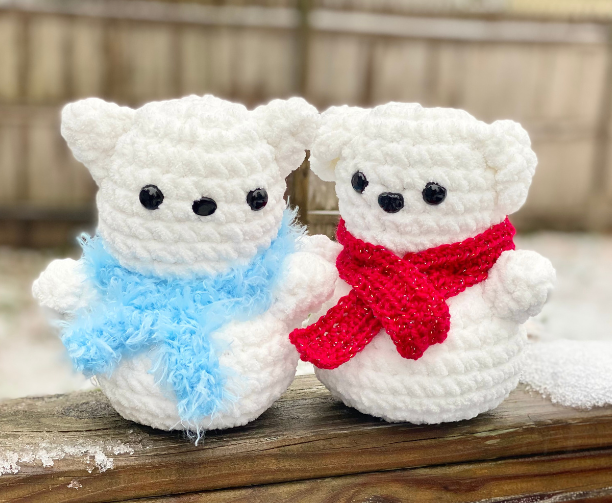
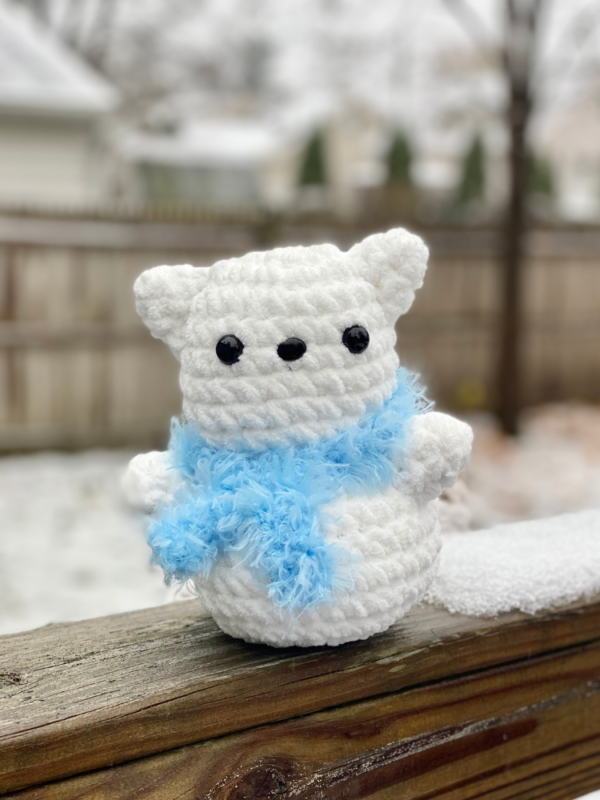
It’s that time of the year again – where snow seems to be made of pure magic, and kids of all ages stop to admire the wondrous beauty of winter! The holidays just aren’t the same without a little snow – even if it means crocheted snow! These adorable amigurumi Snow Critters are fast, fun, and incredibly soft and squishy!!! They are the perfect fast, one-hour DIY gift idea for everyone on your Christmas gift list! Made using thick chenille blanket yarn, the design is simple and easy to follow and can be customized so many ways. You can make a dog, cat, bunny or bear using this pattern – not to mention a cute little scarf that can be customized with any color or texture you like! This is a must make for anyone looking to craft some fun stocking stuffers, kawaii toys, unique decor, or even craft fair / market makes! The possibilities are endless!
Amigurumi Snow Critters
If you’ve checked out some of my other patterns, like my Friendship Frog and Hearty Mushroom amigurumi patterns, then you know how much I’ve been loving fun, fast amigurumi patterns using chenille yarn! I had a big holiday craft show a few weeks ago, and made some of these cute snow critters as a fast and cute holiday choice. They were a hit! I love the combo of a simple, fast base and the option to customize as much as you like. You could even add something like a Santa hat, buttons, etc. to really make yours stand out! And who knows, maybe I’ll even come up with some more choices when it comes to animals in the future! (Pattern mod, anyone?)
For that squishy, snowy texture, it doesn’t get better than Bernat Baby Blanket! Find some on Amazon HERE!
Looking for the ad-free PDF copy of this pattern? Find it in my shop HERE!
Supplies
Size L- 11 / 8 mm crochet hook for regular size
Size P-16 / 11.5 mm with large size
Size 7 / 4.5 mm crochet hook
Super bulky weight white yarn for regular size (Bernat Baby Blanket in White used in photos – 65 yds)
Jumbo weight white yarn for large size (65 yds – Loops & Threads Spring Chenille or similar yarn)
Medium weight yarn in color of choice (Caron Simply Soft Party in Spring Sparkle used in photos – about 20 yds)
1 pair 14 mm safety eyes for regular size
8 mm safety nose for regular size
1 pair 16 mm safety eyes (per animal) for large size
12 mm safety nose for large size
Fiberfill stuffing
Yarn Needle with Large Eye
Scissors
Abbreviations
*= indicates beginning/end of a section to be repeated
Ch = chain
Dc – double crochet
Hdc = half double crochet
Rem = remaining
Rep = repeat
Rnd(s) = round(s)
Sc = single crochet
Sc2tog = single crochet 2 together
St(s) = stitch(es)
Gauge
Exact gauge is not essential to this project
Size
Regular Size: about 9.5 inches length
Large Size: about 11.5 inches length
Notes
When attaching safety eyes and nose, it may work best to place them in between parts of a stitch, as opposed to between stitches. The yarn and hook used for this project are so large that the gaps might be large enough for the pieces and their washers to fall through the gaps between stitches.
Head/Body in pattern are the base pieces; different ears can be attached to make different critters.
How to Make This
Instructions
Head / Body
This piece is worked in continuous rnds; do not join. You may wish to use a stitch marker and move it up and the beginning of each new rnd.
Rnd 1 – with 8 or 11.5 mm hook and super bulky or jumbo white yarn, make a magic ring. 12 sc in ring. (12 sc)
Rnd 2 – 2 sc in each st around. (24 sc)
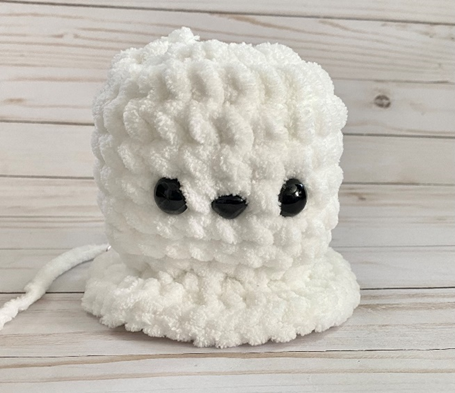
Rnds 3 – 8 – sc in each st around. Attach safety eyes and nose between rnds 6 and 7, about 1-2 sts apart (24 sc)
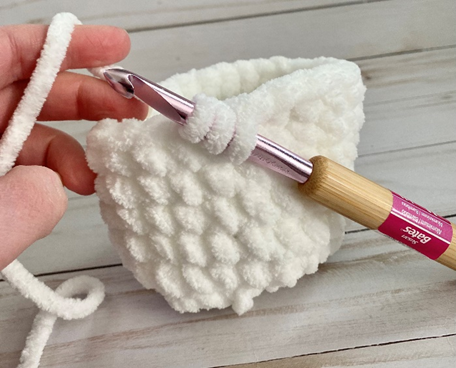
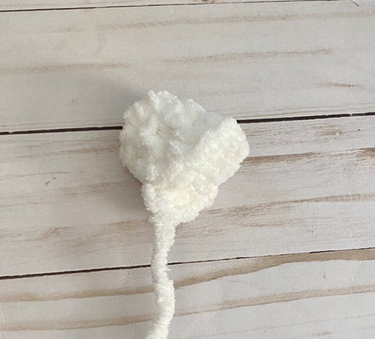
Rnd 9 – *sc2tog over next 2 sts (first photo below).* Rep from * to * around. Begin stuffing. (12 sc)
Rnd 10 – 2 sc in each st around. (24 sc)
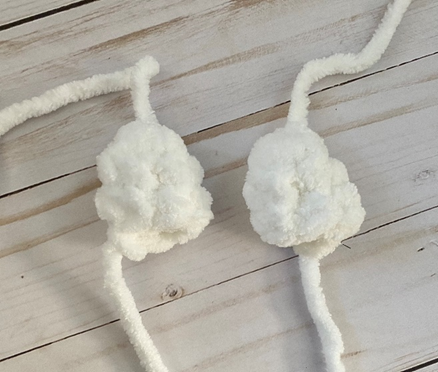
Rnd 11 – *sc in next st, 2 sc in next st.* Rep from * to * around (second photo below). (36 sc)
Rnds 12 – 16 – sc in each st around. Continue stuffing (36 sc)
Rnd 17 – *sc2tog over next 2 sts, sc in next 4 sts.* Rep from * to * around (30 sc)
Rnd 18 – *sc2tog over next 2 sts, sc in next 3 sts.* Rep from * to * around (24 sc)
Rnd 19 – *sc2tog over next 2 sts, sc in next 2 sts.* Rep from * to * around. Finish stuffing (18 sc)
Rnd 20 – *sc2tog over next 2 sts, sc in next st.* Rep from * to * around (12 sc)
Rnd 21 – sc2tog in each st around. (6 sc)
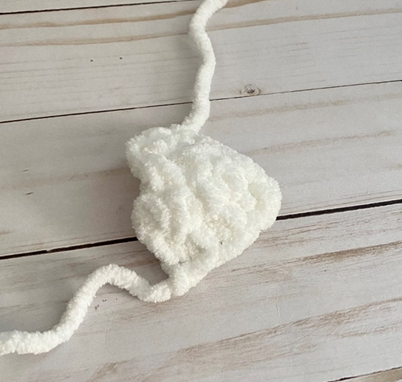
Rnd 22 – sc2tog over next 2 sts. Leave rem sts unworked. (5 sc)
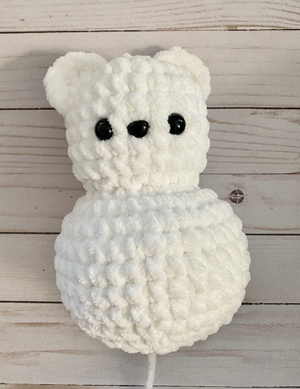
Fasten off, leaving long tail for sewing rem gap from Rnd 22. Third photo below shows piece at this stage.
Arm (make 2)
This piece is worked in continuous rnds; do not join. You may wish to use a stitch marker and move it up and the beginning of each new rnd.
Rnd 1 – with 8 or 11.5 mm hook and super bulky or jumbo white yarn, make a magic ring. 6 sc in ring. (6 sc)
Rnds 2 – 3 – sc in each st around. (6 sc)
Rnd 4 – sc in next 3 sts. Leave rem sts unworked (3 sc worked this rnd, 6 total sc on piece)
Fasten off, leaving long tail for sewing.
Cat Ear (make 2)
This piece is worked in continuous rnds; do not join. You may wish to use a stitch marker and move it up and the beginning of each new rnd.
Rnd 1 – with 8 or 11.5 mm hook and super bulky or jumbo white yarn, make a magic ring. 6 sc in ring. (6 sc)
Rnd 2 – sc in each st around. (6 sc)
Rnd 3 – *sc in next st, 2 sc in next st.* Rep from * to * around (9 sc)
Fasten off, leaving long tail for sewing.
Dog Ear
With 8 or 11.5 mm hook and super bulky or jumbo white yarn, ch 5.
Row 1 – sc in 2nd ch from hook, and in next 3 sts. Ch 1, turn (4 sc)
Row 2 – sc in each st across. Ch 1, turn (4 sc)
Row 3 – sc2tog twice. Ch 1, turn (2 sc)
Row 4 – sc in each st across. (2 sc)
Row 5 – sc2tog over next 2 sts. (1 sc)
Fasten off, leaving long tail for sewing.
Bunny Ear (make 2)
With 8 or 11.5 mm hook and super bulky or jumbo white yarn, ch 7.
Row 1 – sc in 2nd ch from hook, and in next st. Hdc in next st. Dc in next st. Sc in last 2 sts. (4 sc, 1 hdc, 1 dc)
Fasten off, leaving long tail for sewing.
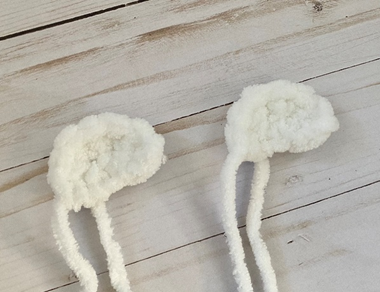
Bear Ear (make 2)
Rnd 1 – with 8 or 11.5 mm hook and super bulky or jumbo white yarn, make a magic ring. 4 sc in ring. Ch 1, turn (4 sc)
Rnd 2 – sc in next st, 2 sc in next 2 sts, sc in last st. (6 sc)
Fasten off, leaving long tail for sewing.
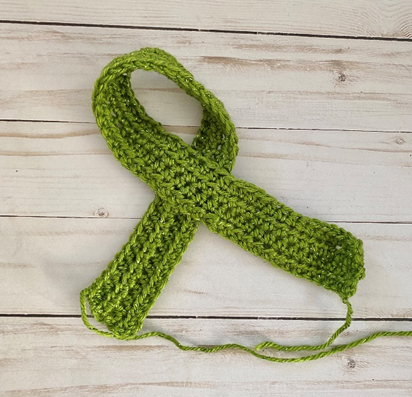
Scarf
With 4.5 mm hook and medium weight yarn, ch 62.
Row 1 – hdc in 3rd ch from hook, and in each st across. Ch 2, turn (60 hdc)
Rows 2 – 4 – hdc in each st across. Ch 2, turn (do not ch 2 at end of Row 4). (60 hdc)
Fasten off, leaving long tail for sewing.
Finishing
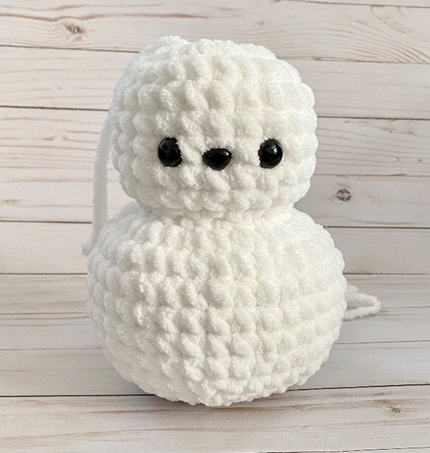
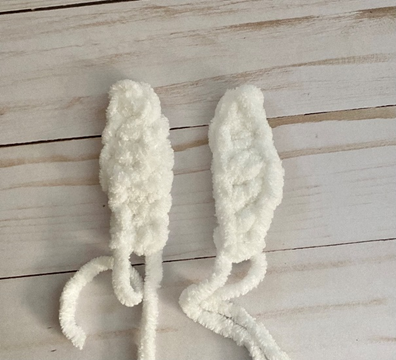
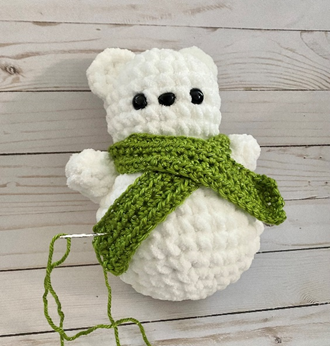
Sew ears on top of Head, about 2 sts apart (sts of Rnd 1 should be placed between each Ear; see first photo below). Stuff and sew Arms to sides of Body (second photo). Wrap scarf around piece between Head and Body; use long tail to secure ends of Scarf, area where Scarf ends overlap, and between Head/Body (third photo).
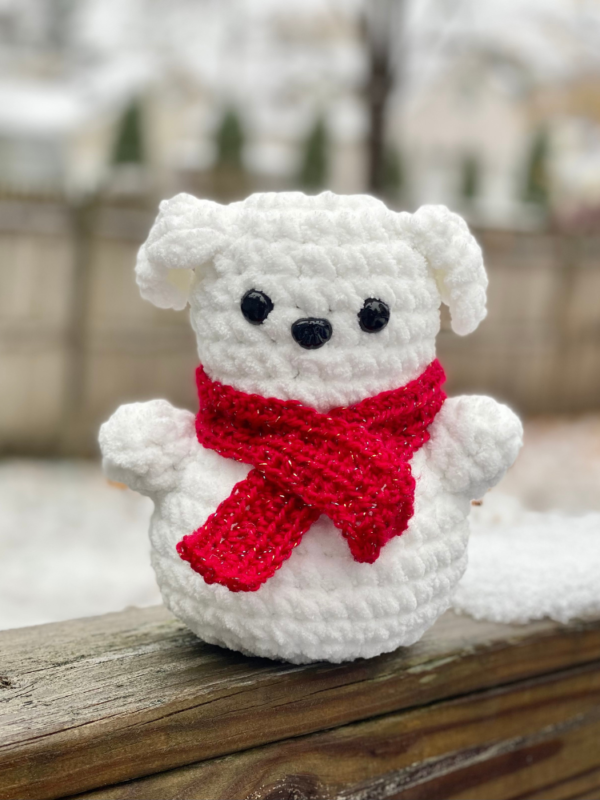
Weave in ends and/or tie off knots and hide inside of sts. Fourth photo shows finished piece.
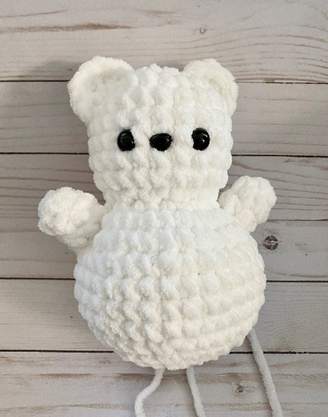
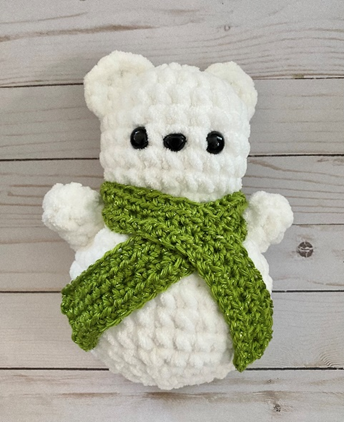
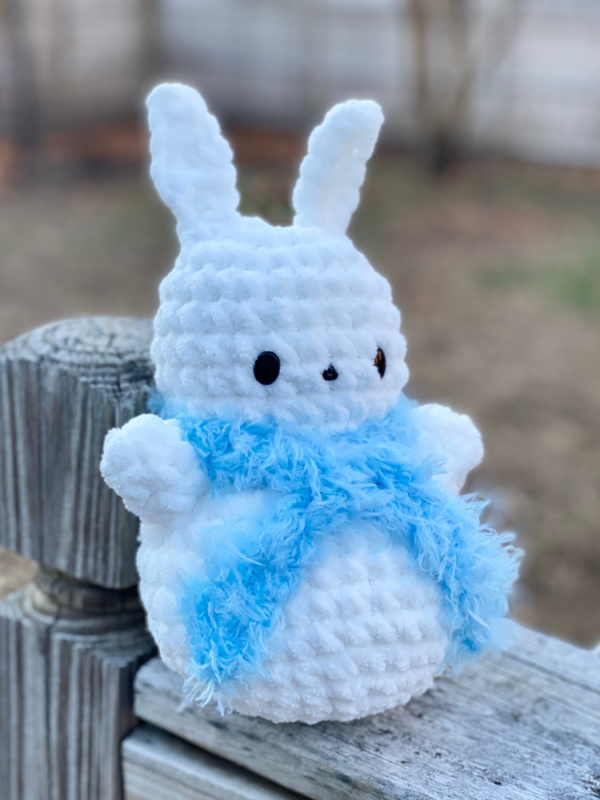
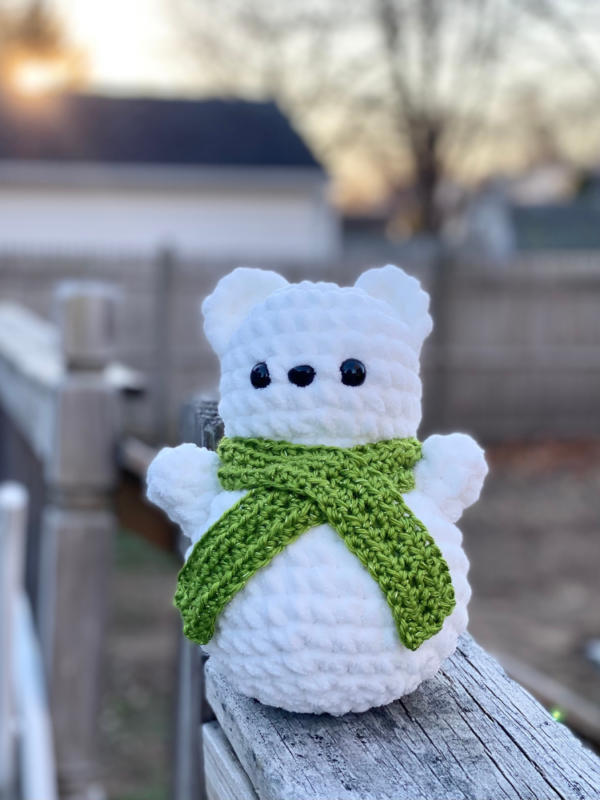
Here are the finished critters!

I hope you enjoyed crocheting these snow critters along with me today. If you love fun, free patterns like this one, then please be sure to sign up for my email list to keep up to date with all my latest designs:
Also, please be sure to follow me on social media, and tag me in photos of your finished projects made from my patterns, so I can see your lovely work!
Don’t forget to pin it for later HERE!
And you can find that ad-free PDF pattern HERE!
Happy Crocheting!
COPYRIGHT:
This pattern is owned by Crafty Kitty Crochet (Melissa Moore). Any reselling or distribution of this pattern is prohibited. Sale of items made using this pattern is welcomed, but I do ask that credit/a link be provided back to my site, craftykittycrochet.com.