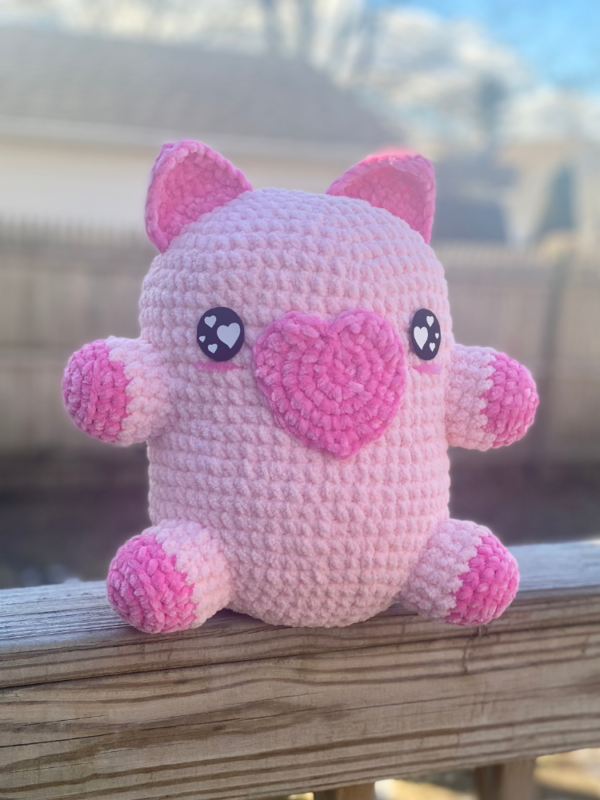
Cupig the Valentine’s Pig – Amigurumi Crochet Pattern
Pin it for later!
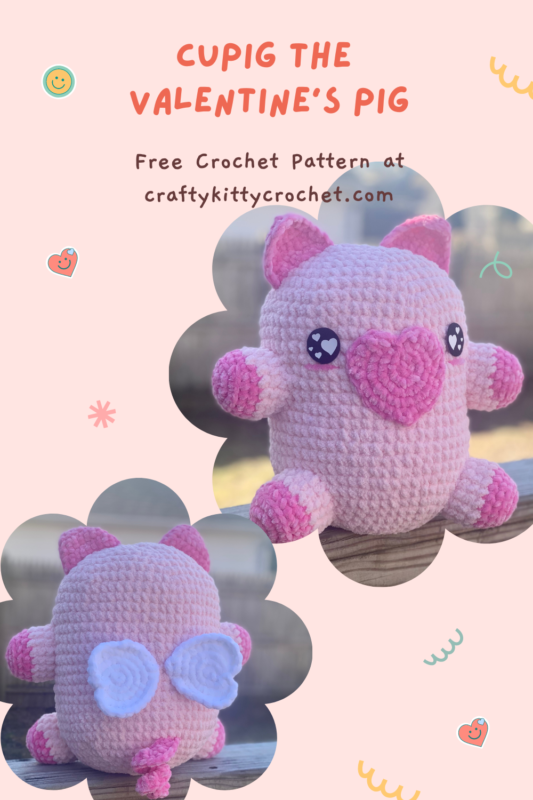
Your Valentine doesn’t want flowers this year – they want CUPIG! Meet this adorable, squishy, amigurumi Cupid Pig pattern! It’s fun, easy, and sure to be a hit as a gift or decor! Since the pattern uses bulky chenille yarn, it works up quickly and is extra cuddly and soft. If you love Squishmallows, you’ll love this extra cute plushie! It’s perfect for anyone who loves kawaii stuffed animals!
Cupig the Valentine’s Day Pig
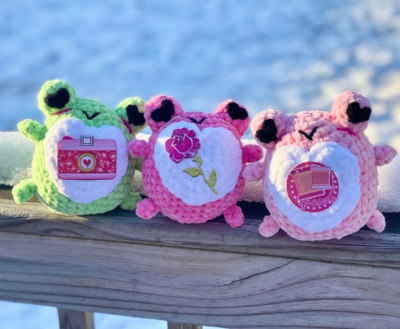
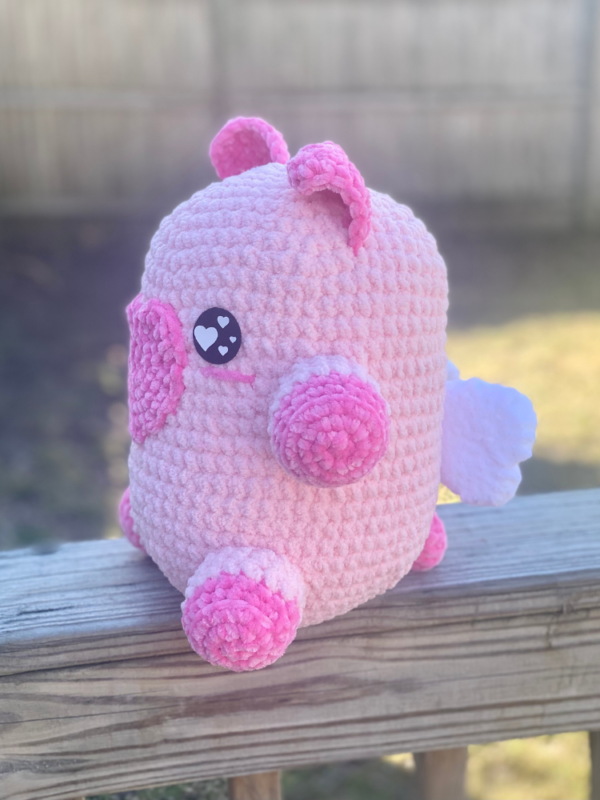
If you’ve seen my Rose Turtle, Sweetheart Frogs, or Valentine’s Dog / Cat patterns, you know that I have a habit of designing cute amigurumi for love season! I just couldn’t resist the thought of a little pig that could fly, and do so for the sole purpose of spreading love on Valentine’s Day 💘 So this design was born! I love the feel the soft yarn and squishy cylindrical body – and how can anyone resist the wings and curly tail! It doesn’t get much cuter than this for Valentine’s Day!
The yarn I used for the body here is getting harder to find as it is a Jo-Ann’s exclusive, so you can find a great alternative HERE!
Looking for the ad-free PDF pattern? You can find it in my shop HERE!
Supplies
Size H/8 5.0 mm crochet hook
Big Twist Cuddle in Blush (super bulky; about 190 yds)
Premier Just Chenille in Flamingo (super bulky; about 45 yds)
Premier Just Chenille in White (super bulky; about 15 yds)
1 pair of 15mm felt eyes
Craft glue
Fiberfill stuffing
Yarn Needle with large eye
Scissors
Abbreviations
*= indicates beginning/end of a section to be repeated
[] = indicates a section separate from the rest of the pattern
BLO = back loop only
Ch = chain
Dc = double crochet
Rem = remaining
Rep = repeat
Rnd(s) = rnd(s)
Sc = single crochet
Sc2tog = single crochet 2 together
Sl st = slip stitch
St(s) = stitch(es)
Gauge
Exact gauge is not essential to this project.
Size About 10 inches length
How to Make This
Instructions
Body
This piece is worked in continuous rnds; do not join. You may wish to use a stitch marker and move it up and the beginning of each new rnd.
Rnd 1 – with Blush, make a magic ring. 6 sc in ring. (6 sc)
Rnd 2 – 2 sc in each st around. (12 sc)
Rnd 3 – *2 sc in next st, sc in next st*; rep around. (18 sc)
Rnd 4 – *2 sc in next st, sc in next 2 sts*; rep from * to * around. (24 sc)
Rnd 5 – *2 sc in next st, sc in next 3 sts*; rep from * to * around. (30 sc)
Rnd 6 – *2 sc in next st, sc in next 4 sts*; rep from * to * around. (36 sc)
Rnd 7 – *2 sc in next st, sc in next 5 sts*; rep from * to * around. (42 sc)
Rnd 8 – *2 sc in next st, sc in next 6 sts*; rep from * to * around. (48 sc)
Rnd 9 – *2 sc in next st, sc in next 7 sts*; rep from * to * around. (54 sc)
Rnd 10 – *2 sc in next st, sc in next 8 sts*; rep from * to * around. (60 sc)
Rnds 11 – 26 – sc in each st around. Begin stuffing. (60 sc)
Rnd 27 – *sc2tog over next 2 sts, sc in next 8 sts*; rep from * to * around. (54 sc)
Rnd 28 – *sc2tog over next 2 sts, sc in next 7 sts*; rep from * to * around. (48 sc)
Rnd 29 – *sc2tog over next 2 sts, sc in next 6 sts*; rep from * to * around. (42 sc)
Rnd 30 – *sc2tog over next 2 sts, sc in next 5 sts*; rep from * to * around. (36 sc)
Rnd 31 – *sc2tog over next 2 sts, sc in next 4 sts*; rep from * to * around. (30 sc)
Rnd 32 – *sc2tog over next 2 sts, sc in next 3 sts*; rep from * to * around. (24 sc)
Rnd 33 – *sc2tog over next 2 sts, sc in next 2 sts*; rep from * to * around. (18 sc)
Rnd 34 – *sc2tog over next 2 sts, sc in next st*; rep from * to * around. Finish stuffing. (12 sc)
Rnd 35 – *sc2tog over in each st around. (6 sc)
Rnd 36 – *sc2tog over next 2 sts. Leave rem sts unworked. (5 sc)
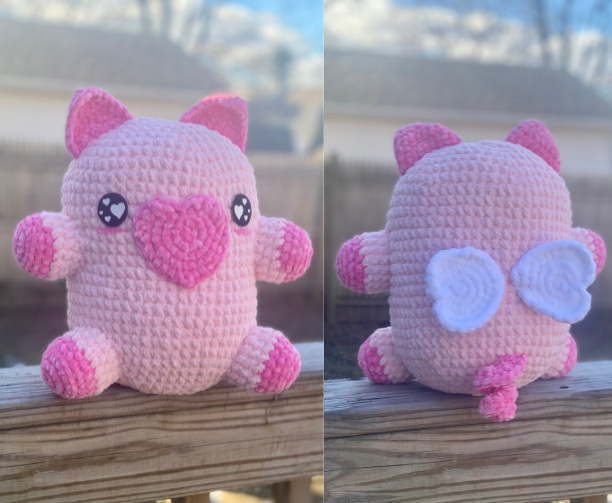
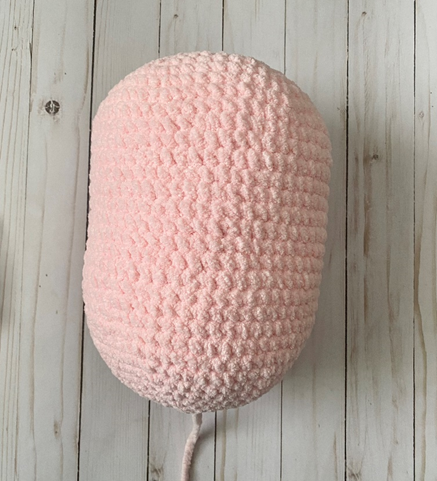
Fasten off, leaving long tail for sewing. Photo below shows finished piece.
Nose / Heart Wing (make 3)
This pattern is worked in continuous rnds; do not join. You may wish to use a stitch marker and move it up at the beginning of each new rnd.
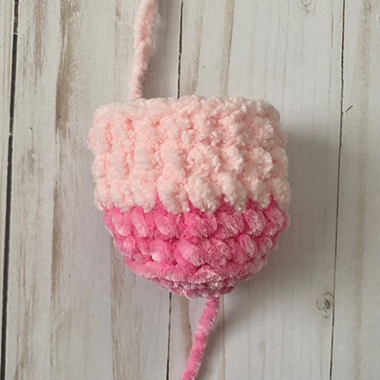
Rnd 1 – with Flamingo (nose) or White (wing), make a magic ring. 6 sc in ring. (6 sc)
Rnd 2 – 2 sc in each st around. (12 sc)
Rnd 3 – *2 sc in next st, sc in next st.* Rep from * to * around. (18 sc)
Rnd 4 – *2 sc in next st, sc in next 2 sts.* Rep from * to * around. (24 sc)
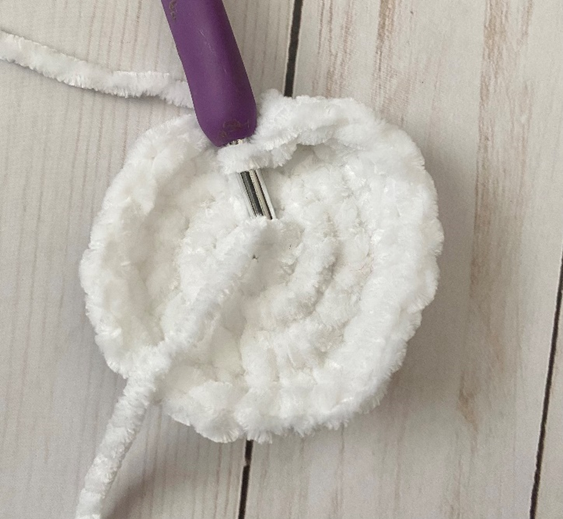
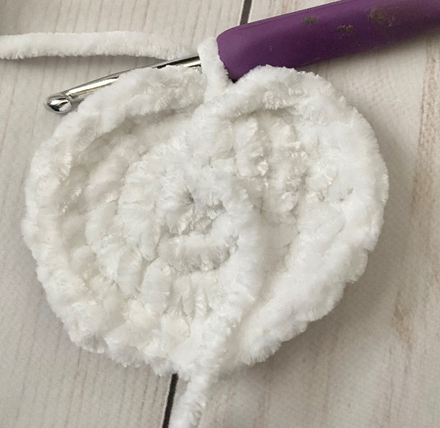
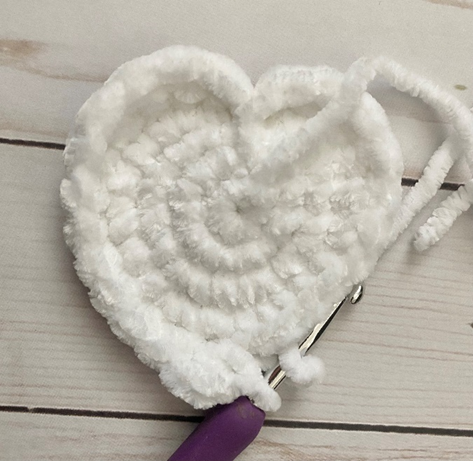
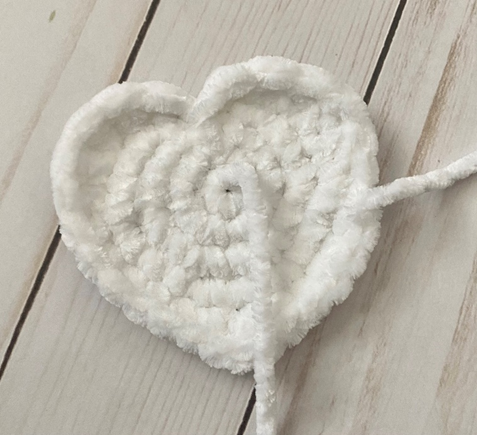
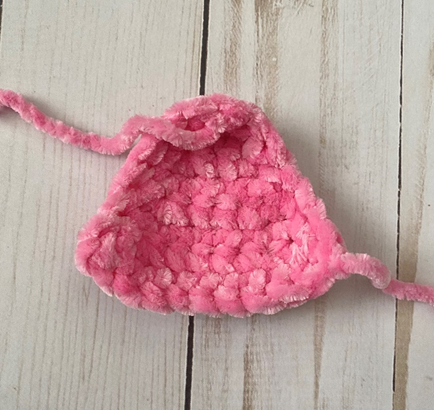
Rnd 5 – Dc in next 5 sts, sl st to first rnd (center of piece – first and second photos below). Ch 1, dc in next 5 sts (third photo). Sc in next 6 sts, [sc, ch 1, sc] in next st (fourth photo), sc in next 5 sts. Sl st in next st. Fasten off, leaving long tail for sewing. (Fifth photo shows finished piece.)

Arm / Leg (make 4)
This piece is worked in continuous rnds; do not join. You may wish to use a stitch marker and move it up and the beginning of each new rnd.
Rnd 1 – with Flamingo, make a magic ring. 6 sc in ring. (6 sc)
Rnd 2 – 2 sc in each st around. (12 sc)
Rnd 3 – 2 sc in next st, sc in next st; rep around. (18 sc)
Rnd 4 – working in BLO (first photo below), sc in each st around. (18 sc)
Rnd 5 – sc in each st around. Change to Blush in last st of rnd. (18 sc)
Rnds 6 – 8 – sc in each st around. (18 sc)
Fasten off, leaving long tail for sewing. Second photo below shows finished piece.

Ear (make 2)
With Flamingo, ch 2.
Row 1 – make 3 sc in first ch. Ch 1, turn. (3 sc)
Row 2 – 2 sc in first st, sc in next st, 2 sc in last st. Ch 1, turn. (5 sc)
Row 3 – sc in each st across. Ch 1, turn. (5 sc)
Row 4 – 2 sc in first st, sc in next 3 sts, 2 sc in last st. Ch 1, turn. (7 sc)
Row 5 – sc in each st across. Ch 1, turn. (7 sc)
Row 6 – 2 sc in first st, sc in next 5 sts, 2 sc in last st. Ch 1, turn. (9 sc)
Row 7 – sc in each st across. Ch 1. (9 sc)
Edging
Working up side of piece, and down other side (ending at beginning of current row), evenly make 13 sc. Join with sl st to first sc of row. (13 sc)
Fasten off, leaving long tail for sewing. First photo below shows finished piece.
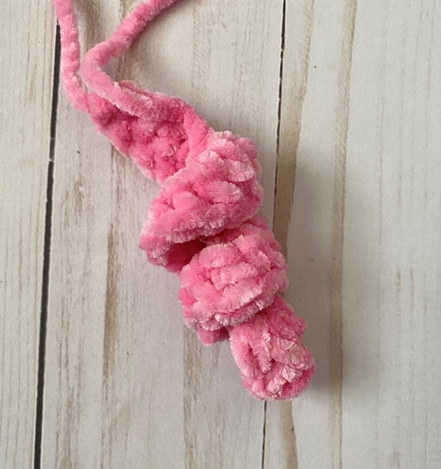
Curly Tail
With Blush, ch 11.
Row 1 – make 3 dc in 3rd ch from hook, and in each st across. (27 dc)
Fasten off, leaving long tail for sewing. Second photo above shows finished piece.
Finishing
Sew Heart Nose to body, with top near Rnd 12 of Body. Glue eyes to Body, between Rnds 12 and 14, on either side of Heart Nose. With Flamingo, sew a small horizontal line below each eye for Blush. Sew Ears to top of Body, about 5-6 sts apart. Line up Arms with bottom of Eyes / Blush and sew onto sides of Body. Place Legs slightly more forward on Body than Arms and sew in place. Sew Heart Wings on center back of Body. Sew Curly Tail on back-bottom of Body. Weave in all ends and/or tie off knots and hide inside sts.
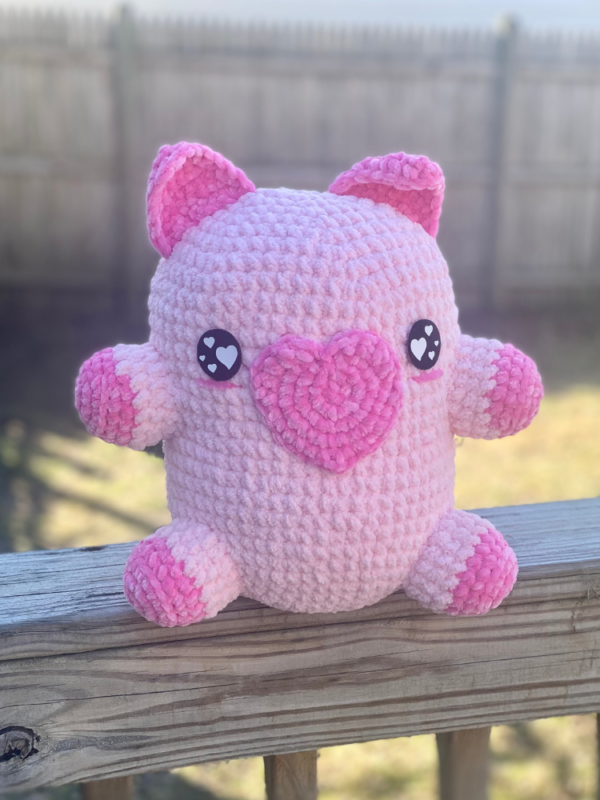
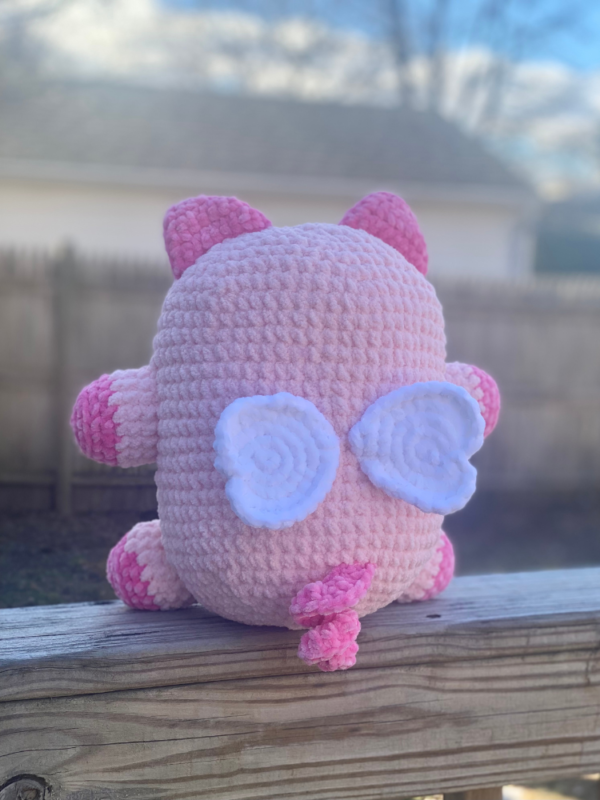
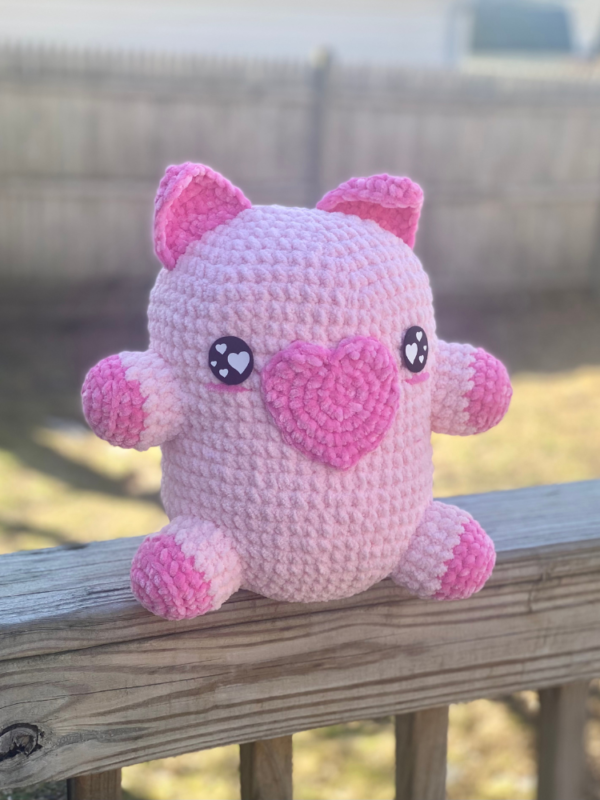
Here is the finished Cupig!
I hope you enjoyed crocheting this piggy along with me today. If you love fun, free patterns like this one, then please be sure to sign up for my email list to keep up to date with all my latest designs:
Also, please be sure to follow me on social media, and tag me in photos of your finished projects made from my patterns, so I can see your lovely work!
Don’t forget to pin it for later HERE!
And you can find that ad-free PDF pattern HERE!
Happy Crocheting!
COPYRIGHT:
This pattern is owned by Crafty Kitty Crochet (Melissa Moore). Any reselling or distribution of this pattern is prohibited. Sale of items made using this pattern is welcomed, but I do ask that credit/a link be provided back to my site, craftykittycrochet.com.