
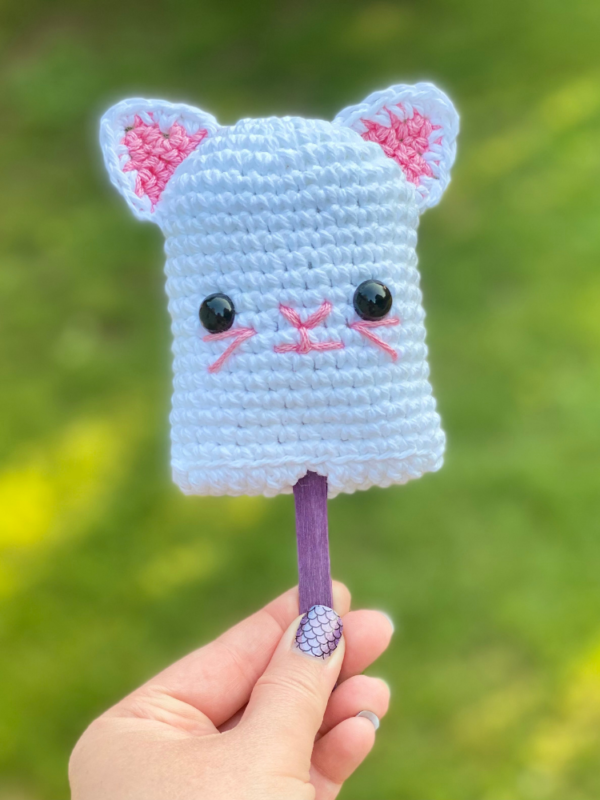
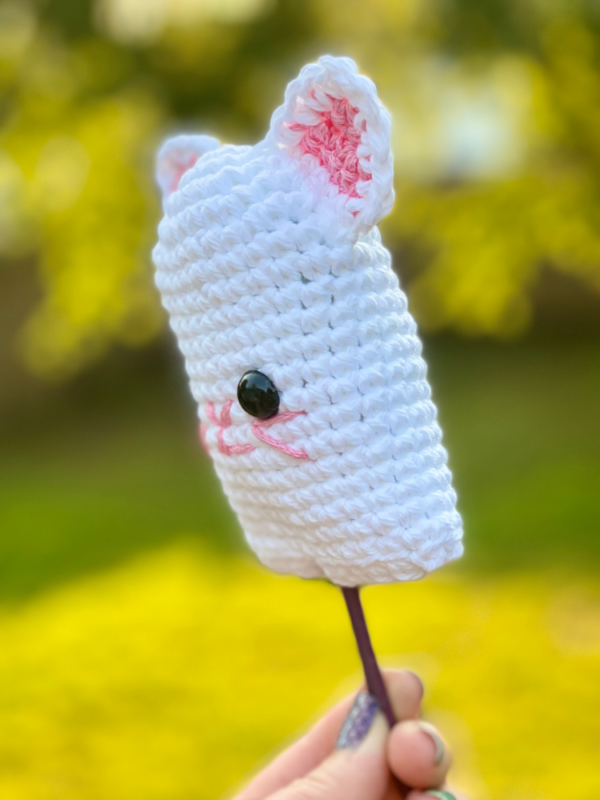
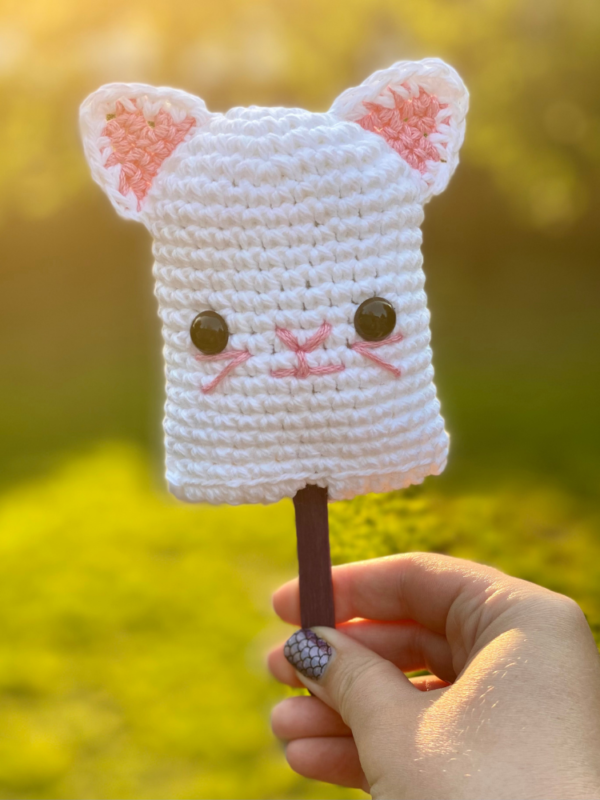
Kitty Popsicle – 3 Year Anniversary Crochet Pattern
Pin it for later!
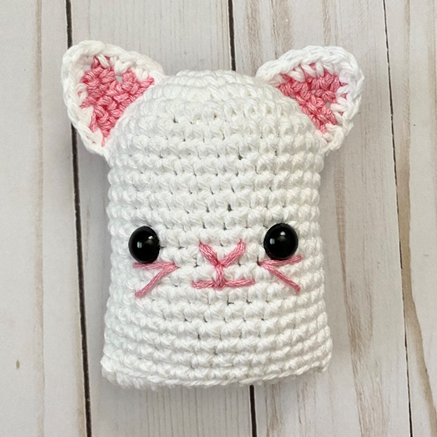
This kitty popsicle is the perfect blend of cute stuffed animal, kawaii play food, and easy crochet pattern! You won’t believe how fast and easy this little cat is to make. Crochet a bunch as gifts, decor, play kitchen toys, and more! They’re wonderful for kids, cat lovers, and anyone who loves unique and adorable things! And best of all – this pattern is not only free on my blog, but because it’s in celebration of my 3 year blog anniversary, it’s a FREE PDF DOWNLOAD as well! Read on to learn how to grab your copy!
Kitty Popsicle Amigurumi
A few weeks ago, I published my Summer Popsicle pattern, and was so pleased to hear how everyone likes it! I’ve wanted to try my hand at more animal/food combos (like my Ice Cream Octopus!), and what better way to introduce a cat/food combo than to release it for Crafty Kitty Crochet’s third blog anniversary?! That’s right, I’ve had the pleasure of bringing you fun, whimsical patterns for three years now! I hope you’ve enjoyed them, and that you’ll look forward to all the fun patterns I have in the works right now!
This pattern works superbly with cotton yarn! Any medium weight yarn will work, but there’s just something about the tight texture and definition in the stitches when it comes to using cotton yarn for amigurumi. I used Lion Brand 24/7 Cotton, which you can find on Amazon:
Supplies
Size D/3 – 3.25 mm crochet hook
Lion Brand 24/7 Cotton in White (60 yds), and Pink (10 yds)
1 pair of 12 mm safety eyes
Craft Popsicle Sticks (one per popsicle)
Small amount of school glue, craft glue, or hot glue
Fiberfill stuffing
Yarn Needle
Scissors
Abbreviations
*= indicates beginning/end of a section to be repeated
Beg = beginning
BLO = back loop only
Ch = chain
FLO = front loop only
Rep = repeat
Rnd(s) = rnd(s)
Sc = single crochet
Sl St = slip stitch
St(s) = stitch(es)
Tr = triple crochet
Gauge
Exact gauge is not essential to this project.
Size
About 4.5 inches in length (before popsicle stick)
Looking for that FREE PDF download of this pattern? Grab it in my Ravelry shop HERE!
How to Make This
Instructions
Popsicle Body
Rnd 1 – with White, make a magic ring, 6 sc in ring. (6 sc)
Rnd 2 – 2 sc in each st around. (12 sc)
Rnd 3 – *2 sc in next st, sc in next st*; rep from * to * around. (18 sc)
Rnd 4 – *2 sc in next st, sc in next 2 sts;* rep from * to * around. (24 sc)
Rnd 5 – *2 sc in next st, sc in next 3 sts*; rep from * to * around. (30 sc)
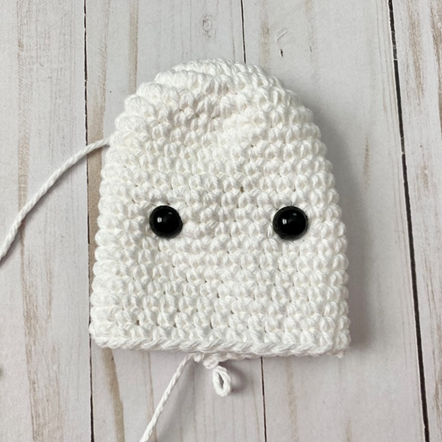
Rnds 6 – 20 – sc in each st around. Stuff piece and attach safety eyes. (30 sc)
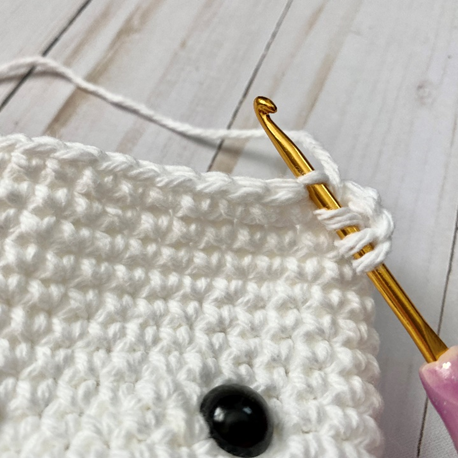
Rnd 21 – ch 2. Working in BLO (first photo below), tr in next 12 sts. Ch 2, join with sl st to BLO of next st (second photo below).
Fasten off, leaving long tail for sewing.
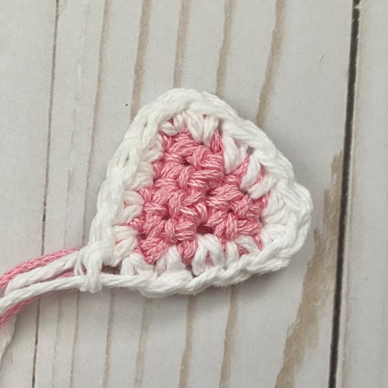
Ear (make 2)
With Pink, ch 2.
Row 1 – 3 sc in 2nd ch from hook. Ch 1, turn (3 sc)
Row 2 – sc in each st across. Ch 1, turn (3 sc)
Row 3 – 2 sc in first st. Sc in next st. 2 sc in last st. Ch 1, turn (5 sc)
Row 4 – sc in each st across. Change to White in last st. (5 sc)
Edging
Make 3 sc up side of piece. 3 in tip of Ear. 3 down other side. Sc across sts of Row 4. Join with sl st to first sc of Edging.
Fasten off, leaving long tail for sewing.
Finishing
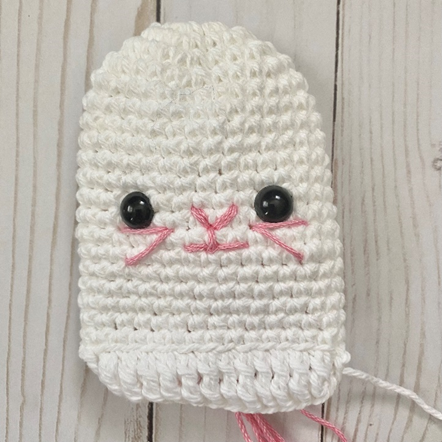
With Pink, make a v between Eyes for Nose. Make a small vertical line below, and two smaller horizontal lines on either side of that line for Mouth. Carry Pink to sides of piece to make horizontal lines below Eyes for Whiskers. Tie off ends on inside of piece. (See photo below.)
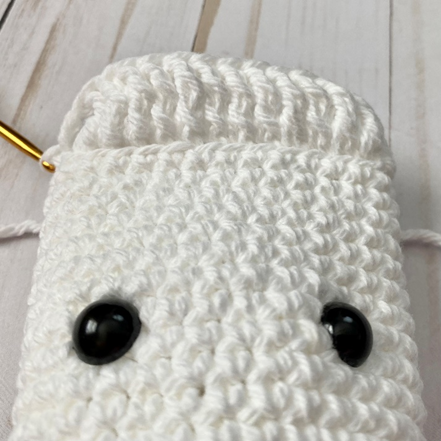
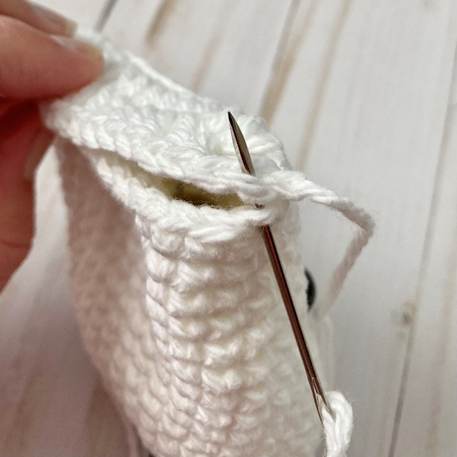
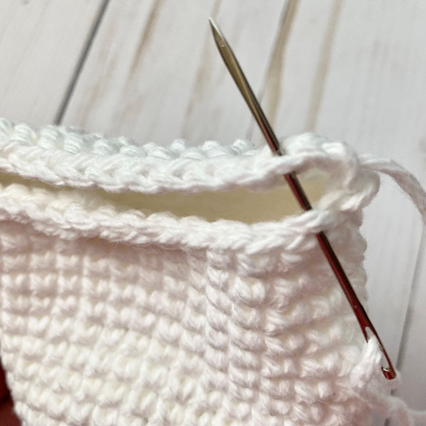
Sew Ears on either side of top of Popsicle. Stuff piece. With long tail left over from Rnd 21, sew ch 2 from end of rnd to sts to side sts of piece. (first photo below) Sew sts of Rnd 21 to FLO of sts on opposite side (second photo below). Sew ch 2 from beg of rnd to side sts of piece. (Third photo shows finished process.)
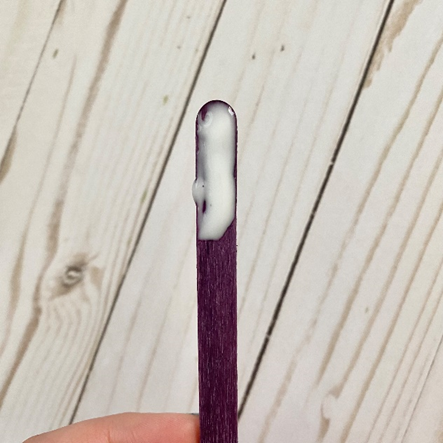
Apply glue to one end of popsicle stick (first photo below). Insert stick into center of sts from Rnd 21, and push through stuffing inside of piece until about half of the stick is visible from the outside of the piece (second photo). Let dry according to directions on label. If desired, sew around small gap near front and back of popsicle stick using a small piece of main color yarn. (Third photo shows finished piece.)

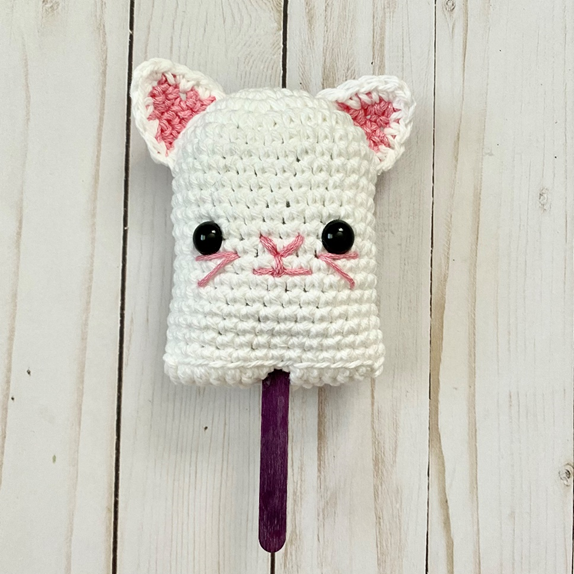
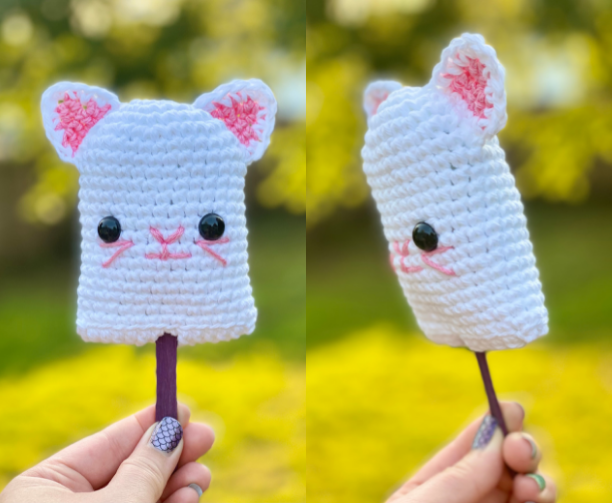
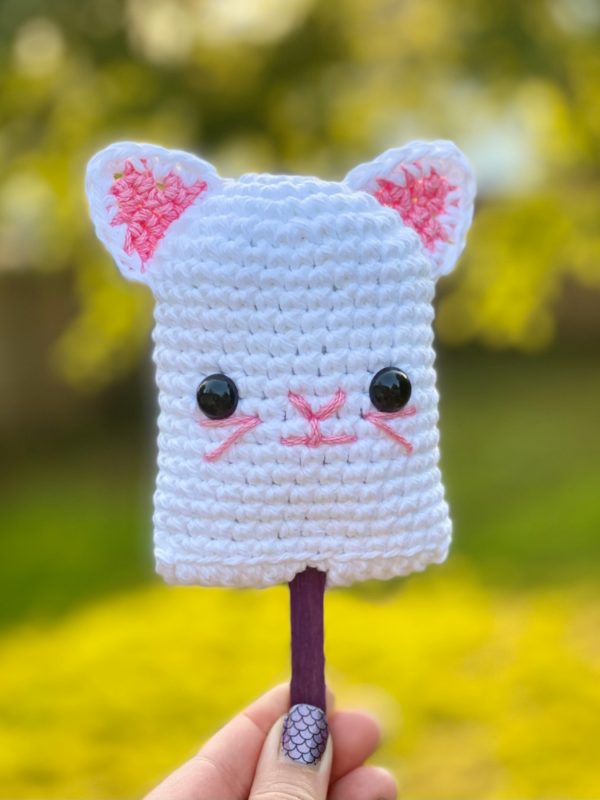
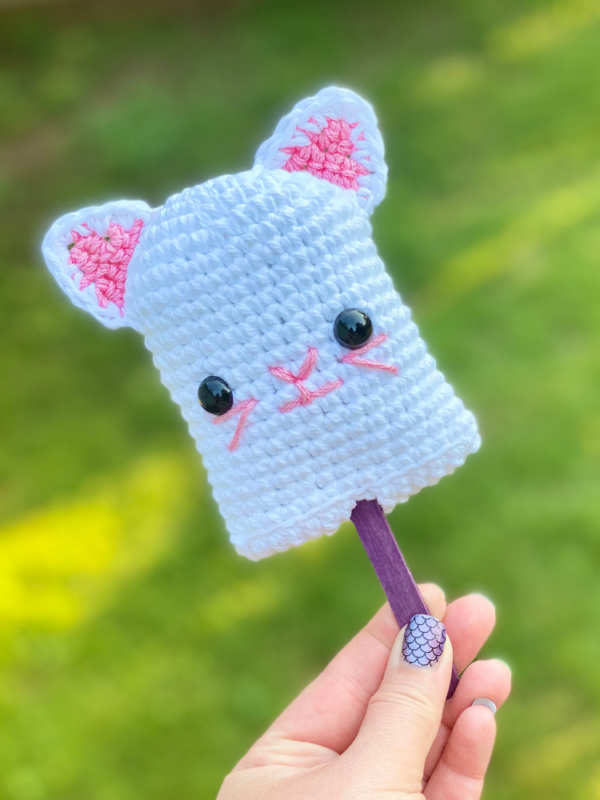
Here is the finished popsicle!
I hope you enjoyed crocheting this kitty popsicle along with me today. If you love fun, free patterns like this one, then please be sure to sign up for my email list to keep up to date with all my latest designs:
Also, please be sure to follow me on social media, and tag me in photos of your finished projects made from my patterns, so I can see your lovely work!
Don’t forget to pin it for later HERE!
And you can find that ad-free PDF pattern HERE!
Happy Crocheting!
COPYRIGHT:
This pattern is owned by Crafty Kitty Crochet (Melissa Moore). Any reselling or distribution of this pattern is prohibited. Sale of items made using this pattern is welcomed, but I do ask that credit/a link be provided back to my site, craftykittycrochet.com.

Comments (2)
Amigurumi Ice Cream Cookie Cat – 4 Year Anniversary Pattern ~ Crafty Kitty Crochet
July 28, 2022 at 10:30 pm
[…] Keeping with tradition, as you know from my Amigurumi Kitty Cupcake, Kitty Ice Cream Cone, and Kitty Popsicle, I’d like to present you with this Ice Cream Cookie Cat as a special free gift to […]
Swiss Roll Cat – Five Year Anniversary Crochet Pattern ~ Crafty Kitty Crochet
August 1, 2023 at 2:56 pm
[…] other anniversary patterns. They’re all cat/dessert themed – my Kitty Cupcake, Ice Cream Kitty, Kitty Popsicle, and Ice Cream Cookie Cat are all free PDFs as well, and would be a great addition to your kawaii […]