
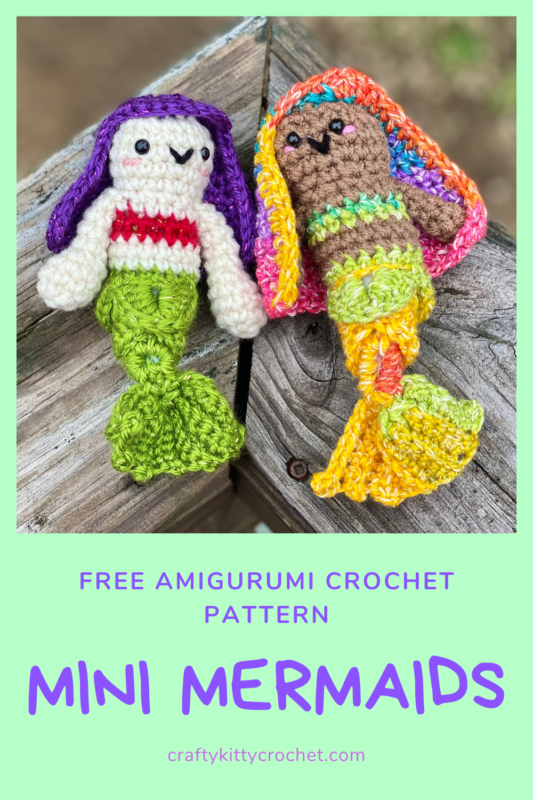
Amigurumi Mini Mermaid – Crochet Pattern
Pin it for later!
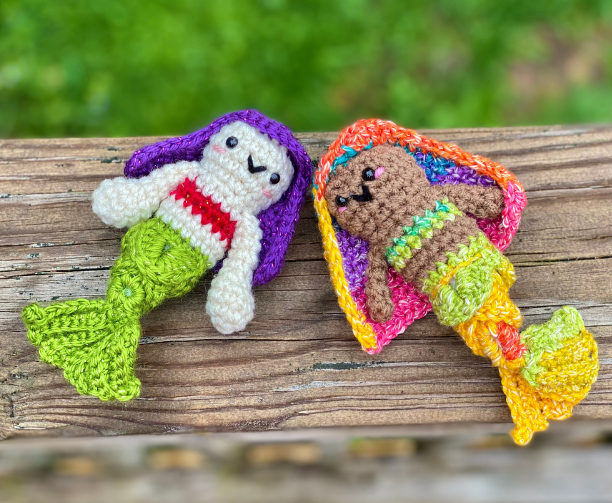
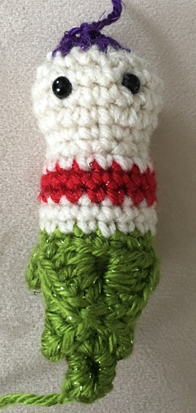
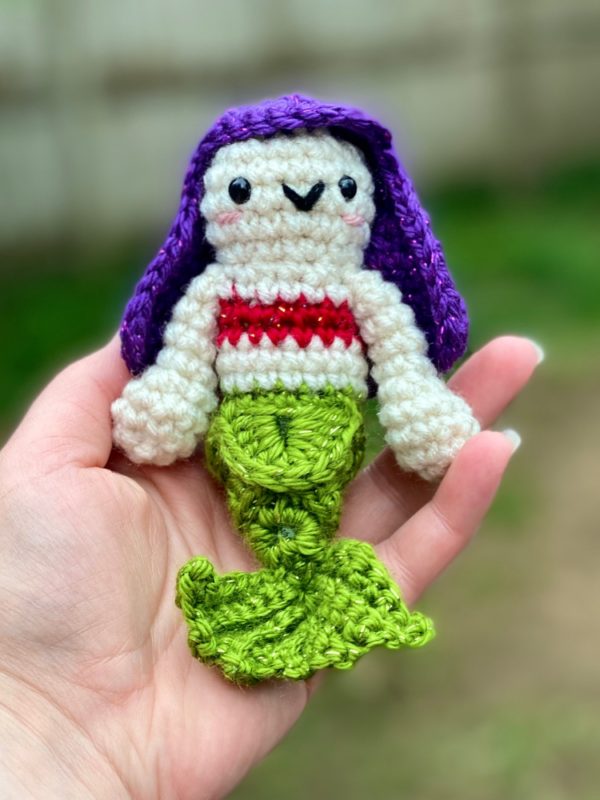
Looking for a cute, magical, aquatic amigurumi pattern that you can customize to make the perfect gift? Then you will love these amigurumi mini mermaids! Quick, easy, and fun to make, you can make them your own by crocheting them in any colors you want! What an adorable piece of kawaii decor they would make! And they’re perfect as quick gifts, craft fair makes, or even party favors! The possibilities are endless!
Mini Mermaids
It’s no secret that I LOVE mermaids, and try to make as many mer-magical designs as possible! From my Mermaid Slouchy Hat to my Mermaid Christmas Stocking, and SO many patterns in between, I’m definitely hooked on mermaids (see what I did there?)!! This particular design is derived straight from my Merry Mermaid Christmas Ornament pattern – this one is the all-seasons version! Now I can’t stop making these little cuties and totally want to make more in all different kinds of color schemes. What colors will you use for your mermaid(s)???
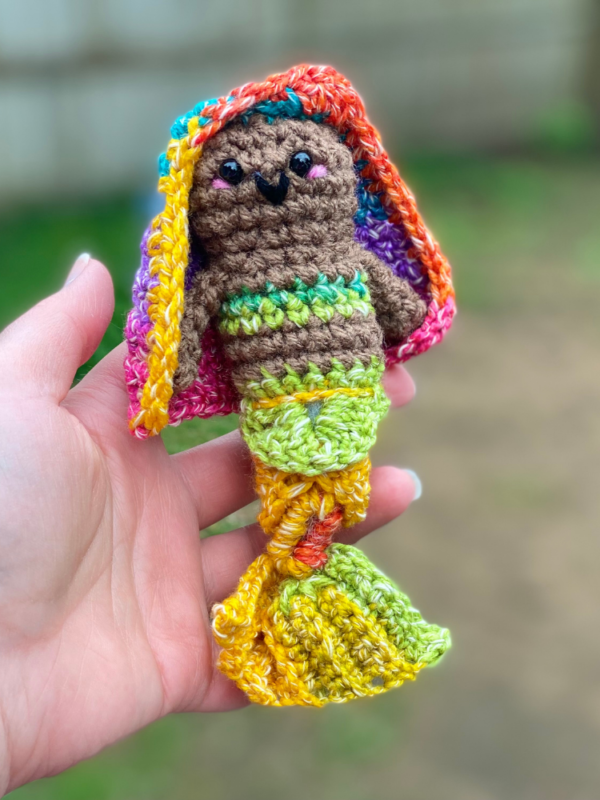
The yarn I used on the rainbow mermaid in these photos is one that I absolutely cannot get enough of – Lion Brand Ice Cream Cotton Blend!!! Find it on Amazon HERE!
Looking for the ad-free PDF version of this pattern? You can find it in my shop HERE!

Supplies
Size D-3 / 3.25 mm crochet hook
Medium weight yarn:
- About 40 yds for Fin Color (Caron Simply Soft Party in Spring Sparkle or Lion Brand Ice Cream Cotton in Rainbow used in photos)
- About 10 yds for Top Color (Caron Simply Soft Party in Red Sparkle or Lion Brand Ice Cream Cotton in Rainbow used in photos)
- About 50 yds for Hair Color (Caron Simply Soft Party in Purple Sparkle or Lion Brand Ice Cream Cotton in Rainbow used in photos)
- About 40 yds for Skin Color (Red Heart Super Saver in Aran and Café Latte used in photos; other possible color ways include Coffee, Buff, Oatmeal, and Warm Brown)
- Less than 1 yd of medium weight black yarn for Smile (Red Heart Super Saver in Black used in photos)
- Less than 1 yd of pink yarn for Blush (Red Heart Soft Baby Steps in Strawberry used in photos)
Fiberfill Stuffing
6 mm plastic safety eyes
Yarn Needle
Scissors
Abbreviations
*= indicates the beginning/end of a section to be repeated
BLO = back loop only
Ch = chain
Croc st = crocodile stitch
Dc = double crochet
Hdc = half double crochet
Rem = remaining
Rep = repeat
Rnd(s) (round(s)
Sc = single crochet
Sc2tog = single crochet 2 together
Sl St = slip stitch
St(s) = stitch(es)
YO = yarn over
Gauge
Exact gauge is not essential to this project.
Size
Finished piece measures about 7 inches in length.
Notes
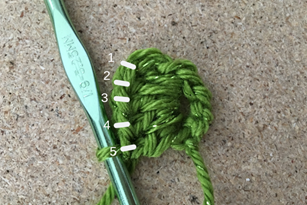
The tail is made using the crocodile stitch (5 dc around each post of a 2dc cluster). It is worked up in alternating rows of 2dc cluster rows, and croc st/sc rows. One increase occurs each row (either a 2dc cluster/dc increase, or croc st/sc increase). At the end of each crocodile stitch row, work will already be turned from creating last croc st. At the end of each 2dc cluster row, work will not be turned until after the first half of the croc in the following row is made. Therefore, instructions do not include a “turn” at the end of each row for Bottom of Body. Here is a diagram of the order in which the double crochet stitches of the crocodile stitch are worked.
How to Make This
Instructions
Bottom of Body
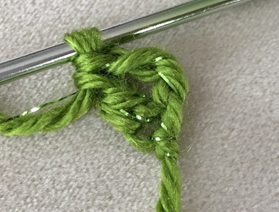
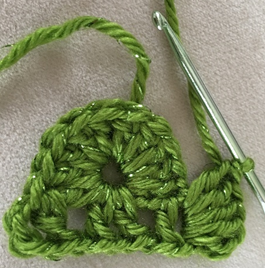
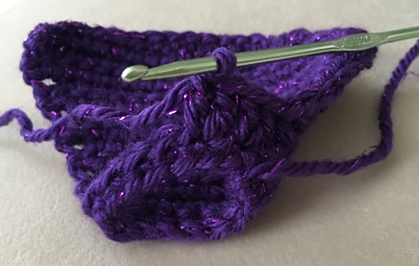
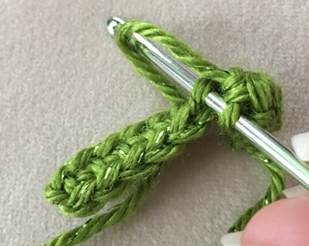
Row 1 – With Fin Color, ch 4, Dc in 4th ch from hook – counts as 2dc cluster (first photo below). Ch 1 (1 dc)
Row 2 – Work croc st (see Notes) around both posts from Row 1 (second photo), working up towards the top of second post while creating second half of croc st (third photo). Ch 4 (1 croc st)
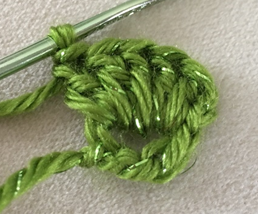
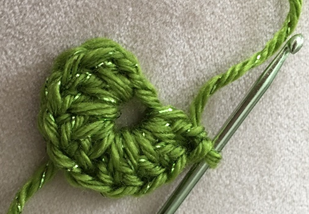
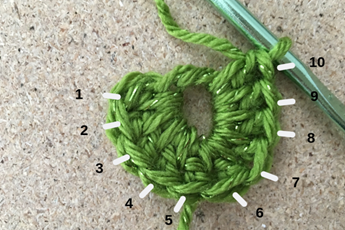
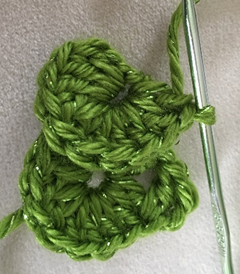
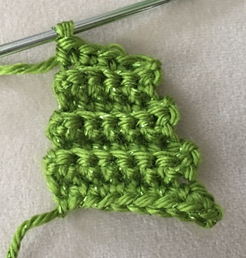
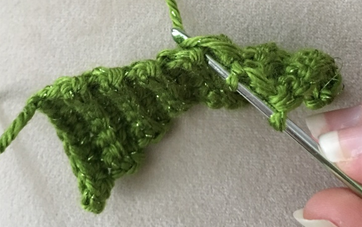
Row 3 – Dc in same st – counts as 2dc cluster. Ch 1. (Dc, ch 1, dc) in center of croc st below, (2dc cluster made) ch 1. (Dc, ch 1, dc) in outer edge of last croc st (first photo below shows 3 clusters made). Ch 1 (3 2dc clusters made)
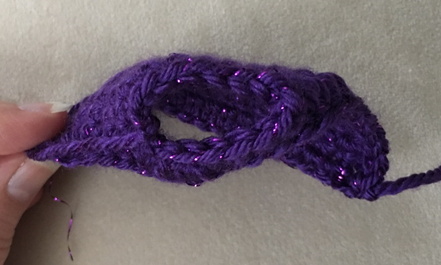
Row 4 – Croc st around first 2dc cluster, turning work while creating second half of croc st (second and third photos). Sc in next 2dc cluster, croc st around last 2dc cluster (fourth photo). Ch 4 (2 croc sts, 1 sc)
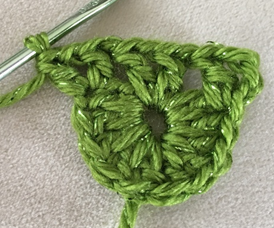
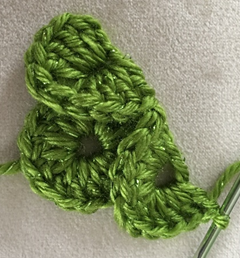
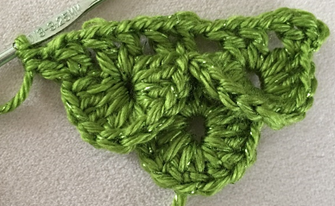
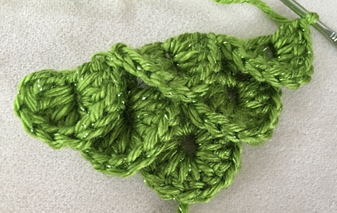
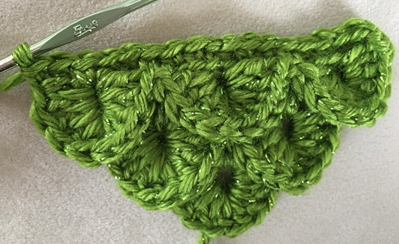
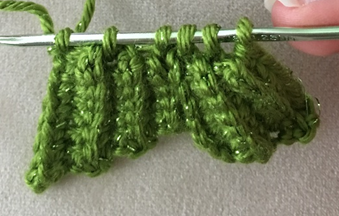
Row 5 – Dc in same st, ch 1. (Dc, ch 1, dc) in center of next croc. Ch 1. (Dc, ch 1, dc) in next sc. Ch 1, (dc, ch 1, dc) in center of next croc, ch 1. (Dc, ch 1, dc) in outer edge of last croc. (First photo below shows finished clusters.) Ch 1 (5 2dc clusters)
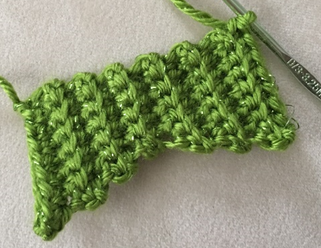
Row 6 – *Croc st around first 2dc cluster, turning work while creating second half of croc st. Sc in next 2dc cluster.* Rep from * to * once more. Croc st around last 2dc cluster. (Second photo shows finished row.) Ch 4 (3 croc sts, 2 sc)
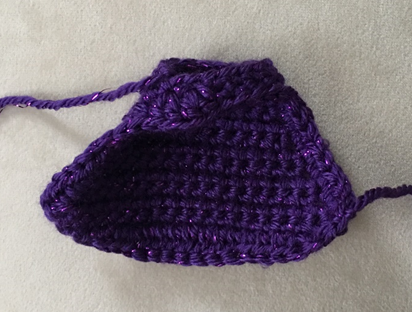
Closing the piece
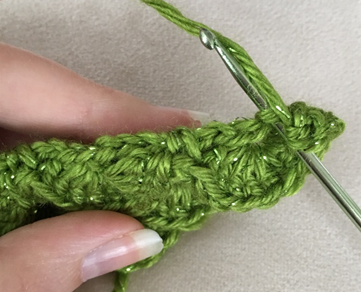
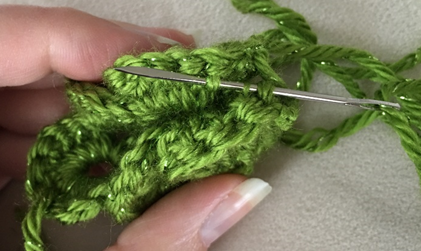
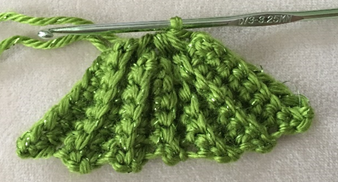
Working across top of piece, sc in BLO (first photo below) of each st of croc sts and in sc sts between croc sts. (Second photo shows finished process.) (17 sc)
Fasten off, leaving long tail for sewing. Fold piece together and sew together, stitching slightly away from edge of croc sts so that they still stick out when piece is sewing together (third photo).
Top of Body
This piece is worked in continuous rnds; do not join. You may wish to use a stitch marker and move it up at the beginning of each new rnd.
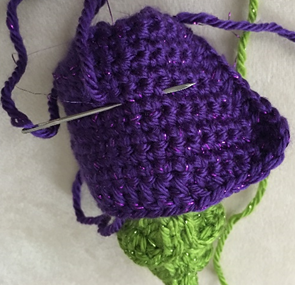
Rnd 1 – Attach Skin Color on back of Bottom of Body, in sc sts made during Closing, ch 1. Sc in each st around (17 sc)
Rnd 2 – sc in each st around. Attach Top Color in last st of rnd (17 sc)
Rnds 3 – 4 – sc in each st around. Attach Skin Color in last st of rnd (17 sc)
Rnd 5 – sc in each st around; begin stuffing (17 sc)
Rnd 6 – *sc2tog over next 2 sts, sc in next st;* rep from * to * four more times. Sc2tog over next 2 sts (11 sc)
Rnd 7 – *sc in next st, 2 sc in next st;* rep from * to * four more times. Sc in next st (16 sc)
Rnd 8 – *sc in next 2 sts, 2 sc in next st;* rep from * to * four more times. Sc in next st (21 sc)
Rnds 9 – 10 – sc in each st around. Attach safety eyes, finish stuffing (21 sc)
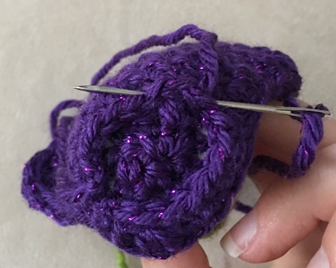
Rnd 11 – *sc2tog over next 2 sts, st in next 2 sts;* rep from * to * four more times. Sc in next st. Attach Hair Color in last st (16 sc)
Rnd 12 – *sc2tog over next 2 sts, sc in next st;* rep from * to * four more times. Sc in last st (11 sc)
Rnd 13 – sc2tog 5 times. Leave rem st unworked (6 sc)
Fasten off. (Photo to right shows piece at this stage.)
Hair
With Hair Color, Ch 16.
Row 1 – sc in 2nd ch from hook and in each st across. Join with sl st to first st. Ch 1, turn (15 sc)
Row 2 – sc in next 9 sts. Leave rem sts unworked. Ch 1, turn (9 sc)
Row 3 – 2 sc in next st. Sc in next 7 sts. 2 sc in last st. Ch 1, turn (11 sc)
Row 4 – sc in each st across. Ch 1, turn (11 sc)
Row 5 – 2 sc in next st. Sc in next 9 sts. 2 sc in last st. Ch 1, turn (13 sc)
Row 6 – sc in each st across. Ch 1, turn (13 sc)
Row 7 – 2 sc in next st. Sc in next 11 sts. 2 sc in last st. Ch 1, turn (15 sc)
Row 8 – sc in each st across. Ch 1, turn (15 sc)
Row 9 – 2 sc in next st. Sc in next 13 sts. 2 sc in last st. Ch 1, turn (17 sc)
Row 10 – sc in each st across. Ch 1, turn (17 sc)
Row 11 – 2 sc in next st. Sc in next 15 sts. 2 sc in last st. Ch 1, turn (19 sc)
Row 12 – sc in each st across. Ch 1, turn (19 sc)
Rows 13 – 15 – sc in each st across. Ch 1, turn. (19 sc)
Row 16 – sc in next 3 sts, hdc in next 3 sts, dc in next 7 sts, hdc in next 3 sts, sc in next 3 sts. (6 sc, 6 hdc, 7 dc)
Edging
Working along side, hdc in each st up one side of Hair, make 2 dc in next 2 sts of top of Hair for bangs (first photo below), sc in rem sts across top, hdc down other side of Hair.
Fasten off, leaving long tail for sewing. (Second and third photos show finished piece.)
Arm (make 2)
This piece is worked in continuous rnds; do not join. You may wish to use a stitch marker and move it up at the beginning of each new rnd.
Rnd 1 – With Skin Color, make a magic ring; 5 sc in ring (5 sc)
Rnd 2 – sc in each st around (5 sc)
Rnd 3 – sc2tog over next 2 sts, sc in next 3 sts. (4 sc)
Rnds 4 – 5 – sc in each st around. (4 sc)
Fasten off, leaving long tail for sewing. (Photo below shows finished piece.
Fin
(This piece is worked entirely in BLO – see first photo below.)
With Fin Color, ch 9.
Row 1 – sc in 2nd ch from hook and in each st across. Ch 1, turn (8 sc)
Row 2 – sc in next 7 sts, leave rem st unworked. Ch 1, turn (7 sc)
Row 3 – sc in each st across. Ch 1, turn (7 sc)
Row 4 – sc in next 6 sts, leave rem st unworked. Ch 1, turn (6 sc)
Row 5 – sc in each st across. Ch 1, turn (6 sc)
Row 6 – sc in next 5 sts, leave rem st unworked. Ch 1, turn (5 sc)
Row 7 – sc in each st across. Ch 1, turn (second photo below shows piece at this stage.) (5 sc)
Row 8 – sc in next 4 sts, 2 sc in last st. Ch 1, turn (6 sc)
Row 9 – sc in each st across. Ch 1, turn (6 sc)
Row 10 – sc in next 5 sts, 2 sc in last st. Ch 1, turn (7 sc)
Row 11 – sc in each st across. Ch 1, turn (7 sc)
Row 12 – sc in next 6 sts, 2 sc in last st. Ch 1, turn (8 sc)
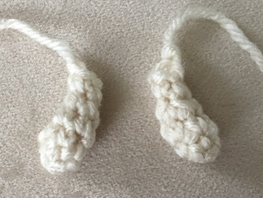
Row 13 – sc in each st across. Do not fasten off (third photo below shows piece at this stage.) (8 sc)
Cinching
Working across top of Fin, [insert hook in a st, draw up a loop] five times (first and second photos below). YO and pull through all 6 loops on hook (third photo).
Fasten off, leaving long tail for sewing.
Finishing
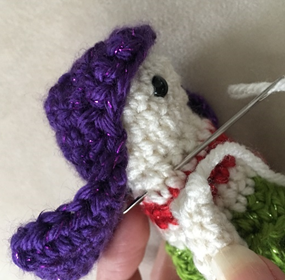
Place Hair on Top of Body, lining up with last rnds of Body so that only Hair Color stitches show (first photo below). Sew Hair around Hair Color sts of Body, and carry yarn tail further down onto head to secure Hair in place closer to base of neck (second photo below). Third photo below shows piece at this stage.
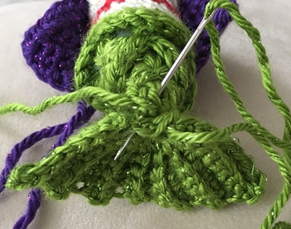
Sew Fin to Bottom of Body (photo below).
Place Arms on each side of Top of Body, slightly above Top Color sts. Sew in place (photo below).
With black yarn, make small V on face for smile. With pink yarn, sew small horizontal lines at edges of both eyes for Blush.
Weave in all ends or tie off/hide ends inside sts.
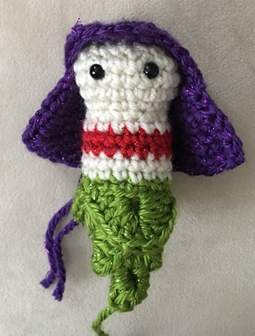
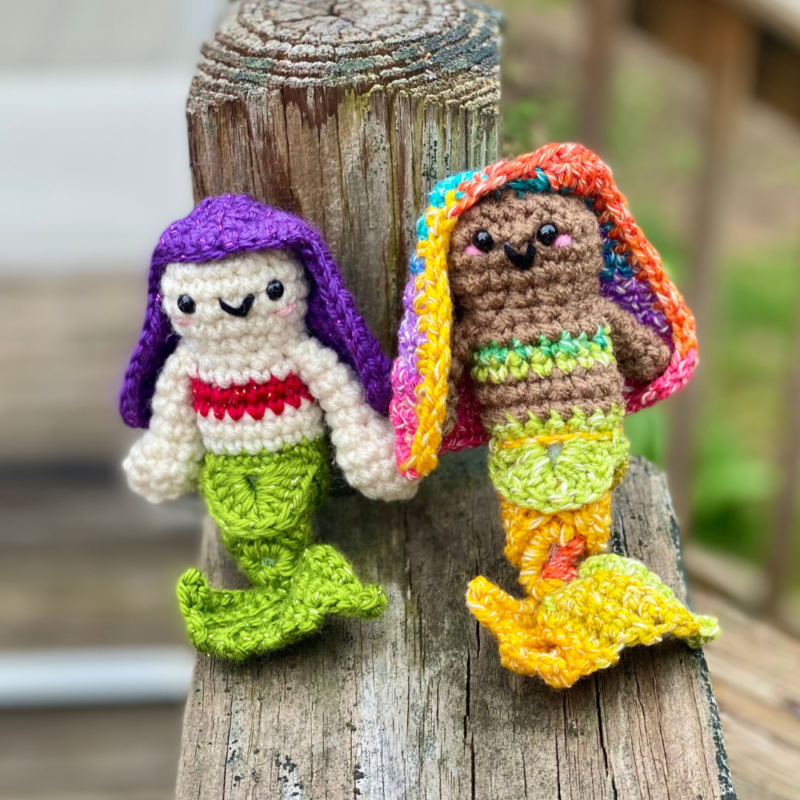
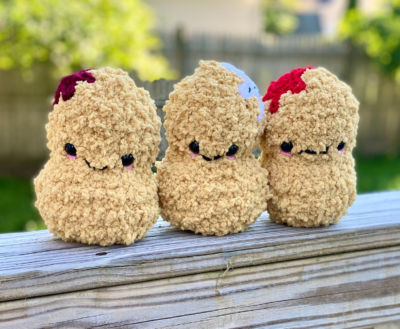
Here are the finished mermaids!

I hope you enjoyed crocheting this mermaid along with me today. If you love fun, free patterns like this one, then please be sure to sign up for my email list to keep up to date with all my latest designs:
Also, please be sure to follow me on social media, and tag me in photos of your finished projects made from my patterns, so I can see your lovely work!
Don’t forget to pin it for later HERE!
And you can find that ad-free PDF pattern HERE!
Happy Crocheting!
COPYRIGHT:
This pattern is owned by Crafty Kitty Crochet (Melissa Moore). Any reselling or distribution of this pattern is prohibited. Sale of items made using this pattern is welcomed, but I do ask that credit/a link be provided back to my site, craftykittycrochet.com.
Comments (2)
Samantha Nener
May 28, 2022 at 10:01 pm
Thanks for sharing this super cute pattern!
Melissa
May 29, 2022 at 2:55 pm
Hi Samantha, you are so welcome and thank YOU!! Hope you love the pattern! ~ Melissa