Bumble Bee Witch Hat – Crochet Pattern
Pin it for later!
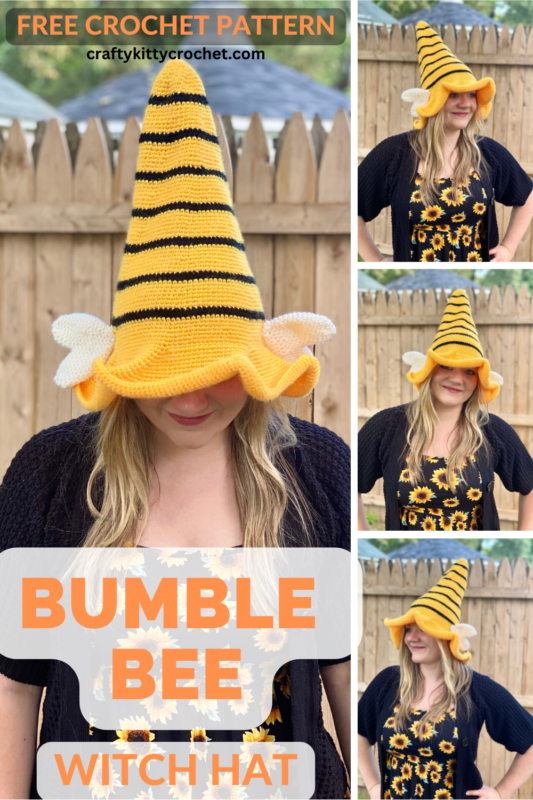
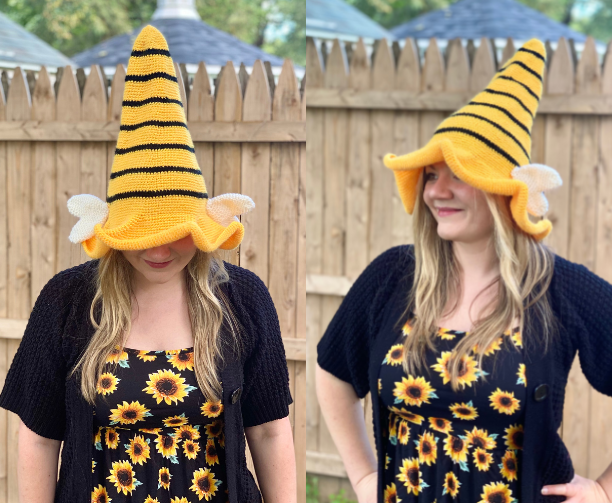
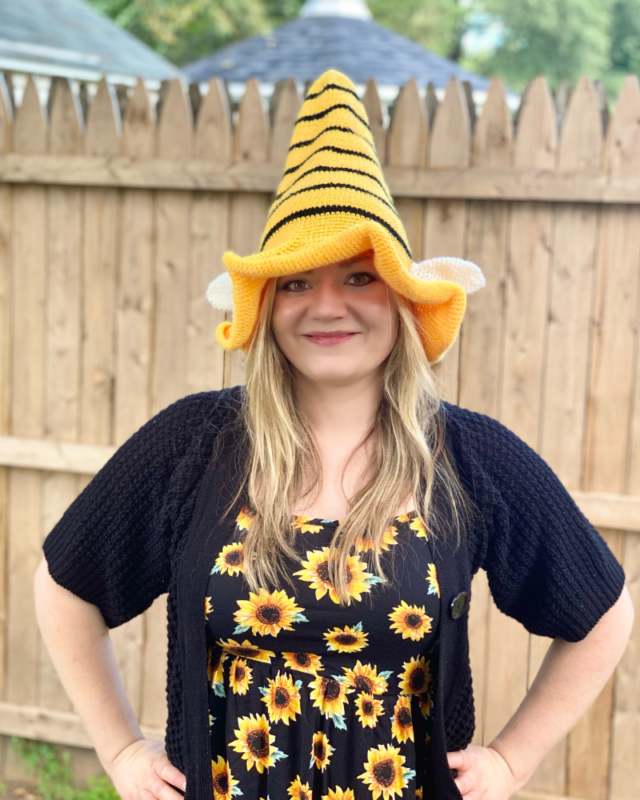
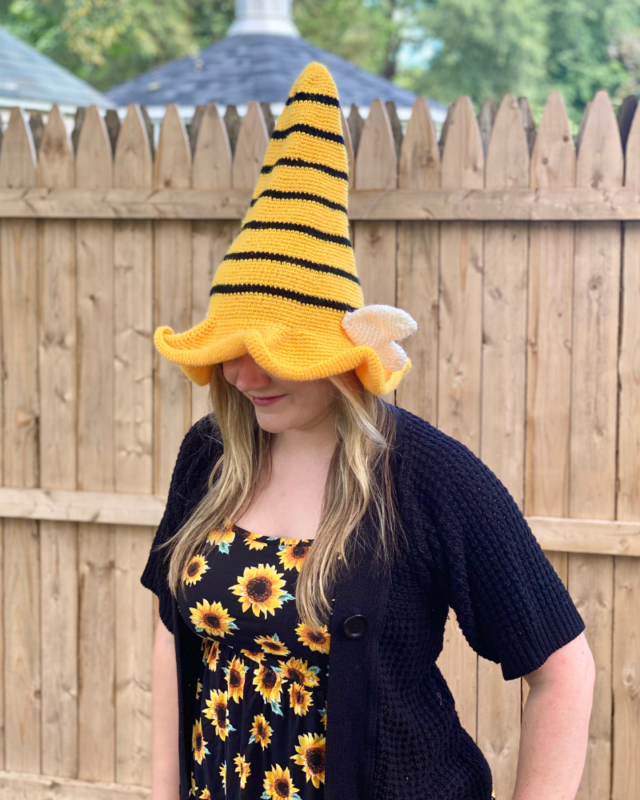
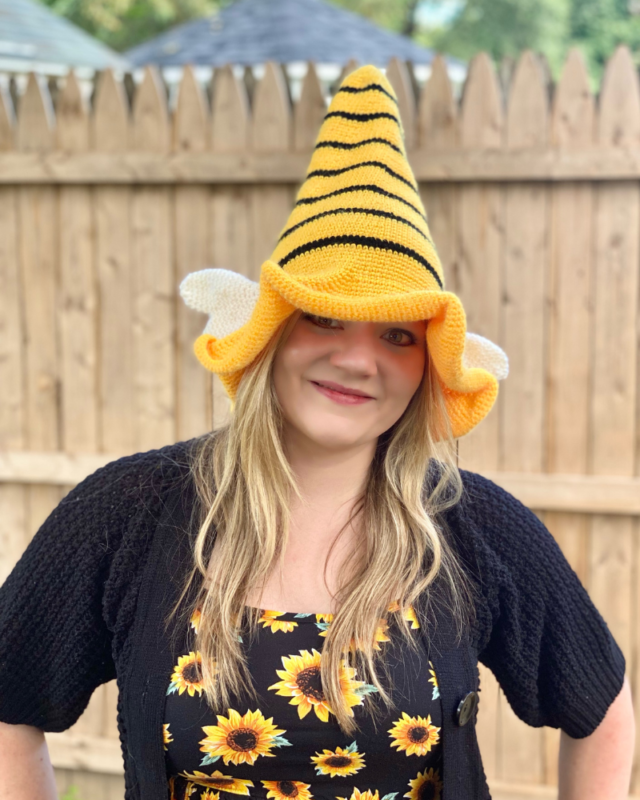
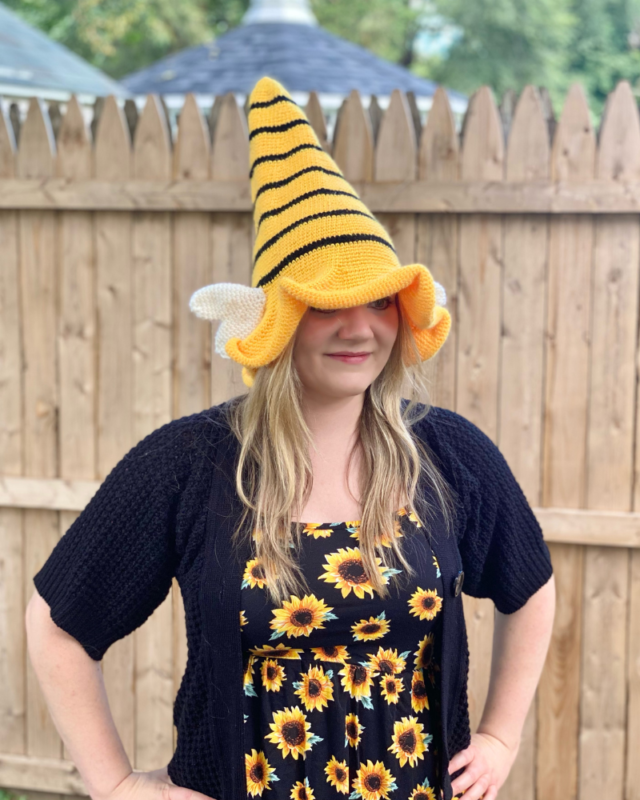
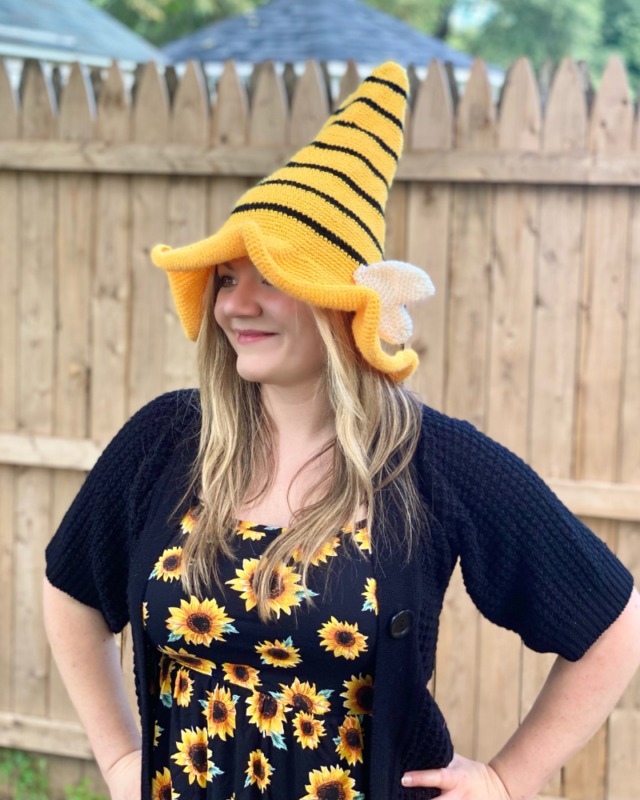
What’s all the buzz about? It’s about this adorable Bumble Bee Witch Hat for Halloween, of course! This fun, bright and easy to make bee-themed witch hat is the perfect accessory for your costume this year! Make your spooky season unique by topping off your Halloween ensemble – quite literally – with this cute pointy hat. It even has tiny heart wings to make your bee costume even more kawaii! This is your chance to “BEE” That Witch at the Halloween party! The pattern works up fairly fast using a simple and repetitive pattern that’s easy to get into the rhythm of. Make one in a weekend with this bee-utiful pattern!
Bumble Bee Witch Hat
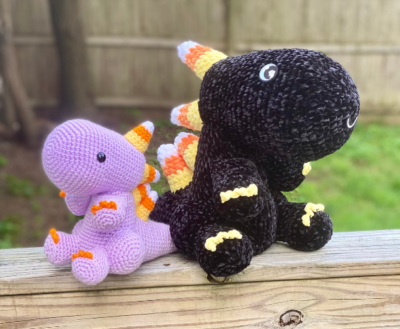
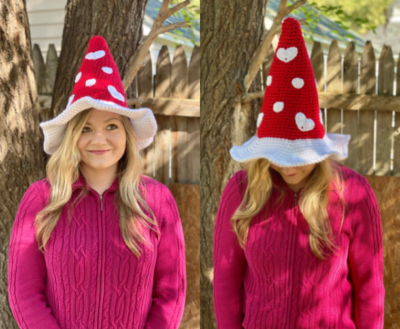
It’s no secret that I adore crocheting witch hats – from my Candy Corn to my Sunflower to my Ice Cream Cone, I love dreaming up new and unique designs for your latest witch costume! And since bumble bees are bright and adorable by nature, why not incorporate their look into this year’s Halloween aesthetic? To top it off, I had to include some heart-shaped wings as the cherry on top of this whole look. This is one costume I promise everyone will be buzzing about for years to come!
The yarn for this pattern was generously provided by KnitPal! Find their yarn on Amazon HERE!
Looking for the ad-free PDF copy of this pattern? Find it in my shop HERE!
Supplies
Size G/6 4 mm crochet hook
KnitPal Woolen Delights (medium / worsted weight) in:
- Bright Yellow (2 skeins / 325 yds)
- Black Onyx (1 skein / 90 yds)
- Snow White (1 skein / 25 yds)
Yarn Needle
Scissors
Optional: fabric stiffening spray to help hat hold shape
Abbreviations
*= indicates beginning/end of a section to be repeated
FLO = front loop only
Rem = remaining
Rep = repeat
Rnd(s) = round(s)
Sc = single crochet
Sc2tog = single crochet 2 together
St(s) = stitch(es)
Gauge
4 stitches and 5 rounds = about 1 inch
Size
About 18 inches length laying flat; fits 21 – 22 inch head circumference
How to Make This
Instructions
Hat
This piece is worked in continuous rnds; do not join. You may wish to use a stitch marker and move it up and the beginning of each new rnd.
Rnd 1 – with white yarn, make a magic ring. 6 sc in ring. (6 sc)
Rnd 2 – 2 sc in each st around. (12 sc)
Rnd 3 – *2 sc in next st, sc in next st;* rep from * to * around. (18 sc)
Rnd 4 – sc in each st around. (18 sc)
Rnd 5 – *2 sc in next st, sc in next 2 sts;* rep from * to * around. (24 sc)
Rnd 6 – sc in each st around. (24 sc)
Rnd 7 – *2 sc in next st, sc in next 3 sts;* rep from * to * around. (30 sc)
Rnds 8 – 10 – sc in each st around. Change to black yarn in last st of rnd 10. (30 sc)
Rnd 11 – *2 sc in next st, sc in next 4 sts;* rep from * to * around. (36 sc)
Rnd 12 – sc in each st around. Change to yellow yarn in last st of rnd. (36 sc)
Rnds 13 – 15 – sc in each st around. (36 sc)
Rnd 16 – *2 sc in next st, sc in next 5 sts;* rep from * to * around. (42 sc)
Rnds 17 – 19 – sc in each st around. Change to black yarn in last st of Rnd 19. (42 sc)
Rnd 20 – *2 sc in next st, sc in next 6 sts;* rep from * to * around. (48 sc)
Rnd 21 – sc in each st around. Change to yellow yarn in last st of rnd. (48 sc)
Rnds 22 – 24 – sc in each st around. (48 sc)
Rnd 25 – *2 sc in next st, sc in next 7 sts;* rep from * to * around. (54 sc)
Rnds 26 – 28 – sc in each st around. Change to black yarn in last st of Rnd 28. (54 sc)
Rnd 29 – *2 sc in next st, sc in next 8 sts;* rep from * to * around. (60 sc)
Rnd 30 – sc in each st around. Change to yellow yarn in last st of rnd. (60 sc)
Rnds 31 – 33 – sc in each st around. (60 sc)
Rnd 34 – *2 sc in next st, sc in next 9 sts;* rep from * to * around. (66 sc)
Rnds 35 – 37 – sc in each st around. Change to black yarn in last st of Rnd 37. (66 sc)
Rnd 38 – *2 sc in next st, sc in next 10 sts;* rep from * to * around. (72 sc)
Rnd 39 – sc in each st around. Change to yellow yarn in last st of rnd. (72 sc)
Rnds 40 – 42 – sc in each st around. (72 sc)
Rnd 43 – *2 sc in next st, sc in next 11 sts;* rep from * to * around. (78 sc)
Rnds 44 – 46 – sc in each st around. Change to black yarn in last st of Rnd 46. (78 sc)
Rnd 47 – *2 sc in next st, sc in next 12 sts;* rep from * to * around. (84 sc)
Rnd 48 – sc in each st around. Change to yellow yarn in last st of rnd. (84 sc)
Rnds 49 – 51 – sc in each st around. (84 sc)
Rnd 52 – *2 sc in next st, sc in next 13 sts;* rep from * to * around. (90 sc)
Rnds 53 – 55 – sc in each st around. Change to black yarn in last st of Rnd 55. (90 sc)
Rnd 56 – *2 sc in next st, sc in next 14 sts;* rep from * to * around. (96 sc)
Rnd 57 – sc in each st around. Change to yellow yarn in last st of rnd. (96 sc)
Rnds 58 – 60 – sc in each st around. (96 sc)
Rnd 61 – *2 sc in next st, sc in next 15 sts;* rep from * to * around. (102 sc)
Rnds 62 – 64 – sc in each st around. Change to black yarn in last st of Rnd 64. (102 sc)
Rnd 65 – *2 sc in next st, sc in next 16 sts;* rep from * to * around. (108 sc)
Rnd 66 – sc in each st around. Change to yellow yarn in last st of rnd. (108 sc)
Rnds 67 – 69 – sc in each st around. (108 sc)
Rnd 70 – *2 sc in next st, sc in next 17 sts;* rep from * to * around. (114 sc)
Rnds 71 – 73 – sc in each st around. (114 sc)
Do not fasten off.
Brim
This portion is also worked in continuous rnds.
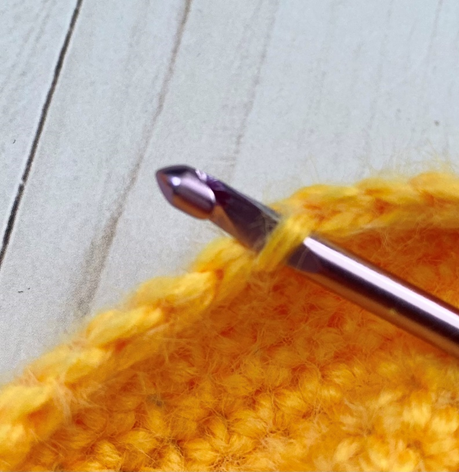
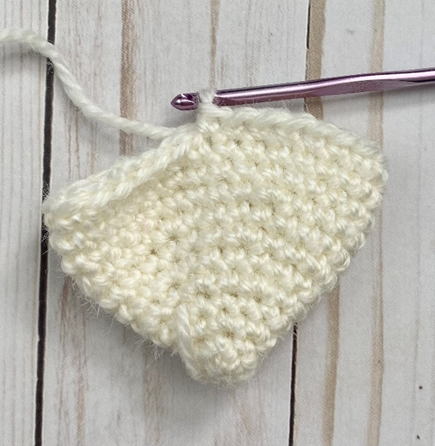
Rnd 1 – working in FLO (first photo below) of sts of Rnd 73 from Hat, *2 sc in next st, sc in next 18 sts.* Rep from * to * around. (120 sc)
Rnd 2 – *2 sc in next st, sc in next 19 sts.* Rep from * to * around. (126 sc)
Rnd 3 – *2 sc in next st, sc in next 20 sts.* Rep from * to * around. (132 sc)
Rnd 4 – *2 sc in next st, sc in next 21 sts.* Rep from * to * around. (138 sc)
Rnd 5 – *2 sc in next st, sc in next 22 sts.* Rep from * to * around. (144 sc)
Rnd 6 – *2 sc in next st, sc in next 23 sts.* Rep from * to * around. (150 sc)
Rnd 7 – *2 sc in next st, sc in next 24 sts.* Rep from * to * around. (156 sc)
Rnd 8 – *2 sc in next st, sc in next 25 sts.* Rep from * to * around. (160 sc)
Rnd 9 – *2 sc in next st, sc in next 26 sts.* Rep from * to * around. (166 sc)
Rnd 10 – *2 sc in next st, sc in next 27 sts.* Rep from * to * around. (172 sc)
Rnd 11 – *2 sc in next st, sc in next 28 sts.* Rep from * to * around. (178 sc)
Rnd 12 – *2 sc in next st, sc in next 29 sts.* Rep from * to * around. (184 sc)
Rnd 13 – *2 sc in next st, sc in next 30 sts.* Rep from * to * around. (190 sc)
Rnd 14 – *2 sc in next st, sc in next 31 sts.* Rep from * to * around. (196 sc)
Rnd 15 – *2 sc in next st, sc in next 32 sts.* Rep from * to * around. (202 sc)
Rnd 16 – *2 sc in next st, sc in next 33 sts.* Rep from * to * around. (208 sc)
Rnd 17 – *2 sc in next st, sc in next 34 sts.* Rep from * to * around. (214 sc)
Rnd 18 – *2 sc in next st, sc in next 35 sts.* Rep from * to * around. (220 sc)
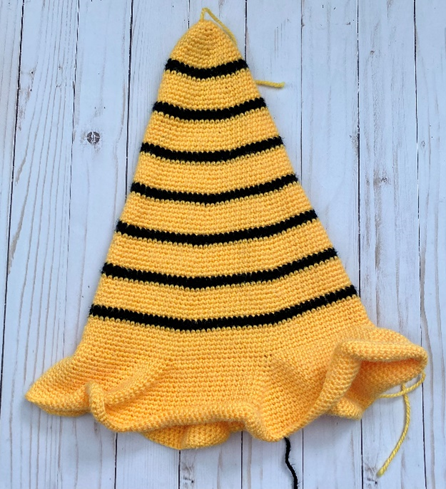
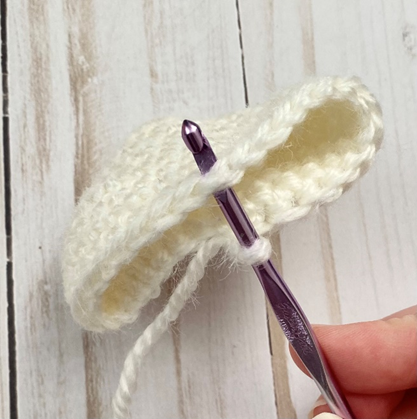
Fasten off. Second photo shows finished piece.
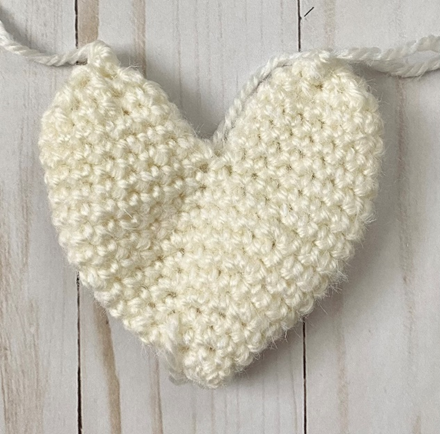
Heart Wing (make 2)
This piece is worked in continuous rnds; do not join. You may wish to use a stitch marker and move it up at the beginning of each new round.
Rnd 1 – with white yarn, make a magic ring. 6 sc in ring. (6 sc)
Rnd 2 – sc in each st around. (6 sc)
Rnd 3 – 2 sc in each st around. (12 sc)
Rnd 4 – sc in each st around. (12 sc)
Rnd 5 – *2 sc in next st, sc in next st.* Rep from * to * around. (18 sc)
Rnd 6 – sc in each st around. (18 sc)
Rnd 7 – *2 sc in next st, sc in next 2 sts.* Rep from * to * around. (24 sc)
Rnd 8 – sc in each st around. (24 sc)
Rnd 9 – *2 sc in next st, sc in next 3 sts.* Rep from * to * around. (30 sc)
Rnd 10 – sc in each st around. (30 sc)
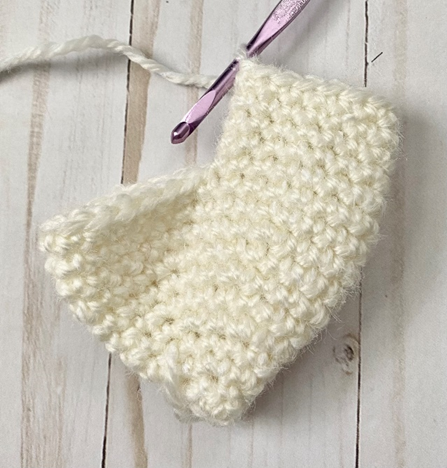
Do not fasten off (first photo below).
First Heart Peak
This portion is also worked in continuous rnds.
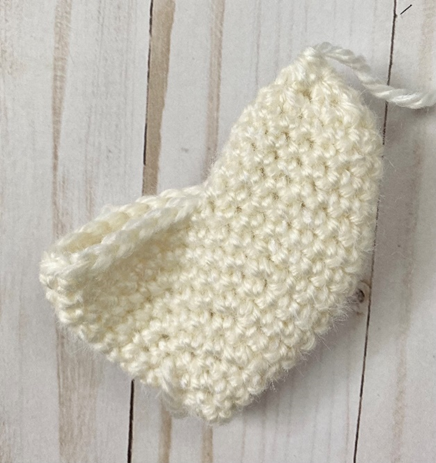
Rnd 1 (partial rnd) – Count backwards 15 sts from the st you are currently in; place a marker on that stitch. Sc across from you into st where marker was placed (second photo below); this st now indicates first st of rnd. Sc in next 14 sts. (15 sc)
Rnds 2 – 4 – sc in each st around (third photo). (15 sc)
Rnd 5 – *Sc2tog over next 2 sts, sc in next st.* Rep from * to * around. (10 sc)
Rnd 6 – sc2tog in each st around. (5 sc)
Fasten off, leaving tail for sewing rem gap from Rnd 6. (Fourth photo.)
Second Heart Peak
This portion is also worked in continuous rnds.
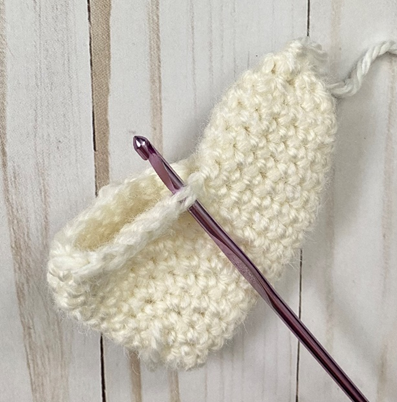
Rnd 1 – Attach white yarn at edge of opening right next to First Heart Peak (first photo below), ch 1. Place marker here to indicate beginning of rnd. Sc in each st around opening. (15 sc)
Rnds 2 – 4 – sc in each st around. (15 sc)
Rnd 5 – *Sc2tog over next 2 sts, sc in next st.* Rep from * to * around. (10 sc)
Rnd 6 – sc2tog in each st around. (5 sc)
Fasten off, leaving long tail for sewing rem gap from Rnd 6, for sewing gap between two Heart Peaks, and for sewing Wing to Hat. (Second photo.)
Finishing
Place Wings on either side of Hat, slightly below Rnd 65, with pointy end of Wing facing Hat. Sew in place. Weave in all ends. If desired, using fabric stiffening spray on body of hat (above Brim) according to directions on the package to help maintain shape.
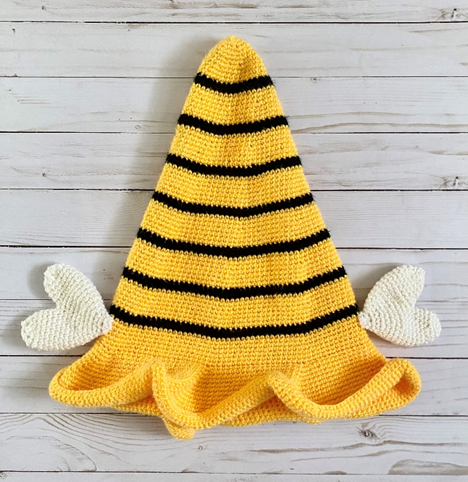
Here is the finished hat!
I hope you enjoyed crocheting this bee witch hat along with me today. If you love fun, free patterns like this one, then please be sure to sign up for my email list to keep up to date with all my latest designs:
Also, please be sure to follow me on social media, and tag me in photos of your finished projects made from my patterns, so I can see your lovely work!
Don’t forget to pin it for later HERE!
And you can find that ad-free PDF pattern HERE!
Happy Crocheting!
COPYRIGHT:
This pattern is owned by Crafty Kitty Crochet (Melissa Moore). Any reselling or distribution of this pattern is prohibited. Sale of items made using this pattern is welcomed, but I do ask that credit/a link be provided back to my site, craftykittycrochet.com.