
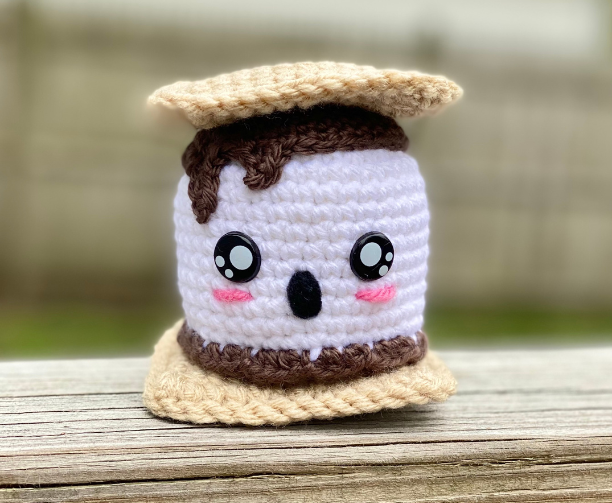
Ghost S’more – Amigurumi Crochet Pattern
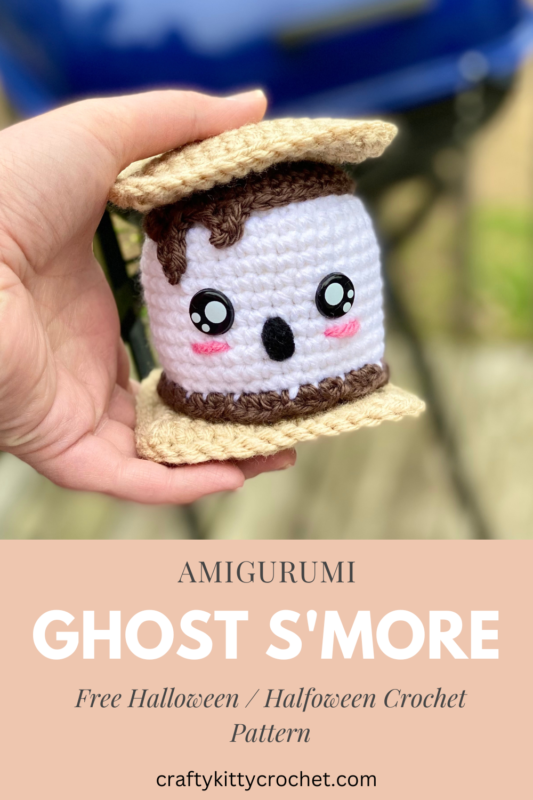
Pin it for later!
It’s spooky, cute, and perfect for snuggling around the bonfire this summer or fall! This kawaii plushie is the perfect gift, miniature, decor, or toy for summer and spooky season! A new take on the classic fireside dessert, this fun pattern is easy, fast, fun, and great for scrap yarn. Start crocheting some now for all your fall markets, and enjoy the combo of kawaii sweet and spoopy ghostie!
Ghost S’mores
If you love sweets, kawaii plushies, and Halloween, then you’ll probably be able to follow my thought process for designing this pattern! I love crocheting s’mores and making s’mores into fun interesting new things (go check out my Amigurumi S’mores, S’mores Turtle, S’mores Jellyfish and S’mores Bucket Hat patterns for more info!) And one of my favorite things to make during spooky season is a cute, chibi ghost (go see my Wee Ghostie pattern!!). Since I really wanted to make a cute ghost with a slightly summery twist for Halfoween, the choice to make a chocolatey marshmallow ghost that lived between two graham crackers seemed obvious!!!
I love these Kawaii Safety Eyes that I used for this pattern! The dots really add something for me! Find them on Amazon HERE!
Looking for the ad-free PDF pattern? You can find it in my shop HERE!
Supplies
Size E-5 / 3.5 mm crochet hook
1 skein of Red Heart with Love in Tan (about 70 yds needed)
1 skein of Red Heart Super Saver in White (about 70 yds needed)
1 skein of Caron Simply Soft in Taupe (about 25 yds needed)
Small amounts of Red Heart Super Saver in Black and Perfect Pink for Mouth and Blush
1 pair of 14 mm plastic safety eyes
Fiberfill stuffing
Yarn Needle
Scissors
Abbreviations
*= indicates the beginning/end of a section to be repeated
BLO = back loop only
Ch = chain
FLO = front loop only
Hdc = half double crochet
Rem = remaining
Rep = repeat
Rnd(s) = round(s)
Sc = single crochet
Sc2tog = single crochet 2 together
Sk = skip
Sl St = slip stitch
St(s) = stitch(es)
Gauge
Exact gauge is not essential to this project
Size
About 4.5 inches in length
How to Make This
Instructions
Graham Cracker (make 2)
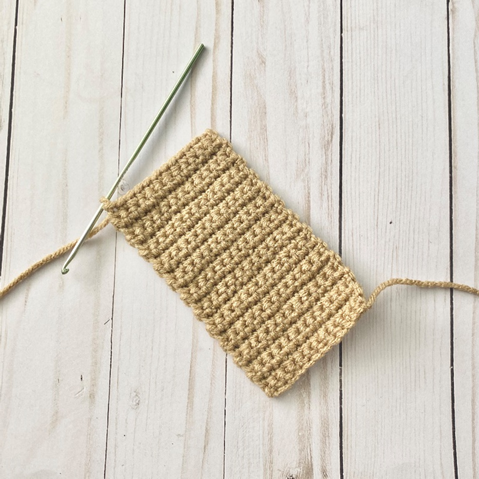
With Tan, ch 13.
Row 1 – sc in each st across. Ch 1, turn (12 sc)
Rows 2 – 24 – rep Row 1. Do not turn at end of Row 24. Do not fasten off. (12 sc per row)
Assembly & Edging
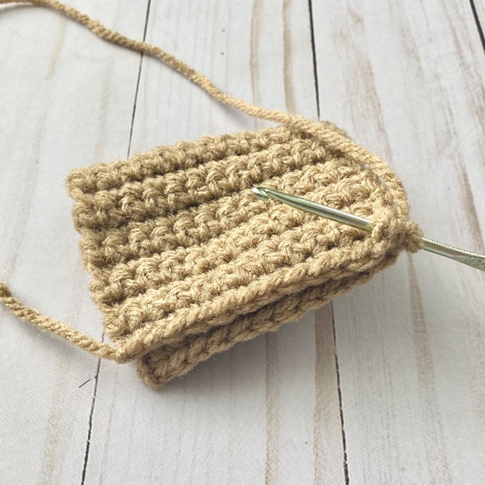
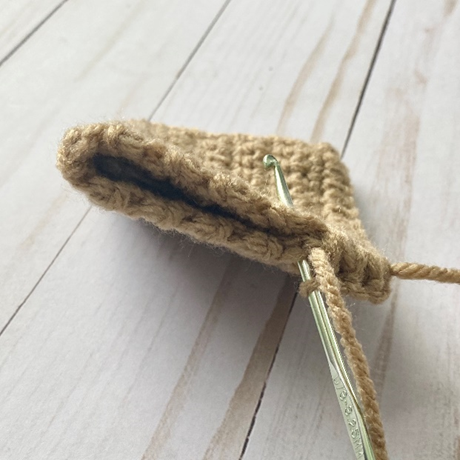
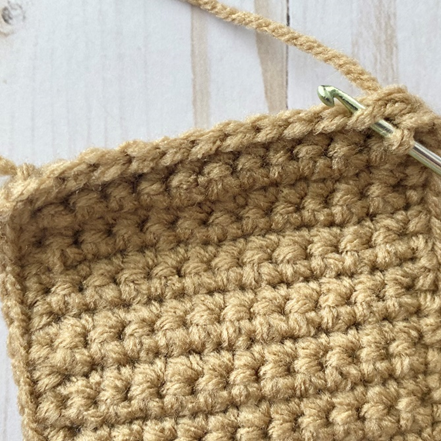
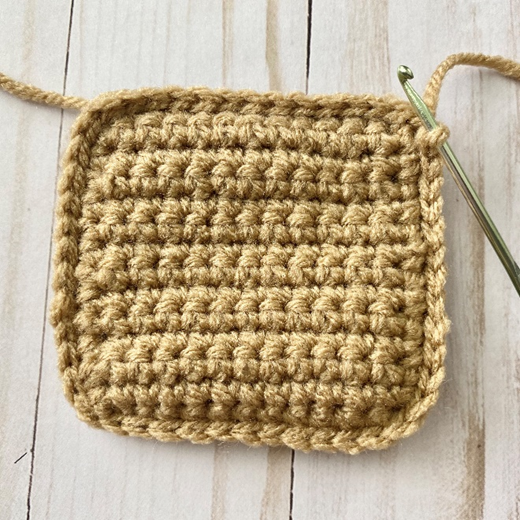
With wrong sides facing each other, fold piece in half and sc Rows 1 and 24 together (first photo below). Working down side of folded piece, make 12 sc (second photo below). Working on bottom of folded piece, make 12 sc in between sts (third photo below). Working up other folded side of piece, make 12 sc. Join with sl st to first sc of Edging. (Fourth photo below shows piece after this step.)
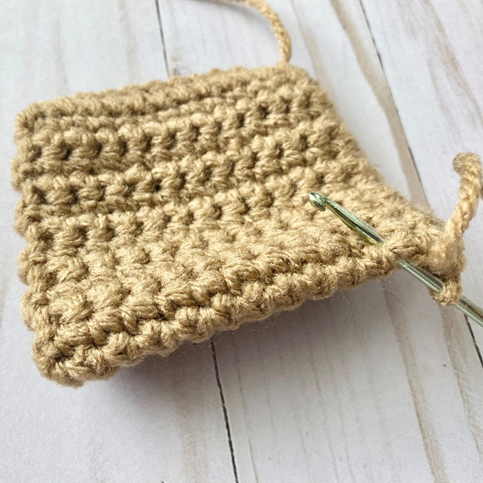

Loosely sl st in FLO of each sc of Edging around.
Fasten off.
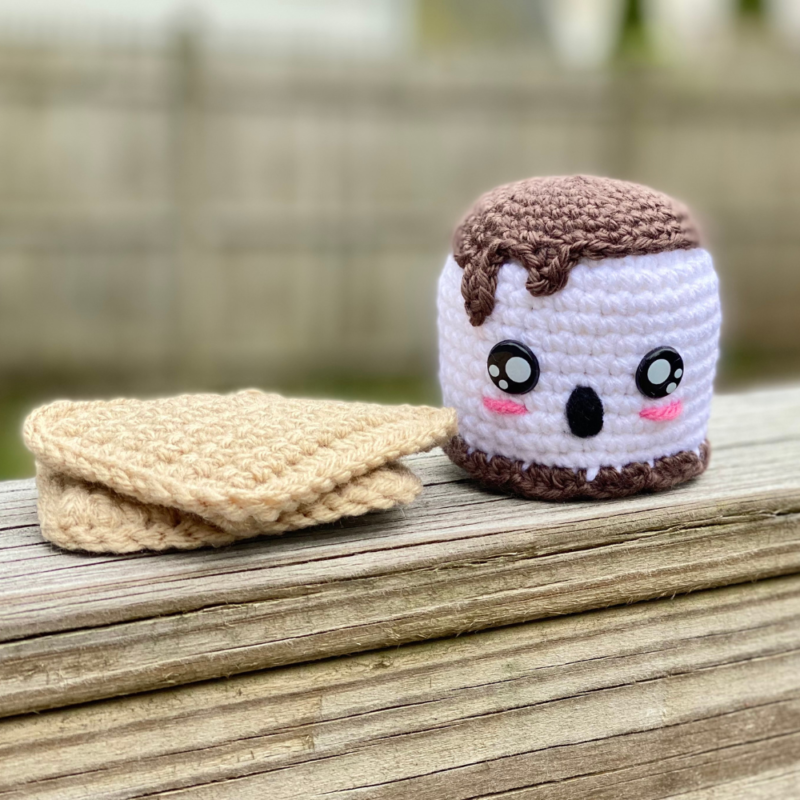
Marshmallow Ghost
This piece is worked in continuous rnds; do not join. You may wish to use a stitch marker and move it up at the beginning of each new rnd.
Rnd 1 – With White, make a magic ring. 6 sc in ring (6 sc)
Rnd 2 – 2 sc in each st around. (12 sc)
Rnd 3 – *2 sc in first st, sc in next st*; rep from * to * around. (18 sc)
Rnd 4 – *2 sc in first st, sc in next 2 sts*; rep from * to * around. (24 sc)
Rnd 5 – *2 sc in first st, sc in next 3 sts*; rep from * to * around. (30 sc)
Rnd 6 – *2 sc in first st, sc in next 4 sts*; rep from * to * around. (36 sc)
Rnds 7 – 16 – sc in each st around; change to Taupe in last st of rnd. Attach safety eyes between Rnds 11 and 12, about 4 sts apart. (36 sc per rnd)
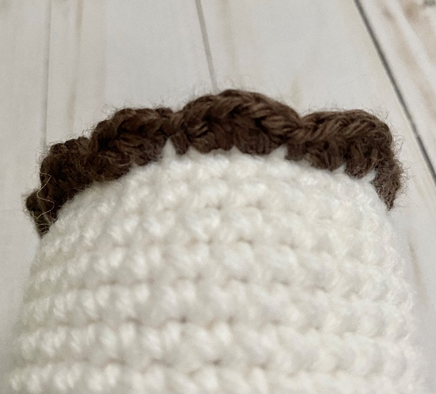
Rnd 17 – Working in FLO (this rnd only), *make 2 hdc in each of the next 2 sts, sl st in next st.* Rep from * to * 11 more times. Fasten off, begin stuffing. First and second photos below show scallops (12 scallops)
Closing Bottom
Rnd 1 – Attach White in rem loop of first st of Rnd 17, ch 1. *Sc2tog over next 2 sts, sc in next 4 sts.* Rep from * to * around. (30 sc)
Rnd 2 – *Sc2tog over next 2 sts, sc in next 3 sts.* Rep from * to * around. (24 sc)
Rnd 3 – *Sc2tog over next 2 sts, sc in next 2 sts.* Rep from * to * around. (18 sc)
Rnd 4 – *Sc2tog over next 2 sts, sc in next st.* Rep from * to * around. Finish stuffing (12 sc)
Rnd 5 – sc2tog around. (6 sc)
Rnd 6 – sc2tog over next 2 sts; leave rem sts unworked. (5 sc)
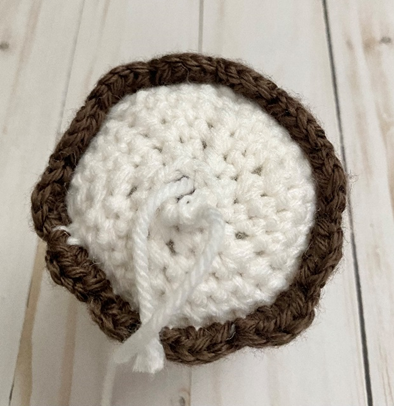
Fasten off, leaving long tail for closing rem gap from Rnd 6 of Bottom. Second photo shows closed gap; third photo shows piece at this stage.
Chocolate Covering
This piece is worked in continuous rnds; do not join. You may wish to use a stitch marker and move it up at the beginning of each new rnd.
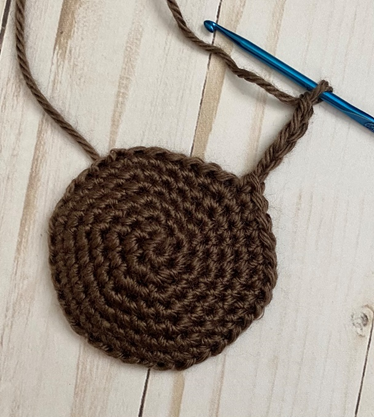
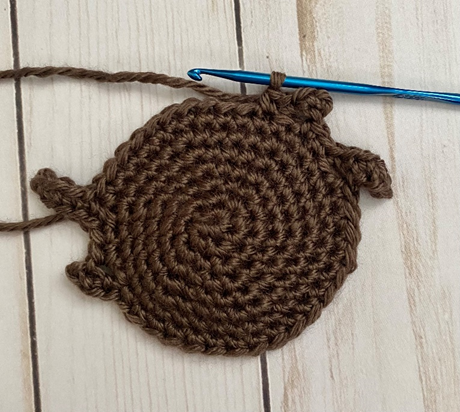
Rnd 1 – With Taupe, make a magic ring. 6 sc in ring (6 sc)
Rnd 2 – 2 sc in each st around. (12 sc)
Rnd 3 – *2 sc in first st, sc in next st*; rep from * to * around. (18 sc)
Rnd 4 – *2 sc in first st, sc in next 2 sts*; rep from * to * around. (24 sc)
Rnd 5 – *2 sc in first st, sc in next 3 sts*; rep from * to * around. (30 sc)
Rnd 6 – *2 sc in first st, sc in next 4 sts*; rep from * to * around. (36 sc)
Rnd 7 – sc in each st around. Do not fasten off (36 sc)
Chocolate Drips
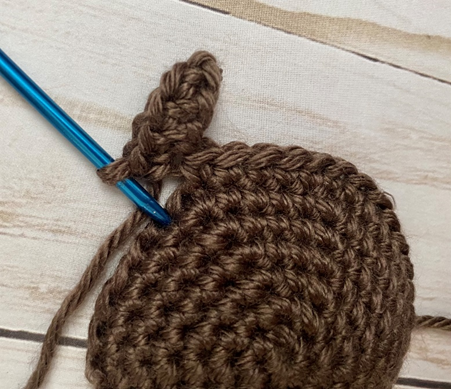
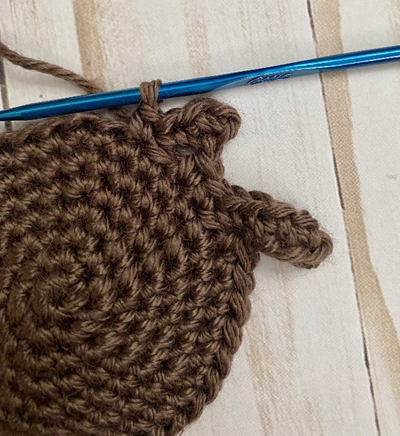
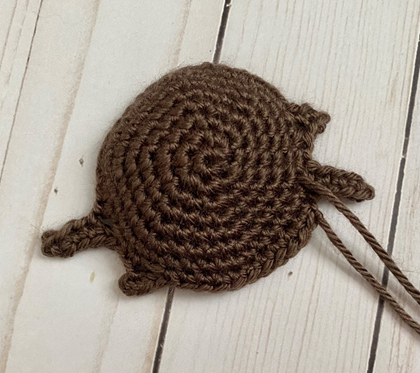
Rnd 1 – *Ch 5 (first photo below). Sc in 2nd ch from hook and in each st across. Sk next st on Rnd 7 (second photo), sc in next 2 sts (first drip made – third photo). Ch 3. Sc in 2nd ch from hook and in each st across. Sk next st on Rnd 7, sc in next st (second drip made).* Sc in next 16 sts. Rep from * to * once more (fourth photo). Sc in next 10 sts. (4 drips, 34 sc)
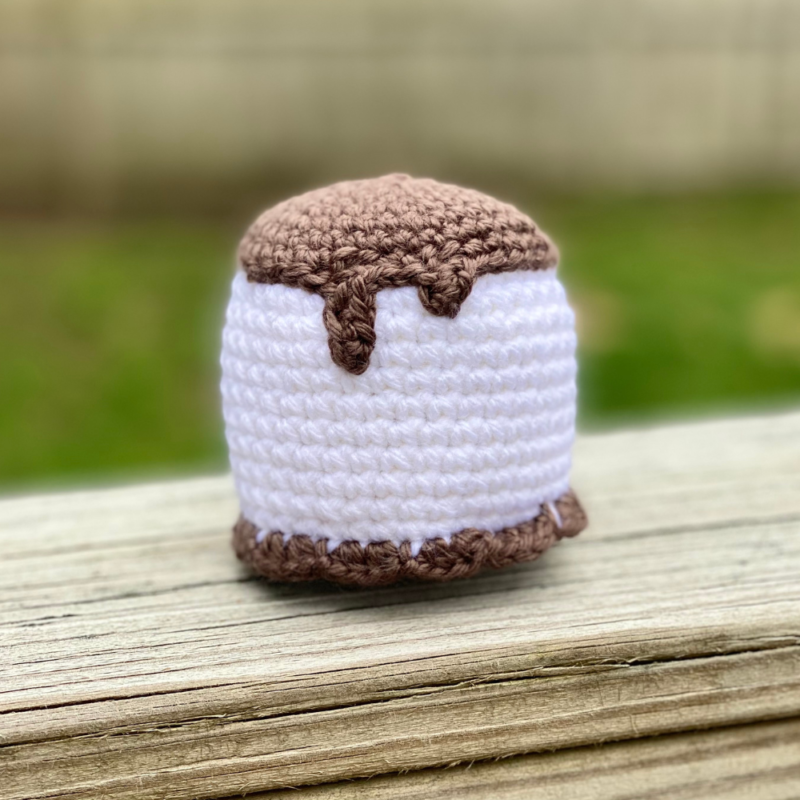
Fasten off, leaving long tail for sewing. Fifth photo shows finished piece.
Finishing
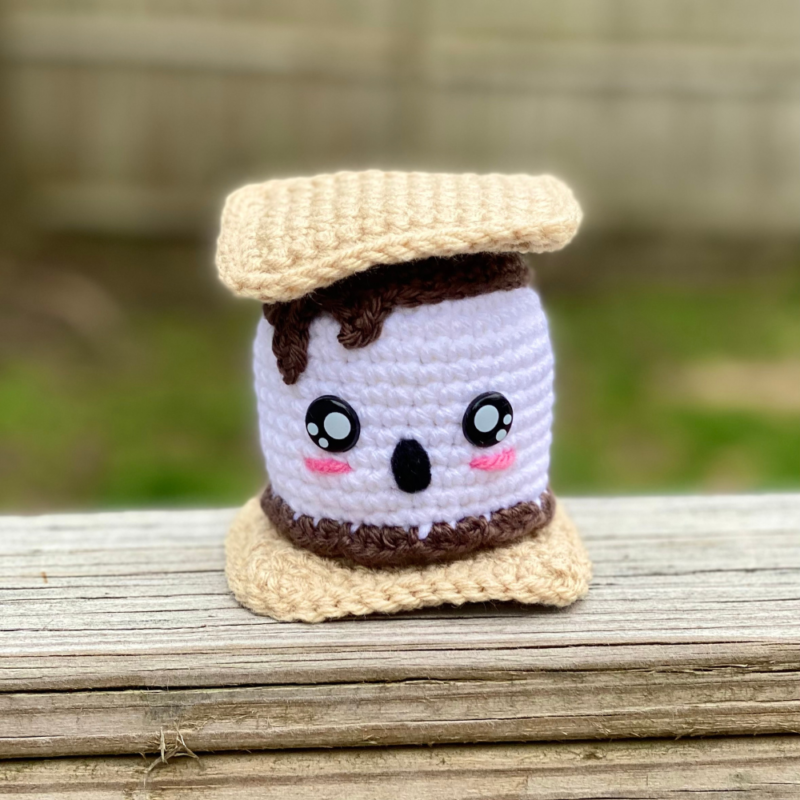
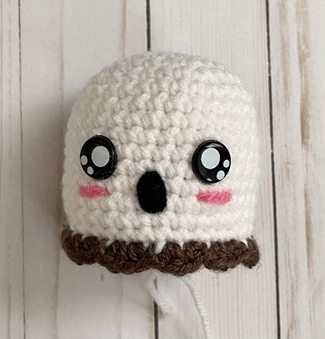
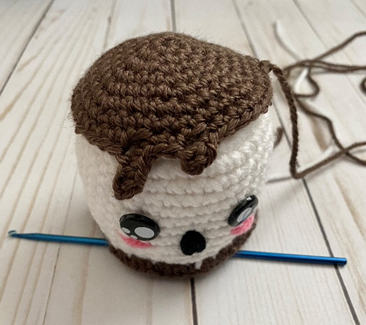
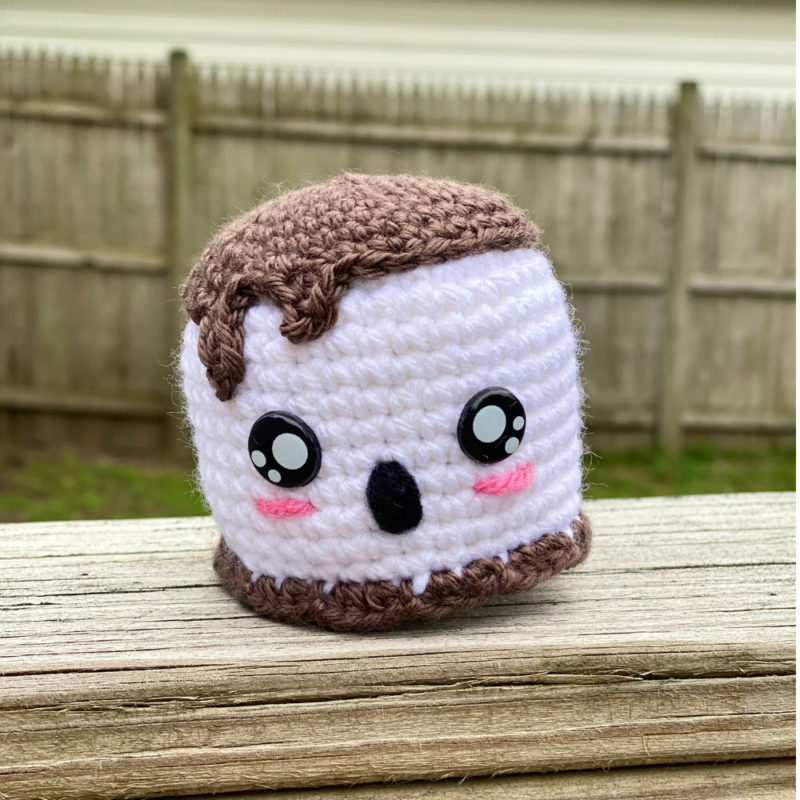
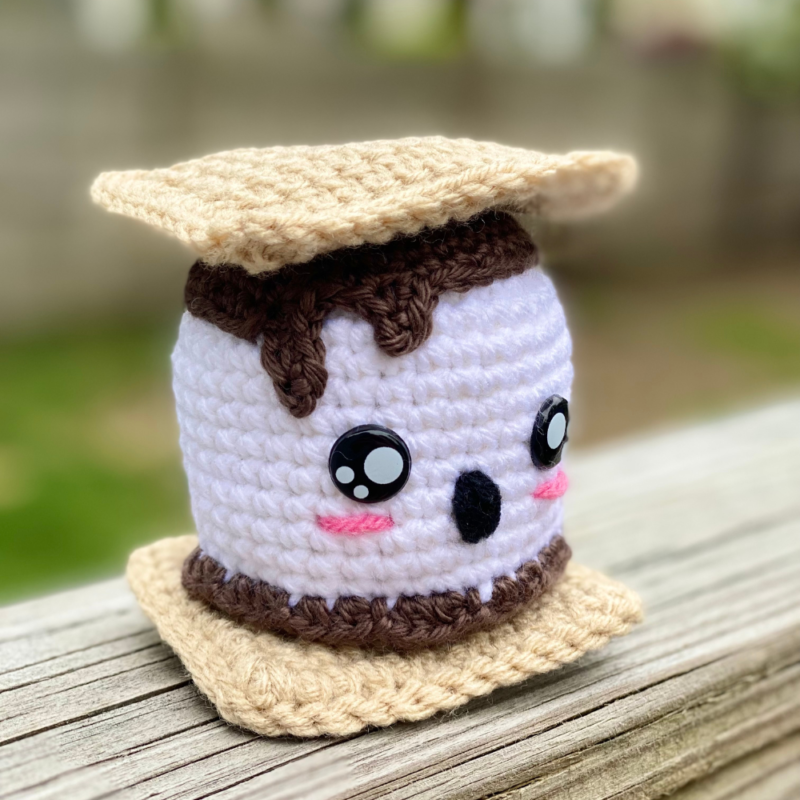
With Black, make several vertical lines centered slightly below Eyes for Mouth; with Perfect Pink, make a horizontal line below each Eye for Blush (first photo below). Place Chocolate Covering on top of Marshmallow Ghost, aligning first Chocolate Drips on front of piece, with second Drips in back (second and third photos). Ghost can be placed between Graham Crackers with or without sewing all three pieces together; sew if desired. Fasten off, weave in ends and/or tie off knots and hide inside sts.

Here is the finished Ghost S’more!
I hope you enjoyed crocheting this Ghost S’more along with me today. If you love fun, free patterns like this one, then please be sure to sign up for my email list to keep up to date with all my latest designs:
Also, please be sure to follow me on social media, and tag me in photos of your finished projects made from my patterns, so I can see your lovely work!
Don’t forget to pin it for later HERE!
And you can find that ad-free PDF pattern HERE!
Happy Crocheting!
COPYRIGHT:
This pattern is owned by Crafty Kitty Crochet (Melissa Moore). Any reselling or distribution of this pattern is prohibited. Sale of items made using this pattern is welcomed, but I do ask that credit/a link be provided back to my site, craftykittycrochet.com.
Comments (3)
Kim
September 18, 2023 at 3:40 pm
So cute! Do you design other projects too? I thought a two headed Llama like the one in the 1960’s movie Doctor Doo Little, Rex Harrison, main character, would be cool. Also, been looking for key chains for men. Specifically, a golf club amigurumi one. And of course it would have to be sturdy. Thanks. Mrs B
Melissa
October 5, 2023 at 9:55 pm
Those are great ideas!! Thank you so much!!
10 Crochet Halloween Ghost Plush Ideas – Crochet Creators
November 21, 2025 at 5:12 am
[…] Want whimsy? “Ghost S’more Amigurumi” stacks a kawaii ghost between chocolate and graham cracker layers—fun decor and a great gift. The pattern is quick, scrap-friendly, and clearly photographed. Tip: lightly stuff the graham layers and seam evenly so your s’more sits flat like the sample. Add blushing cheeks for extra charm. This one steals the show on dessert tables and tiered trays. Tutorial. […]