
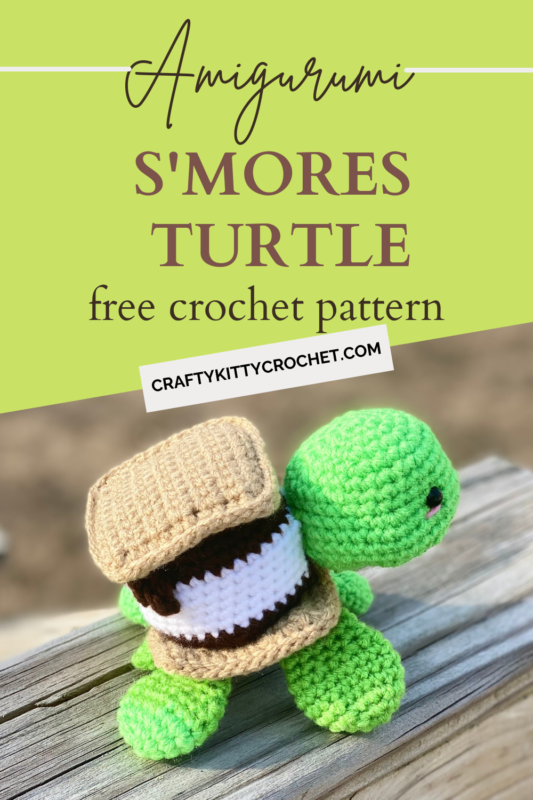
Amigurumi S’mores Turtle – Crochet Pattern
Pin it for later!
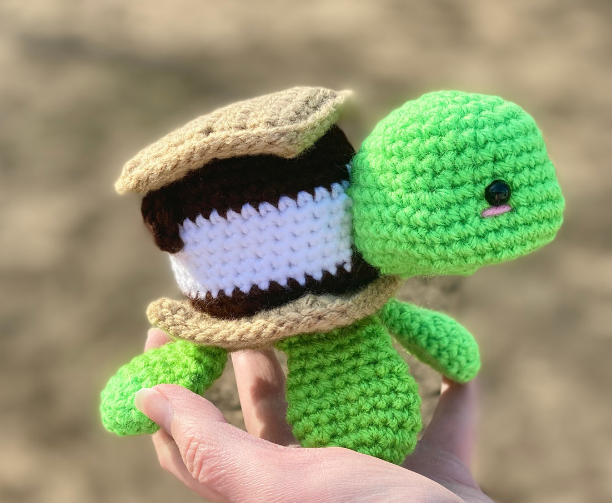
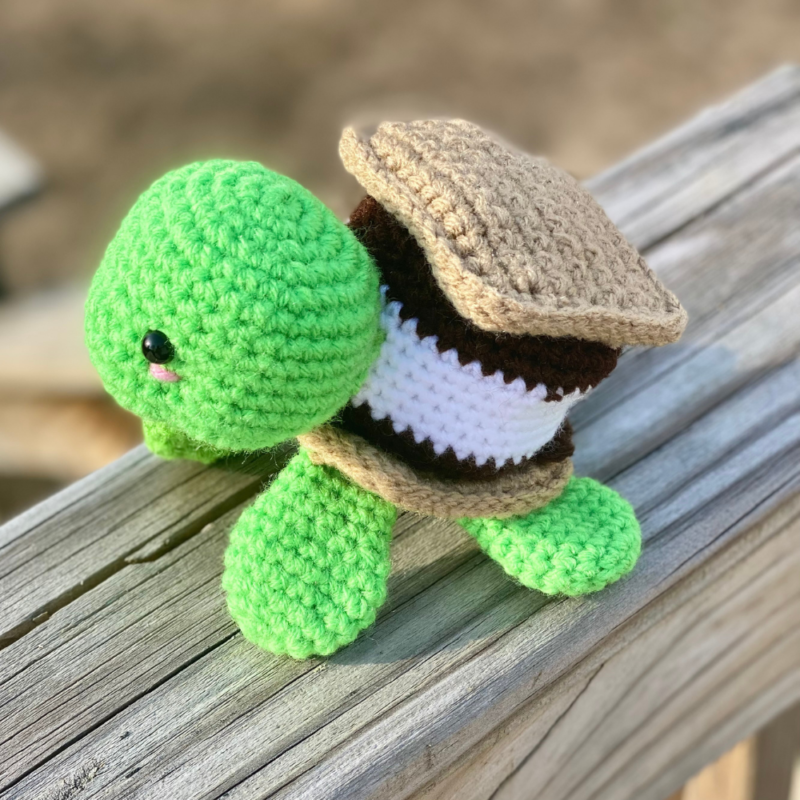
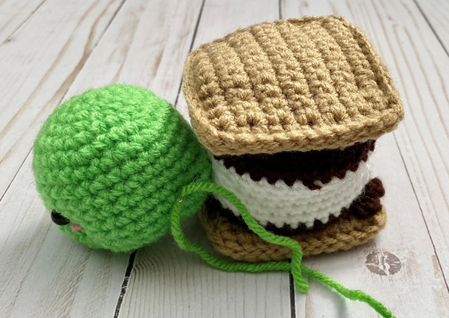
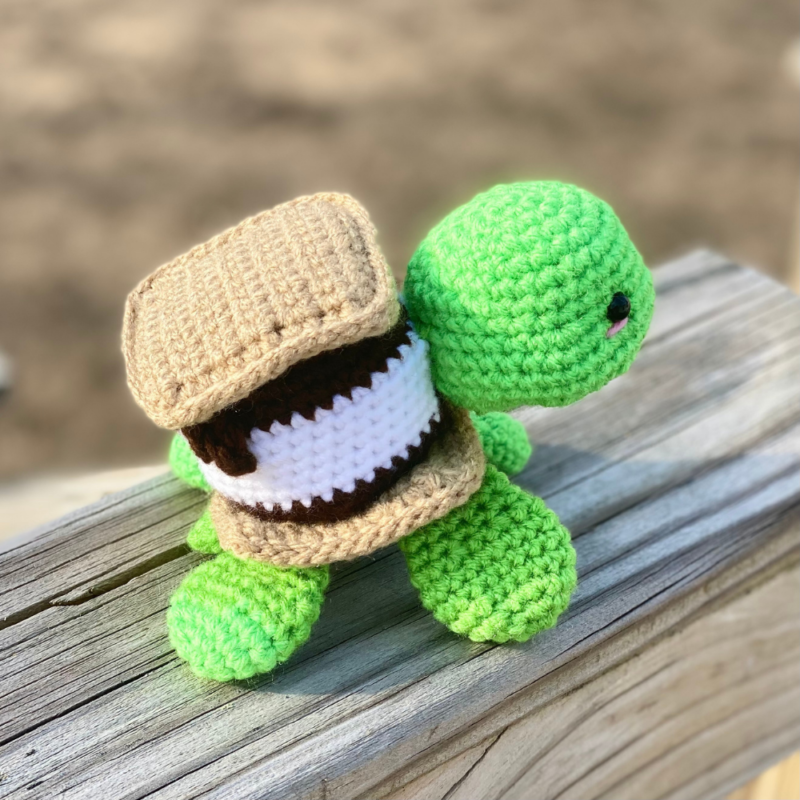
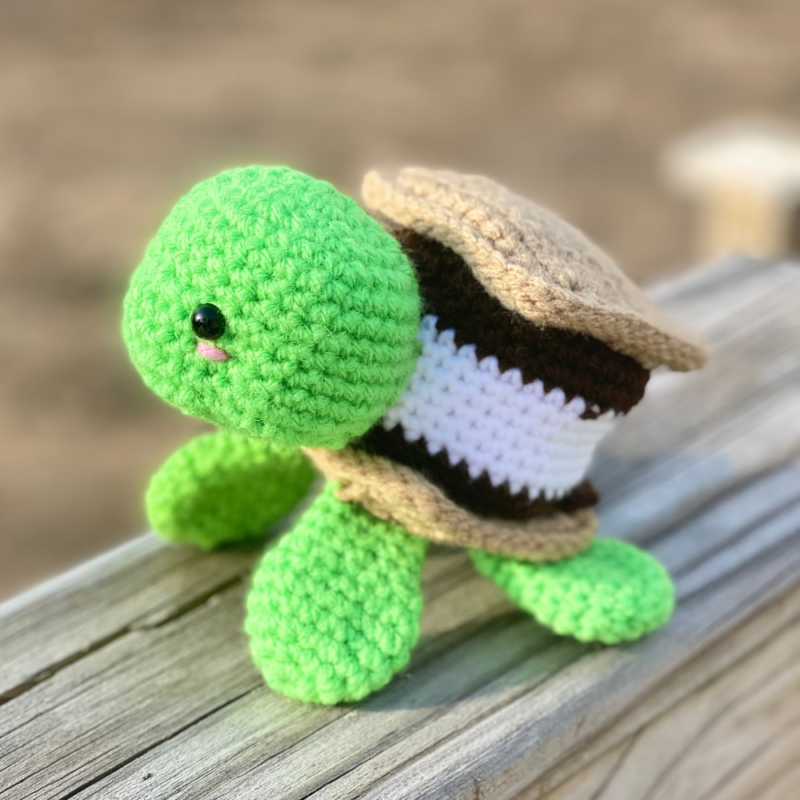
Warm spring and summer weather is for bonfires, making s’mores, and making….s’mores turtles?! Why not?! This kawaii cutie has a s’more as its shell, and it’s about the most adorable dessert around! If you enjoy fun, easy to make plushies, food / animal combos, and just kawaii aesthetic in general, then you will love this fast and easy crochet pattern. Make one for your plushie collection, as a gift to the food and / or animal lover in your life, or all of the above! The possibilities are endless!
Amigurumi S’mores Turtle
Do you remember other fun crochet turtle mutations on my blog, such as my Birthday Turtle, Rosy Turtle or Cherry Pie Turtle? Then here comes another one to add to your collection! And it’s summertime themed! You may have seen my Amigurumi S’mores pattern around, and I’m pleased to say that it served as a wonderful shell for this pattern. With all the fun I’m having customizing these turtles, who knows what I’ll come up with next! (Pizza Turtle? Pumpkin Turtle? There are so many possibilities!)
I was kindly provided with the stuffing for this pattern by Polyfil! It’s my number one favorite stuffing to use, and you can find some on Amazon HERE!
Looking for the ad-free PDF pattern? You can find it in my shop HERE!
Supplies
Size D/3 – 3.25 mm crochet hook
Size L/11 – 8 mm crochet hook
Small Size:
*Medium weight green yarn – about 90 yds (Lion Brand Vanna’s Choice in Dusty Green and Craft Yarn by CraftSmart in Kelly used in photos)
*Medium weight beige yarn – about 50 yds (Red Heart with Love in Tan used in photos)
*Medium weight brown yarn – about 50 yds (Red Heart Super Saver in Coffee used in photos)
*Medium weight white yarn – about 50 yds (Red Heart Super Saver in White used in photos)
*Small amount of medium weight pink yarn – less than a yd (Red Heart Super Saver in Pretty in Pink used in photos)
Large Size:
*Super Bulky weight green yarn – about 90 yds
*Super Bulky weight yarn in beige – about 50 yds
*Super Bulky weight yarn in brown – about 50 yds
*Super Bulky weight yarn in white – about 50 yds
*Medium weight yarn in black (if not using safety or felt eyes) – about 10 yds (Red Heart Super Saver in Black used in photos)
*Small amount of medium weight yarn in white – less than a yd (Red Heart Super Saver in White used in photos)
*Small amount of Super Bulky weight pink yarn – less than a yd
1 pair of 10 mm safety eyes (for small size)
1 pair of 25-30 mm safety eyes or felt eyes (optional – for large size)
Polyfil stuffing
Yarn Needle (if making large size – one with a large eye)
Scissors
Abbreviations
*= indicates beginning/end of a section to be repeated
BLO = back loop only
Ch = chain
FLO = front loop only
Rem = remaining
Rep = repeat
Rnd(s) = round(s)
Sc = single crochet
Sc2tog = single crochet 2 together
Sl st = slip stitch
St(s) = stitch(es)
Gauge
Exact gauge is not essential to this project.
Size
Small Size: about 7 inches in length from head to tail; Large Size: about 13 inches from head to tail
Notes
Turtle can be made in small or large size. To make Small Size, use yarns listed for “Small Size” above, and 3.25 crochet hook where noted throughout pattern. To make Large Size, use yarns listed for “Large Size” above, and 8 mm crochet hook where noted throughout pattern.
How to Make This
Instructions
Head
This piece is worked in continuous rnds; do not join. You may wish to use a stitch marker and move it up at the beginning of each new rnd.
Rnd 1 – with 3.25 or 8 mm hook and green yarn, make a magic ring. 6 sc in ring. (6 sc)
Rnd 2 – 2 sc in each st around. (12 sc)
Rnd 3 – *2 sc in next st, sc in next st.* Rep from * to * around. (18 sc)
Rnd 4 – *2 sc in next st, sc in 2 next sts.* Rep from * to * around. (24 sc)
Rnd 5- *2 sc in next st, sc in 3 next sts.* Rep from * to * around. (30 sc)
Rnds 6 – 8 – sc in each st around. (30 sc)
Rnd 9 – *3 sc in next st. Sc in next 6 sts.* Rep from * to * once more. 3 sc in next st. Sc in last 15 sts. (36 sc)
Rnds 10 – 13 – sc in each st around. Attach safety eyes if making small size, and begin stuffing piece. (36 sc)
Rnd 14 – *sc2tog over next 2 sts.* Rep from * to * around. (18 sc)
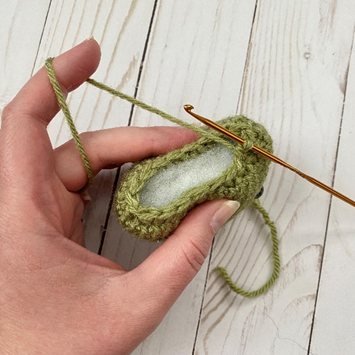
Rnd 15 – *sc2tog over next 2 sts. Sc in next st.* Rep from * to * around. Finishing stuffing. Squeeze piece together while decreasing to help prevent gaps in sts (first photo below). (12 sc)
Rnd 16 – *sc2tog over next 2 sts.* Rep from * to * around. (6 sc)
Rnd 17 – Sc2tog over next 2 sts. Leave rem sts unworked. (5 sc)
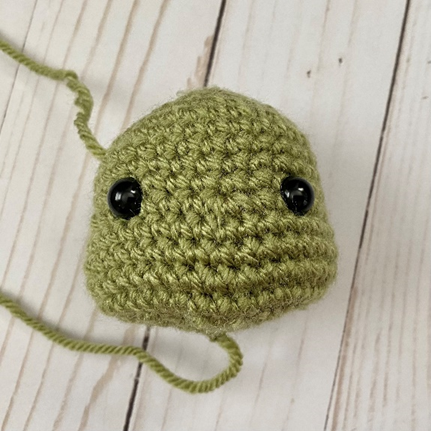
Fasten off, leaving long tail to use for sewing rem gap. (Second photo below shows finished piece.)
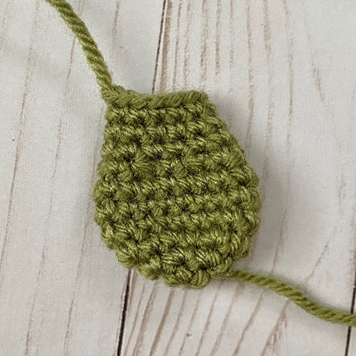
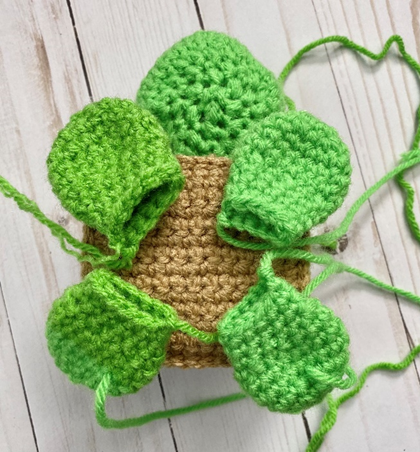
Leg (make 4)
This piece is worked in continuous rnds; do not join. You may wish to use a stitch marker and move it up at the beginning of each new rnd.
Rnd 1 – with 3.25 or 8 mm hook and green yarn, make a magic ring. 6 sc in ring. (6 sc)
Rnd 2 – 2 sc in each st around. (12 sc)
Rnd 3 – *2 sc in next st, sc in next st.* Rep from * to * around. (18 sc)
Rnds 4 – 6 – sc in each st around. (18 sc)
Rnd 7 – *sc2tog over next 2 sts. Sc in next st.* Rep from * to * around. (12 sc)
Rnds 8 – 10 – sc in each st around. (12 sc)
Fasten off, leaving long tail for sewing.
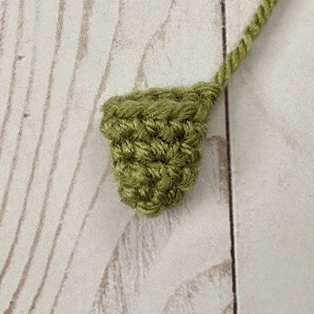
Tail
This piece is worked in continuous rnds; do not join. You may wish to use a stitch marker and move it up at the beginning of each new rnd.
Rnd 1 – with 3.25 or 8 mm hook and green yarn, make a magic ring. 6 sc in ring. (6 sc)
Rnd 2 – *2 sc in next st, sc in next st.* Rep from * to * around. (9 sc)
Rnd 3 – sc in each st around. (9 sc)
Fasten off, leaving long tail for sewing.
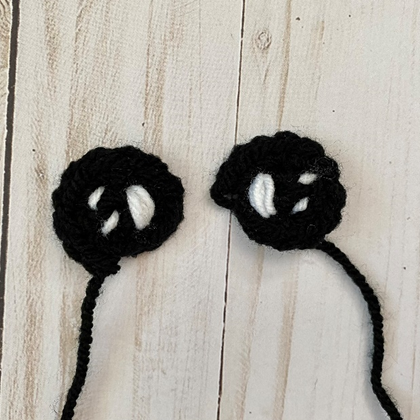
Eye (for Large Size only; make 2 (substitute with 25-30 mm safety or felt eyes if desired)
This piece is worked in continuous rnds; do not join. You may wish to use a stitch marker and move it up and the beginning of each new rnd.
Rnd 1 – With Black, make a magic ring. 5 sc in ring. (5 sc)
Rnd 2 – 2 sc in next st, sc in next st; rep around. (10 sc)
Fasten off, leaving long tail for sewing.
Eye Sparkle
With White, make several vertical lines near edge of Eye. Make several smaller lines to the side for smaller sparkles. Tie off White ends on back of Eye.
Instructions
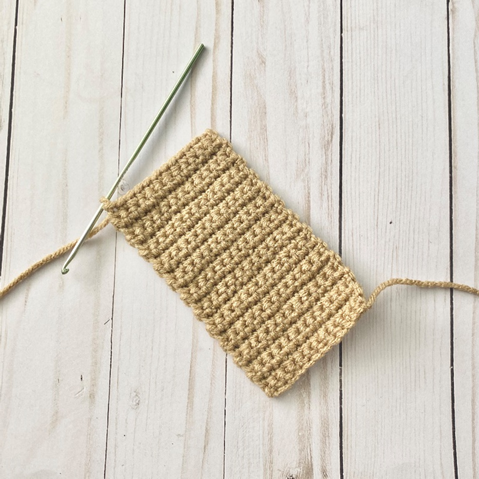
Graham Cracker (make 2)
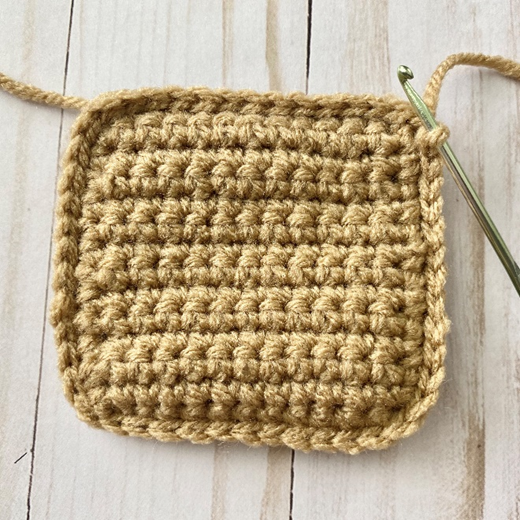
With 3.25 or 8 mm hook and beige yarn, ch 13.
Row 1 – sc in each st across. Ch 1, turn (12 sc)
Rows 2 – 24 – rep Row 1. Do not turn at end of Row 24. Do not fasten off. (12 sc per row)
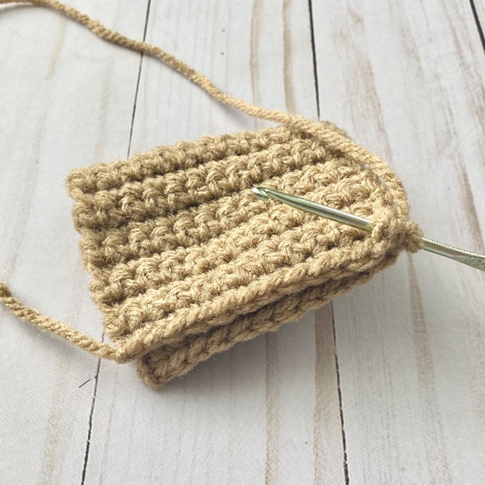
Assembly & Edging
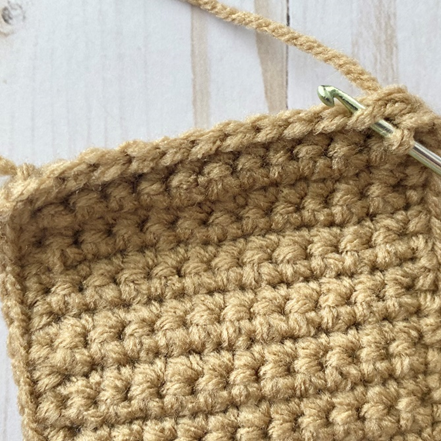
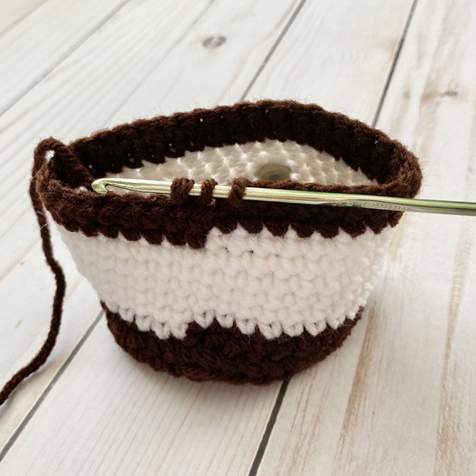
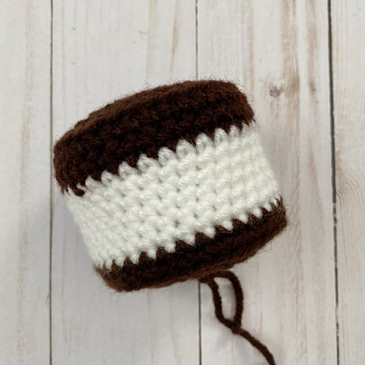
With wrong sides facing each other, fold piece in half and sc Rows 1 and 24 together (first photo below). Working down side of folded piece, make 12 sc (second photo below). Working on bottom of folded piece, make 12 sc in between sts (third photo below). Working up other folded side of piece, make 12 sc. Join with sl st to first sc of Edging. (Fourth photo below shows piece after this step.)
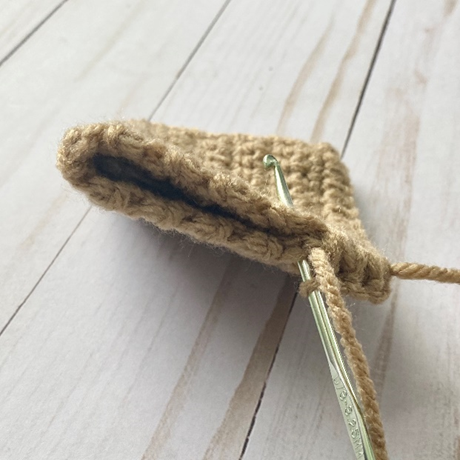
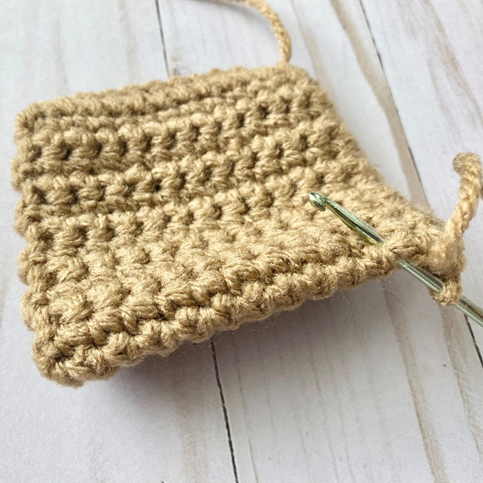

Loosely sl st in FLO of each sc of Edging around.
Fasten off.
Marshmallow
This piece is worked in continuous rnds; do not join. You may wish to use a stitch marker and move it up at the beginning of each new rnd.
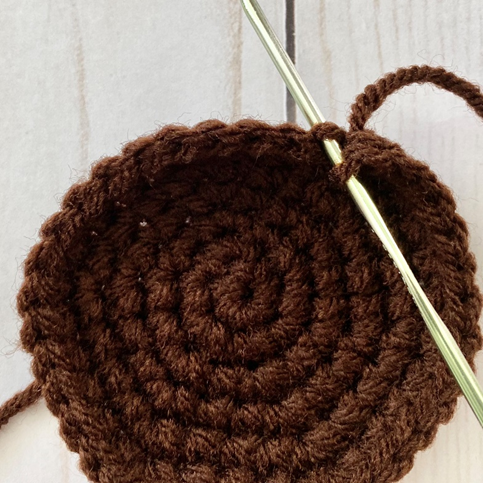
Rnd 1 – With 3.25 or 8 mm hook and brown yarn, make a magic ring. 6 sc in ring (6 sc)
Rnd 2 – 2 sc in each st around. (12 sc)
Rnd 3 – *2 sc in first st, sc in next st*; rep from * to * around. (18 sc)
Rnd 4 – *2 sc in first st, sc in next 2 sts*; rep from * to * around. (24 sc)
Rnd 5 – *2 sc in first st, sc in next 3 sts*; rep from * to * around. (30 sc)
Rnd 6 – *2 sc in first st, sc in next 4 sts*; rep from * to * around. (36 sc)
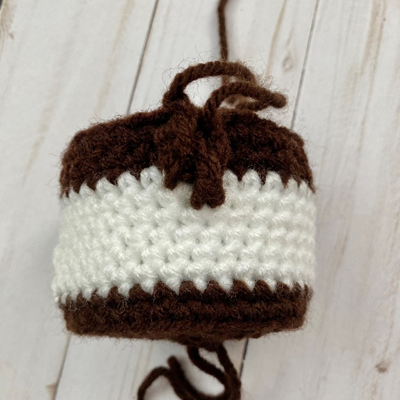
Rnd 7 – working in BLO (photo below), sc in each st around. (36 sc)
Rnd 8 – sc in each st around. In last st, change to white yarn. (36 sc)
Rnds 9 – 14 – sc in each st around. In last st of Rnd 14, change to brown yarn. (36 sc per rnd)
Rnds 15 – 16 – sc in each st around. Begin stuffing (do not overstuff). (36 sc per rnd)
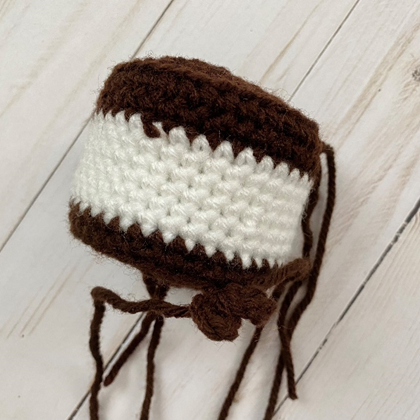
Rnd 17 – working in BLO, sc2tog over next 2 sts (photo below), sc in next 4 sts. Rep around. (30 sc)
Rnd 18 – *sc2tog over next 2 sts, sc in next 3 sts.* Rep from * to * around. (24 sc)
Rnd 19 – *sc2tog over next 2 sts, sc in next 2 sts.* Rep from * to * around. (18 sc)
Rnd 20 – *sc2tog over next 2 sts, sc in next st.* Rep from * to * around. (12 sc)
Rnd 21 – *sc2tog in next 2 sts.* Rep from * to * around. Finish stuffing. (6 sc)
Rnd 22 – sc2tog over next 2 sts. Leave rem sts unworked. (5 sc)
Fasten off, leaving long tail. Use tail to sew together rem gap from Rnd 22.
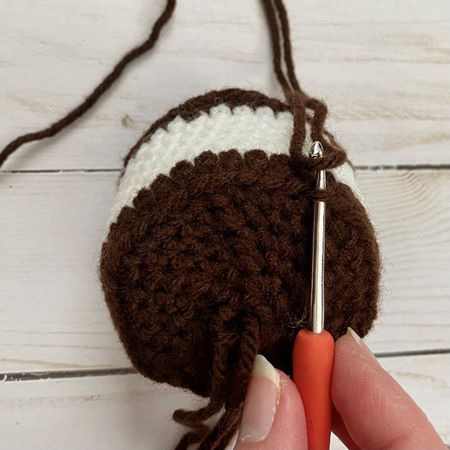
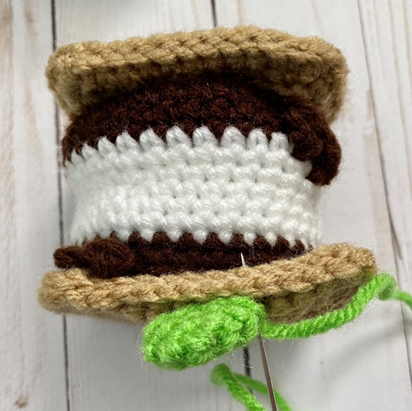
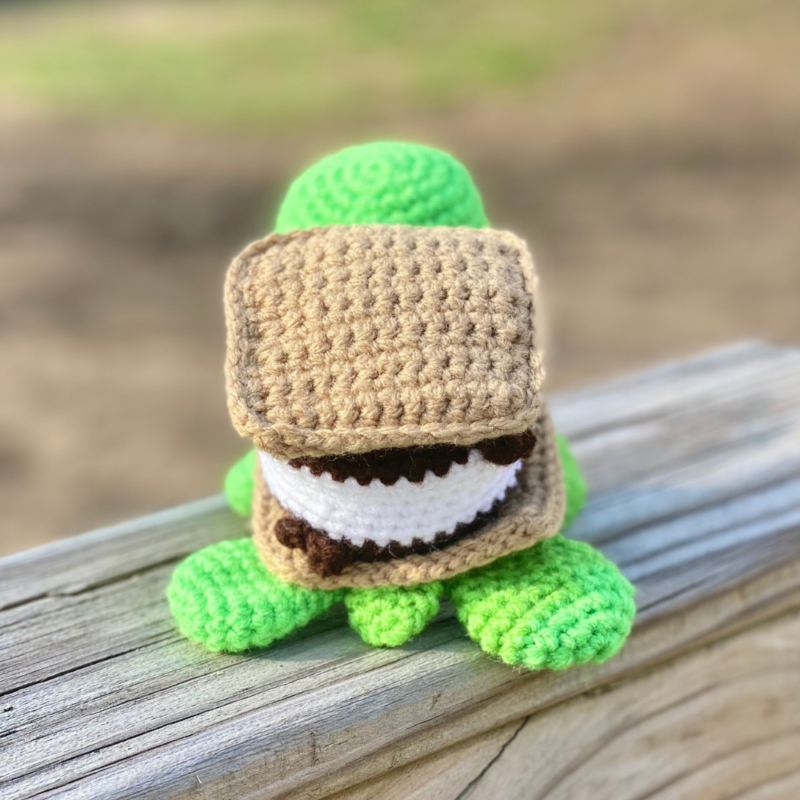
Chocolate Drip – Top
Attach brown yarn in rem loop of Rnd 7 (first photo below). Ch 3, sl st between one of the sc sts of Rnds 10 and 11 of Marshmallow below (second photo below). Ch 3, sl st into same rem loop you started in. Ch 3, sl st between one of the sc sts of Rnds 9 and 10 below. Ch 3, sl st back into rem loop you started in.
Fasten off. (Third photo below shows this process when finished.)
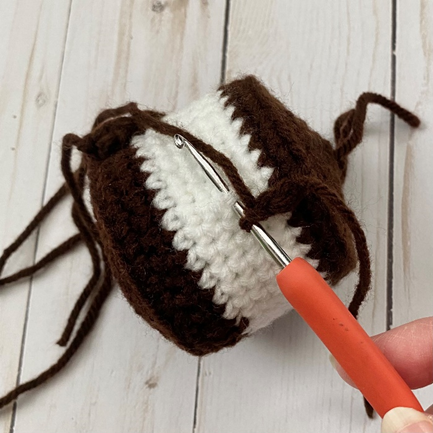
Chocolate Drip – Bottom
Attach brown yarn in rem loop of Rnd 17, to opposite side of where you created Top Chocolate Drip. *Ch 4, sl st back into same rem loop.* Rep from * to * once (photo below). Fasten off.
Finishing
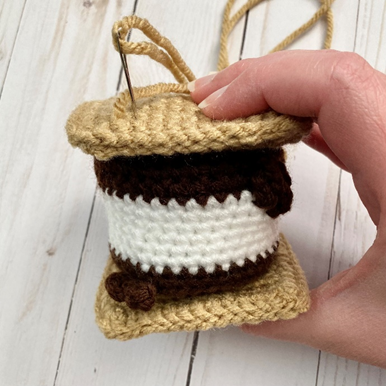
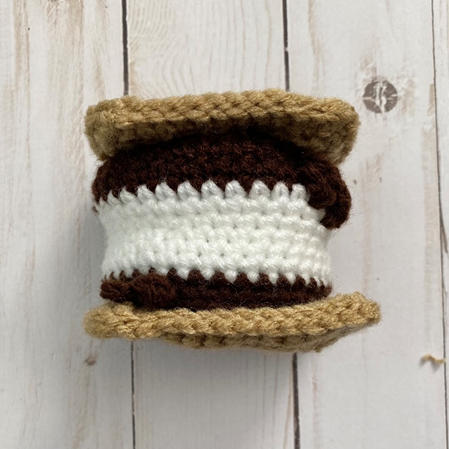
Sew Graham Crackers and Marshmallow together, sewing along edges of each cracker and also sewing through all 3 pieces a few times (be careful not to pull too tightly on yarn while doing this – first photo below). Second photo below shows finished piece.
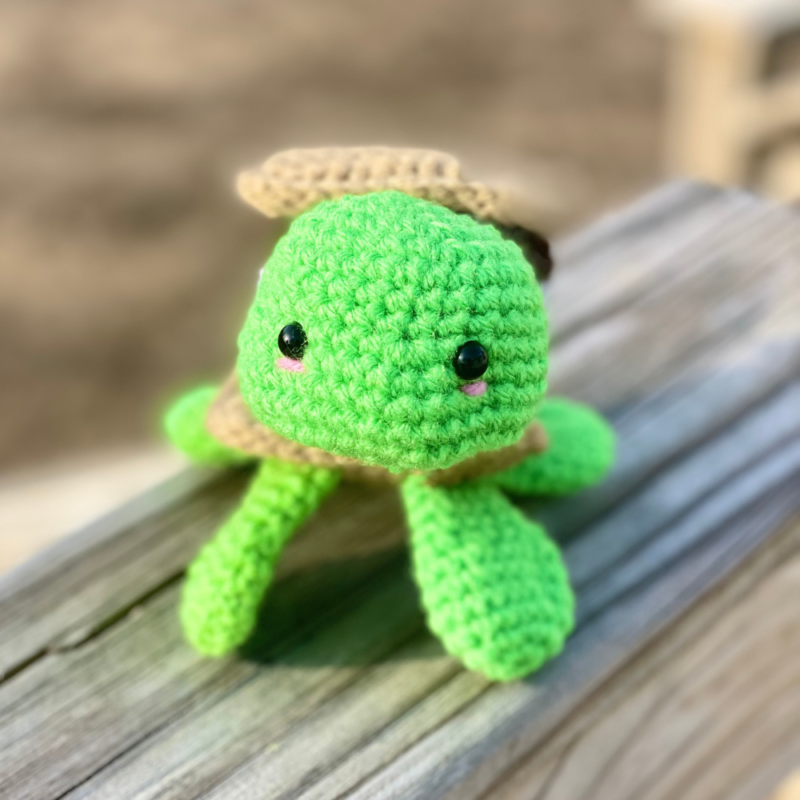
Sew Head to S’mores, with Drip portion of S’mores facing furthest back (where Tail will be placed). (First photo below). Press Legs and Tail flat and arrange as seen in second and third photos below; sew in place. With pink yarn on needle, sew a few horizontal lines below each eye for Blush (optional – fourth photo below). Weave in all ends and/or tie knots and hide inside sts.
Here is the finished turtle!
I hope you enjoyed crocheting this turtle along with me today. If you love fun, free patterns like this one, then please be sure to sign up for my email list to keep up to date with all my latest designs:
Also, please be sure to follow me on social media, and tag me in photos of your finished projects made from my patterns, so I can see your lovely work!
Don’t forget to pin it for later HERE!
And you can find that ad-free PDF pattern HERE!
Happy Crocheting!
COPYRIGHT:
This pattern is owned by Crafty Kitty Crochet (Melissa Moore). Any reselling or distribution of this pattern is prohibited. Sale of items made using this pattern is welcomed, but I do ask that credit/a link be provided back to my site, craftykittycrochet.com.
Comments (2)
S'mores Bucket Hat – Crochet Pattern ~ Crafty Kitty Crochet
April 16, 2023 at 10:19 pm
[…] seen some of my other patterns, like my Frog Gingham Bucket Hat, my S’mores Amigurumi, and my S’mores Turtle, then you already know that I love crocheting bucket hats and s’mores! And since I love combining […]
Ghost S'more – Amigurumi Crochet Pattern ~ Crafty Kitty Crochet
April 29, 2023 at 2:38 pm
[…] and making s’mores into fun interesting new things (go check out my Amigurumi S’mores, S’mores Turtle, S’mores Jellyfish and S’mores Bucket Hat patterns for more info!) And one of my favorite […]