
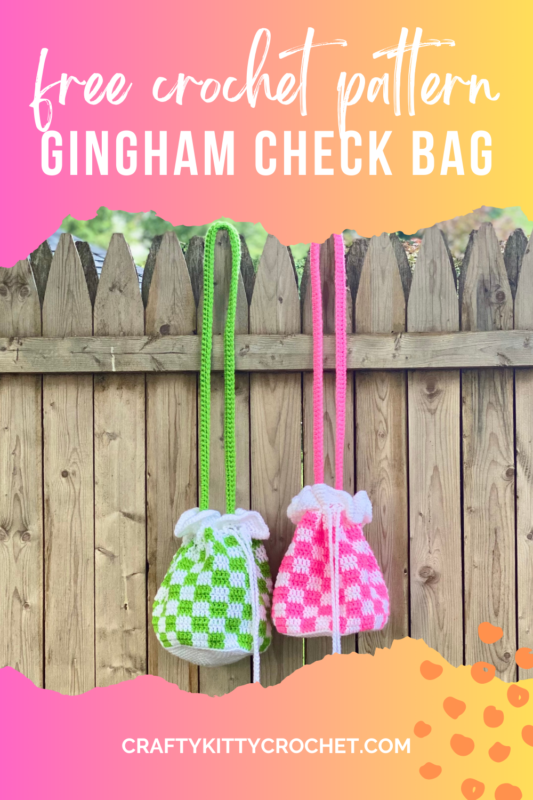
Frilly Gingham Bag – Crochet Pattern
Pin it for later!
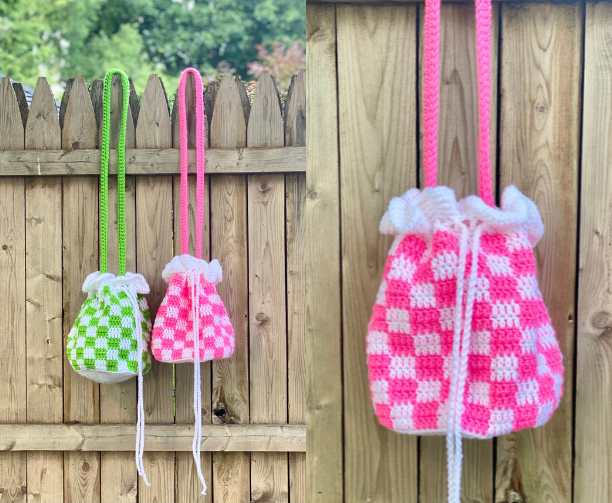
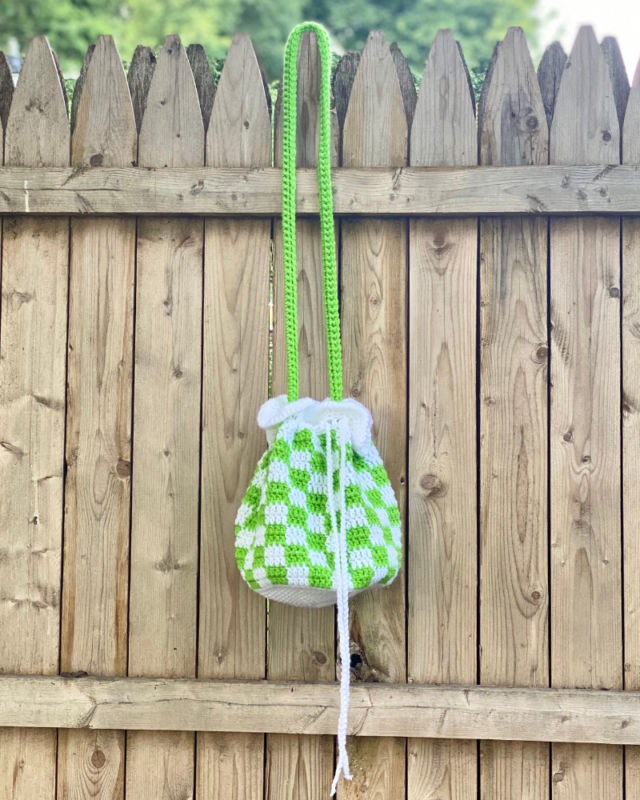
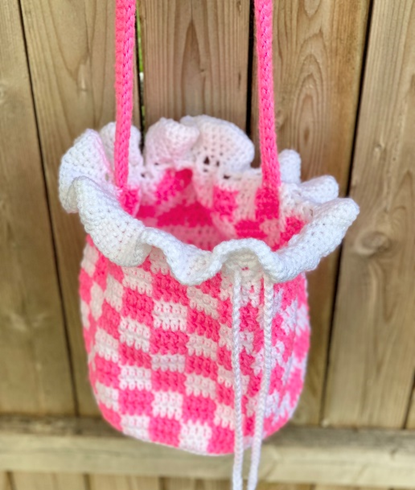
Looking for the perfect DIY bag to compliment your outfit all season round? This Frilly Gingham Bag is perfect for pairing with a cute kawaii outfit, casual wear, and more! It can be customized for a wide range of holidays and seasons – from spring and summer to autumn hues to holiday and Christmas aesthetic! The plaid / check pattern is sure to compliment a variety of outfits and accessories. Plus, this is a fast and easy make that makes it great for selling at craft fairs, gifting for the holidays, etc.!
Frilly Gingham Bag
Lately I’ve been obsessed with gingham / check patterns – for example, my Gingham Frog Hat and Gingham Witch Hat! So I decided to create a small, simple bag pattern using this look that is versatile but still cute! The long strap makes it perfect to wear as a crossbody bag, and you could even add a second strap to make it into a tiny backpack. Bonus points if you add extras like charms inside of the gingham squares, and/or a cute keychain near the opening!
This pattern uses my trust favorite medium weight yarn, Red Heart Super Saver! Stock up on the White color used in this pattern on Amazon HERE!
Looking for the ad-free PDF pattern? You can find it in my shop HERE!
Supplies
Size H-8 / 5.0 mm crochet hook
About 250 yds of medium weight yarn in contrast color (Red Heart Super Saver in Spring Green, Light Blue and Pretty in Pink used in photos)
About 250 yds of medium weight white yarn (Red Heart Super Saver in White used in photos)
Yarn Needle
Scissors
Abbreviations
*= indicates beginning/end of a section to be repeated
Beg = beginning
BLO = back loop only
Ch(s) = chain(s)
Ch-sp(s) = chain space(s)
Dc = double crochet
FLO = front loop only
Rem = remaining
Rep = repeat
Rnd(s) = round(s)
Sc = single crochet
Sk = skip
Sl st = slip stitch
St(s) = stitch(es)
Size
About 12 inches wide and 12 inches length laying flat; about 23 inch circumference
Gauge
4 dc and 2 rows = about 1 inch
Notes
Chains do not count as stitches throughout pattern.
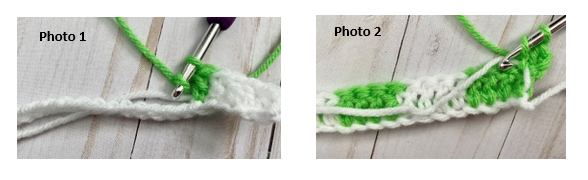
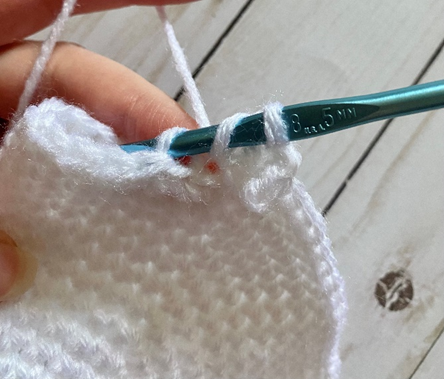
When making body of bag, carry yarn not being used underneath your stitches instead of fastening off (photo 1).
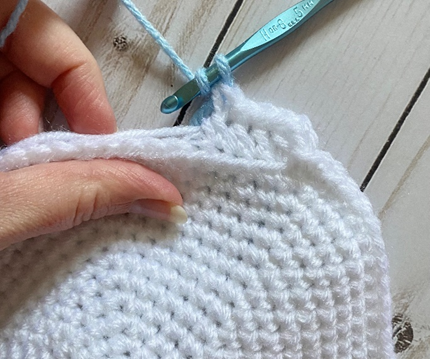
Also, carry yarn not being used from round to round when chaining and starting a new round (photo 2).
How to Make This
Instructions
Bottom of Bag
This portion of the piece is worked in continuous rnds; you may wish to use a stitch marker and move it up at the beg of each new rnd.
Rnd 1 – with white yarn, make a magic ring. 6 sc in ring (6 sc)
Rnd 2 – 2 sc in each st (12 sc)
Rnd 3 – *2 sc in next st, sc in next.* Rep from * to * around (18 sc)
Rnd 4 – *2 sc in next st, sc in next 2 sts.* Rep from * to * around (24 sc)
Rnd 5 – *2 sc in next st, sc in next 3 sts.* Rep from * to * around. (30 sc)
Rnd 6 – *2 sc in next st, sc in next 4 sts.* Rep from * to * around (36 sc)
Rnd 7 – *2 sc in next st, sc in next 5 sts.* Rep from * to * around (42 sc)
Rnd 8 – *2 sc in next st, sc in next 6 sts.* Rep from * to * around (48 sc)
Rnd 9 – *2 sc in next st, sc in next 7 sts.* Rep from * to * around (54 sc)
Rnd 10 – *2 sc in next st, sc in next 8 sts.* Rep from * to * around (60 sc)
Rnd 11 – *2 sc in next st, sc in next 9 sts.* Rep from * to * around (66 sc)
Rnd 12 – *2 sc in next st, sc in next 10 sts.* Rep from * to * around (72 sc)
Rnd 13 – *2 sc in next st, sc in next 11 sts.* Rep from * to * around (78 sc)
Rnd 14 – *2 sc in next st, sc in next 12 sts.* Rep from * to * around. Ch 2 (84 sc)
Do not fasten off.
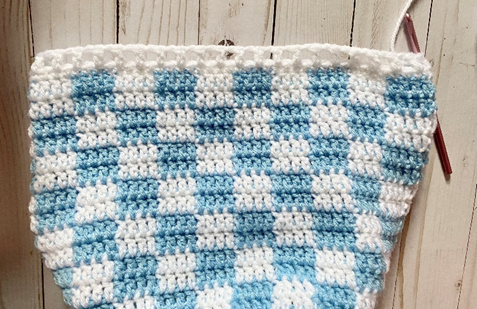
Body of Bag (gingham check)
Rnd 1 – working in BLO (this rnd only – first photo below), *dc in next 4 sts, change to contrast color yarn (second photo). Dc in next 4 sts, change back to white yarn.* Rep from * to * 9 more times. Dc in last 4 sts. Join with sl st to first dc of rnd. Ch 2 (third photo shows end of rnd). (84 dc)
Rnd 2 – rep from * to * of Rnd 1. In last st of rnd, join contrast color yarn (fourth photo). (84 dc)
Rnd 3 – *dc in next 4 sts, change to white yarn. Dc in next 4 sts, change back to contrast color yarn.* (See first photo below.) Rep from * to * 9 more times. Dc in last 4 sts. Join with sl st to first dc of rnd. (Second photo below shows finished rnd.) Ch 2 (84 dc)


Rnd 4 – rep from * to * of Rnd 1. In last st of rnd, join white yarn. (84 dc)
Rnds 5 – 16 – rep Rnds 1 – 4. At end of Rnd 16, ch 1 instead of 2. (84 dc)
Rnd 17 – sc in each st around. Ch 3. Do not fasten off. (84 sc)
Drawstring Opening
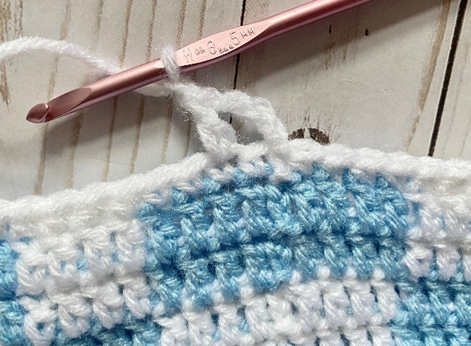
Rnd 1 – *Sk next st, dc in next st. Ch 1 (first photo below)* Rep from * to * 40 more times. Sk next st, dc in last st. Join with sl st to second ch in beg ch-3. Ch 1 (second photo below shows finished rnd). (42 dc, 42 ch-sps)
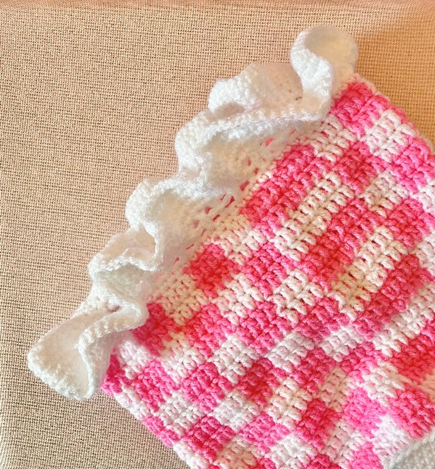
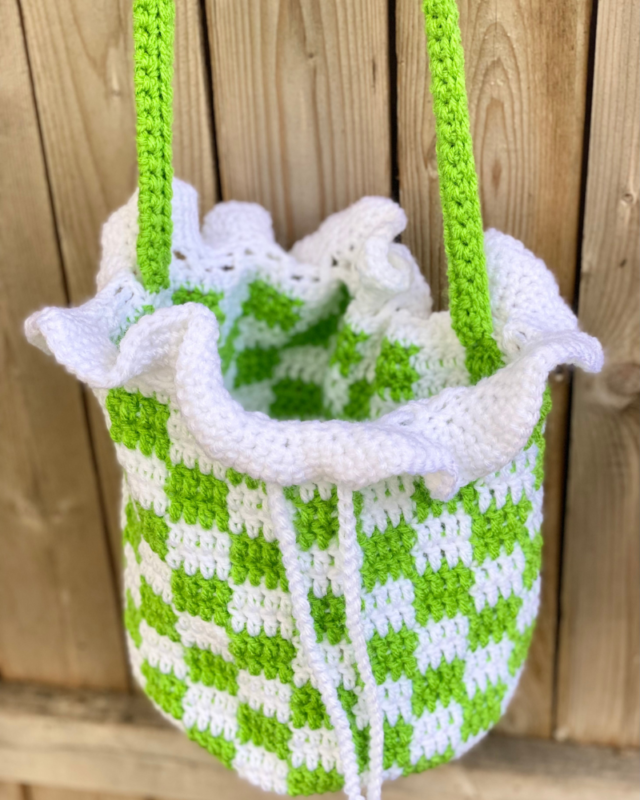
Top Frill
Rnd 1 – sc in each dc and ch-sp from previous rnd. Join with sl st to first sc. Ch 1 (84 sc)
Rnd 2 – *2 sc in next st, sc in next st.* Rep from * to * around. Join with sl st to first sc of rnd. Ch 1 (126 sc)
Rnd 3 – *2 sc in next st, sc in next 2 sts.* Rep from * to * around. Join with sl st to first sc of rnd. Ch 1 (168 sc)
Rnd 4 – *2 sc in next st, sc in next 3 sts.* Rep from * to * around. Join with sl st to first sc of rnd. Ch 1 (210 sc)
Rnd 5 – sc in each st around. Join with sl st to first sc of rnd (photo to right shows finished rnd). (210 sc)
Fasten off.
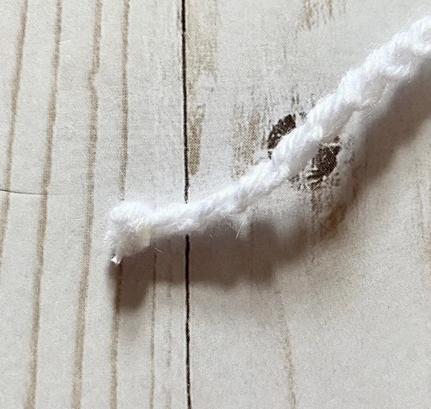
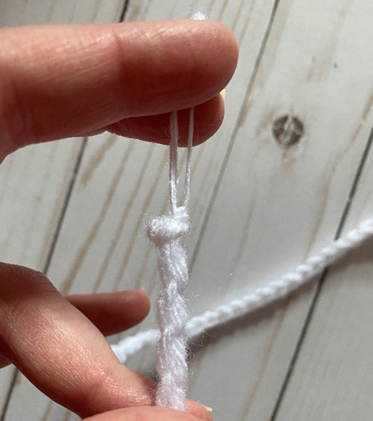
Drawstring
With white yarn, ch 161. Fasten off and tie a knot at each edge of Drawstring (first photo below). Pull apart ply of tails at each end, and use to tie a few extra knots to secure (second photo below). (161 chs)
Strap
With contrast color yarn, ch 131.
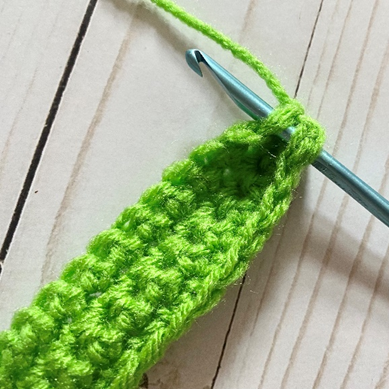
Row 1 – sc in 2nd ch from hook and in each st across. Ch 1, turn (130 sc)
Row 2 – sc in each st across. Ch 1, turn (130 sc)
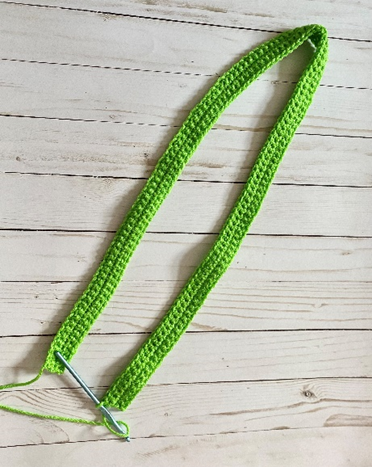
Rows 3 – 4 – rep Row 2 (first photo below shows piece at this stage). (130 sc)
Assembly
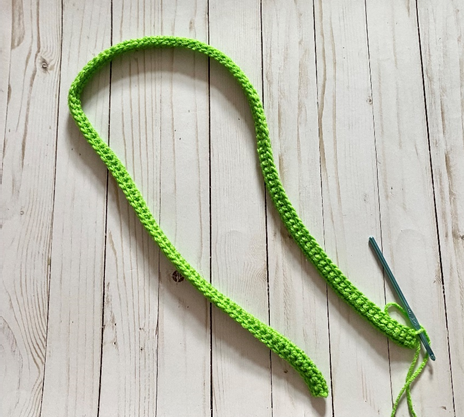
With wrong sides facing each other, fold strap in half vertically. Sl st through both sides (Rows 1 and 4) to attach together (second photo below).
Fasten off, leaving long tail for sewing (third photo shows finished piece).
Finishing
Lay Bag flat and mark left and right sides of piece while it is folded in half. Sew each end of strap where bag is marked, near Rnd 17 of Body of Bag. (See first photo below.)
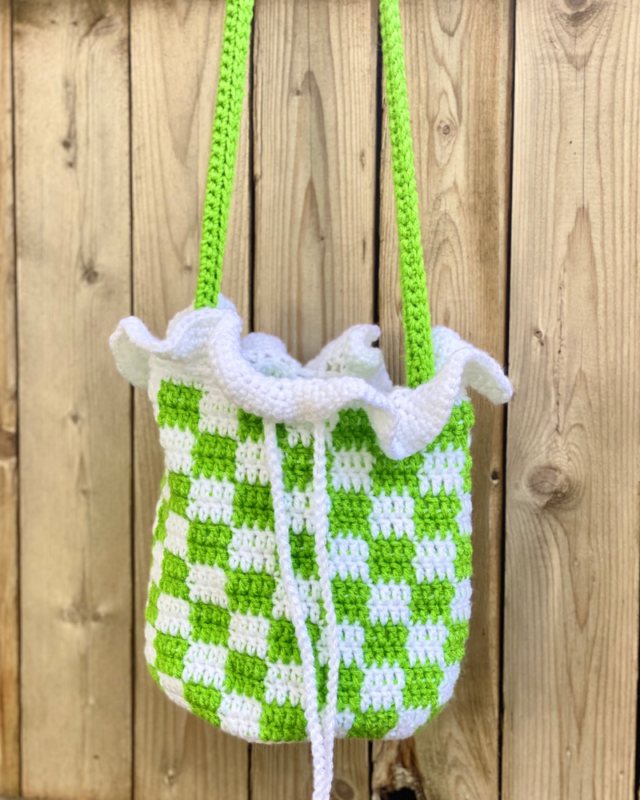
Weave in all ends. Run drawstring through Drawstring Opening, alternating in front of / behind each dc of opening. (Second photo below shows finished piece.)
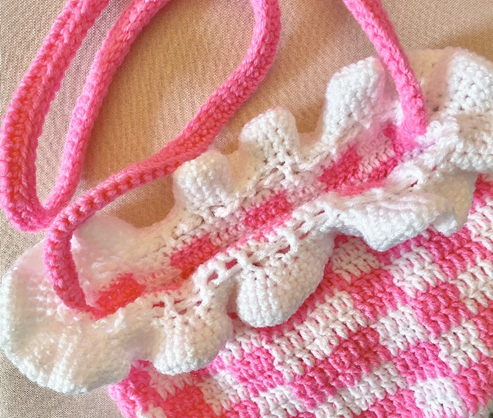
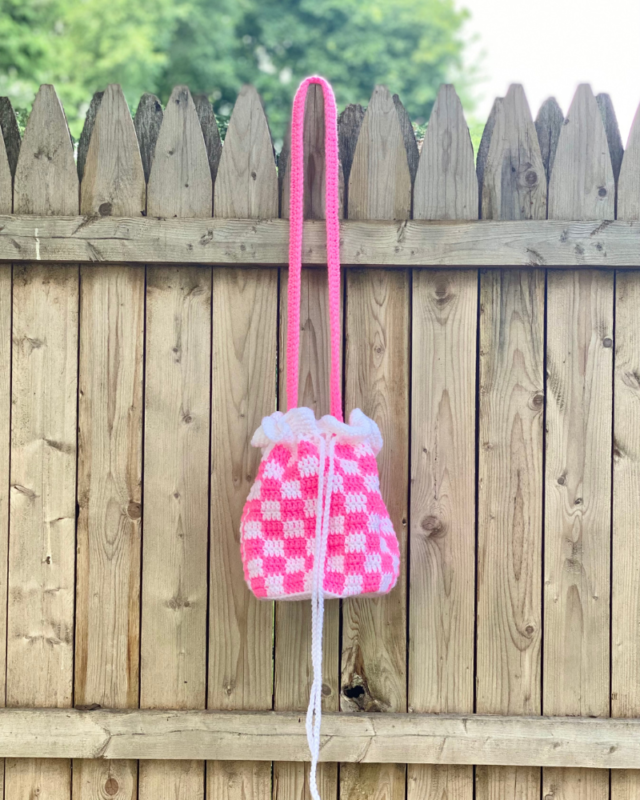
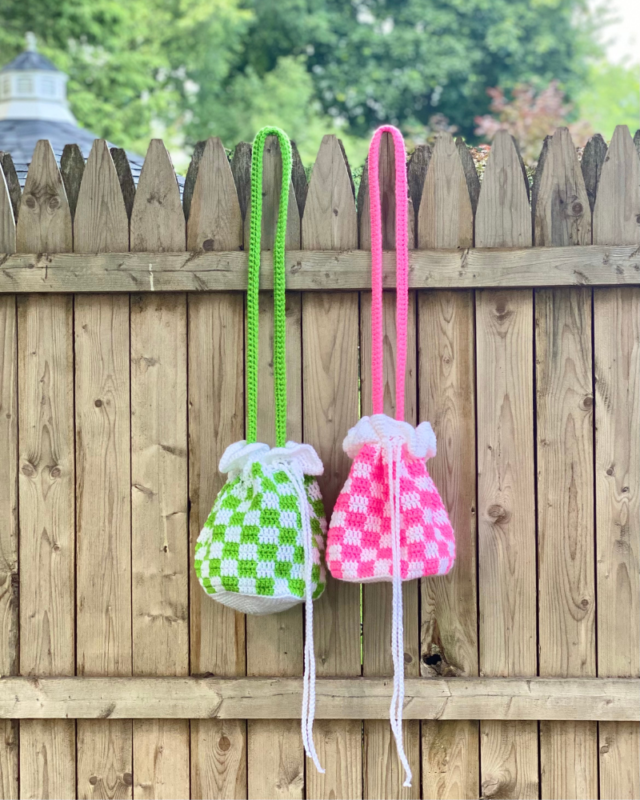
Here is the finished bag!
I hope you enjoyed crocheting this gingham bag along with me today. If you love fun, free patterns like this one, then please be sure to sign up for my email list to keep up to date with all my latest designs:
Also, please be sure to follow me on social media, and tag me in photos of your finished projects made from my patterns, so I can see your lovely work!
Don’t forget to pin it for later HERE!
And you can find that ad-free PDF pattern HERE!
Happy Crocheting!
COPYRIGHT:
This pattern is owned by Crafty Kitty Crochet (Melissa Moore). Any reselling or distribution of this pattern is prohibited. Sale of items made using this pattern is welcomed, but I do ask that credit/a link be provided back to my site, craftykittycrochet.com.
Comments (3)
2023 Christmas in July Make Along – Underground Crafter
July 12, 2023 at 2:30 pm
[…] the Frilly Gingham Bag crochet […]
12+ Handmade Gift Ideas for Women – Underground Crafter
July 15, 2023 at 1:03 pm
[…] Frilly Gingham Bag by Crafty Kitty Crochet: This fun checked bag pattern can be worn as a crossbody bag or as a single-strap backpack. […]
Snowman Wall Hanging – Christmas In July – The Quilting Room with Mel
July 30, 2023 at 12:43 am
[…] Frilly Gingham Bag by Crafty Kitty Crochet […]