
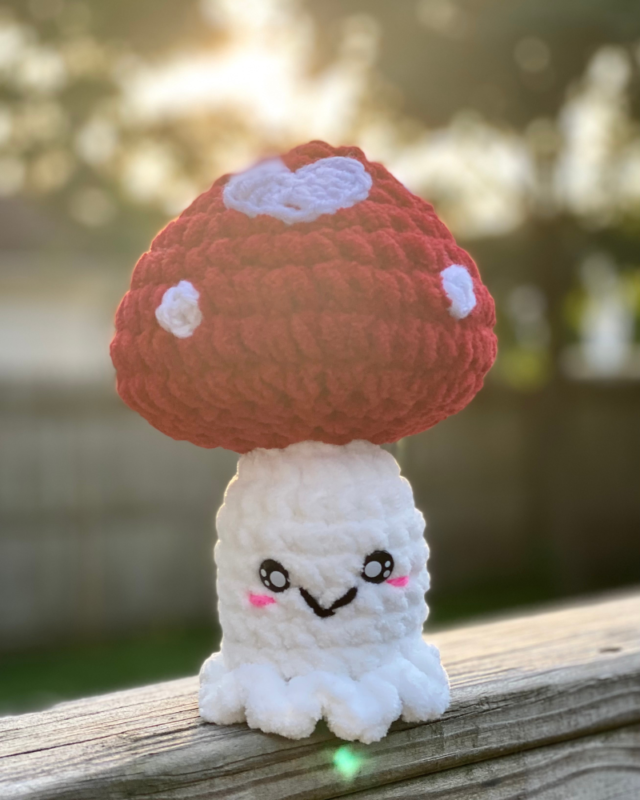
Amigurumi Mushroom Ghost – Crochet Pattern
Pin it for later!

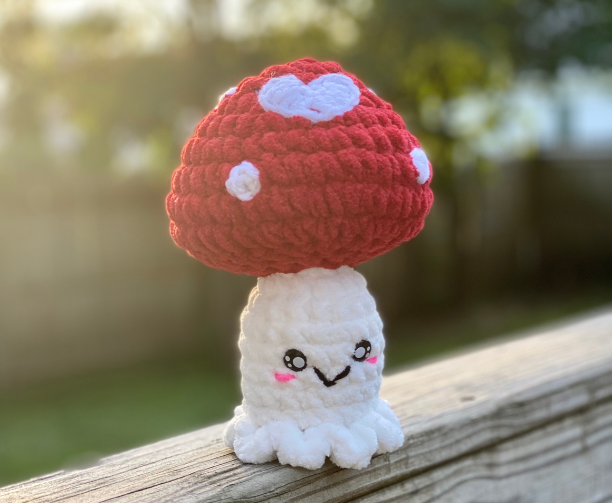
Looking for the perfect kawaii, cottagecore Halloween pattern for this spooky season? This mushroom ghost is cute, whimsical, and sure to please those who love both nature and spooky cute vibes! The mushroom even has heart-shaped spots to make it even more adorable! This fun, easy pattern would be the perfect make as a Halloween gift / boo basket item, for decor, or as a quick plushie for craft fairs and markets this fall. Or how about an any-occasion gift for a loved one who loves spooky or witchy aesthetic? The possibilities are endless!
Amigurumi Mushroom Ghost
Fall is my favorite time of year, and Halloween is my all-time favorite holiday, so it’s no surprise that I love crocheting spooky cute plushies! I also love kawaii and cottagecore aesthetic, so it seemed like a natural choice to combine my Hearty Mushroom and Wee Ghostie patterns to make this adorable nature-inspired plushie for Halloween. I plan on making a bunch for my fall craft fairs – they’re so cute, squishy, and unique! They’d also go so well with plushies like my Candy Corn Cow and Easy Pumpkins!
I used Bernat Blanket for this Mushroom Ghost and I couldn’t be happier with the springy, soft, squishy feel! Find some on Amazon HERE!
Looking for the ad-free PDF pattern? You can find it in my shop HERE!
Supplies
Size K-10.5 / 6.5 mm crochet hook
Size H-8 / 5.0 mm crochet hook
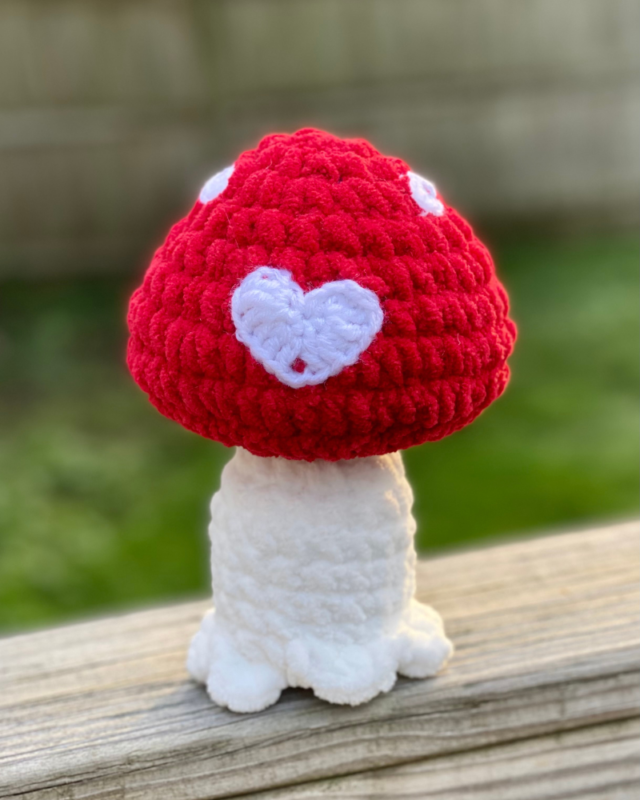
50 yds of super bulky or bulky yarn in top of mushroom color – Bernat Blanket Brights in Race Car Red used in photos
50 yds white of super bulky or bulky, in bottom of mushroom color – Bernat Blanket in White used in photos
Less than 1 yd each of medium weight yarn in pink and black for blush and smile – Red Heart Super Saver in Baby Pink and Black used in photos
1 pair of 12 mm plastic safety eyes
Fiberfill stuffing
Yarn Needle (with large eye for large size)
Scissors
Abbreviations
*= indicates beginning/end of a section to be repeated
Beg = beginning
Ch = chain
Dc = double crochet
Rem = remaining
Rep = repeat
Rnd(s) = rnd(s)
Sc = single crochet
Sc2tog = single crochet 2 together
Sk = skip
Sl st = slip stitch
St(s) = stitch(es)
Tr = triple crochet
Gauge
Exact gauge is not essential to this project.
Size
About 9 inches length
How to Make This
Mushroom
This pattern is worked in continuous rnds; do not join. You may wish to use a stitch marker and move it up at the beginning of each new rnd.
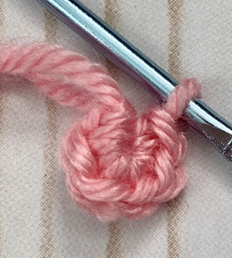
Rnd 1 – with red yarn and 6.5 mm hook, make a magic ring. 12 sc in ring for large size (12 sc)
Rnd 2 – sc in each st around. (12 sc)
Rnd 3 – 2 sc in each st around. (24 sc)
Rnd 4 – sc in each st around. (24 sc)
Rnd 5 – *2 sc in next st, sc in next st.* Rep from * to * around. (36 sc)
Rnd 6 – sc in each st around. (36 sc)
Rnd 7 – *2 sc in next st, sc in next 2 sts.* Rep from * to * around. (48 sc)
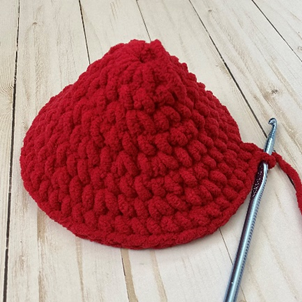
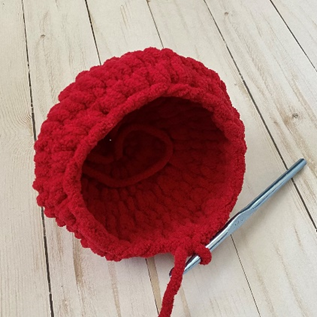
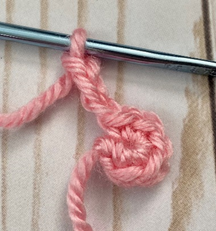
Rnd 8 – sc in each st around (first photo below). (48 sc)
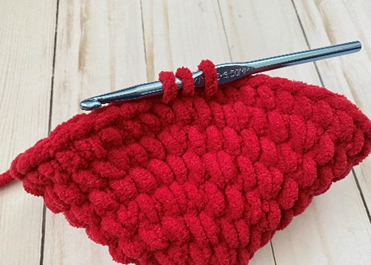
Rnd 9 – *sc2tog over next 2 sts (second photo below).* Rep from * to * around (third photo below). Begin stuffing. (24 sc)
Rnd 10 – *sc2tog over next 2 sts. Sc in next 2 sts.* Rep from * to * around (18 sc)
Rnd 11 – *sc2tog over next 2 sts. Sc in next st.* Rep from * to * around. (12 sc)
Rnd 12 – *sc2tog over next 2 sts.* Rep from * to * around. Attach white yarn in last st. (6 sc)
Rnd 13 – 2 sc in each st around. (12 sc)
Rnd 14 – *2 sc in next st, sc in next st.* Rep from * to * around. (18 sc)
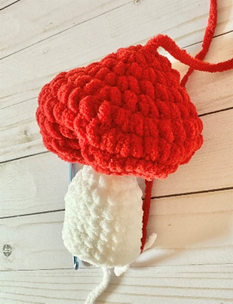
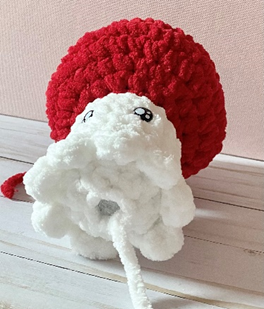
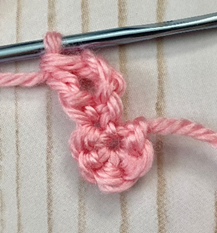
Rnds 15 – 20 – sc in each st around. Attach safety eyes between rnds 17 and 18 ; continue stuffing. Fourth photo below shows piece at this stage (18 sc)
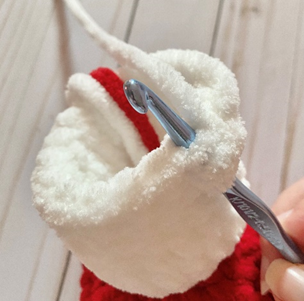
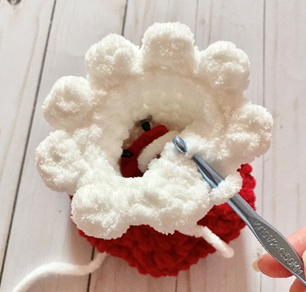
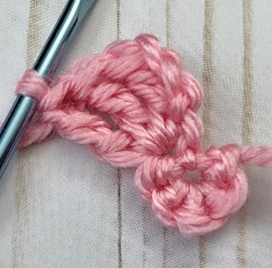
Rnd 21 – *working in FLO (fifth photo below), *[2 hdc, sl st] in next st (sixth photo below); sl st in next 2 sts.* Rep from * to * 5 more times. Seventh photo shows finished scallops. (6 scallops)
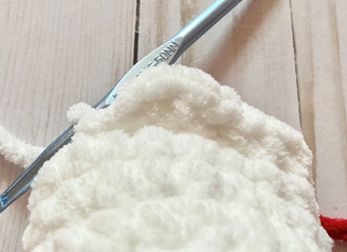
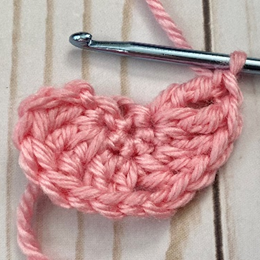
Rnd 22 – working in rem loops from Rnd 21 (eighth photo below), *sc2tog over next 2 sts, sc in next st.* Rep from * to * around. (12 sc)
Rnd 23 – sc2tog over next 2 sts. (6 sc)
Rnd 24 – sc2tog over next 2 sts. Leave rem sts unworked. (6 sc)
Fasten off, leaving long tail for sewing rem gap from Rnd 24. Ninth photo below shows piece at this stage.
Heart Spot (Make 2 – 4)
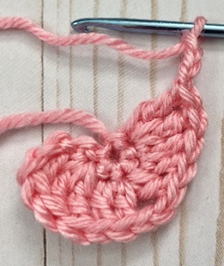
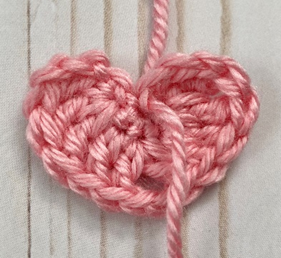
Rnd 1 – With medium weight white yarn and 5 mm hook, make a magic ring, 6 sc in ring. Ch 3, turn. 3 tr in first st. Dc in next st. Dc, ch 2, Dc in next st. Dc in next st. 3 tr in next st. Ch 3, sk last st and sl st into small hole in center of magic ring. Fasten off; pull beg end to close hole and weave in ends (leave a long tail for sewing when fastening off.)


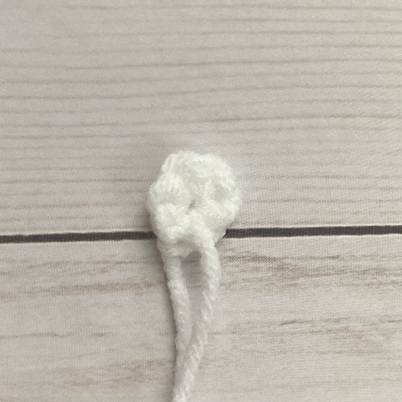
Regular Spot (Make 3 – 4)
Rnd 1 – With medium weight white yarn and 5 mm hook, make a magic ring. 6 sc in ring. Sl st into first sc of rnd. (6 sc)
Fasten off, leaving long tail for sewing.
Finishing
With pink yarn on needle, make small horizontal lines on either side of (or underneath) each eye for Blush. With black yarn on needle, make a small “v” between eyes for Smile, or if desired, a double “v”. (First photo shows finished face.) Sew Heart Spots and Regular Spots to top of Mushroom. (Second photo shows finished spots and finished piece.) Weave in all ends or tie off and hide inside sts.
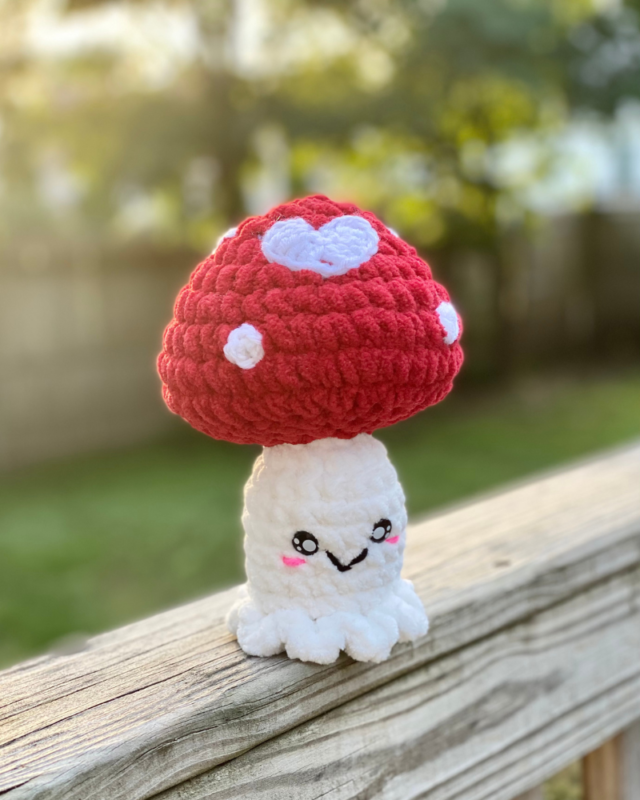
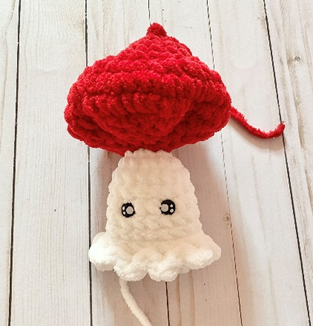
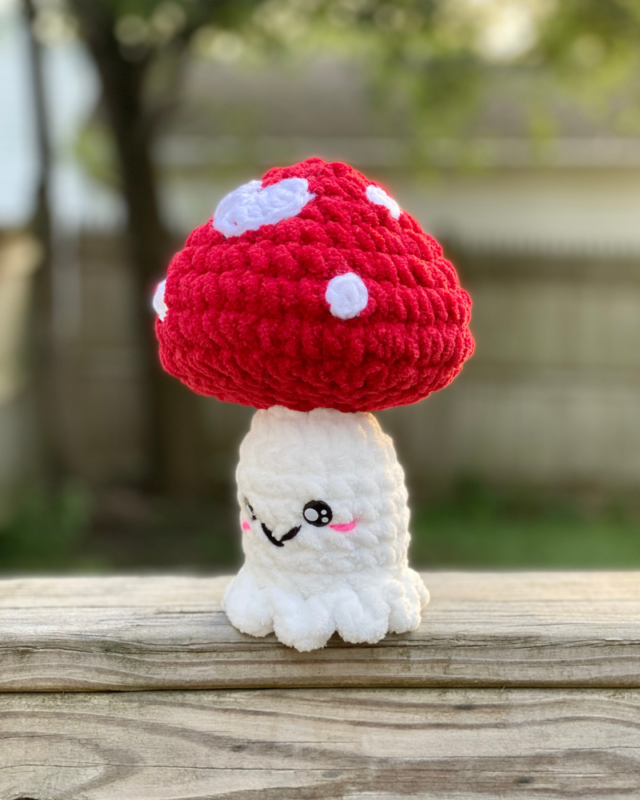
Here’s the finished Mushroom Ghost!
I hope you enjoyed crocheting this mushroom ghost along with me today. If you love fun, free patterns like this one, then please be sure to sign up for my email list to keep up to date with all my latest designs:
Also, please be sure to follow me on social media, and tag me in photos of your finished projects made from my patterns, so I can see your lovely work!
Don’t forget to pin it for later HERE!
And you can find that ad-free PDF pattern HERE!
Happy Crocheting!
COPYRIGHT:
This pattern is owned by Crafty Kitty Crochet (Melissa Moore). Any reselling or distribution of this pattern is prohibited. Sale of items made using this pattern is welcomed, but I do ask that credit/a link be provided back to my site, craftykittycrochet.com.
Comments (1)
2023 Halloween Crochet Along – Underground Crafter
September 14, 2023 at 12:47 am
[…] the Amigurumi Mushroom Ghost […]