
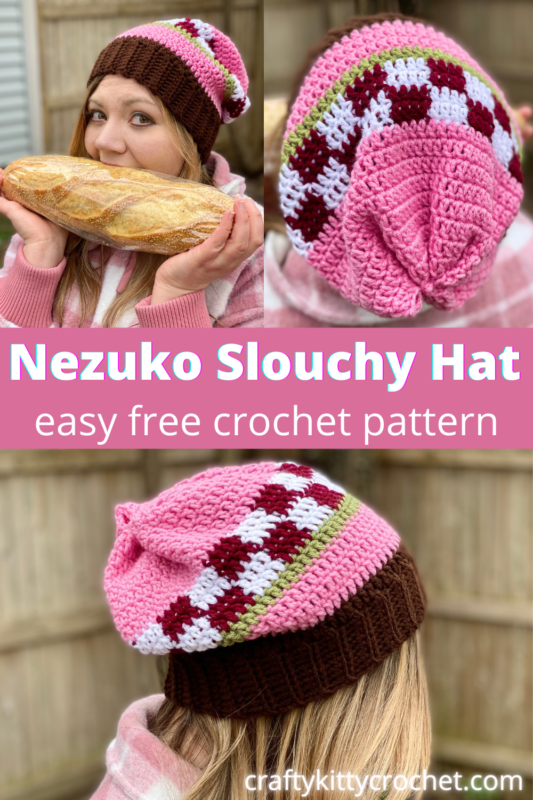
Little Sis Slouchy Hat – Crochet Pattern
Pin it for later!
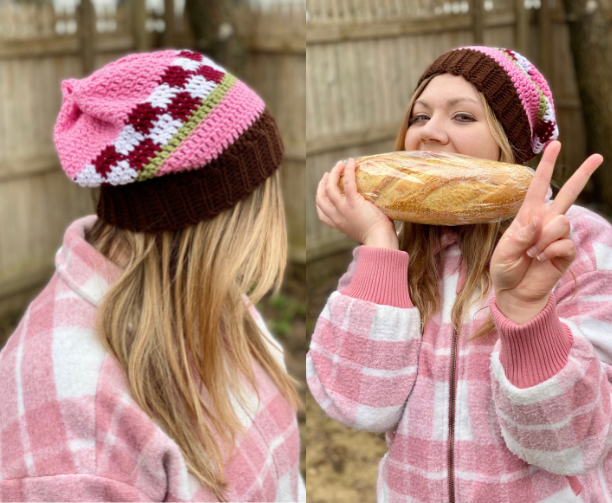
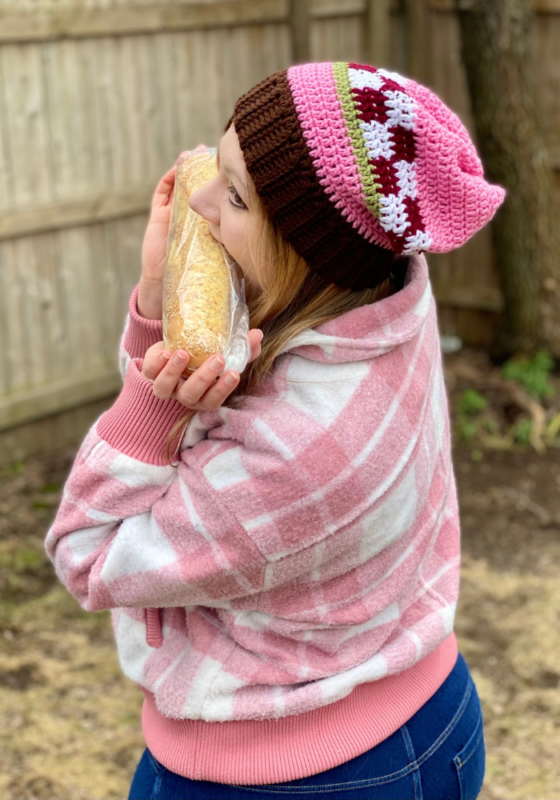
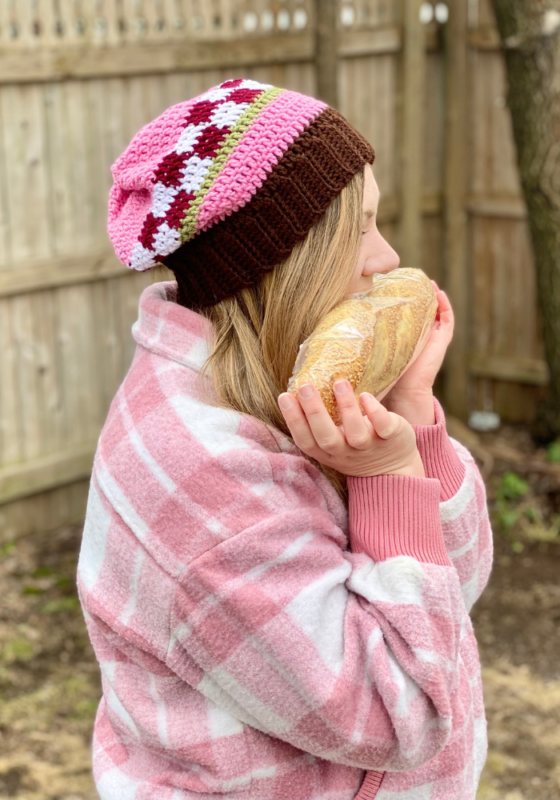
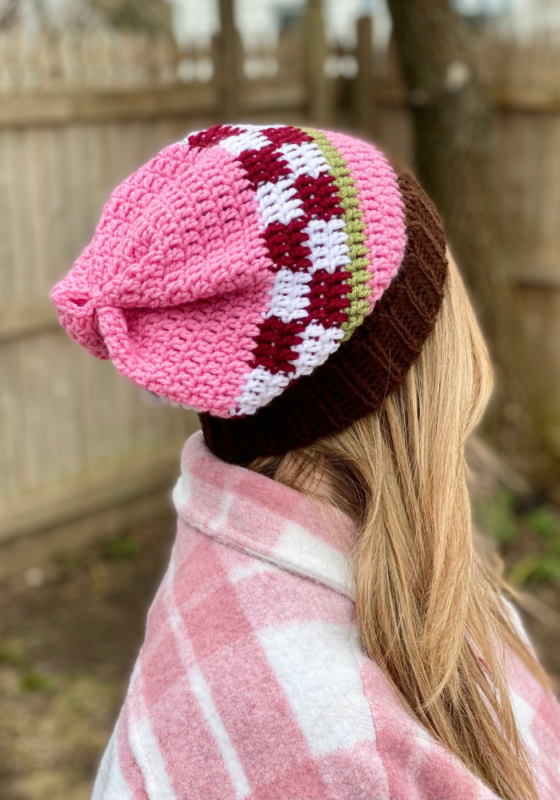
If you love anime, pink, checkerboard, and all-around kawaii fashion, then you will love this Little Sis Beanie! Designed to match the look of the iconic kimono outfit worn by our fave anime / manga little sister, this beanie is both fashionable and comfy! And the pattern is incredibly easy and fairly fast. Crochet this for the little demon in your life as the perfect gift for any occasion – or make one for yourself to wear as a casual cosplay, to comic cons, and more!
Little Sis Slouchy Hat
I absolutely love anime, kawaii fashion, and slouchy hats! Don’t believe me? Check out my Pretty Sailor Slouchy Hat – it’s just the first of many anime-inspired beanies I hope to create! After finishing Demon Slayer season 2 recently, I got inspired to make something in the lovely colors and pattern of Nezuko’s kimono that she can most often be seen wearing. A slouchy hat is a great way to showcase a design like this – and it’s fairly quick and easy, so I had to take a shot at it! This was my first time crocheting a “checkerboard” pattern and I have to say that I LOVED it. SO easy and the result is just fabulous!!! I’m hoping to do more with this new technique in the future.
Another great thing about this beanie is that it uses fairly easy to find yarns from Red Heart Super Saver. Find them on Amazon!
Looking for the ad-free PDF copy of this pattern? You can find it in my shop HERE!
Supplies:
Size H/8 (5.0 MM) Crochet Hook
-Medium weight yarn in Pink– about 150 yds (1 skein Red Heart Super Saver in Perfect Pink used in photos)
-Medium weight yarn in Maroon – about 50 yds (1 skein Red Heart Super Saver in Burgundy used in photos)
-Medium weight yarn in White – about 50 yds (1 skein Red Heart Super Saver in White used in photos)
Medium weight yarn in Green – about 30 yds (Red Heart Super Saver in Tea Leaf used in photos)
Medium weight yarn in Brown– 80 yds (Red Heart Super Saver in Coffee used in photos)
Yarn Needle
Scissors
Abbreviations
*= Indicates the beginning of a section that will be repeated
Beg = beginning
BLO = back loop only
Ch = chain
Dc = double crochet
FLO = front loop only
Rep = repeat
Rnd(s) = round(s)
Sc = single crochet
Sl st(s) = slip stitch(es)
St(s) = stitch(es)
Gauge:
9 sc = 2 in (5 cm) and 6 rows of sc rib (when VERY stretched) = 1.75 in (4.5 cm)
Size:
About 20-21” circumference around cuff; 10-11” total length
How to Make This
Instructions
Cuff
With brown yarn, Ch 10.
Row 1 – Sc in each ch across (9 sc). Ch 1, turn.
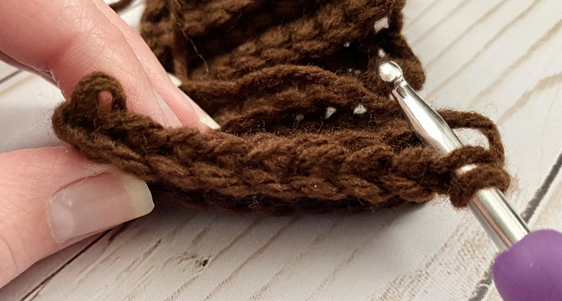
Row 2 – Working in BLO (first photo below), sc across (9 sc). Ch 1, turn.
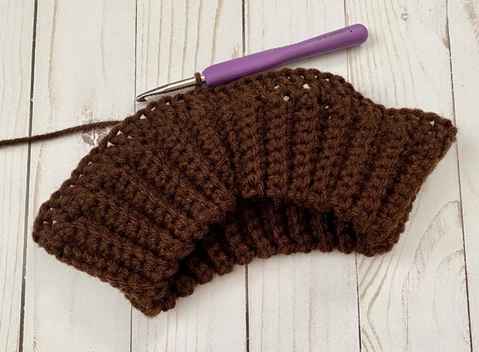
Rep Row 2 until piece measures about 21″ when VERY stretched (or about 15-16” when unstretched – about 54 rows). Second photo below shows Cuff at this stage.
Joining cuff
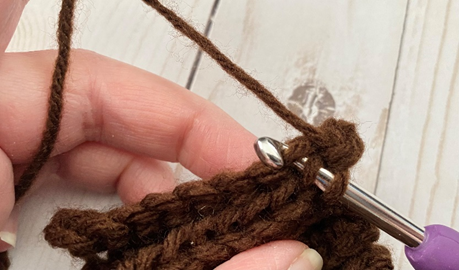
With right sides facing together, fold cuff and sl st two sides together, working in FLO of end closest to you, and through BLO of end furthest away (third photo below). Do not fasten off. (9 sl st)
Turn right side out, ch 2.

Body of hat
Rnd 1 – Dc 72 sts evenly across cuff cuff (it helps to dc 1 in each row of sc rib below, but add an extra dc about every 7-10 sts – first photo below). Second photo below shows finished rnd. Change to pink yarn in last st. Join with sl st to first tr of rnd. (72 dc)
Rnd 2 – Ch 2, dc in each st around. Join with sl st to top of ch 2. (72 dc)
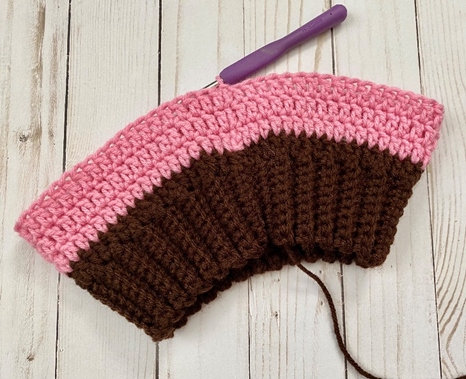
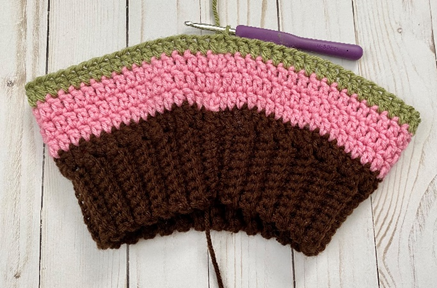
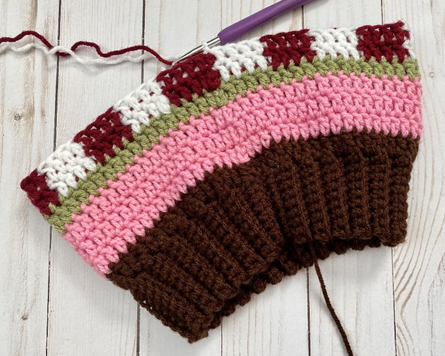
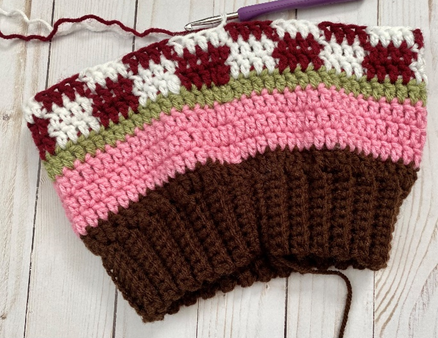
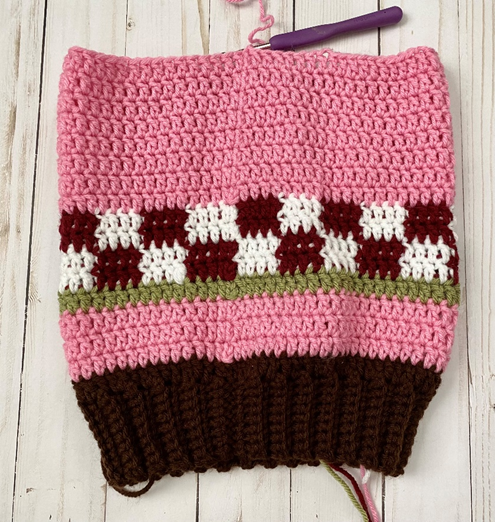
Rnds 3 – 4 – Ch 2, dc in each st around. Join with sl st to top of ch 2. In last st of Rnd 4, change to green yarn. Third photo below shows piece at this stage. (72 dc per rnd)
Rnd 5 – Ch 2, dc in each st around. In last st, change to maroon yarn. Join with sl st to top of ch 2. Fourth photo below shows piece at this stage. (72 dc)

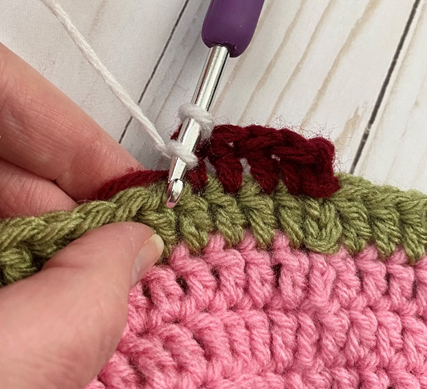
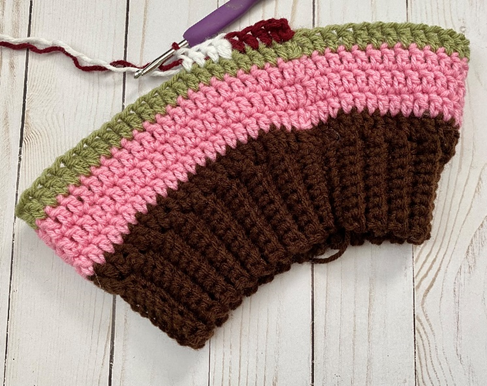
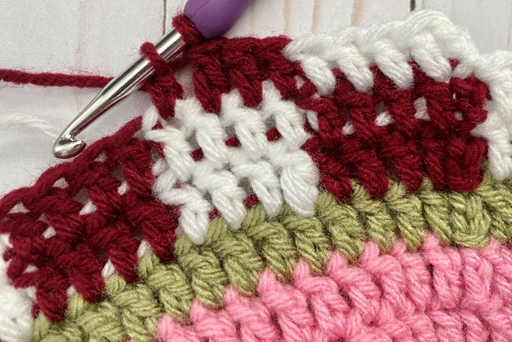
Rnd 6 – Ch 2. *Dc in next 4 sts; change to white yarn in last st but do not fasten off maroon. Dc in next 4 sts, keeping maroon yarn underneath sts (first photo below); change to maroon yarn in last st.* (Second photo below.) Rep from * to * 8 more times (third photo below). Join with sl st to top of ch 2. Continue to carry contrast color yarn under sts as you move on to next rnd. (72 dc)
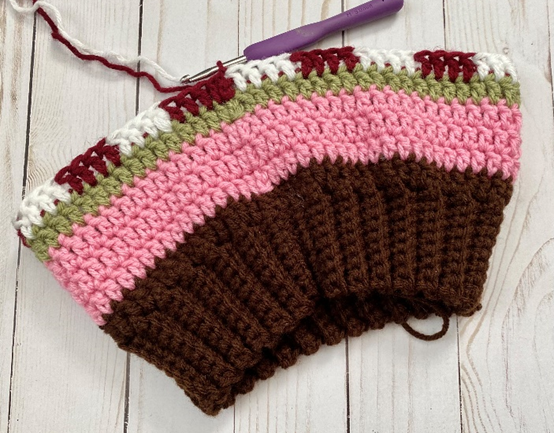
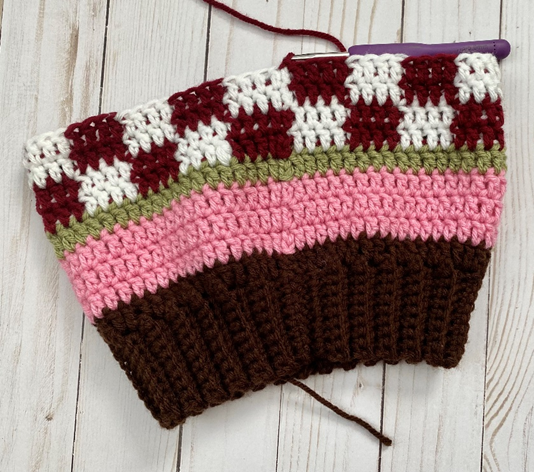
Rnd 7 – Rep Rnd 6. Do not change yarn color in last st of rnd. Fourth photo shows piece at this stage. (72 dc)
Rnd 8 – Ch 2. *Dc in next 4 sts; change to maroon yarn in last st but do not fasten off white yarn. Dc in next 4 sts, keeping white yarn underneath sts; change to white yarn in last st (fifth photo below).* Rep from * to * 8 more times (sixth photo below). Join with sl st to top of ch 2. Continue to carry contrast color yarn under sts as you move on to next rnd. (72 dc)
Rnds 10 – 17 – Ch 2, dc in each st around. Join with sl st to top of ch 2. (72 dc per rnd)
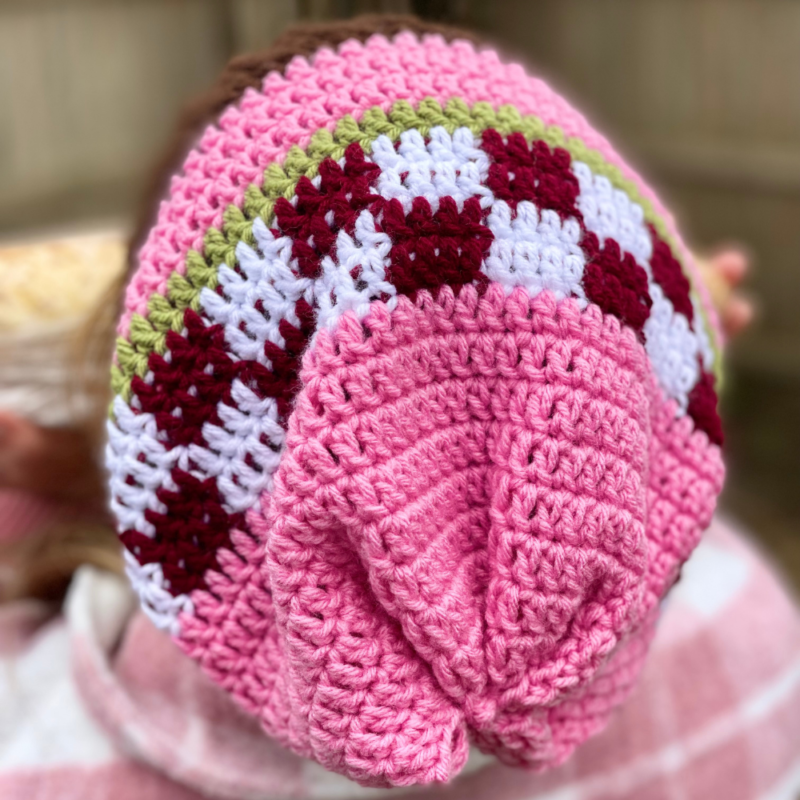
Closing the hat
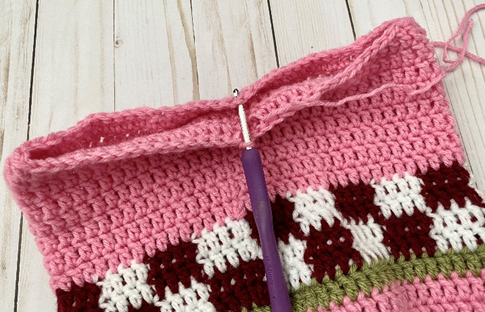
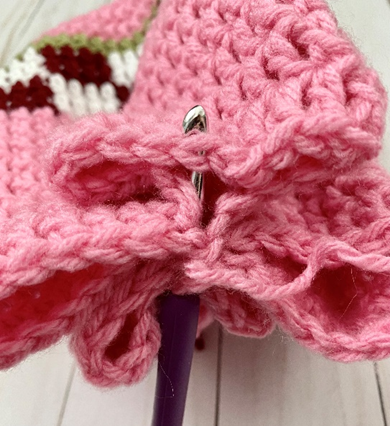
Fold body of hat together and sc two sides together (first photo below).
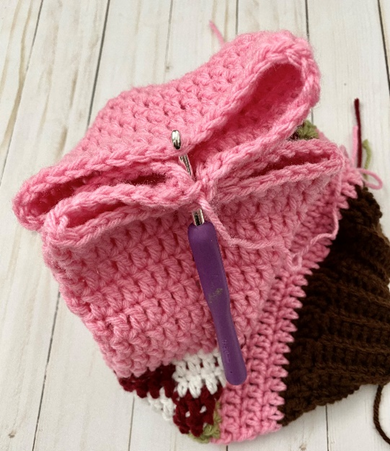
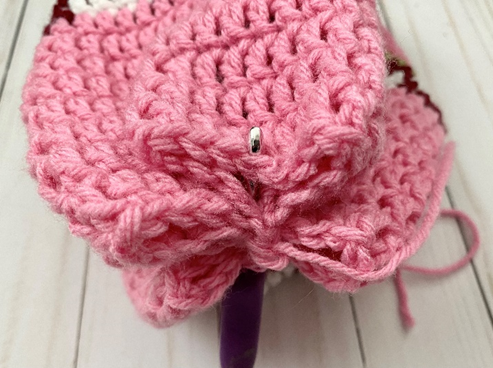
Fold in the other direction, working a sc through the two large gaps left after first side has been closed (second and third photos below).
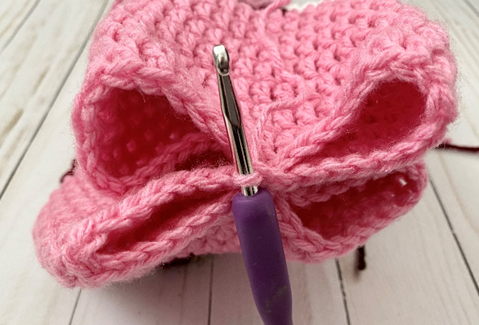
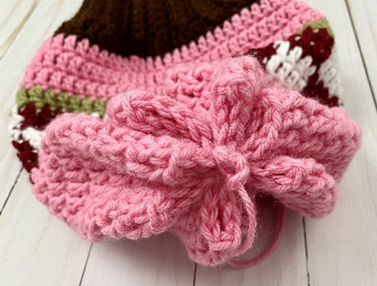
Close the remaining gaps even further by repeating the above two steps (fourth and fifth photos below). Rep again if desired, to cinch hat even further. Sixth and seventh photos show finished process.
Fasten off, weave in all ends.
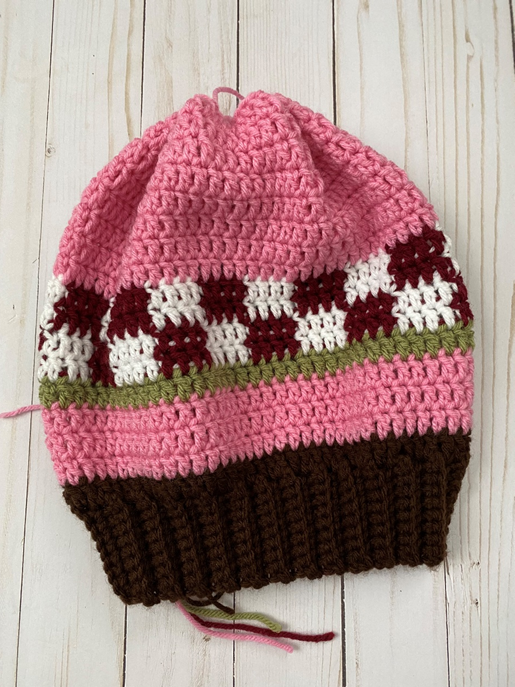
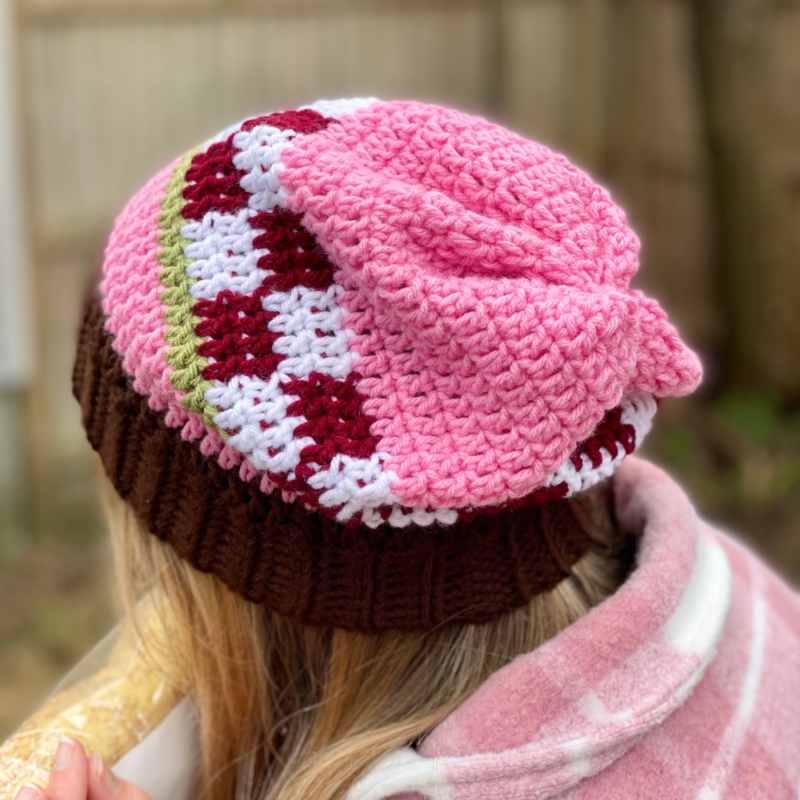
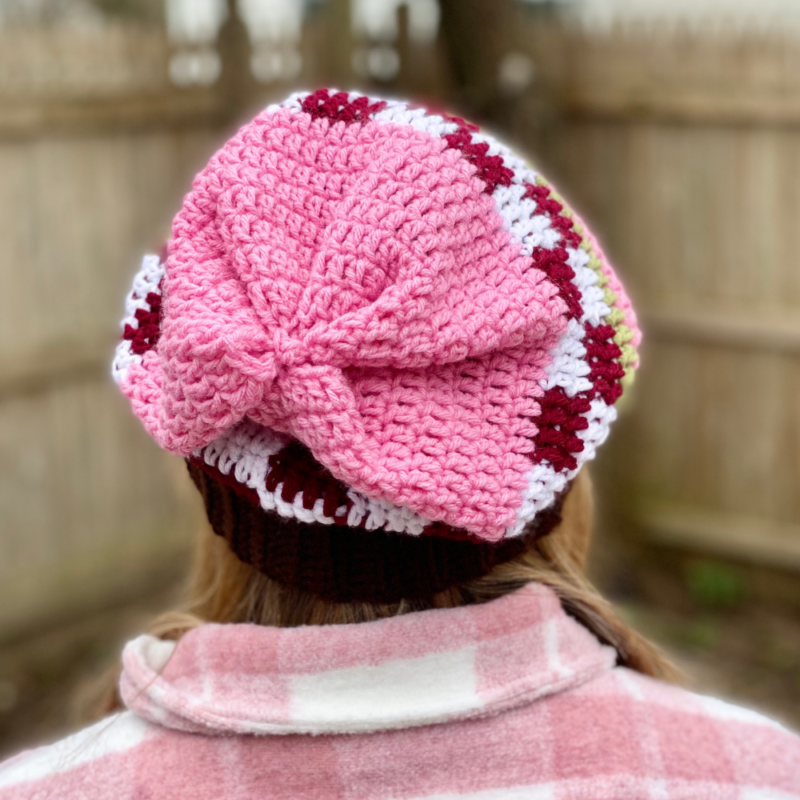
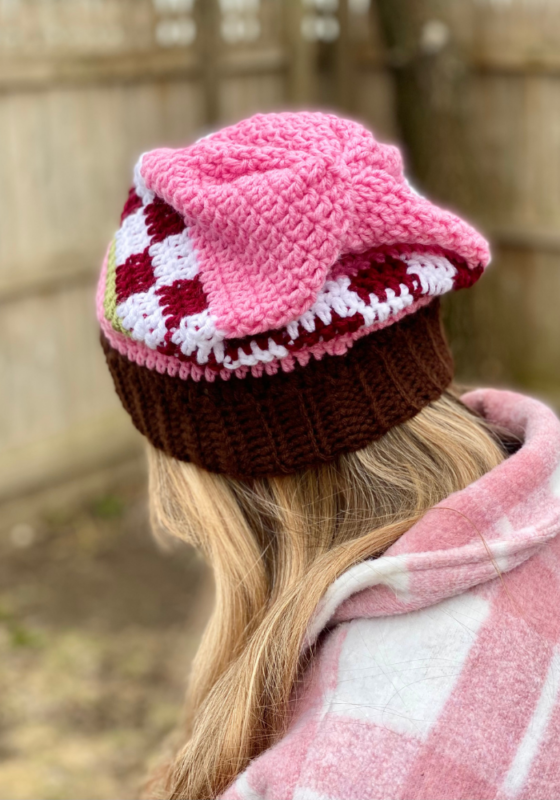
Here is the finished slouchy hat!
I hope you enjoyed crocheting this slouchy hat along with me today. If you love fun, free patterns like this one, then please be sure to sign up for my email list to keep up to date with all my latest designs:
Also, please be sure to follow me on social media, and tag me in photos of your finished projects made from my patterns, so I can see your lovely work!
Don’t forget to pin it for later HERE!
And you can find that ad-free PDF pattern HERE!
Happy Crocheting!
COPYRIGHT:
This pattern is owned by Crafty Kitty Crochet (Melissa Moore). Any reselling or distribution of this pattern is prohibited. Sale of items made using this pattern is welcomed, but I do ask that credit/a link be provided back to my site, craftykittycrochet.com.

Comments (5)
Strawberry & Mushroom Frog Backpacks – Crochet Pattern ~ Crafty Kitty Crochet
April 11, 2022 at 11:20 pm
[…] of cute animals, a nature/cottagecore vibe, and my recent awareness of crochet checkerboard (see my Little Sis Slouchy Hat pattern!) would be a cute frog backpack with strawberries or mushrooms attached to a springy […]
Little Sis Bucket Hat – Crochet Pattern ~ Crafty Kitty Crochet
April 22, 2022 at 7:41 pm
[…] a compliment to my Little Sis Slouchy Hat, here is a gorgeous and trendy bucket hat made in the same colors and pattern! I was so pleased […]
8 Free One Day Crochet Slouchy Hat Patterns – The Yarn Crew
December 11, 2022 at 8:00 am
[…] GO TO FREE PATTERN […]
Cute Crochet Hats –
October 6, 2023 at 4:03 pm
[…] original free pattern on craftykittycrochet.com, or read more about it on […]
28 Easy Baby Crochet Hat Patterns For Beginners
February 6, 2026 at 9:09 am
[…] the original pattern on http://www.craftykittycrochet.com, or read more about it on […]